ページを読み込んでいます...

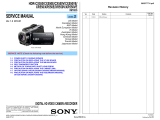
SERVICE MANUAL
LEVEL 2
Link
DISASSEMBLY
SERVICE NOTE
SPECIFICATIONS
SCHEMATIC DIAGRAMS
FRAME SCHEMATIC DIAGRAM
BLOCK DIAGRAMS
REPAIR PARTS LIST
PRINTED WIRING BOARDS
Link
Revision History
Revision History
How to use
Acrobat Reader
How to use
Acrobat Reader
Sony EMCS Co.
DSC-T20/T25_L2
Internal memory
ON BOARD
Internal memory
ON BOARD
Ver. 1.2 2007.08
DIGITAL STILL CAMERA
2007H0800-1
© 2007.08
Published by Kohda TEC9-852-195-32
US Model
Canadian Model
AEP Model
UK Model
E Model
Australian Model
Hong Kong Model
Chinese Model
Korea Model
Argentine Model
Brazillian Model
Japanese Model
Tourist Model
The components identified by
mark 0 or dotted line with
mark 0 are critical for safety.
Replace only with part num-
ber specified.
Les composants identifiés par une
marque 0 sont critiques pour la
sécurité.
Ne les remplacer que par une pièce
portant le numéro spécifié.
• Precaution on Replacing the SY-170 Board
DSC-T20/T25
Photo: Silver
Revised-2

— 2 —
DSC-T20/T25_L2
SPECIFICATIONS
Camera
[System]
Image device: 7.18 mm (1/2.5 type) color CCD,
Primary color filter
Total pixel number of camera:
Approx. 8286 000 pixels
Effective pixel number of camera:
Approx. 8083 000 pixels
6.33 – 19.0 mm (38 – 144 mm when
converted to a 35 mm still camera) F3.5 – 4.3
Exposure control: Automatic exposure, Scene
Selection (9 modes)
White balance: Automatic, Daylight, Cloudy,
Fluorescent 1, Fluorescent 2, Fluorescent 3,
Incandescent, Flash
File format (DCF compliant):
Still images: Exif Ver. 2.21 JPEG compliant,
DPOF compatible
Movies: MPEG1 compliant (Monaural)
Recording media: Internal Memory (approx.
31 MB), “Memory Stick Duo”
Flash: Flash range (ISO (Recommended Exposure
approx. 0.25 to 2.5 m (9 7/8 inches to 8
feet 21/2 inches) (T)
[Input and Output connectors]
Multi connector
Video output
Audio output (mono)
USB communication: Hi-Speed USB (USB 2.0
compliant)
[LCD screen]
LCD panel: 6.2 cm (2.5 type) TFT drive
[Power, general]
Power: Rechargeable battery pack NP-BG1, 3.6 V
AC-LS5K AC Adaptor (not supplied), 4.2 V
Power consumption (during shooting): 1.0 W
Operating temperature: 0 to 40°C (32 to 104°F)
Storage temperature: –20 to +60°C (–4 to +140°F)
protrusions)
Mass: Approx. 159 g (5.6 oz) (including NP-BG1
battery pack and wrist strap, etc.)
Microphone: Monaural
Speaker: Monaural
Exif Print: Compatible
PRINT Image Matching III: Compatible
PictBridge: Compatible
BC-CSG/BC-CSGB/BC-CSGC
battery charger
Power requirements: AC 100 to 240 V, 50/60 Hz,
2 W (BC-CSG/BC-CSGC)/2.6 W (BC-CSGB)
Output voltage: DC 4.2 V, 0.25 A
Operating temperature: 0 to 40°C (32 to 104°F)
Storage temperature: –20 to +60°C (–4 to +140°F)
Mass: Approx. 75 g (2.7 oz)
Rechargeable battery pack NP-BG1
Used battery: Lithium-ion battery
Maximum voltage: DC 4.2 V
Nominal voltage: DC 3.6 V
Capacity: 3.4 Wh (960 mAh)
Design and specifications are subject to change
without notice.
Lens: Carl Zeiss Vario-Tessar 3× zoom lens f =
Total number of dots: 230 400 (960×240) dots
Dimensions: 89.7×55.7×22.8 mm (3 5/8×
2 1/4×29/32 inches) (W/H/D, excluding
Dimensions: Approx. 62×24×91 mm (2 1/2×
31/32×3 5/8 inches) (W/H/D)
Index) set to Auto): approx. 0.1 to 3.0 m
(4 inches to 9 feet 10 1/8 inches) (W)/

— 3 —
DSC-T20/T25_L2
SAFETY-RELATED COMPONENT WARNING!!
COMPONENTS IDENTIFIED BY MARK 0 OR DOTTED LINE WITH
MARK 0 ON THE SCHEMATIC DIAGRAMS AND IN THE PARTS
LIST ARE CRITICAL TO SAFE OPERATION. REPLACE THESE
COMPONENTS WITH SONY PARTS WHOSE PART NUMBERS
APPEAR AS SHOWN IN THIS MANUAL OR IN SUPPLEMENTS
PUBLISHED BY SONY.
ATTENTION AU COMPOSANT AYANT RAPPORT
À LA SÉCURITÉ!
LES COMPOSANTS IDENTIFÉS PAR UNE MARQUE 0 SUR LES
DIAGRAMMES SCHÉMATIQUES ET LA LISTE DES PIÈCES SONT
CRITIQUES POUR LA SÉCURITÉ DE FONCTIONNEMENT. NE
REMPLACER CES COMPOSANTS QUE PAR DES PIÈSES SONY
DONT LES NUMÉROS SONT DONNÉS DANS CE MANUEL OU
DANS LES SUPPÉMENTS PUBLIÉS PAR SONY.
1. Check the area of your repair for unsoldered or poorly-soldered
connections. Check the entire board surface for solder splashes
and bridges.
2. Check the interboard wiring to ensure that no wires are
"pinched" or contact high-wattage resistors.
3. Look for unauthorized replacement parts, particularly
transistors, that were installed during a previous repair. Point
them out to the customer and recommend their replacement.
4. Look for parts which, through functioning, show obvious signs
of deterioration. Point them out to the customer and
recommend their replacement.
5. Check the B+ voltage to see it is at the values specified.
6. FLEXIBLE Circuit Board Repairing
• Keep the temperature of the soldering iron around 270°C
during repairing.
• Do not touch the soldering iron on the same conductor of the
circuit board (within 3 times).
• Be careful not to apply force on the conductor when soldering
or unsoldering.
Unleaded solder
Boards requiring use of unleaded solder are printed with the lead-
free mark (LF) indicating the solder contains no lead.
(Caution: Some printed circuit boards may not come printed with
the lead free mark due to their particular size.)
: LEAD FREE MARK
Unleaded solder has the following characteristics.
• Unleaded solder melts at a temperature about 40°C higher than
ordinary solder.
Ordinary soldering irons can be used but the iron tip has to be
applied to the solder joint for a slightly longer time.
Soldering irons using a temperature regulator should be set to
about 350°C.
Caution: The printed pattern (copper foil) may peel away if the
heated tip is applied for too long, so be careful!
• Strong viscosity
Unleaded solder is more viscous (sticky, less prone to flow) than
ordinary solder so use caution not to let solder bridges occur such
as on IC pins, etc.
• Usable with ordinary solder
It is best to use only unleaded solder but unleaded solder may
also be added to ordinary solder.
SAFETY CHECK-OUT
After correcting the original service problem, perform the following
safety checks before releasing the set to the customer.
CAUTION
Danger of explosion if battery is incorrectly replaced.
Replace only with the same or equivalent type.
Model
Destination
DSC-T20
US, CND, AEP, UK, E, AUS,
HK, CH, KR, AR, BR, J, JE
DSC-T25
AEP, E, AUS, HK
• Abbreviation
AR : Argentine model
AUS: Australian model
BR : Brazilian model
CH : Chinese model
CND: Canadian model
EE : East European model
HK : Hong Kong model
J : Japanese model
JE : Tourist model
KR : Korea model
NE : North European model
TW : Taiwan model
Model information table

— 4 —
DSC-T20/T25_L2
TABLE OF CONTENTS
1. SERVICE NOTE
1-1. Precaution on Replacing the SY-170 Board ···················· 1-1
1-2. Self-Diagnosis Function ·················································· 1-1
1-3. Process After Fixing Flash Error ····································· 1-2
1-4. Method for Copying or Erasing the Data in Internal
Memory ··········································································· 1-3
1-5. How to Write Data to Internal Memory ··························1-4
2. DISASSEMBLY
2-1. Disassembly ····································································· 2-2
3. BLOCK DIAGRAMS
3-1. Overall Block Diagram (1/2) ··········································· 3-1
3-2. Overall Block Diagram (2/2) ··········································· 3-2
3-3. Power Block Diagram ····················································· 3-3
3-4. Power Block Diagram ····················································· 3-4
4. PRINTED WIRING BOARDS AND
SCHEMATIC DIAGRAMS
4-1. Frame Schematic Diagram ·············································· 4-1
4-2. Schematic Diagrams ························································ 4-2
4-3. Printed Wiring Boards ··················································· 4-16
5. REPAIR PARTS LIST
5-1. Exploded Views ······························································· 5-2
5-2. Electrical Parts List ························································· 5-5
Section Title Page

1-1
ENGLISH JAPANESE
ENGLISH JAPANESE
DSC-T20/T25_L2
1. SERVICE NOTE
1-2. SELF-DIAGNOSIS FUNCTION
1-2-1. Self-diagnosis Function
When problems occur while the unit is operating, the self-diagnosis
function starts working, and displays on the LCD screen what to
do.
Details of the self-diagnosis functions are provided in the Instruction
manual.
1-2-2. Self-diagnosis Display
When problems occur while the unit is operating, the LCD screen
shows a 4-digit display consisting of an alphabet and numbers, which
blinks at 3.2 Hz. This 5-character display indicates the “repaired
by:”, “block” in which the problem occurred, and “detailed code”
of the problem.
0 0
3 2C
Repaired by:
Refer to “1-2-3. Self-diagnosis Code Table”.
Indicates the appropriate
step to be taken.
E.g.
13 ....Format the “Memory Stick Duo”.
32 ....Turn on power again.
Block
Detailed Code
Blinks at 3.2 Hz
C : Corrected by customer
E : Corrected by service
engineer
LCD screen
1-1. PRECAUTION ON REPLACING THE SY-170 BOARD
DESTINATION DATA
When you replace to the repairing board, the written destination data of repairing board also might be changed to original setting.
Refer to Service Manual ADJ, and perform “DESTINATION DATA WRITE”.
USB SERIAL No.
The set is shipped with a unique ID (USB Serial No.) written in it.
This ID has not been written in a new board for service, and therefore it must be entered after the board replacement.
Refer to Service Manual ADJ, and perform “USB SERIAL No. INPUT”.

1-2
ENGLISH JAPANESE
ENGLISH JAPANESE
DSC-T20/T25_L2
1-3. PROCESS AFTER FIXING FLASH ERROR
When “FLASH error” (Self-diagnosis Code E : 91 : 01) occurs, to prevent any abnormal situation caused by high voltage, setting of the flash
is changed automatically to disabling charge and flash setting.
After fixing, this setting needs to be deactivated. Flash error code can be initialized by the operations on the HOME screen.
Method for Initializing the Flash Error Code
1-2-3. Self-diagnosis Code Table
C
C
E
E
E
E
E
E
E
E
E
Block
Function
13
32
61
61
62
62
62
62
62
91
92
Detailed
Code
01
01
00
10
02
10
11
12
20
01
00
Symptom/State
The internal memory has experienced a
format error.
“Memory Stick Duo” is unformatted.
“Memory Stick Duo” is broken.
“Memory Stick Duo” type error
The camera cannot read or write data
on the “Memory Stick Duo”.
Trouble with hardware
Difficult to adjust focus
(Cannot initialize focus)
Zoom operations fault
(Cannot initialize zoom lens.)
Abnormality of IC for steadyshot.
Lens initializing failure.
Lens overheating (PITCH).
Lens overheating (YAW).
Abnormality of thermistor.
Abnormality when flash is being charged.
Non-standard battery is used.
Self-diagnosis Code
Repaired by:
Correction
Format the internal memory.
Format the “Memory Stick Duo”.
Insert a new “Memory Stick Duo”.
Insert a supported “Memory Stick Duo”.
Turn the power off and on again, or taking out and inserting the
“Memory Stick Duo” several times.
Turn the power off and on again.
Retry turn the power on by the power switch. If it does not
recover, check the focus reset sensor of lens block (pin ea of
CN401 on the SY-170 board). If it is OK, check the focus motor
drive IC (IC401 on the SY-170 board).
Retry turn the power on by the power switch. Check the zoom
reset sensor of lens block (pin wk of CN401 on the SY-170
board), if zooming is performed when the zoom button is
operated. If it is OK, check the zoom motor drive IC (IC401 on
the SY-170 board).
Check or replacement of the IC for steadyshot (IC503 on the SY-
170 board).
Check or replacement of the IC for steadyshot (IC503 on the SY-
170 board).
Check the HALL element (PITCH) of optical image stabilizer
(pin 1, 2 of CN401 on the SY-170 board). If it is OK, check
PITCH angular velocity sensor (SE502 on the SY-170 board)
peripheral circuits.
Check the HALL element (YAW) of optical image stabilizer (pin
6, 7 of CN401 on the SY-170 board). If it is OK, check YAW
angular velocity sensor (SE501 on the SY-170 board) peripheral
circuits.
Check the OIS temp sensor of optical image stabilizer (pin 5 of
CN401 on the SY-170 board).
Checking of flash unit or replacement of flash unit. (Note)
Use the compatible battery only.
Note: After repair, be sure to perform “1-3. PROCESS AFTER FIXING FLASH ERROR”.
Initializes the setting to the default setting. Even if you execute this function, the images
stored in the internal memory are retained.
1 Select [Initialize] with v/V/b/B, then press z.
The message “Initialize all settings” appears.
2 Select [OK] with v, then press z.
The settings are reset to the default setting.
To cancel the resetting
Select [Cancel] in step 2, then press z.
•Make sure that the power is not disconnected during resetting.
Initialize

1-3
ENGLISH JAPANESE
ENGLISH JAPANESE
DSC-T20/T25_L2
1-4. METHOD FOR COPYING OR ERASING THE DATA IN INTERNAL MEMORY
The data can be copied/erased by the operations on the HOME screen. (When erasing the data, execute formatting the internal memory.)
Note 1: When replacing the SY-170 board, erase the data in internal memory of the board before replacement.
Note 2: When replacing the SY-170 board, execute formatting and initialize the internal memory after replacement.
Method for Copying the Data in Internal Memory
Method for Formatting the Internal Memory
This item does not appear when a “Memory Stick Duo” is inserted in the camera.
Formats the internal memory.
• Note that formatting irrevocably erases all data in the internal memory, including even protected images.
1 Select [Format] with v/V/b/B on the control button, then press z.
The message “All data in internal memory will be erased” appears.
2 Select [OK] with v, then press z.
The format is completed.
To cancel the formatting
Select [Cancel] in step 2, then press z.
Format
Copies all images in the internal memory to a “Memory Stick Duo”.
1 Insert a “Memory Stick Duo” having 32 MB or larger capacity.
2 Select [Copy] with v/V/b/B on the control button, then press z.
The message “All data in internal memory will be copied” appears.
3 Select [OK] with v, then press z.
Copying starts.
To cancel the copying
Select [Cancel] in step 3, then press z.
• Use a fully charged battery pack. If you attempt to copy image files using a battery pack with little
remaining charge, the battery pack may run out, causing copying to fail or possibly corrupting the data.
• You cannot copy individual images.
• The original images in the internal memory are retained even after copying. To delete the contents of the
internal memory, remove the “Memory Stick Duo” after copying, then execute the [Format] command in
[ Internal Memory Tool] .
• When you copy the data in the internal memory to the “Memory Stick Duo”, all the data will be copied.
You cannot choose a specific folder on the “Memory Stick Duo” as the destination for the data to be
copied.
• Even if you copy data, a DPOF (Print order) mark is not copied.
Copy

1-4
ENGLISH JAPANESE
ENGLISH JAPANESE
DSC-T20/T25_L2
1-5. HOW TO WRITE DATA TO INTERNAL MEMORY
Usually, the camera has been set so as to disable the data writing from the PC to the internal memory of the camera.
This setting must be changed temporarily when the data is to be written to the internal memory such as a case after the board replacement.
To change the setting, use the write enable tool “WriteEnableTool.exe”.
Data writing method
1) Connect the PC to the camera (USB mode: Mass Storage), and switch the driver to the “Sony Seus USB Driver”.
2) Start the Write Enable Tool and the SeusEX.
3) Click the [Activate Write Enable Mode] button of the Write Enable Tool.
4) Upon completion of the setting change, the following message will be displayed.
5) Return the driver to the original one, and connect the PC to the camera (USB mode: Mass Storage).
6) Write the data read out into the PC to the internal memory of the camera.
7) Disconnect the PC from the camera, and turn off the camera.
Note: By turning off the camera, the write enable setting is reset.


2-1
2. DISASSEMBLY
DSC-T20/T25_L2
NOTE FOR REPAIR
• Make sure that the flat cable and flexible board are not cracked of bent at the terminal.
Do not insert the cable insufficiently nor crookedly.
• When remove a connector, don’t pull at wire of connector. It is possible that a wire is snapped.
• When installing a connector, don’t press down at wire of connector.
It is possible that a wire is snapped.
• Do not apply excessive load to the gilded flexible board.
Cut and remove the part of gilt
which comes off at the point.
(Be careful or some
pieces of gilt may be left inside)
DISCHARGING OF THE ST-163 BOARD’S CHARGING CAPACITOR (C901)
The charging capacitor (C901) of the ST-163 board is charged
up to the maximum 300 V potential.
There is a danger of electric shock by this high voltage when the
capacitor is handled by hand. The electric shock is caused by
the charged voltage which is kept without discharging when the
main power of the unit is simply turned off. Therefore, the
remaining voltage must be discharged as described below.
Preparing the Short Jig
As the discharging location is in depths, the short jig may touch
to the opening of frame.
Expose the tip of resistor of 1kΩ /1 W (1-215-869-11) by 1mm
and insulate the rest of it with insulation tape.
1 kΩ/1 W
Wrap insulating tape.
to about 1mm
to about 1mm
Note: High-voltage cautions
Discharging the Capacitor
Short-circuit between the two points
with the short jig about 10 seconds.
To avoid the spark with the metal plate,
wrap the short jig with the insulation tape.
R:1 kΩ/1 W
(Part code: 1-215-869-11)
Charging
Capacitor

2-2
DSC-T20/T25_L2
HELP
HELP
EXPLODED VIEW
HARDWARE LIST
2-1. DISASSEMBLY
2-1-1. OVERALL SECTION
Follow the disassembly in the numerical order given.
1 Cabinet (Front) Assy (1-1 to 1-3)
2 Lens Block (2-1 to 2-2)
3 Cabinet (Rear) Assy (3-1 to 3-6)
1 Cabinet (Front)
Assy
3 Cabinet (Rear) Assy
1-1 (#18/#29)
1-2 (#18/#29)
1-3 (#18/#29)
2 Lens Block
2-1
2-2
3-1 (#72)
3-2 (#72)
3-3 (claw)
3-4 (claw)
3-5 (claw)
3-6
HELP
Note: High-voltage cautions
Discharging the Capacitor
Short-circuit between the two points
with the short jig about 10 seconds.
To avoid the spark with the metal plate,
wrap the short jig with the insulation tape.
R:1 kΩ/1 W
(Part code: 1-215-869-11)
Charging
Capacitor
Note: Speaker cable cautions
As the wire of speaker is fragile, disconnect the
connector carefully to prevent damage it.


2-4E
DSC-T20/T25_L2
EXPLODED VIEW
2-1-3. FRAME SECTION
Follow the disassembly in the numerical order given.
1 LCD Block (1-1 to 1-2)
2 Battery Holder Assy (2-1 to 2-4)
3 BT-034 Flexible Board (3-1 to 3-2)
1 LCD Block
2-1 (claw)
2-2 (claw)
2-4
2-3 (claw)
2 Battery Holder Assy
3 BT-034 Flexible Board
3-1 (fook)
3-2 (fook)
1-1 (claw)
1-2 (claw)

HELP
DSC-T20/T25_L2
HELP
Sheet attachment positions and procedures of processing the flexible boards/harnesses are shown.
PLATE (CCD), FIXED
SHEET (CCD), ADHESIVE
PLATE (CCD), FIXED
CCD BLOCK ASSY
SHEET (CCD), ADHESIVE


DSC-T20/T25_L2
3-1
3. BLOCK DIAGRAMS
3-1. OVERALL BLOCK DIAGRAM (1/2)
( ) : Number in parenthesis ( ) indicates the division number of schematic diagram where the component is located.
: VIDEO SIGNAL
SY-170 BOARD (1/2)
IC203_3_SO
VSUB_CONT_PRE, VSUB_CONT_POST
C25
D19
XIC203_3_SCK
AF22
CA_FD
CA_FD
AE23
CA_HD
CA_AD00 - CA_AD13
LENS
CCD
IMAGER
IC001
CD-695 FLEXIBLE BOARD
18 14
1
10 L7
J8
LENS BLOCK
CN301
ZOOM
MOTOR
M
FOCUS
MOTOR
M
FOCUS
SENSOR
ZOOM
SENSOR
YAW
MOTOR
M
HALL
ELEMENT
21, 24 - 28, 32 - 37
5 - 7
D1, D2, H1,
H2, K1, K2
16
LENS TEMP
SENSOR
IC002
HIGH SPEED
BUFFER AMP
27
28, 29, 30
9
L2
38
3 - 14
CCD_OUT
POWER_SAVEPOWER_SAVE
H1, H2, H3H1, H2, H3
V1, V2, V3A, V3B, V4, V5A, V5B, V6 - V10
V1, V2, V3A, V3B, V4, V5A, V5B,
V6 - V10
LH1
20
11
25
Q301
CCD SIGNAL
PROCESS,
TIMING
GENERATOR
(5/8)
IC304
1 G7
F11
SUB
SUB_CONT
Q302
L10
K10
XLENS_DRIVER_PS
H11
D4
E10
D11
R7, AF25
AE3
Y10
AD26
IRIS
(METER)
IRIS
MOTOR
M
IC401
36 - 3918 - 2122 - 25
FOCUS
MOTOR
DRIVER
IRIS_DIR_A, IRIS_BRK_A, IRIS_DIR_B, IRIS_BRK_B
FC_DIR_A, FC_DIR_B, FC_BRK_A
ZM_DIR_A, ZM_DIR_B, ZM_BRK_A
ZOOM
MOTOR
DRIVER
IRIS MOTOR
DRIVER
FOCUS_A, A, B, B
FC_SENS
ZM_SENS
LENS_TEMP
FC_SENS
ZM_SENS_1ST
LENS_TEMP
IRIS_A, A, B, B IRIS_A, IRIS_A, IRIS_B, IRIS_B
CN401
F2, E2, D2, B1
D6, E6, B7, C6
B4, B5, B3, A3
LENS DRIVER
(6/8)
27
31
28
M8
FC_SENS_GND
XFC_RST_LED
33
J8
ZM_SENS_GND
XZM_RST_LED
30
TZ HALL TEMP
SENSOR
AF3
AB18
TZ_HALL_TEMP
TZ_HALL_TEMP
5
08
XDD_SYS_RST
XDD_SYS_RST
XDD_SYS_RST
2
OVERALL (2/2)
(PAGE 3-2)
CAMERA DSP,
LENS CONTROL,
MODE CONTROL,
FRONT CONTROL
(3/8, 4/8)
IC203
(1/2)
OVERALL (2/2)
(PAGE 3-2)
3
LCD_CK, LCD_HD, LCD_VD
LCD_D0 - LCD_D7
U19
XCS_ PANEL
IC203_0_SI, IC203_0_SO, XIC203_0_SCK
IC203_2_SO, XIC203_2_SCK
IC203_2_SO, XIC203_2_SCK
C4, D9, F7, F9,
D10, E5, F5, F6,
J9, E9, G5, G9
22, 23, 29 - 31
15, 16, 31 - 33
VHLD1, VHLD2, LV, VST1, VST2
LH1
20
3
L4
RG
RG
24
12
CSUB
CSUB
SUB
SUB_CONT
VHLD1, VHLD2, LV, VST1, VST2
C8, E7, E6,
B5, C5
A3 - A8, B4, B6 - B10,
C6, C7
AE18 - AE21, AF19 - AF21,
AC18 - AC21, AB19 - AB21
F5, E5, D3, F1D5, A6, B6, C5
A2, C3, C4, A1
B23, E18
B18, D18, B17
W16, Y18, AD25, Y17
A17, D16, A18, E16,
A19, E17, B19, D17
W18, AB26, W17
AB23, AC26, AA23
FOCUS_A, FOCUS_A, FOCUS_B, FOCUS_B
ZOOM_A, ZOOM_A, ZOOM_B, ZOOM_B
13, 173, 4, 6, 7
PITCH
MOTOR
M
HALL
ELEMENT
OPTICAL IMAGE
STABILIZER
YAW±
YAW_HALLBIAS±,
YAW_HALL±
9 - 12
15, 16, 1, 2
PITCH±
PITCH_HALLBIAS±,
PITCH_HALL±
ZOOM_A, A, B, B
SE501
SE502
PITCH_AD
YAW_AD
IC506
PITCH/YAW
SENSOR
AMP
(7/8)
IC503
OPTICAL
IMAGE
STABILIZATION
DRIVE
(7/8)
21
18
J5
G5
D5
13
10
24
CPU_PIO_0
D6 25
CPU_PIO_1
CLK_IC503
XCS_IC503
A3
A7
C9
A5
XIC503_IC203_RST
A6
W13
U8
H10
YAW
SENSOR
PITCH
SENSOR
B10, D10
G6, J8,
J9, J7
J3, J2,
H2, J4
B1, D1
B4, A4, B5
D901
BACKLIGHT
3 - 10
CN706
2.5 inch
COLOR
LCD
MONITOR
LCD901
BL_H
BL_L
OVERALL (2/2)
(PAGE 3-2)
1
16
17
BL_H
38
BL_L
39
11, 12, 1314, 15
RESET
DCK, HD, VD
XCS
D0 - D7
SI, SCK
E11
5
1
16
GEN_TG_CLK
GEAR_ON
AF18
Y13
J5
X201
36MHz
IC202
LOW POWER
CLOCK GEN
(4/8)
1
BATT_SIG
3
GEN_SYS_CLK
Y12
IC203_1_SI
G18
IC203_1_SO
B24
5
2
IC201
DSC
CONTROL
(3/8)
D5
C5
XIC203_1_SCK
H18
B5
XCS_IC201
W20
B1
E4
XDD_SYS_RSTXDD_SYS_RST
B2
4
OVERALL (2/2)
(PAGE 3-2)

DSC-T20/T25_L2
3-2
3-2. OVERALL BLOCK DIAGRAM (2/2)
( ) : Number in parenthesis ( ) indicates the division number of schematic diagram where the component is located.
DIRECT_PB
MS_IN
SY-170 BOARD (2/2)
V_LINE_OUT
AU_LINE_OUT
USB_VBUS
AUDIO, VIDEO AMP
(8/8)
IC602
A6
E2
F1
SP+, SP-
V_LINE_OUT
AU_LINE_OUT
B6
F3
D6
IC203_2_SO, XIC203_2_SCK
D5, E6
A1, C1
MEMORY
STICK
DUO
2 - 5, 7, 8
6
CN704
XMS_IN
XACV_DET
D003
D002
AF_SW
Q704, Q707
MAX_5.0V
ACV_UNREG
BATT_UNREG
XPWR_ON
VL_3V
BL_H
BL_L
V_OUT
A_OUT_L
XAV_JACK_IN
USB_VBUS
CN705
24
18, 20
22
28
16
USB_DP, USB_DM
10, 12
6
20
16
26
MC-177 FLEXIBLE
BOARD
BATT_XEXT
HD_PR
10
8, 9
12
UART_Tx, UART_Rx
15, 9
ACV_UNREG
23, 25
CHARGE_V
17, 21
19
2
XPOWER_ON
7
7
HD_PB
14
4
HD_Y
26 24
CN001
MULTI
CONNECTOR
34 - 3929 - 33
08
ST-161 BOARD ST-163 FLEXIBLE
BOARD
ST_UNREG
Q001
FLASH
DRIVE
FLASH
UNIT
FLASH
CONTROL,
CHARGE
CONTROL
6
4
9
7
IC001
XE_H
TRIGGER
TRIGGER_GND
XE_L
+
C901
CHARGING
CAPACITOR
D001
3
4 1
2
15
T001
10
CN701
5
1
2
8
7
6
1, 2
: VIDEO SIGNAL
: AUDIO SIGNAL
: VIDEO/AUDIO SIGNAL
STRB_CHG
XSTRB_FULL
STB_CHG_CONT
STRB_ON STRB_ON1
XAF_LED
AF_ANODE
D002
SELF-TIMER/
AF ILLUMINATOR
E2
A1
B9
XPWR_OFF
XCS_FR
XIC203_RST_REQ
IC203_1_UO, IC203_1_UIIC203_1_UO, IC203_1_UI
IC203_AUOUT
USB_DP, USB_DMUSB_DP, USB_DM
AE8
AF8
IC203_AUIN
V8
XCS_AUDIO
IC203_AUOUT
IC203_AUIN
XCS_AUDIO
XHD_EN
AB13
IC203_CVOUT IC203_YOUT
IC203_CVOUT
MSX_BS, MSX_D0 - MSX_D3, MSX_CLKMSX_BS, MSX_D0 - MSX_D3, MSX_CLK
Y1, AA1
G19, D26
A14, A13, B14,
B13, A15, B15
AF12
VOUT_1 IC203_PBOUT
AC12
VOUT_2 IC203_PROUT
Q202, Q203, Q204
MUTE
A_3.0V
Q201
V7
Y16
H9
V2
H15
STRB_CHG
XSTRB_FULL
STB_CHG_CONT
STRB_ON1
G15
AF_LED_CONT
AF_LED_CONT
G9
XVA_JACK_IN XVA_JACK_IN
Y9
XPWR_LED
R19
X_SHUT_SW
N19
XAE_LOCK_SW
AC8
KEY_AD_1
AF6
KEY_AD_2
H8
A23
XCS_FR
W12
G8
XPWR_OFF
K8
XACV_IN
XIC203_RST_REQ
CAMERA DSP,
LENS CONTROL,
MODE CONTROL,
FRONT CONTROL
(3/8, 4/8)
IC203
(2/2)
D706
MS ACCESS
LED
MEMORY STICK
DETECT
Q101
BACKUP POWER
REG
(2/8)
IC103
POWER/ENABLE SIG
CONTROLLER
(2/8)
IC101
TI_5.0V
A1
B4
EVER_3V
A2
J4
C6
XUSB_JACK
XMS_IN
USB_VBUS
D8
DISW1P8_EN
1.8V/3.0V
DISCHARGE
1.8V
SELECT SW
Q007
C2
DISW2P9_EN
C1
XRSTX
D7 B2
LCD POWER REG
(1/8)
IC006
PANEL_EN
B11
DC/DC CONVERTER
(1/8)
IC002
EVER_PSB
J98
1.8V REG
(1/8)
IC003
LDO_1P8_EN
H21
B7
XPWR_ON
B8
XDD_SYS_RST
BATT_SIG
XDD_SYS_RST
B4
A8
J5
X102
32.768KHz
LENS COVER
DETECT
S101
DDCPV_EN
SW
Q014
C9
BL_EN2
SW
Q006
F8
SW_1P8_EN
Q010, Q012
J1
5V LOAD SW
DDC5PSW_EN
Q003
F7
CAMDD_EN, DDC1P2_EN,
DDC1P8_EN, DDC2P9_EN,
BL_EN1, VSU_EN
B2, D9, E8,
E9, F8, J8
DC/DC
CONVERTER
(1/8)
IC001
D_1.8V
D_3.0V
A_3.0V
D_1.2V
CAM_-7.5V
MAX_5V
CAM_12V
AVC/BATT UNREG
8
5
16
21
30
34
37
43, 44
1, 3, 10, 15,
22, 36, 46
SP901
SPEAKER
BATT_UNREG
BATT_SIG
VL_3V
CN702
+
−
BH001
BATTERY
TERMINAL
BATT_UNREG
VL_3V
BATT_GND
S
BATT_SIG
BT-034 FLEXIBLE
BOARD
2
BT001
LITHIUM
BATTERY
9 - 123 - 7
8
XPWR_ON
CN707 CN002
CONTROL SWITCH BLOCK
(RL-073)
CONTROL SWITCH BLOCK
(SW-495)
4
XPWR_LED
5
XSHUTTER_SW
10
XAE_LOCK_SW
11
DIRECT_PB
12
KEY_AD_1
13
KEY_AD_2
15
SP+, SP-
7, 8
1, 2
CN001
6
POWER
S001
S002
D001
(POWER)
(SHUTTER)
S001
4
2
S003
W
(ZOOM)
S008
(REVIEW)
S005
MENU
S007
(SET)
S004
(FLASH)
(MACRO) (SELF-TIMER)
S002
T
(ZOOM)
S010S006 S009
HOME
OVERALL (1/2)
(PAGE 3-1)
1
OVERALL (1/2)
(PAGE 3-1)
4
OVERALL (1/2)
(PAGE 3-1)
2
OVERALL (1/2)
(PAGE 3-1)
3
IC203_0_SI, IC203_0_SO, XIC203_0_SCK
H17, A24, G17
D1, D2, E1
Q004,
Q013
/