
OPERATING INSTRUCTIONS
READ THESE INSTRUCTIONS CAREFULLY BEFORE USING THE MACHINE.
Register your product and get support at
注册您的产品及获取支持服务,请登陆
제품 등록 및 지원:
註冊您的產品及取得支援服務,請登入 :
www.philips.com/welcome
English
Type / 型号 / 모델 / 型號 :HD 8323 / HD 8325 / HD8327
使用说明书
请在使用咖啡机前仔细阅读本说明书。
中文
中文
커피 머신을 사용하기 전에 이 설명서를 주의 깊게 읽으십시오.
사용 및 유지관리 설명서
한국어
한국어
繁體中文
繁體中文
使用說明書
請在使用咖啡機前仔細閱讀本說明書。

• 2 •
Fig. -
图
- 그림 -
圖
- (A)
Fig. -
图
图 -
그림 -
圖
-
(B)
20 cm
8 in
20 cm
8 in
20 cm
8 in
40 cm
16 in
20 cm
8 in
4 65
1
2 3
7 8 9 10
11
13
14
12
16
17
18
19
20
15

• 3 •
Fig. -
图
图 - 그림 -
圖
- (1)
Fig. -
图
图 - 그림 -
圖
- (4)
Fig. -
图
图 - 그림 -
圖
- (7)
Fig. -
图
图 - 그림 -
圖
- (10)
Fig. -
图
图 - 그림 -
圖
- (2)
Fig. -
图
图 - 그림 -
圖
- (5)
Fig. -
图
图 - 그림 -
圖
- (8)
Fig. -
图
图 - 그림 -
圖
- (11)
Fig. -
图
图 - 그림 -
圖
- (3)
Fig. -
图
图 - 그림 -
圖
- (6)
Fig. -
图
图 - 그림 -
圖
- (9)
Fig. -
图
图 - 그림 -
圖
- (12)

• 4 •
Fig. -
图
图 - 그림 -
圖
- (13)
Fig. -
图
图 - 그림 -
圖
- (16)
Fig. -
图
图 - 그림 -
圖
- (19)
Fig. -
图
图 - 그림 -
圖
- (22)
Fig. -
图
图 - 그림 -
圖
- (14)
Fig. -
图
图 - 그림 -
圖
- (17)
Fig. -
图
图 - 그림 -
圖
- (20)
Fig. -
图
图 - 그림 -
圖
- (23)
Fig. -
图
图 - 그림 -
圖
- (15)
Fig. -
图
图 - 그림 -
圖
- (18)
Fig. -
图
图 - 그림 -
圖
- (21)
Fig. -
图
图 - 그림 -
圖
- (24)

• 5 •
Fig. -
图
图 - 그림 -
圖
- (25)
Fig. -
图
图 - 그림 -
圖
- (28)
Fig. -
图
图 - 그림 -
圖
- (31)
Fig. -
图
图 - 그림 -
圖
- (34)
Fig. -
图
图 - 그림 -
圖
- (26)
Fig. -
图
图 - 그림 -
圖
- (29)
Fig. -
图
图 - 그림 -
圖
- (32)
Fig. -
图
图 - 그림 -
圖
- (35)
Fig. -
图
图 - 그림
-
圖
- (27)
Fig. -
图
图 - 그림 -
圖
- (30)
Fig. -
图
图 - 그림 -
圖
- (33)
Fig. -
图
图 - 그림 -
圖
- (36)

• 6 •
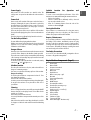
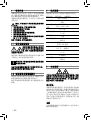
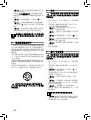
1 GENERAL INFORMATION
The co ee machine is suitable for preparing 1 or 2 cups of
espresso co ee and is provided with a swivel steam and hot
water wand. The controls on the front side of the machine are
labelled with easy-to-read symbols.
The machine has been designed for domestic use and is not
suitable for professional, continuous use.
Warning. No liability is held for damage caused
by:
• Incorrect use not in accordance with the intended
purposes;
• Repairs not carried out in authorised service
centres;
• Tampering with the power cord;
• Tampering with any part of the machine;
• Use of non-genuine spare parts and accessories;
• Failure to descale the machine and storage at
temperatures below 0°C.
In these cases, the warranty is not valid.
1.1 To Simplify Manual Reading
The warning triangle indicates the
instructions that are important for
user’s safety. Please carefully follow
these instructions to avoid serious injury!
References to illustrations, parts of the appliance or controls,
etc. are indicated by numbers or letters. Whenever possible,
refer to the illustration.
This symbol is used to highlight information
that is particularly impor tant to ensure optimal
use of the machine.
The illustrations corresponding to the text can be found
on the rst pages of the manual. Please refer to these
pages while reading the operating instructions.
1.2 How to use these Operating
Instructions
Keep these operating instructions in a safe place and make
them available to anyone who may use the co ee machine.
For further information or in case of problems, please refer to
an authorised service centre.
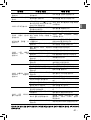
2 TECHNICAL SPECIFICATIONS
The manufacturer reserves the right to make changes to the
technical speci cations of the product.
Nominal Voltage - Power Rating - Power Supply
See label on the appliance
Housing Material
Plastic
Size (w x h x d) (mm)
210 x 300 x 280
Weight
3.9 kg
Power Cord Length
1.3 m
Control Panel
Front side
Filter Holder
Pressurized type
Pannarello
Special for cappuccinos
Water Tank
1.25 litres – Removable type
Pump Pressure
15bar
Boiler
Stainless steel type
Safety Devices
Thermal fuse
3 SAFETY REGULATIONS
Never allow water to come into contact with any of the
electrical parts of the machine: Danger of short circuit!
Overheated steam and hot water may cause scalding!
Do not direct the steam or hot water jet towards body
parts. Handle the steam/hot water spout with care:
Danger of scalding!
Intended Use
The co ee machine is intended for domestic use only. Do
not make any technical changes or use the machine for
unauthorised purposes since this would create serious hazards!
The appliance is not to be used by persons (including children)
with reduced physical, mental or sensory abilities or with
scarce experience and/or expertise, unless they are supervised
by a person responsible for their safety, or they are instructed
by this person on how to properly use the machine.

• 7 •
English
Power Supply
Only connect the co ee machine to a suitable socket. The
voltage must correspond to that indicated on the machine’s
label.
Power Cord
Never use the co ee machine if the power cord is defective or
damaged. If damaged, the power cord must be replaced by
the manufacturer or an authorised service centre. Do not pass
the power cord around corners, over sharp edges or over hot
objects and keep it away from oil.
Do not use the power cord to carry or pull the co ee machine.
Do not pull out the plug by the power cord or touch it with wet
hands.
Do not let the power cord hang freely from tables or shelves.
For the Safety of Others
Prevent children from playing with the machine.
Children are not aware of the risks related to electric household
appliances. Do not leave the machine packaging materials
within the reach of children.
Danger of Burns
Never direct jets of overheated steam and/or hot water towards
yourself or others. Always use the handles or knobs provided.
Do not disconnect (remove) the pressurized lter holder during
co ee brewing. Hot water drips may spill out of the brew unit
during the warming phase.
Do not brew co ee when the machine is overheated, namely
when both “
” and “ ” lights are on.
Machine Location
Place the co ee machine in a safe place, where there will be no
danger of overturning or injury.
Hot water or overheated steam may spill out of the machine:
Danger of scalding!
Do not keep the machine at a temperature below 0°C. Frost
may damage the machine.
Do not use the co ee machine outdoors.
In order to prevent its housing from melting or being damaged,
do not place the machine on very hot surfaces and close to
open ames.
Cleaning
Before cleaning the machine, turn it o by pressing the ON/OFF
button, then pull out the plug from the socket. Wait for the
machine to cool down.
Never immerse the machine in water!
It is strictly forbidden to tamper with the internal parts of the
machine.
Water left in the tank for several days should not be used for
food purposes. Wash the tank and ll it with fresh drinking
water.
Suitable Location for Operation and
Maintenance
To ensure a correct and e cient performance of the co ee
machine, we recommend following the instructions below:
• Choose a level surface.
• Choose a location that is su ciently well-lit, clean and
near an easily reachable socket.
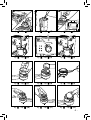
• Allow for a minimum distance from the sides of the
machine as shown in (Fig.A).
Storing the Machine
If the machine is to remain inactive for a long time, turn it
o and unplug it. Store it in a dry place, out of the reach of
children. Keep it protected from dust and dirt.
Repairs / Maintenance
In case of failure, problems or a suspected fault resulting from
the falling of the machine, immediately remove the plug
from the socket. Never attempt to operate a faulty machine.
Servicing and repairs may only be carried out by Authorised
Service Centres. All liability for damages resulting from work
not carried out by professionals is declined.
Fire Safety Precautions
In case of re, use carbon dioxide (CO
2
) extinguishers. Do not
use water or dry powder extinguishers.
Key to Machine Components (Page 2)
1 Control panel
2 Water tank lid
3 Hot water/steam knob
4 Seat for accessories
5 Water tank
6 Cup holder rest
7 Water recovery tray + grill
8 Brew unit
9 Steam wand (Pannarello)
10 Power cord
11 ON/OFF button
12 Pressurized lter holder
13 Ground co ee measuring scoop
14 Ground co ee lter
(single piece for 1 or 2 co ee(s))
15 Pod lter adapter
16 Co ee pod lter
17 Selection knob
18 "Machine on" light
19 "Steam ready" light
20 Co ee/Water light - "Machine ready"

• 8 •
4 INSTALLATION
For your own and other people safety, follow the
"Safety Regulations" indicated in Section 3 carefully.
4.1 Packaging
The original packaging has been designed to protect the
machine during shipping. We recommend keeping the
packaging material for possible future transport.
4.2 Installation Instructions
Before installing the machine, read the following safety
instructions carefully:
• Place the machine in a safe place;
• Make sure children cannot play with the machine;
• Do not place the machine on hot surfaces or near open
a m e s .
The co ee machine is now ready to be connected to the
electrical network.
Note: It is recommended to wash the
components before using them for the rst
time and/or after they have not been used for a certain
period of time.
4.3 Machine Connection
Electric power may be very dangerous! It is
therefore necessary to strictly follow the safety
regulations. Do not use faulty power cords! Faulty cords
and plugs must be replaced immediately in Authorised
Service Centres.
The voltage of the appliance has been pre-set by the
manufacturer. Check that the voltage matches the indication
on the data plate placed at the bottom of the appliance.
• Check that the ON/OFF button (11) is set on “0” before
connecting the machine to the electrical network.
• Insert the plug into a wall socket with suitable power
voltage.
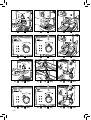
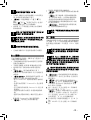
4.4 Water Tank
• (Fig.1A) - Remove the lid from the water tank (2) by lifting
it.
• (Fig.1B) - Remove the water tank (5).
• (Fig.2) - Rinse and ll it with fresh drinking water taking
care not to over ll.
Fill the tank only with fresh, non-sparkling,
drinking water. Hot water or any other liquid
may damage the tank. Do not operate the machine if
water is not present: Make sure there is enough water
in the tank.
• (Fig.3A) - Insert the water tank making sure that it has
been properly repositioned in its former seat and then
reposition the lid (2).
After lling the water tank, place it back
into the machine. Make sure that the tank is
correctly inserted into the machine by pushing it rmly
until its limit stop in order to avoid water leaks from
the bottom - THE REFERENCE MARK INDICATED IN FIG. 3B
SHOULD BE FULLY VISIBLE.
4.5 Circuit Priming
At the beginning, after dispensing steam or when the water
tank is empty, the machine’s water circuit must be primed.
• Press the ON/OFF button (11) and switch it to the "I"
position. The light (18) will turn on to indicate that the
machine is on.
• (Fig.4) - Place a container under the steam wand
(Pannarello).
• Open the "hot water/steam" knob (3) by turning it counter-
clockwise.
• (Fig.5) - Set the selection knob (17) to the
"
" position.
• Wait until a steady jet of water ows out of the steam
wand (Pannarello).
• (Fig.5) - Set the selection knob (17) to the "
" position.
• Close the "hot water/steam" knob (3) by turning it
clockwise. Remove the container.
4.6 Using the Machine for the First Time
or after a Period of Inactivity
This simple operation ensures optimum brewing and must be
performed:
- At rst start-up;
- When the machine remains inactive for a long time (more
than 2 weeks).
Dispensed water must be emptied into an
adequate drain. It is not suitable for food use. If
the container lls up during the cycle, stop dispensing
water and empty the container before resuming the
operation.
• (Fig.2) - Rinse the tank and ll it again with fresh drinking
water.

• 9 •
English
• (Fig.4) - Place a container under the steam wand
(Pannarello). Open the knob (3) by turning it counter-
clockwise.
(Fig.5) - Set the selection knob (17) to the "
" position.
• Dispense the whole water tank content from the steam/
hot water wand (Pannarello). To end the operation, set the
selection knob (17) to the "
" position and close the knob
(3) by turning it clockwise.
• (Fig.2) - Fill the tank with fresh drinking water.
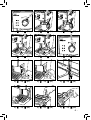
• (Fig.13-14) - Insert the lter holder into the brew unit (8)
from the bottom and turn it from left to right until it locks
into place.
• (Fig.15) - Place a suitable container under the lter
holder.
• (Fig.16) - Turn the selection knob (17) to the "
"
position and dispense all the water in the tank.
(Fig.17) - Once the tank is empty, stop dispensing and
switch the selection knob (17) to the "
" position.
• Fill the tank again and wait until the "machine ready" light
(20) turns on.
• (Fig.19) - Remove the lter holder from the unit by turning
it from right to left and rinse it with fresh drinking water.
The machine is now ready; please see related sections for
operating details on how to brew co ee and dispense steam.
5 COFFEE BREWING
Warning! During the co ee brewing it is
forbidden to remove the pressurized lter
holder by manually turning it clockwise. Danger of
burns.
• During this operation, the "machine ready" light (20) may
ash; this is to be considered as a standard and not a faulty
operating mode.
• Before using the machine, make sure that the hot water/
steam knob (3) is closed and that there is enough water in
the tank.
• Press the ON/OFF button (11) and switch it to the "I"
position.
• Wait until the "machine ready" light (20) turns on. The
machine is now ready for co ee brewing.
Accessories for co ee brewing are placed in
a specially designed seat to make operations
easy and immediate.
If the ground co ee measuring scoop and/or the lters
are required, lift the cover (2) and take what you need
(Fig.35 e Fig.36).
5.1 Using Ground Coff ee
• (Fig.7) - Insert the lter (14) in the pressurized lter holder
(12); the lter is already inserted when using the machine
for the rst time.
• (Fig.13) - Insert the lter holder into the brew unit (8) from
the bottom.
• (Fig.14) - Turn the lter holder from left to right until it
locks into place. Release the pressurized lter holder grip.
The handle will slightly turn to the left. This movement
guarantees proper lter holder performance.
• (Fig.16) - Preheat the pressurized lter holder by switching
the selection knob (17) to the "
" position until some
water spills out of it. This is to be done only for the rst
co ee brewing.
• (Fig.17) -When 150cc of water have owed out, set the
selection knob (17) to the "
" position to stop brewing.
• (Fig.19) - Remove the lter holder from the machine by
turning it from right to left and pour out any water left. As
the machine is tted with the special lter (14), there is no
need to change the lter to make one or two co ees.
• (Fig.35) - Remove the measuring scoop from the
machine.
• (Fig.8) - Add 1-1.5 measuring scoop(s) for single co ee
and 2 measuring scoops for double co ee. Remove any
co ee residues from the rim of the lter holder.
• (Fig.13) - Insert the lter holder (12) into the brew unit (8)
from the bottom.
• (Fig.14) - Turn the lter holder from left to right until it
locks into place.
• (Fig.15) - Take 1 or 2 preheated cups and place them
under the pressurized lter holder. Make sure that they are
correctly placed under the co ee brewing nozzles.
• (Fig.14) - Switch the selection knob (17) to the "
"
position.
• When the desired quantity of co ee has been obtained,
turn the selection knob (17) to the "
" position to stop
co ee brewing. Wait a few seconds after brewing has
stopped, then remove the cups of co ee (Fig.18).
• (Fig.19) - Remove the pressurized lter holder and empty
out the remaining co ee residues.
Note: If a small quantity of water remains
in the lter holder, this has to be considered
as absolutely normal and is due to the lter holder
features.
Important Note: The lter (14) should be kept
clean to guarantee perfect results. Clean daily
after use.

• 10 •
5.2 Using Coff ee Pods
• (Fig.9) - Use a co ee spoon to remove the lter for ground
co ee (14) from the pressurized lter holder (12).
• (Fig.10) - Insert the co ee pod adapter (15) - with the
convex part facing down - into the pressurized lter holder
(12).
• (Fig.11) - Then, insert the pod lter (16) into the pressurized
lter holder (12).
• (Fig.13) - Insert the pressurized lter holder into the brew
unit (8) from the bottom.
• (Fig.14) - Turn the lter holder from left to right until it
locks into place. Release the grip from the pressurized
lter holder. The handle is automatically slightly turned
leftwards.
This movement guarantees proper pressurized lter holder
performance.
• (Fig.16) - Preheat the pressurized lter holder by switching
the selection knob (17) to the "
" position until some
water spills out of it. This is to be done only for the rst
co ee brewing.
• (Fig.17) -When 150cc of water have owed out, set the
selection knob (17) to the "
" position to stop brewing.
• (Fig.19) - Remove the pressurized lter holder from the
machine by turning it from right to left and pour out any
water left.
• (Fig.12) - Insert the pod into the lter holder and make
sure the paper of the pod does not overhang the lter
holder.
• (Fig.13) - Insert the pressurized lter holder into the brew
unit (8) from the bottom.
• (Fig.14) - Turn the lter holder from left to right until it
locks into place.
• Take 1 preheated cup and place it under the lter holder.
Check that it is correctly placed under the co ee brewing
nozzles.
• (Fig.16) - Switch the selection knob (17) to the "
"
position.
• (Fig.17) - When the desired quantity of co ee has been
obtained, turn the selection knob (17) to the "
" position
to stop co ee brewing, and then remove the co ee cup.
• (Fig.19) - Wait a few seconds after brewing, then remove
the lter holder and dispose of the used pod.
Important Note: The lter (16) and the adapter
(15) should be kept clean to guarantee perfect
results. Clean daily after use.
6 TIPS FOR CHOOSING COFFEE
As a general rule any type of co ee available on the market can
be used. However, co ee is a natural product and its avour
changes according to its origin and blend; it is therefore a good
idea to try di erent types of co ee in order to nd the most
suited to your personal taste.
For optimal results, we recommend using espresso machine
blends. As a rule, co ee should always come out of the
pressurized lter holder, without dripping.
The co ee brewing speed can be modi ed by slightly changing
the amount of co ee in the lter and/or using a di erent co ee
grind.
Saeco recommends using ESE single-dose co ee pods for a
tasty co ee and easier cleaning and preparing.
BEFORE PERFORMING ANY OPERATIONS RELATED
TO HOT WATER/STEAM DISPENSING, MAKE SURE
THAT THE STEAM WAND (PANNARELLO) IS DIRECTED OVER
THE WATER RECOVERY TRAY.
7 HOT WATER
Danger of scalding! Dispensing may be preceded
by small jets of hot water. The wand can reach
high temperatures: Do not touch it directly with bare
hands.
• Press the ON/OFF button (11) and switch it to the "I"
position.
• Wait until the "machine ready" light (20) turns on. The
machine is now ready.
• (Fig.21) - Place a container or a tea glass under the steam
wand (Pannarello).
• (Fig.21) - Open the knob (3) by turning it counter-
clockwise.
• (Fig.22) - Set the selection knob (17) to the "
"
position.
• (Fig.23) - When the desired quantity of hot water has been
dispensed, set the selection knob (17) to the "
" position.
• (Fig.24) - Close the knob (3) by turning it clockwise.
• Remove the hot water container.

• 11 •
English
8 STEAM / CAPPUCCINO
Danger of scalding! Dispensing may be preceded
by small jets of hot water. The wand can reach
high temperatures: Do not touch it directly with bare
hands.
• Press the ON/OFF button (11) and switch it to the "I"
position.
• Wait until the "machine ready" (20) light turns on.
• (Fig.25) - Set the selection knob (17) to the "
" position.
The light (20) turns o .
• Wait until the light (19) turns on. The machine is now ready
for steam dispensing.
• (Fig.26) - Place a container under the steam wand.
• (Fig.26) - Open the knob (3) for a few seconds, so that
remaining water ows out of the steam wand (Pannarello).
In a short time only steam will come out.
• (Fig.27) - Close the knob (3) and remove the container.
• Fill 1/3 of the container you wish to use to prepare
cappuccino with cold milk.
Use cold milk to get a better result.
• (Fig.28) - Immerse the steam wand in the milk and open
the knob (3) by turning it counter-clockwise. Turn the milk
container with slow upward movements so that it warms
up evenly.
A maximum dispensing of 60 seconds is
recommended.
• Once nished, close the knob (3) by turning it clockwise
and remove the cup with frothed milk.
• (Fig.30) - Set the selection knob (17) to the "
" position.
If both "
" and " " lights are on, the temperature of
the machine is too high for brewing co ee.
• Prime the circuit as described in Section 4.5 to make the
machine ready for use.
Note: The machine is ready when the "machine
ready" light
is permanently on.
Important Note: If it is not possible to brew
cappuccino as described, prime the circuit as
explained in Section 4.5 and then repeat the steps.
The same procedure can be performed to heat
other beverages.
• After this operation, clean the steam wand with a wet
cloth.
9 CLEANING
Maintenance and cleaning can only be carried out when the
machine is cold and disconnected from the electrical network.
• Do not immerse the machine in water or place any of its
parts in a dishwasher.
• Do not use spirit, solvents and/or aggressive chemical
agents.
• We recommend cleaning the water tank and re lling it
with fresh water daily.
• (Fig.31-33) - Every day, after heating milk, remove the
external part of the Pannarello and wash it with fresh
drinking water.
• (Fig.31-32-33) - Clean the steam wand weekly. To do this,
the following operations have to be performed:
- Remove the external part of the Pannarello (for standard
cleaning);
- Remove the upper part of the Pannarello from the steam
wand;
- Wash the upper part of the Pannarello with fresh drinking
water;
- Wash the steam wand with a wet cloth and remove any
milk residues;
- Reposition the upper part in the steam wand (make sure
it is completely inserted).
Reassemble the external part of the Pannarello.
• (Fig.34) - Empty and clean the drip tray every day.
• Use a soft, dampened cloth to clean the appliance.
• (Fig.20) - Perform the following operations to clean the
pressurized lter holder:
- (Fig.9) - Remove the lter and wash it thoroughly with
hot water.
- Remove the adapter (if tted) and wash it thoroughly
with hot water.
- Wash the internal part of the pressurized lter holder.
• Do not dry the machine and/or its components using a
microwave and/or standard oven.
• (Fig.35-36) - Clean the seat for accessories with a damp
cloth every week to remove any co ee or dust residues.
Note: Do not wash the pressurized lter holder
in the dishwasher.

• 12 •
10 DESCALING
Limescale builds up with the use of the appliance; the machine
needs descaling every 1-2 months and/or whenever a reduction
in water ow is noticed. Use the Saeco descaling solution only.
In case of con ict, priority must be given
to what is indicated in the operation and
maintenance manual over the instructions provided on
separately sold accessories and materials.
Use the Saeco descaling solution (Fig.B).
Its formula has been designed to ensure
better machine performance and operation for its
whole operating life. If correctly used, it also avoids
alterations in the brewed product. Before starting a
descaling cycle make sure that: THE WATER FILTER (if
used) HAS BEEN REMOVED.
Never drink the descaling solution or any
products dispensed until the cycle has been
carried out to the end. Never use vinegar as a descaling
solution.
1 (Fig.13-14) - Insert the lter holder into the brew unit (8)
from the bottom and turn it from left to right until it locks
into place.
2 (Fig.1B) - Remove and empty the water tank.
3 (Fig.2) - Pour HALF the content of the Saeco concentrated
descaling solution into the water tank, then ll the tank
with fresh drinking water up to the MAX level.
4 Switch on the machine by pressing the ON/OFF button (11)
and switch it to the "I" position.
(Fig.21) - Fill up (as described in Section 7 of the manual)
2 cups of water (about 150ml each) from the steam / hot
water wand and turn o the machine by pressing and
switching the ON/OFF button (11) to the "0" position.
5 Let the descaling solution sit for about 15-20 minutes with
the machine o .
6 Switch on the machine by pressing the ON/OFF button (11).
(Fig.21) - Fill up (as described in Section 7 of the manual)
two cups of water (about 150 ml each) from the steam /
hot water wand. Then turn the machine o by means of
the ON/OFF button (11) and leave it o for 3 minutes.
7 Repeat the operations described in step 6 until the water
tank is completely empty.
8 (Fig.2) - Rinse the tank and ll it completely with fresh
drinking water.
9 Place a container under the lter holder.
10 Switch on the machine by pressing the ON/OFF button (11);
turn the selection knob (17) to the "
" position and, by
means of the lter holder, dispense the whole content of
the tank. Set the selection knob (17) to the "
" position to
stop dispensing.
11 (Fig.2) - Fill the tank again with fresh water.
(Fig.21) - Place a large enough container under the steam
wand (Pannarello). Open the water dispensing knob (3) by
turning it counter-clockwise.
(Fig.22) - Turn the selection knob (17) to the "
"
position and dispense the whole content of the tank by
means of the steam / hot water wand.
12 (Fig.23) - After dispensing water, set the selection knob
(17) to the "
" position to stop dispensing.
(Fig.24) - Close the water dispensing knob (3) by turning it
clockwise.
13 Repeat the operations from point (8) once again for a total
of 4 tanks.
14 (Fig.19) - Remove the lter holder from the unit by turning
it from right to left and rinse it with fresh drinking water.
The descaling cycle is now complete.
(Fig.2) - Fill the tank again with fresh water. If necessary,
prime the circuit as described in Section 4.5.
The descaling solution must be disposed of
according to the manufacturer’s instructions
and/or regulations in force in the country of use.
11 DISPOSAL
- The packing materials can be recycled.
- Appliance: Unplug the appliance and cut the power cord.
- Deliver the appliance and power cord to a service center or
public waste disposal facility.
This product complies with eu directive 2002/96/EC.
The symbol
on the product or on its packaging
indicates that this product may not be treated as household
waste. Instead it shall be handed over to the applicable
collection point for the recycling of electrical and electronic
equipment.
By ensuring this product is disposed of correctly, you will help
prevent potential negative consequences for the environment
and human health, which could otherwise be caused by
inappropriate waste handling of this product. For more
detailed information about recycling of this product, please
contact your local city o ce, your household waste disposal
service or the shop where you purchased the product.

• 13 •
English
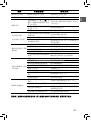
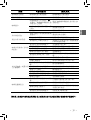
Problem Possible Causes Solution
The machine does not turn on.
The machine is not connected to the
electrical network.
Connect the machine to the electrical network.
The pump is very noisy. No water in the tank. Re ll with water (Section 4.4).
The co ee is too cold.
The "machine ready" light (20) was o
while switching the selection knob (17) to
the "
" position.
Wait until the "machine ready" light (20) turns
on.
The lter holder is not inserted for
preheating (Section 5).
Preheat the lter holder.
The cups are cold. Preheat the cups with hot water.
The milk does not froth.
It is not possible to prepare a
cappuccino.
Not suitable milk: Powdered milk or low-
fat milk has been used.
Use only cold, whole milk.
Dirty Pannarello. Clean the Pannarello as described in Section 9.
No steam left in the boiler.
Prime the circuit (Section 4.5) and repeat the
steps described in Section 8.
The co ee is brewed too fast,
crema does not form.
There is too little co ee in the lter
holder.
Add co ee (Section 5).
The grind is too coarse. Use a di erent blend (Section 6).
Co ee is old or not suitable. Use a di erent blend (Section 6).
Old or not suitable pod. Change the pod.
One component missing in the lter
holder.
Make sure that all components are present and
properly installed.
Co ee is not brewed or brewed
in drips only.
No water. Re ll with water (Section 4.4).
The grind is too ne. Use a di erent blend (Section 6).
Co ee pressed in the lter holder. Shake the ground co ee.
There is too much co ee in the lter
holder.
Reduce the quantity of co ee in the lter holder.
Knob (3) is open. Close knob (3).
The machine has limescale build-up. Descale the machine (Section 10).
The lter in the lter holder is clogged. Clean the lter (Section 9).
Not suitable pod. Change type of pod.
Co ee ows out of the edges.
The lter holder is incorrectly inserted in
the brew unit.
Insert the lter holder correctly (Section 5).
The upper edge of the lter holder is
dirty.
Clean the rim of the lter holder.
The pod is inserted incorrectly.
Insert the pod correctly. Make sure it does not
come out of the lter holder.
There is too much co ee in the lter
holder.
Reduce the quantity of co ee using the measuring
scoop.
Please contact the customer service for any problems not covered in the above table or when the suggested
solutions do not solve the problem.

• 14 •
1 常规信息
1 常规信息
本咖啡机适用于冲煮 1 杯或 2 杯意式浓缩咖
啡,并配备有旋转蒸汽管和热水冲煮管。咖啡
机正面的控制开关标有简单易懂的标记。
本咖啡机仅供家庭使用,不可用于专业用途或
连续作业。
注意。不承担因下列原因引起的赔偿责
注意。不承担因下列原因引起的赔偿责
任:
任:
• 不正确的使用,不符合标称用途;
• 不正确的使用,不符合标称用途;
• 未在授权服务中心修理;
• 未在授权服务中心修理;
• 私自改动电源线;
• 私自改动电源线;
• 私自改动咖啡机的任何零部件;
• 私自改动咖啡机的任何零部件;
• 使用非原装零配件;
• 使用非原装零配件;
• 没有按说明进行除垢操作并把咖啡机储存
• 没有按说明进行除垢操作并把咖啡机储存
在 0°C 以下环境中。
在 0°C 以下环境中。
如有上述情况,恕不提供质保。
如有上述情况,恕不提供质保。
1.1 说明书阅读说明
1.1 说明书阅读说明
本使用说明书以警示三角符号
本使用说明书以警示三角符号
标出和用户安全有关的重要说
标出和用户安全有关的重要说
明。请小心按照说明进行操作
明。请小心按照说明进行操作
以避免严重受伤!
以避免严重受伤!
图示说明、咖啡机零部件或控制开关以数字或
字母标记。请尽量查阅图示说明。
该标志用于强调确保咖啡机最佳使用效
该标志用于强调确保咖啡机最佳使用效
果的重要信息。
果的重要信息。
与正文对应的图示说明列于本说明书前几页。
与正文对应的图示说明列于本说明书前几页。
阅读使用说明时请查阅图示说明。
阅读使用说明时请查阅图示说明。
1.2 如何使用本使用说明书
1.2 如何使用本使用说明书
请将使用说明书放在安全的地方,确保任何可
能使用咖啡机的人都能查看本说明书。
如有其他疑问或发现问题,请与授权服务中心
联系。
2 技术规格
2 技术规格
制造商有权对本产品的技术规格作出更改。
额定电压 - 额定功率 - 电源供应
参见产品标签
外壳材料
塑料
尺寸(宽 x 高 x 深)(毫米)
210 x 300 x 280
重量
3.9 千克
电源线长度
1.3 米
操作面板
正面
滤水器固定架
加压式
Pannarello 打奶器
专用于卡布奇诺
水箱
1.25 升 - 摘取式
泵压
15 巴
热水器
不锈钢式
安全装置
保险丝
3 安全准则
3 安全准则
不要让水同咖啡机任何电气部件相接触:有短
不要让水同咖啡机任何电气部件相接触:有短
路危险!过热蒸汽和热水可能造成灼伤!切勿
路危险!过热蒸汽和热水可能造成灼伤!切勿
将蒸汽或热水指向身体部位。小心操作蒸汽/
将蒸汽或热水指向身体部位。小心操作蒸汽/
热水冲煮口:有灼伤危险!
热水冲煮口:有灼伤危险!
设计用途
设计用途
本咖啡机仅限家庭使用。未经授权禁止改动咖
啡机或用于非设计用途,否则可能导致严重后
果!本产品不打算由肢体不健全、感觉或精神
上有障碍或缺乏相关经验和知识的人(包 括儿
童)使用,除非有负责他们安全的人对他们使
用本产品进行监督或指导。应照看好儿童,确
保他们不玩耍本产品。
电源
电源
只可将咖啡机接在合适的插座中。电压必须与
咖啡机标签相符。

• 15 •
中文
中文
电源线
电源线
若电源线损坏,不可使用本机。若电源线损坏,
必须由制造商或授权服务中心进行更换。不要
让电源线绕过拐角、经过锋利边沿或位于高温
物体上方,远离油脂。
不要用电源线牵引或拖拽咖啡机。不要通过电
源线拔出插头,或者用潮湿的手触碰插头。
不要让电源线从台面或架面上自由悬挂。
为了他人安全
为了他 人安 全
不要让孩子将咖啡机当作玩具。
儿童并不了解家庭电器风险。不要将产品包装
材料放在儿童可以接触的范围内。
烫伤危险
烫伤危险
不要将过热蒸汽和/或水指向自己或他人。请使
用本机自带的手柄或球柄。
冲煮咖啡时,不要断开(取下)加压滤水器固定
架。在预热阶段,可能会从冲煮部件溢出热水
滴。
咖啡机过热时,即“
”和“ ”两 盏 指 示 灯均
点亮时,不要冲煮咖啡。
咖啡机的位置
咖啡机的位置
将咖啡机放在安全的地方,确保没有翻倒咖啡
机或因咖啡机而受伤的危险。
热水和过热蒸汽可能会溢出咖啡机:
有灼伤危
有灼伤危
险!
险!
不要将咖啡机放在低于 0°C 的环境中。结冰
可能会损坏本机。
不要在室外使用。
为防止其外壳熔化或损坏,不要把咖啡机放在
非常热的表面或靠近明火。
清洁
清洁
清洁前,通过按下 ON/OFF(开/关)按钮关闭咖
啡机,然后从插座拔出插头。之后等待咖啡机
冷却。
切勿将咖啡机浸泡在水中!
绝对禁止私自改造咖啡机内部零部件。
存放在水箱中数天的水,不得用来制作食品。
清洗水箱,并注入干净的饮用水。
操作和维护的适当位置
操作和维护的适当位置
为确保咖啡机性能正常和高效,建议遵循下述
说明:
• 选择水平的表面。
• 选择照明充足、干净且靠近插座的位置。
• 确保与咖啡机两侧的最少距离如
(图 A)
(图 A)所
示。
咖啡机的储存
咖啡机的储存
若咖啡机长时间闲置,将其关闭并拔下插头。
将其存放在干燥且儿童无法触及的地方。防止
灰尘与浮土。
修理/维护
修理/维护
若咖啡机因跌落而导致故障、问题、潜在错误,
请立即拔下插头。不要操作有故障的咖啡机。
服务与修理仅可由授权服务中心执行。因非专
业人士开展工作而导致的损失,恕不承担责
任。
防火安全注意事项
防火安全注意事项
发生火情时,请使用二氧化碳(CO
2
)灭火器。不
要使用水或干粉灭火器。
主要咖啡机零部件(第 2 页)
主要咖啡机零部件(第 2 页)
1
1 操作面板
2
2 水箱盖
3
3 热水/蒸汽旋钮
4
4 零配件底座
5
5 水箱
6
6 咖啡杯固定支架
7
7 液体回收盘 + 格栅
8
8 冲煮部件
9
9 蒸汽冲煮管(Pannarello 打奶器)
10
10 电源线
11
11 ON/OFF(开/关)按钮
12
12 加压滤水器固定架
13
13 预磨咖啡粉量匙
14
14 预磨咖啡粉滤水器
(一份可冲煮 1 杯或 2 杯咖啡)
15
15 定量包滤水器接合器
16
16 咖啡定量包滤水器
17
17 选择旋钮
18
18 “咖啡机启动”指示灯
19
19 “蒸汽准备就绪”指示灯
20
20 咖啡粉/水指示灯 -“咖啡机准备就绪”

• 16 •
4 安装
4 安装
为了自己和他人的安全,请小心遵从第 3 节所
为了自己 和他 人 的安 全,请小心遵从第 3 节所
列明的“安全准则”。
列明的“安全准则”。
4.1 包装
4.1 包装
原包装能够在运输期间保护咖啡机。若将来可
能需要进行运输,建议保存包装材料。
4.2 安装说明
4.2 安装说明
安装咖啡机前,仔细阅读以下安全说明:
• 将咖啡机放在安全的地方;
• 确保孩子不会将咖啡机当作玩具;
• 不要将咖啡机放在高热温表面或明火附
近。
现在咖啡机准备就绪,可进行电气连接。
注释:第一次使用前,和/或一段时间没
注释:第一次使用前,和/或一段时间没
有使用后,建议清洗零部件。
有使用后,建议清洗零部件。
4.3 咖啡机连接
4.3 咖啡机连接
带电操作非常危险!因此必须严格遵从
带电操作非常危险!因此必须严格遵从
安全准则。不要使用有故障的电源线!有
安全准则。不要使用有故障的电源线!有
故障的电源线和插头必须立即在授权服务中心
故障的电源线和插头必须立即在授权服务中心
更换。
更换。
咖啡机的电压已由制造商预设。检查电压与咖
啡机底部的参数铭牌上的指示相符。
• 对咖啡机进行电气连接前,确保
ON/OFF(
开/关)按钮(11)位于 "0" 位。
• 把插头插进电源电压合适的墙上插座。
4.4 水箱
4.4 水箱
•
(图
(图
1A)-
1A)- 提起盖子,以从水箱(2)取下。
•
(图
(图
1B)-
1B)- 取下水箱(5)。
•
(图
(图
2)-
2)- 冲洗水箱并注入干净的饮用水,
注意不要满溢。
向水箱内注入干净、无碳酸添加的饮用
向水箱内注入干净、无碳酸添加的饮用
水。热水或其他液体可能损坏水箱。无水
水。热水或其他液体可能损坏水箱。无水
时不要操作咖啡机:确保水箱中有足够的水。
时不要操作咖啡机:确保水箱中有足够的水。
•
(图
(图
3A)-
3A)- 把水箱正确地放回原位,然后把
盖子(2)放回原位。
为水箱充水后,请将其放回至咖啡机。
为水箱充水后,请将其放回至咖啡机。
缓缓推动水箱,直至卡入到位,确保水
缓缓推动水箱,直至卡入到位,确保水
箱正确插入咖啡机,以避免底部漏水。——图
箱正确插入咖啡机,以避免底部漏水。——图
3B 说明必须完全可见。
3B 说明必须完全可见。
4.5 回路上水
4.5 回路上水
开始时,冲煮蒸汽后或水箱清空时,必须为咖
啡机水线回路上水。
• 按下 ON/OFF(开/关)按钮(11),并将其置
于 "I" 位。指示灯(18)将点亮,表示咖啡
机已启动。
•
(图
(图
4)-
4)- 在蒸汽冲煮管下放置一个器皿
(Pannarello)。
• 逆时针方向转动“热水/蒸汽”旋钮(3)以
将其打开。
•
(图
(图
5)-
5)- 将选择旋钮(17)置于“ ”位置。
• 等待直到蒸汽冲煮管(Pannarello 打奶
器)的水流稳定。
•
(图
(图
5)-
5)- 将选择旋钮(17)置于“ ”位置。
• 顺时针方向转动“热水/蒸汽”旋钮(3)以
将其关闭。移走器皿。
4.6 首次使用时或闲置一段时间后的
4.6 首次使用时或闲置一段时间后的
咖啡机使用说明
咖啡机使用说明
这项简单的操作确保了最佳冲煮效果,必须执
行:
- 首次启动时;
- 咖啡机长时间闲置时(2 周以上)。
排出的水必须倒空至合适的下水道。不
排出的水必须倒空至合适的下水道。不
可用于制作食品。如果器皿在执行程式
可用于制作食品。如果器皿在执行程式
期间注满了,停止排水,并清空器皿后再重新开
期间注满了,停止排水,并清空器皿后再重新开
始操作。
始操作。
•
(图
(图
2)-
2)- 冲洗水箱并再次注入干净的饮用
水。
•
(图
(图
4)-
4)- 在蒸汽冲煮管下放置一个器皿
(Pannarello)。逆时针方向转动旋钮(3)
以将其打开。
(图
(图
5)-
5)- 将选择旋钮(17)置于“ ”位
置。
• 从蒸汽/热水冲煮管排出水箱中的水
(Pannarello)。将选择旋钮(17)置于“
”
位置,并顺时针方向转动旋钮(3)以将其关
闭,结束该项操作。
•
(图
(图
2)-
2)- 向水箱内注入干净的饮用水。
•
(图
(图
13-14)-
13-14)- 把滤水器固定架从底部插入
冲煮部件(8),并从左至右转动,直至将其
锁定到位。
•
(图
(图
15)-
15)- 在滤水器固定架下放置一个合
适的器皿。
•
(图
(图
16)-
16)- 将选择旋钮(17)置于“ ”位
置,并排出水箱内所有水。
(图
(图
17)-
17)- 水箱倒空后即停止排水,并将选
择旋钮(17)置于“
”位置。
• 再次向水箱内注水,等待直到“咖啡机准备

• 17 •
中文
中文
就绪”指示灯(20)点亮。
•
(图
(图
19)-
19)- 通过从右至左转动滤水器固定
架,将其从部件取下,并用干净的饮用水冲
洗。
现在咖啡机已准备就绪;请查阅有关章节以了
解关于冲煮咖啡和蒸汽的操作细节。
5 冲煮咖啡
5 冲煮咖啡
注意!在咖啡冲煮期间,禁止顺时针方向
注意!在咖啡冲煮期间,禁止顺时针方向
手动转动加压滤水器固定架,将其取下。
手动转动加压滤水器固定架,将其取下。
有烫伤危险。
有烫伤危险。
• 在此操作期间,“咖啡机准备就绪”指示灯
(20) 可能会闪烁;这是标准的操作模式,
而非表示有故障。
• 使用咖啡机前,确认热水/蒸汽旋钮(3)
已关闭,并且水 箱内有足够的水。
• 按下 ON/OFF(开/关)按钮(11),并将其置
于 "I" 位。
• 等待直到“咖啡机准备就绪”指示灯(20)
点亮。现在咖啡机准备就绪,可冲煮咖啡。
咖啡冲煮的零配件放置于专门设计的底
咖啡冲煮的零配件放置于专门设计的底
座中,使操作简易快捷。
座中,使操作简易快捷。
如果需要预磨咖啡粉量匙和/或滤水器,提起
如果需要预磨咖啡粉量匙和/或滤水器,提起
盖子(2),取出所需之物(图35 e 图 36)。
盖子(2),取出所需之物(图35 e 图 36)。
5.1 预磨咖啡粉的使用
5.1 预磨咖啡粉的使用
•
(图
(图
7)-
7)- 将滤水器(14)插入加压滤水器
固定架(12);首次使用咖啡机时,滤水器已
插入。
•
(图
(图
13)-
13)- 把滤水器固定架从底部插入冲
煮部件(8)。
•
(图
(图
14)-
14)- 从左至右转动滤水器固定架,直
至将其锁定到位。松开加压滤水器固定架手
柄。手柄会轻微转向左边。这一操作确保了
较佳的滤水器固定架性能。
•
(图
(图
16)-
16)- 将选择旋钮(17)置于“ ”位
置,直到溢出一些水,来预热加压滤水器固
定架。仅首次冲煮咖啡时需要进行此操作。
•
(图
(图
17)-
17)- 流出 150 毫升的水后,将选择
旋钮(17)置于“
”位置,停止冲煮。
•
(图
(图
19)-
19)- 通过从右至左转动滤水器固定
架,将其从部件取下,并倒出剩余的水。由
于咖啡机配有专用的滤水器(14),因此无
需更换滤水器来冲煮 1 杯或 2 杯咖啡。
•
(图
(图
35)-
35)- 从咖啡机取出量匙。
•
(图
(图
8)-
8)- 添加 1 至 1.5 量匙来冲煮单 1
杯咖啡,2 量匙冲煮 2 杯咖啡。清除滤水
器固定架边缘上的咖啡残渣。
•
(图
(图
13)-
13)- 把滤水器固定架(12)从底部插
入冲煮部件(8)。
•
(图
(图
14)-
14)- 从左至右转动滤水器固定架,直
至将其锁定到位。
•
(图
(图
15)-
15)- 拿出
1 或 2 个已预热的杯子
1 或 2 个已预热的杯子,
将其放置于加压滤水器固定架下。确保杯子
正确地放置于咖啡冲煮口下。
•
(图
(图
14)-
14)- 将选择旋钮(17)置于“ ”位
置。
• 获得所需咖啡量后,将选择旋钮(17)置于“
”位置,停止冲煮。停止冲煮后等候几秒
钟,然后取出盛有咖啡的杯子
(图
(图
18)
18)。
•
(图
(图
19)-
19)- 取下加压滤水器固定架,倒空剩
下的咖啡残渣。
注释:如果滤水器固定架中残留少量水,
注释:如果滤水器固定架中残留少量水,
这是绝对正常的,这是由于滤水器固定
这是绝对正常的,这是由于滤水器固定
架的特征。
架的特征。
重要提示:应保持滤水器(14)洁净以确
重要提示:应保持滤水器(14)洁净以确
保最佳效果。使用后每日清洁。
保最佳效果。使用后每日清洁。
5.2 咖啡定量包的使用
5.2 咖啡定量包的使用
•
(图
(图
9)
9)- 冲煮预磨咖啡粉(14)时,使用
咖啡匙,从加压滤水器固定架移下滤水器
(12)。
•
(图
(图
10)-
10)- 将咖啡定量包接合器(15)- 突出
部分向下 -插入加压滤水器固定架(12)。
•
(图
(图
11)
11)- 然后将咖啡定量包(16)插入加
压滤水器固定架(12)。
•
(图
(图
13)
13)- 把加压滤水器固定架从底部插
入冲煮部件(8)。
•
(图
(图
14)
14)- 从左至右转动滤水器固定架,直
至将其锁定到位。从加压滤水器固定架松开
手柄。手柄会自动轻微转向左边。
这一操作确保了较佳的加压滤水器固定架
性能。
•
(图
(图
16)-
16)- 将选择旋钮(17)置于“ ”位
置,直到溢出一些水,来预热加压滤水器固
定架。仅首次冲煮咖啡时需要进行此操作。
•
(图
(图
17)-
17)- 流出 150 毫升的水后,将选择
旋钮(17)置于“
”位置,停止冲煮。
•
(图
(图
19)
19)- 通过从右至左转动加压滤水器
固定架,将其从部件取下,并倒出剩余的
水。
•
(图
(图
12)
12)- 把定量包插入滤水器固定架,
确认定量包的纸没有悬垂于滤水器固定架
上。
•
(图
(图
13)
13)- 把加压滤水器固定架从底部插
入冲煮部件(8)。

• 18 •
•
(图
(图
14)
14)- 从左至右转动滤水器固定架,直
至将其锁定到位。
• 拿出
1 个已预热的杯子
1 个已预热的杯子,将其放置于滤水
器固定架下。确保杯子正确地放置于咖啡冲
煮口下。
•
(图
(图
16)-
16)- 将选择旋钮(17)置于“ ”位
置。
•
(图
(图
17)-
17)- 获得所需咖啡量后,将选择旋钮
(17)置于“ ”位置,停止冲煮,然后取出咖
啡杯。
•
(图
(图
19)
19)- 停止冲煮后等候几秒钟,然后取
出滤水器固定架,并丢弃已使用的定量包。
重要提示:应保持滤水器(16)和接合器
重要提示:应保持滤水器(16)和接合器
(15)洁净以确保最佳效果。使用后每日
(15)洁净以确保最佳效果。使用后每日
清洁。
清洁。
6 挑选咖啡粉的技巧
6 挑选咖啡粉的技巧
一般来说,市场上所有类型的咖啡粉都可使
用。然而,咖啡粉是天然产品,其香味根据其产
地及其混合咖啡豆而改变,因此应该尝试不同
类型的咖啡粉,以找到最适合您的个人口味的
咖啡粉。
为获得最佳效果,建议使用浓缩咖啡机混合
豆。一般来说,咖啡应从加压滤水器固定架流
出,不应滴下。
可通过稍微改变滤水器中咖啡粉的份量,和/
或使用不同的咖啡粉研磨器,来改良咖啡冲煮
的速度。
为制作出美味的咖啡,并使清洁和冲煮更轻
松,Saeco 建议使用 ESE 单份咖啡定量包。
执行任何有关冲煮热水/蒸汽的操作前,
执行任何有关冲煮热水/蒸汽的操作前,
确认蒸汽冲煮管(
确认蒸汽冲煮管(
PANNARELLO
PANNARELLO
)指向液
)指 向 液
体回收盘。
体回收盘。
7 热水
7 热水
有灼伤危险!冲煮之前可能出现热水液
有灼伤危险!冲煮之前可能出现热水液
滴飞溅。冲煮管温度可能较高:切勿徒手
滴飞溅。冲煮管温度可能较高:切勿徒手
直接接触。
直接接触。
• 按下 ON/OFF(开/关)按钮(11),并将其置
于 "I" 位。
• 等待直到“咖啡机准备就绪”指示灯(20)
点亮。现在咖啡机准备就绪。
•
(图
(图
21)-
21)- 在蒸汽冲煮管(Pannarello)
下放置一个器皿或茶杯。
•
(图
(图
21)-
21)- 逆时针方向转动旋钮(3)以将其
打开。
•
(图
(图
22)-
22)- 将选择旋钮(17)置于“ ”位
置。
•
(图
(图
23)-
23)- 冲煮好所需的热水量后,将选择
旋钮(17)置于“
”位置。
•
(图
(图
24)-
24)- 顺时针方向转动以旋钮(3)以将
其关闭。
• 移走热水器皿。
8 蒸汽/卡布奇诺
8 蒸汽/卡布奇诺
有灼伤危险!冲煮之前可能出现热水液
有灼伤危险!冲煮之前可能出现热水液
滴飞溅。冲煮管温度可能较高:切勿徒手
滴飞溅。冲煮管温度可能较高:切勿徒手
直接接触。
直接接触。
• 按下 ON/OFF(开/关)按钮(11),并将其置
于 "I" 位。
• 等待直到“咖啡机准备就绪”(20)指示灯
点亮。
•
(图
(图
25)-
25)- 将选择旋钮(17)置于“ ”位
置。指示灯(20)熄灭。
• 等待直到指示灯(19)点亮。现在咖啡机准
备就绪,可冲煮蒸汽。
•
(图
(图
26)-
26)- 在蒸汽冲煮管下放置一个器
皿。
•
(图
(图
26)-
26)- 开启旋钮(3)数秒钟,使残留的
水流出蒸汽冲煮管(Pannarello)。在短时
间内,只会冒出蒸汽。
•
(图
(图
27)-
27)- 关闭旋钮(3)并取出器皿。
• 将要用于冲煮卡布奇诺的器皿注入 1/3 满
的冷鲜奶。
使用冷鲜奶可获得较好的效果。
使用冷鲜奶可获得较好的效果。
•
(图
(图
28)-
28)-将蒸汽冲煮管浸入鲜奶,逆时针
方向转动旋钮(3)以将其打开。慢慢地向上
转动鲜奶壶,使其均匀预热。

• 19 •
中文
中文
建议冲煮最多不超过 60 秒。
建议冲煮最多不超过 60 秒。
• 完成后,顺时针方向转动旋钮(3)以将其关
闭,并将盛有奶泡的杯子取下。
•
(图
(图
30)-
30)- 将选择旋钮(17)置于“ ”位
置。
如果“
”和“ ”两 盏 灯 均 点 亮 ,这表示
咖啡机温度过高,不宜冲煮咖啡。
• 按照第 4.5 节说明进行回路上水,使咖啡
机准备就绪。
注释:当“咖啡机准备就绪”指示灯
注释:当“ 咖 啡 机 准 备 就 绪 ”指 示 灯
恒亮时,咖啡机准备就绪。
恒亮时,咖啡机准备就绪。
重要提示:如果无法按照说明冲煮卡布
重要提示:如果无法按照说明冲煮卡布
奇诺,按照第
奇诺,按照第
4.5
4.5
节说明进行回路上水,
节说明进行回路上水,
然后重复以上步骤。
然后重复以上步骤。
可执行同样的操作加热其他饮品。
可执行同样的操作加热其他饮品。
• 完成此项操作后,用湿布清洁蒸汽冲煮管。
9 清洁
9 清洁
只可在咖啡机冷却时,并断开电气连接后,方
可维护和清洁咖啡机。
• 不要将咖啡机浸泡在水中或将其任何零部
件放在洗碗机中。
• 不要使用酒精、溶剂和/或腐蚀性化学剂。
• 建议每日用干净的水清洁水箱并重新注
满。
•
(图
(图
31-33)-
31-33)- 每日加热鲜奶后,取下
Pannarello 的外部零部件,用干净的饮用
水清洗。
•
(图
(图
31-32-33)-
31-32-33)- 每周清洁蒸汽冲煮管。必
须执行以下操作来清洁蒸汽冲煮管:
- 取下 Pannarello 的外部零部件(标准清
洁);
- 从蒸汽冲煮管取下 Pannarello 的上部零
部件;
- 用干净的饮用水清洗 Pannarello 的上部
零部件;
- 用湿布清洗蒸汽冲煮管,并清除残留的鲜
奶;
- 把蒸汽冲煮管放回原位(确认其完全插入)
。
重新组装 Pannarello 的外部零部件。
•
(图
(图
34)-
34)- 每日倒空并清洁滴水盘。
• 用柔软、潮湿的布清洁咖啡机。
•
(图
(图
20)-
20)-
执行以下操作来清洁加压滤水器
固定架:
-
(图
(图
9)-
9)- 取下滤水器,并用热水彻底清洗。
- 取下接合器(如有),并用热水彻底清洗。
- 清洗加压滤水器固定架的内部零部件。
• 不要在微波炉和/或标准烤箱中烘干本机
和/或其零部件。
•
(图
(图
35-36)-
35-36)- 每周用湿布清洁零配件底
座,清除残留的咖啡或灰尘。
注释:不要用洗碗机清洗加压滤水器固
注释:不要用洗碗机清洗加压滤水器固
定架。
定架。
10 除垢
10 除垢
在咖啡机的使用过程中,水垢日积月累逐渐增
多;每隔 1 至 2 个月或发现水流量显著减小
时需要进行除垢操作。只可使用 Saeco 除垢
剂。
若操作和维护手册与单独销售的配件和
若操作和维护手册与单独销售的配件和
材料上的说明相抵触,请以操作和维护
材料上的说明相抵触,请以操作和维护
手册为准。
手册为准。
使用 Saeco 除垢剂(图 B)。其配方设
使用 Saeco 除垢剂(图 B)。其配方设
计能够保证咖啡机在其寿命期内性能出
计能够保证咖啡机在其寿命期内性能出
众、操作理想。若使用方法正确,还能避免冲
众、操作理想。若使用方法正确,还能避免冲
煮饮品口味改变。开始进行除垢程式之前,确
煮饮品口味改变。开始进行除垢程式之前,确
保:已取下滤水器(若使用)。
保:已取下滤水器(若使用)。
绝对不要饮用除垢剂,除垢程式运行过
绝对不要饮用除垢剂,除垢程式运行过
程中冲煮的任何饮品均不可饮用。切勿
程中冲煮的任何饮品均不可饮用。切勿
将醋用作除垢剂。
将醋用作除垢剂。
1
1
(图
(图
13-14)-
13-14)- 将滤水器固定架从底部插入
冲煮部件(8),并从左至右转动,直至将其
锁定到位。
2
2
(图
(图
1B)-
1B)- 取下水箱并清空水箱中的水。
3
3
(图
(图
2)-
2)- 将 Saeco 浓缩除垢剂的
一半
一半倒
入水箱中,然后加入干净的饮用水,直到
MAX(最大)刻度线。
4
4 按下 ON/OFF(开/关)按钮(11)开启咖啡
机,并将其置于 "I" 位。
(图
(图
21)-
21)- 从蒸汽/热水冲煮管注入(参照
手册第 7 节说明)2 杯水(各 150 毫升左
右),然后按下 ON/OFF(开/关)按钮(11)
并将其置于 "0" 位,以关闭咖啡机。
5
5 在关机状态下将除垢剂静置 15 至 20 分
钟。
6
6 按下 ON/OFF(开/关)按钮(11)开启咖啡
机。

• 20 •
(图
(图
21)-
21)- 从蒸汽/热水冲煮管注入(参照
手册第 7 节说明) 2 杯水(各 150 毫升
左右)。然后按下 ON/OFF(开/关)按钮(11
)关闭咖啡机,并将其静置 3 分钟。
7
7 重复
步骤 6
步骤 6的操作,直到水箱清空
。
8
8
(图
(图
2)-
2)- 冲洗水箱并用干净的饮用水注满
水箱。
9
9 在滤水器固定架下放置一个器皿。
10
10 按下 ON/OFF(开/关)按钮(11)开启咖啡
机;将选择旋钮(17)置于“
”位置,并通
过使用滤水器固定架将水箱中的水全部排
出。将选择旋钮(17)设至“
”位置,以停止
排水。
11
11
(图
(图
2)
2)- 再次向水箱内注入干净的水。
(图
(图
21)
21)- 在蒸汽冲煮管(Pannarello)下
放置一个足够大的器皿。逆时针方向转动以
打开出水旋钮(3)。
(图
(图
22)
22)- 将选择旋钮(17)置于“ ”位
置,并通过蒸汽/热水冲煮管将水箱中的水
全部排出。
12
12
(图
(图
23)
23)- 排水后,将选择旋钮(17)设至“
”位置,以停止排水。
(图
(图
24)
24)- 顺时针方向转动以关闭出水旋钮
(3)。
13
13 从
第(8)点
第(8)点开始重复上述操作,以完成 4
个水箱的除垢程式。
14
14
(图
(图
19)-
19)- 通过从右至左转动滤水器固定
架,将其从部件取下,并用干净的饮用水冲
洗。
除垢程式现已完成。
(图
(图
2
2
)
)- 再 次 向 水 箱 内 注 入干 净 的 水 。如有必
要,按照第 4.5 节说明进行回路上水。
必须根据制造商要求和/或产品使用所
必须根据制造商要求和/或产品使用所
在国的现行法规废弃除垢剂。
在国的现行法规废弃除垢剂。
11 废弃
11 废弃
- 包装材料可回收。
- 电器:拔掉电源并切断电源线。
- 将电器及电源线送往服务中心或公共废弃物
处置中心。
本产品符合欧洲指令 2002/96/EC。
本产品及其包装上的标志
说明不可将本
产品视同家庭垃圾处置。用户必须将本产品送
到专门的电子和电气设备回收点。
若您能正确处置废弃后的产品,便可预防错误
处置本产品对环境和人类健康可能造成的负面
影响。关于产品回收详细信息,请与当地城市规
划办公室、家庭废弃物服务中心或购买本产品
的商店联系。
ページが読み込まれています...
ページが読み込まれています...
ページが読み込まれています...
ページが読み込まれています...
ページが読み込まれています...
ページが読み込まれています...
ページが読み込まれています...
ページが読み込まれています...
ページが読み込まれています...
ページが読み込まれています...
ページが読み込まれています...
ページが読み込まれています...
ページが読み込まれています...
ページが読み込まれています...
ページが読み込まれています...
ページが読み込まれています...
ページが読み込まれています...
ページが読み込まれています...
ページが読み込まれています...
ページが読み込まれています...
-
 1
1
-
 2
2
-
 3
3
-
 4
4
-
 5
5
-
 6
6
-
 7
7
-
 8
8
-
 9
9
-
 10
10
-
 11
11
-
 12
12
-
 13
13
-
 14
14
-
 15
15
-
 16
16
-
 17
17
-
 18
18
-
 19
19
-
 20
20
-
 21
21
-
 22
22
-
 23
23
-
 24
24
-
 25
25
-
 26
26
-
 27
27
-
 28
28
-
 29
29
-
 30
30
-
 31
31
-
 32
32
-
 33
33
-
 34
34
-
 35
35
-
 36
36
-
 37
37
-
 38
38
-
 39
39
-
 40
40


Saeco HD8323/05 ユーザーマニュアル
- カテゴリー
- コーヒーメーカーのアクセサリー
- タイプ
- ユーザーマニュアル
他の言語で
- English: Saeco HD8323/05 User manual