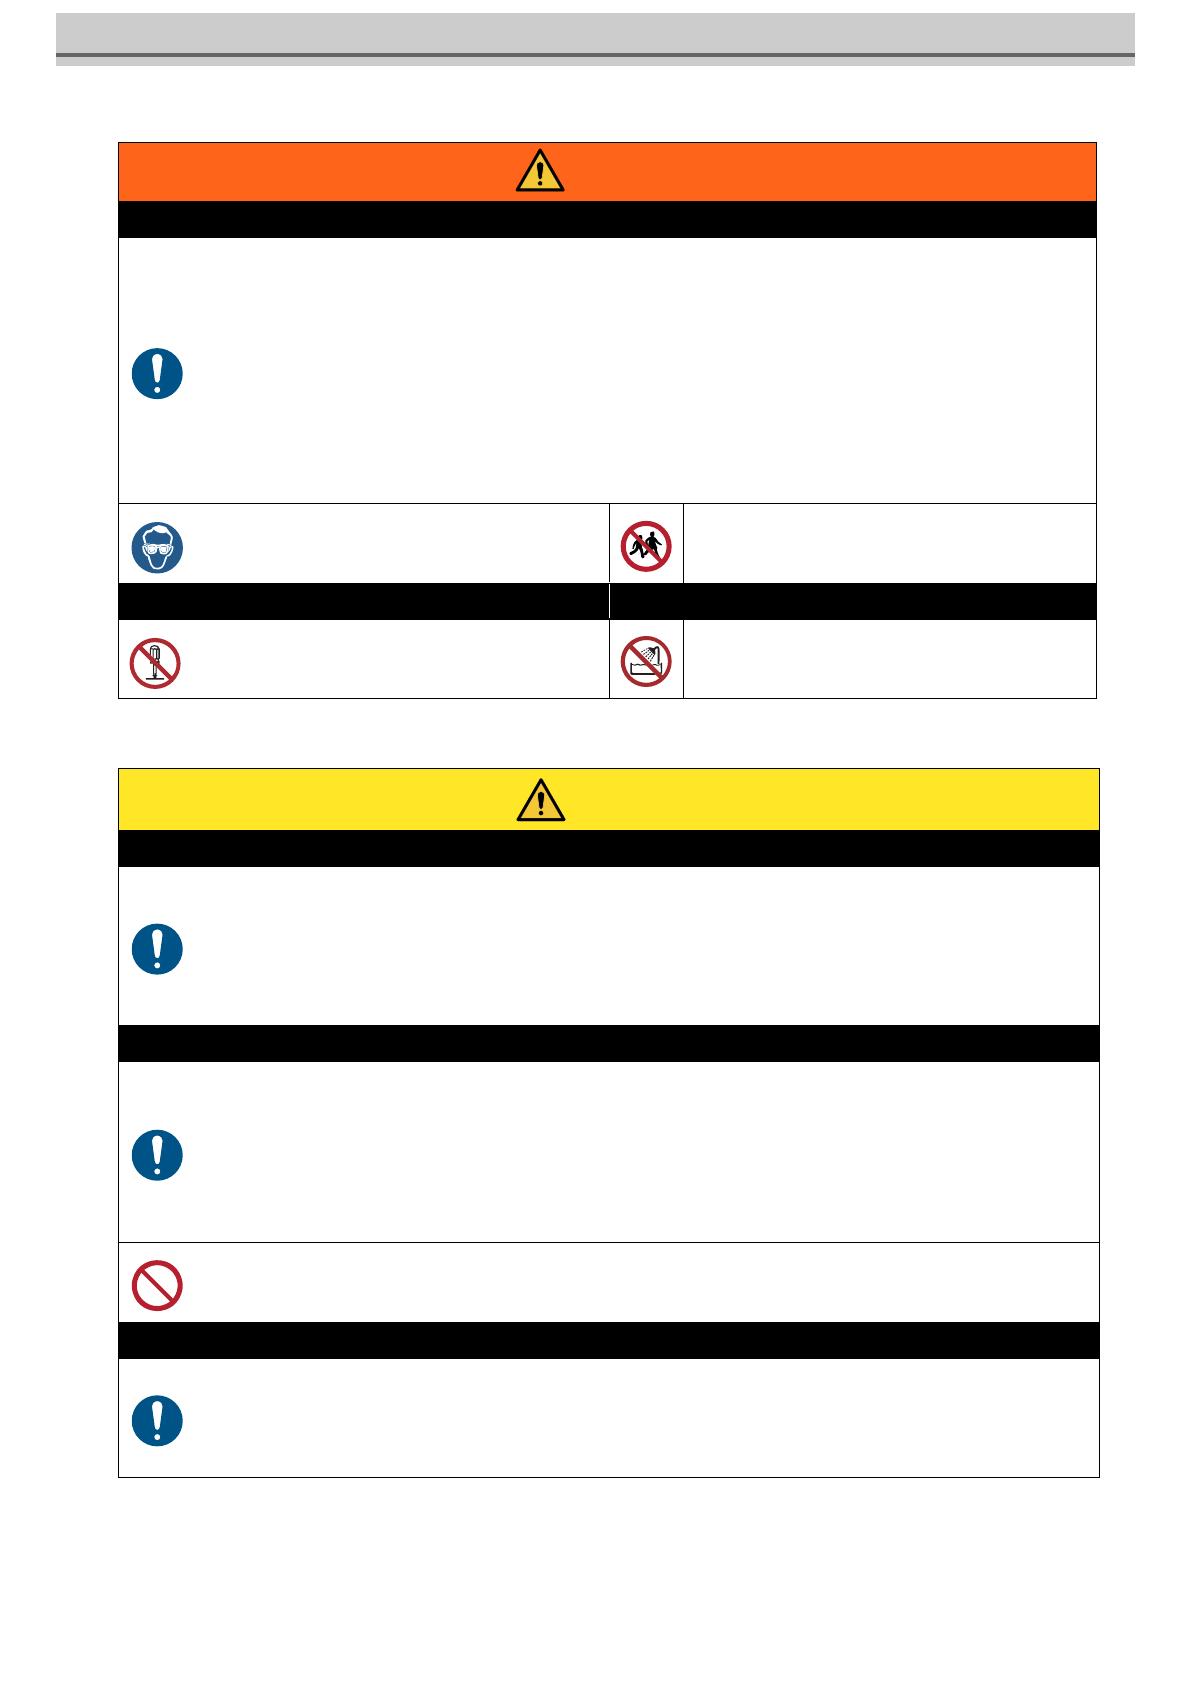
MIMAKI TS55-1800 取扱説明書

タイプ
取扱説明書
MIMAKI ENGINEERING CO., LTD.
https://mimaki.com/
https://japan.mimaki.com/
English
Japanese
Foreword ........................................................................2
Safety Precautions ........................................................3
Warning labels ...............................................................5
Name of Each Part .........................................................6
Setting of 10kg Ink Tank ...............................................7
Set 10kg ink automatic stirring unit .............................9
Replace 10kg ink tank (
when the supply pipe is attached
) ...10
Replace 10kg ink tank (when the automatic stirring unit is attached)
12
Set 2L ink pack .............................................................15
Replace 2L ink pack ....................................................17
Use the same color ink in one tank ............................19
About ink level correction ...........................................21
Maintenance .................................................................22
If abnormality occurs ..................................................26
はじめに ........................................................................28
安全にお使いいただくために ........................................29
警告ラベルについて ......................................................31
各部の名称 .....................................................................32
10kg インクタンクをセットする ..................................33
10kg インク自動撹拌ユニットをセットする ................35
10kg インクタンクを交換する ( 供給パイプ装着時 ) ....36
10kg インクタンクを交換する (
自動撹拌ユニット装着
) ...39
2L インクパックをセットする ......................................42
2L インクパックを交換する ..........................................44
同色インクを 1 つのタンクで使用する .........................46
インク残量補正について ...............................................48
メンテナンス .................................................................49
異常が発生したら ..........................................................53
D203324-13
OPT-J0475, OPT-J0476
10kg Ink supply unit
10kgインニッ
OPT-J0494
Conversion to 2L Ink Unit
2L
インニッ セッ
OPT-J0501
10kg Ink automatic stirring unit
10kg
自動攪拌
2
Foreword
Congratulations on your purchase of the 10kg ink supply unit.
This operation manual
This manual explains the operation of the 10kg ink supply unit.
Read and fully understand this operation manual before using this machine. It is also necessary to keep this operation
manual on hand.
Make arrangements to deliver this operation manual to the person in charge of the operation of the 10kg ink supply unit.
Although this operation manual has been carefully prepared for your easy understanding, please do not hesitate to con-
tact your local distributor if you have any inquiry.
The contents of this operation manual are subject to change for improvement without notice. Please note.
If this manual should become illegible due to damage, or is destroyed due to fire or similar reason, purchase another copy
of the operation manual at our sales office.
CAUTION
THIS LIMITED WARRANTY OF MIMAKI SHALL BE THE SOLE AND EXCLUSIVE WARRANTY AND IS IN LIEU OF ALL
OTHER WARRANTIES, EXPRESS OR IMPLIED, INCLUDING, BUT NOT LIMITED TO, ANY IMPLIED WARRANTY OF MER-
CHANTABILITY OR FITNESS, AND MIMAKI NEITHER ASSUMES NOR AUTHORIZES DEALERS TO ASSUME FOR IT ANY
OTHER OBLIGATION OR LIABILITY, OR MAKE ANY OTHER WARRANTY, OR MAKE ANY OTHER WARRANTY IN CON-
NECTION WITH ANY PRODUCT WITHOUT MIMAKI'S PRIOR WRITTEN CONSENT.
IN NO EVENT SHALL MIMAKI BE LIABLE FOR SPECIAL, INCIDENTAL OR CONSEQUENTIAL DAMAGES, OR FOR LOSS
OF PROFITS OF DEALER OR CUSTOMERS OF ANY PRODUCT.
Reproduction of this manual is strictly prohibited.
© Mimaki Engineering Co., Ltd.
All Rights Reserved.Copyright
3
Safety Precautions
Symbols
In this document, symbols are used for explaining the contents of cautions on operation. The symbol to be displayed differs
depending on the caution content. Understand the meaning of each symbol and use this machine safely and correctly.
Examples of Symbols
Cautions on Installation
Meaning
WARNING
Failure to observe the instructions given with this symbol can result in death or seri-
ous injuries to personnel. Be sure to read it carefully and use the printer properly.
CAUTION
Failure to observe the instructions given with this symbol can result in minor or
medium injuries to personnel.
GENERAL WARNING
This symbol indicates that the items shown need to be noted. Specific notes are
drawn in the figure.
GENERAL MANDATORY
ACTION
This symbol indicates that the action shown must be executed. Specific instruction is
shown in the illustration.
GENERAL PROHIBITION
This symbol indicates that the action shown is prohibited. Specific action that is pro-
hibited is shown in the illustration.
IMPORTANT
Important notes for the use of this unit are given with this symbol. Refer to the oper-
ation.
HINT Useful information is given with this symbol. Refer to the operation.
REFERENCE
This symbol indicates the reference page for related contents. Click the text to dis-
play the corresponding page.
Caution
Do not install in the following locations
A location exposed to direct sunlight.
On an inclined surface.
A location that vibrates.
A location exposed to a direct air flow from an air con-
ditioner, etc.
Around a location where fire is used.
A location where the temperature or humidity
changes significantly. (The recommended usage
environment differs depending on the connected
printer. Confirm by referring to the operation manual
of the printer)
4
Warning for Use
Precautions
Warning
How to handle ink
When operating it in poorly ventilated area or closed room, make sure to install ventilation system.
If you swallow ink or maintenance cleaning solution mistakenly, rest and see a doctor to consult immediately. Never swal-
low the vomit.
If you feel bad by inhaling a large amount of the steam, immediately move to the place with fresh air and rest with keeping
warm. In addition, consult a doctor immediately.
If ink adheres to your skin and clothing, rinse immediately with soap water.
If ink enters your eyes, immediately rinse with plenty of clean running water for more than 15 minutes, rinse thoroughly
even the back of the eyelids. Consult a doctor immediately as soon as possible.
Keep ink tanks and waste ink tanks away from children.
Prevent ink from leaking and flowing to the natural water system and domestic wastewater.
Dispose the waste ink according to the local regulations.
Ask the industrial waste disposal company to dispose the emptied ink tanks and waste inks.
Be sure to read the Safety Data Sheet (SDS) before handling ink.
When handling the ink, pay close attention to ventila-
tion and be sure to wear the included safety glasses
and gloves. Ink may enter the eyes.
Keep children away from this machine.
Prohibition of disassembly or modification Prohibition of use in a damp environment
Never disassemble or modify this machine and ink
tank Doing so may result in electric shocks or product
breakdown.
Avoid placing the product in a damp environment.
Donot splash water onto the product. Otherwise, fire,
electric shocks, or product breakdown may result.
Caution
Use dedicated ink
Use dedicated ink Understand that if it is damaged due to use of non-dedicated ink, the repair is a burden to the customer.
When the ink other than dedicated ink is used, the protective device does not work.
The dedicated ink must not be used for other printers. The printer will be broken.
Do not refill the tank with the ink except the ink specified by us. Please understand we cannot take responsibility to all about
the trouble caused by using refilled ink.
Ink tank
Store the ink tank at 1 m and lower place. If you store it at 1 m and higher place, in case of ink tank falls, the cap may come
off and the ink may scatter.
After moving the ink tank from a cold place to a warm place, leave it for 3 hours and more under the room temperature.
Open the ink tank just before installation. If the ink tank is left for a long time after opening it, it may not print normally.
Use up the ink tank within 3 months after opening it. After an extended period with opening it, the ink quality deteriorates.
Store the ink tank in a cool dark place.
Please use the dedicated ink tank for this machine. This machine recognizes the dedicated ink tank and operates. In case
of the failure by remodeling ink tank etc., even within the warranty period, it will not be covered by the warranty.
Do not touch the PCB contact portion of the ink IC chip with hands or contaminate it. It may cause damage to the PCBs.
Do not tap the ink tank strongly or shake violently. The Ink may leak from the tank.
Bending tube
For the protruding tube, be careful not to bend it in the following situation.
When the tube bends, the replacement is required, Call dealer or our service office.
1. When moving to the back of the machine to do media setting, etc.
2. Replace ink tank
5
Warning labels
Warning labels are stuck on the machine. Be sure to fully understand the warning given on the labels.
If a warning label is illegible due to stains or has come off, purchase a new one from a distributor or our sales office.
No. Order No. Label Description
1 M903330
Be sure to wear the included
safety glasses and gloves.
2 M907764
Because there is a possibility of
damage, do not ride or put any-
thing.
3 M907834
Moving part.
Do not bring your fingers and body
close.
(Only automatic stirring unit)
1
2
3
3
ὀࠉព
CAUTION
ATTENTION
ୖ㒊࡟஌ࡿ࡞
DO NOT STEP ON TOP
NE GRIMPEZ PAS DESSUS
6
Name of Each Part
Be sure to lock the casters of the 10kg ink supply unit before turning on the power.
Your waist may get hurt by the weight of the ink tank, be careful enough when setting the tank.
Do not move the 10kg ink supply unit with the ink tank on.
Supply pipe
10kg ink supply unit
10kg ink tank
Ink supply attachment
IC slot
2L eco-case
Base
When 2L ink pack is used
10kg ink automatic stirring unit
When automatic stirring unit is used
7
Setting of 10kg Ink Tank
1
Attach the ink IC chip.
Insert the ink IC chip with the surface having metal pieces facing up.
Inserting the wrong side by accident can cause faults or damage of the ink
IC chip.
Do not touch the metal parts of the ink IC chip. Doing so can damage the
ink IC chip due to static, or may cause a read error due to contamination
or scratch.
2
Set 10kg ink tank to the ink supply unit.
3
Remove the lid of the ink tank.
Be sure to wear the included safety glasses and gloves. Ink and cleaning solution for maintenance may enter the eyes.
The ink IC chip has information on the ink color, remaining amount of ink, expiration data, and similar items.
To set the ink tank, insert the ink IC chip packed with the ink tank into the Ink IC socket.
Be careful not to set an ink IC chip that is not the pair of the ink tank. Doing so can result in poor image quality or
similar problem.
The symbol indicating color information is affixed on the ink IC chip.
Never move the tank after setting the ink tank. It may cause ink
leakage.
Ink IC chip.
Color of ink Indication mark
Black (K) (one black circle)
Blue (Bl) (one blue circle)
Magenta (M) (one red circle)
Yellow (Y) (one yellow circle)
Light blue (LBl) (two blue circles)
Light magenta (Lm) (two red circles)
Light black (Lk) (two black circle)
Fluorescent yellow (FY) (two yellow circles)
Fluorescent pink (FP) (two orange circles)
Ink IC chip.
Location of the mark
10kg ink tank
8
4
Stir the ink with a supply pipe.
5
Set the supply pipe in the ink tank.
Ink tank arrangement of each ink set, and ink IC chip arrangement
• Ink may be scattered. Always wear the included safety
glasses.
Supply pipe
Supply pipe
1 2 3 4 5 6 7 8
14
8
3
7
2
6 5
Front
1 2 3 4 5 6 7 8
M YY K KM
Bl Bl
M Y K
Bl
FP
Lbl
FY
Lm
M Y KM
Bl Bl
Lbl
Lm
M Y KM
Bl
Lbl
Lm
Lk
4-color
8-color
7-color
6-color
9
Set 10kg ink automatic stirring unit
1
Refer to Steps 1 to 3 of P.7 "Setting of 10kg Ink Tank" to set a new ink tank.
2
Attach the automatic stirring unit to the 10kg ink
tank.
(1) Release the latch of the automatic stirring unit, and put the unit inside
the ink tank through the opening.
(2) Press the fixing part of the unit against the top of the ink tank, and
engage the latch.
Be sure to wear the included safety glasses and gloves. Ink and cleaning solution for maintenance may enter your eyes.
Be sure to hold the handle when handling the automatic stirring
unit. Be careful not to turn it upside down.
Do not touch the stirring spindle of the automatic stirring unit.
Failure to do so may result in injury.
• Ink may be scattered. Always wear the included safety
glasses.
Automatic stirring unit
Handle
Latch
Fixing part
The stirring spindle
10
Replace 10kg ink tank (when the supply pipe is attached)
Do as follows when [INK END] or [INK NEAR END] is displayed on the sub-display.
When [INK END] is displayed
1
Press the [ENTER] key to cancel the message dis-
play.
A message prompting ink replacement will be displayed.
2
Remove the supply pipe from the ink tank.
3
Remove the used ink tank.
4
Refer to Step 2 of P.7 "Setting of 10kg Ink Tank" and set a new ink tank.
Be sure to wear the included safety glasses and gloves as there is a danger of ink splashing.
When exchanging the ink tank, perform it after curing the surroundings with a waste etc. The surroundings become dirty with
ink dripping from the supply pipe.
Ink tank has an expiry date. It is usable until the second month after the expiry date stated in the ink tank, but it will be unus-
able after 3 months. Replace the ink tank as soon as possible.
Hook the removed supply pipe in the cutout of the supply unit.
Information
Please exchange ink tank
and ink IC
After replacing the ink IC,
ink supply is started.
(Time: about 3 minutes)
OK
Supply pipe
Cutout part of the supply unit
Hooked onto
the cutout
10kg ink tank
11
5
Remove the used Ink IC chip.
6
Attach the ink IC chip.
After the ink IC is inserted, the supply between the ink supply unit and the
ink supply attachment is automatically performed.
Supply ink of 10kg
If [INK SUPPLY ERROR] occurs after ink tank replacement and automatic supply, do as follows.
1
Refer to P.7"Setting of 10kg Ink Tank" and set the ink tank and ink supply pipe.
2
Select [TEST PRINT / CLEANING] > [10kg INK
SUPPLY] and press the [ENTER] key.
3
Press the [ENTER] key on the 10kg ink supply
start screen to start supply.
When [INK NEAR END] is displayed
Very little ink remains in the bottle. Although the print operation can continue without replacing the ink bottle, the
ink may run out during the printing operation. We recommend that you replace the ink tank with a new one soon
after this is indicated.
If you press the key in local mode, you can check the replacement tank with the local guidance.
Replace the ink IC chip after setting a new 10kg ink tank.
Remove and attach ink IC chips in local mode.
Automatic supply takes about 3 minutes at maximum. Other
supply operations and printing can not be performed while
automatic supply is in progress.
In order to resolve [INK SUPPLY ERROR], make sure that the
ink tank and ink supply pipe are set correctly.
Ink IC chip.
Ink IC chip.
10kg ink supply unit
Start [ENT]
10kg ink supply unit
Filling
Please wait
12
Replace 10kg ink tank (when the automatic stirring
unit is attached)
Do as follows when [INK END] or [INK NEAR END] is displayed on the sub-display.
When [INK END] is displayed
1
Press the [ENTER] key to cancel the message dis-
play.
A message prompting ink replacement will be displayed.
2
Remove the automatic stirring unit from the ink
tank.
Release the latch to loosen the fixing part of the unit. Then grip the handle
and pull the unit up slowly.
Be sure to wear the included safety glasses and gloves as there is a danger of ink splashing.
When exchanging the ink tank, perform it after curing the surroundings with a waste etc. The surroundings become dirty with
ink dripping from the supply pipe.
After removing the automatic stirring unit from the ink tank, do not touch the stirring spindle of the unit. Failure to do so may
cause injury or ink to be scattered.
Ink tank has an expiry date. It is usable until the second month after the expiry date stated in the ink tank, but it will be unus-
able after 3 months. Replace the ink tank as soon as possible.
When removing the automatic stirring unit, hold the supply pipe
with a waste cloth or the like. Ink may be scattered.
Rotate the removed Automatic stirring unit 90 degrees and
hang it on the cutout of the supply unit.
If the space between the ink supply unit and the ink tank is too
narrow, move the tank frontward.
Information
Please exchange ink tank
and ink IC
After replacing the ink IC,
ink supply is started.
(Time: about 3 minutes)
OK
Automatic stirring unit
Handle
Cutout part of the supply unit
Hooked onto
the cutout
13
3
Remove the used ink tank.
4
Refer to Step 2 of P.9 "Set 10kg ink automatic
stirring unit" to set a new ink tank.
5
Remove the used ink IC chip.
6
Attach the ink IC chip.
7
Stir ink in the ink tank.
Select [Auto (about 3 min)] or [Manual] on the screen.
After the stir is completed, the supply between the automatic stirring unit
and the ink supply attachment is performed.
Replace the ink IC chip after setting a new 10kg ink tank.
Remove and attach ink IC chips in local mode.
Other supply operations and printing can not be performed
while stirring is in progress.
• Execute step4 of P.8 "Stir the ink with a supply pipe." when
[Manual] is selected.
Automatic supply takes about 3 minutes at maximum.
Other supply operations and printing can not be performed
while automatic supply is in progress.
If [INK SUPPLY ERROR] occurs after ink tank replacement and automatic supply, perform P.11 "Supply ink of 10kg".
10kg ink tank
Ink IC chip
Ink IC chip
Information
Ink Tank is exchanged.
Start stirring Ink Tank
Target: MMCCYYKK
Auto (about 3 min)
Manual
14
When [INK NEAR END] is displayed
Very little ink remains in the bottle. Although the print operation can continue without replacing the ink bottle, the
ink may run out during the printing operation. We recommend that you replace the ink tank with a new one soon
after this is indicated.
If you press the key in local mode, you can check the replacement tank with the local guidance.
15
Set 2L ink pack
By attaching 2L ink unit conversion set, 2L ink pack of spot color ink can be used.
Set it in the ink supply unit by the following procedure.
1
Prepare 2 L ink pack.
Remove the ink pack and the ink IC chip from small cartons.
2
Attach the ink IC chip.
Insert the ink IC chip with the surface having metal pieces facing up.
Inserting the wrong side by accident can cause faults or damage of the ink
IC chip.
Do not touch the metal parts of the ink IC chip. Doing so can damage the
ink IC chip due to static, or may cause a read error due to contamination
or scratch.
3
Shake the 2L ink pack slowly to the right and left.
Tilt greatly so that it may be stirred to the bottom and then shake more than 20 times.
Press the connector part of the ink pack with a paper towel, etc. to prevent ink from leaking when shaking.
2L ink unit conversion set is optional item. Purchase at our sales office because it is necessary to install by our service techni-
cian.
When setting the ink pack, be sure to wear the included safety glasses and gloves. Ink and cleaning solution for maintenance
may enter the eyes.
2L ink pack
Ink IC chip.
Ink IC chip.
Repeat
16
4
Put 2L ink pack in 2L eco_case.
(1) Open the 2L eco-case.
Push the knob and spread the case to the left and right.
(2) Remove the seal from the 2L ink pack connector.
(3) Make the connector part downward and then place the 2L ink pack and
then close the 2L eco-case.
5
Attach the 2L eco-case to the conversion set of
the ink supply unit.
A click sounds and the lever goes up.
When ink is supplied to the connected printer, the EMPTY lamp goes off.
The remained seal may cause a large amount of ink leak out
when removing the 2L ink pack from the base. Be careful that
there are no seal remnants.
When inserting the 2L ink pack, adjust the shape according to
the label in the 2L eco-case. If you place an ink pack without
adjusting its shape, the ink may not be used up.
Before closing the 2L eco case, confirm that the connector of
the ink pack is fitted to the groove of 2L eco-case. If the con-
nector does not fit with the groove, the ink supply may not be
performed.
Push the 2L eco-case as far as it goes. If you does not push it
enough, the ink may not be supplied.
OK No good
Remained seal
Groove part
17
Replace 2L ink pack
Do as follows when [INK END] or [INK NEAR END] is displayed on the sub-display.
When [INK END] is displayed
When the ink in the ink pack runs out, a message prompting ink replacement will be displayed. Replace the ink pack with the fol-
lowing procedure.
1
Press the [ENTER] key to cancel the message dis-
play.
2
Push the lever down and then remove the 2L eco-
case.
3
Open 2L eco-case, and then remove the 2L ink
pack.
4
Refer to Step 3 and following of P.15 "Set 2L ink pack" and set a new 2L ink pack.
Be sure to wear the included safety glasses and gloves as there is a danger of ink splashing.
When exchanging the ink tank, perform it after curing the surroundings with a waste etc. The surroundings become dirty with
ink dripping from the supply pipe.
Ink tank has an expiry date. It is usable until the second month after the expiry date stated in the ink tank, but it will be unus-
able after 3 months. Replace the ink tank as soon as possible.
Information
Please exchange ink tank
and ink IC
After replacing the ink IC,
ink supply is started.
(Time: about 3 minutes)
OK
Lever
18
5
Remove the used Ink IC chip.
6
Attach the ink IC chip.
After the ink IC is inserted, the supply between the ink supply unit and the
ink supply attachment is automatically performed.
When [INK NEAR END] is displayed
Very little ink remains in the bottle. Although the print operation can continue without replacing the ink bottle, the ink
may run out during the printing operation. We recommend that you replace the ink tank with a new one soon after
this is indicated.
If you press the key in local mode, you can check the replacement tank with the local guidance.
Replace the ink IC chip after setting a new 2L ink pack.
Remove and attach ink IC chips in local mode.
Store the ink IC chip that removed together with the used 2L
ink pack.
Be careful not to mix the ink IC chip of the new 2L ink pack with
the used one.
Automatic supply takes about 3 minutes at maximum. Other
supply operations and printing can not be performed while
automatic supply is in progress.
Ask the industrial waste disposal company to dispose the emptied 2L ink pack.
When removing the half-used 2L ink pack, do as follows. Otherwise, you cannot manage the remaining amount
of ink accurately.
(1) Remove the half-used 2 L ink pack from the 2L eco-case.
(2) Wipe off the ink that adhered to the inside of the connector part of the 2L ink pack using a
swab, etc.
(3) Remove the ink IC chip and store it together with 2L ink pack.
(4) When using them again, set 2L ink pack and then set the ink IC chip that kept together with
it.
Ink IC chip.
Ink IC chip.
19
Use the same color ink in one tank
The 10 kg supply unit can change the 10 kg ink tank to use one tank per color.
Ink tank arrangement and ink IC chip arrangement of each ink set
When using a 10 kg ink tank for each color, insert the ink IC chip into the odd number path.
Changing the number of 10 kg ink tanks requires setup by a service person. Please contact your dealer or our sales office or
call center.
Be careful not to insert the ink IC chip into the even numbered path.
4 color ink set
(when the supply pipe
is attached)
6 color ink set
Ink supply tube
1 2 3 4 5 6 7 8
14 3 2
1 2 3 4 5 6 7 8
Front
8 7 6
5
M Y KBlM Y KBl
Front
1 2 3 4 5 6 7 8
1 2 3 4 5 6 7 8
14 3 2
8 7 6
5
M Y K
Bl
M
Bl
Lbl
Lm
1 2 3 4 5 6 7 8
17 3 5
1 2 3 4 5 6 7 8
Front
M Y K
Bl
M Y K
Bl
4 color ink set
(when the automatic
stirring unit is attached)
20
About ink bottle lamp
When using a 10 kg ink tank for each color, the ink bottle lamp displays the status of only the odd numbered path.
About the ink status display on the display
When using a 10 kg ink tank for each color 1 tank, the status of the ink tank (ink remaining amount / error etc.) will be displayed
with an icon only for the odd path in the local guidance.
The even number path displays the following icons.
The even numbered route displays the status only when a
problem occurs.
Icon Contents
Even numbered path icon when using 10kg ink tank for each color 1 tank.
Front
1 2 3 4 5 6 7 8
1 2 3 4 5 6 7 8
14 3 2
8 7 6
5
M M Y K
Bl
LblLm
Lk
7 color ink set
Ink bottle lamp
  • Page 1 1
  • Page 2 2
  • Page 3 3
  • Page 4 4
  • Page 5 5
  • Page 6 6
  • Page 7 7
  • Page 8 8
  • Page 9 9
  • Page 10 10
  • Page 11 11
  • Page 12 12
  • Page 13 13
  • Page 14 14
  • Page 15 15
  • Page 16 16
  • Page 17 17
  • Page 18 18
  • Page 19 19
  • Page 20 20
  • Page 21 21
  • Page 22 22
  • Page 23 23
  • Page 24 24
  • Page 25 25
  • Page 26 26
  • Page 27 27
  • Page 28 28
  • Page 29 29
  • Page 30 30
  • Page 31 31
  • Page 32 32
  • Page 33 33
  • Page 34 34
  • Page 35 35
  • Page 36 36
  • Page 37 37
  • Page 38 38
  • Page 39 39
  • Page 40 40
  • Page 41 41
  • Page 42 42
  • Page 43 43
  • Page 44 44
  • Page 45 45
  • Page 46 46
  • Page 47 47
  • Page 48 48
  • Page 49 49
  • Page 50 50
  • Page 51 51
  • Page 52 52
  • Page 53 53
  • Page 54 54
  • Page 55 55
  • Page 56 56

MIMAKI TS55-1800 取扱説明書

タイプ
取扱説明書

他の言語で