Korenix JetCon 3701G Quick Installation Manual
- カテゴリー
- ネットワークスイッチ
- タイプ
- Quick Installation Manual

JetCon 3701G
Quick Installation Guide v1.0
This is warranty is voided if defects, malfuncons or failures ohe
warranted Product are caused by damage resulng from force measure
(such as floods, fire, etc.), other external forces such as power
disturbances, over spec power input, or incorrect cabling; or the
warranted producs misused, a bused, or operated, altered and
repaired in an unauthorized or improper way.
Aenon! To avoid system damage caused by sparks, please DO NOT
plug in power connector when power is on.
The producs in compliance with Direcve 2002/95/EC and 2011/65/EU
ohe European Parliament and ohe Council of 27 January 2003 on the
restricon ohe use of certain hazardous substances in electrical and
elect
ronics equipment (RoHS Direcves & RoHS 2.0)
Korenix Customer Service
KoreCARE is Korenix Technology's global service center, where our
professional staff are ready to solve your problems at any me Korenix
global service center's e -mail is [email protected].
For more informaon and documents download please visit our website:
hp://www.korenix.com/downloads.htm
5 Years Warranty
Each of Korenix’s product line is designed, produced, and tested with
high industrial standard. Korenix warrants thahe Product(s) shall be
free from defects in materials and workmanship for a period offive (5)
years from the date of delivery provided thahe Product was properly
installed and used.
Support
DIP Switch Setting
Note:
Aer adjusng the DIP-switch, please reboot the unit to acvate the
new sengs.
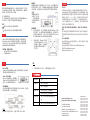
Dipswitch Funconality
Switch 1 On: Enable power event alarm
Off: Disable.
Switch #2 On: SFP speed at 100Mbps
Off: SFP speed at 1000Mbps
Switch #3 On: Enable LLF funcon
Off: Disable.
Wiring the Relay Output
The relay output contacts are in the middle of the terminal block connector
as shown below. By inserng the wires and sengs the DIP switch of the
respecve alarm funcon to “ON”, relay output alarm will detect port or
power fault, and form a short circui
t. The alarm relay output is “Normal
Open”. For more informaon, please refer Manual chapter for more detail.
Note:
The relay contact only support 1A current, DC 24V. It does not recommend
apply higher voltage and current that over this specificaon.
Wiring the Power Inputs
1. Insert the posive and negave wires into the V+ and V- contact on the
terminal block connector.
2. Tighten the wire-clamp screws to prevent the power wires loosened.
Copyright
Copyright © 2014 all rights reserved. No part of this publicaon may be
reproduced, adapted, stored in a retrieval system, translated into any
language, or transmied in any form or by any means without the wrien
permission of the supplier.
About the Quick Installaon Guide
This Quick Installaon Guide is intended to guide professional installer to
install and configure the JetCon 3701G . It covers procedures to assist you
in avoiding unforeseen problems.
Introduction
JetCon 3701G is an Ethernet to fiber opc media converter. It conforms
IEEE802.3 10Base-T, IEEE802.3u 100Base-TX, and IEEE 802.3ab 1000Base-T
supports RJ-45 copper to Gigabit fiber conversion. JetCon3701G are
classified as power source equipment (PSE), providing 15.4/30 was to
powered devices(PD). It could be used to power IEEE 802.3af/at compliant
powered devices (PD). The JetCon 3701G adopts rugged metal case design
to operate in harsh environment (-40~75°C). It a
lso IP-31 standard
protecon. It features link loss forwarding raise an alarm when a remote
fault occurs and also adopts one relay output to alarm users if a port link or
power fails. Alarm can be enable/disable by dip switch. The fiber port
supports SFP sockets for several of SFP transceiver to achieve different link
distance.
JetCon 3701G recommend working voltage is DC 48V. (Input range: DC10~
60 V)
Package Check List
JetCon 3701G Industrial Media Converter
Quick Install
aon Guide
Installaon
Aenon:
This is a Class 1 Laser/LED product.
Don’t stare into the Laser/LED
Beam.
Mount the unit
Din-Rail mount: Mount the din-rail clip on the rear of JetCon 3701G V2 on
the DIN rail. For informaon about the DIN Rail installaon, please refer
to user’s manual.
Grounding JetCon 3701G
There is one grounding screw on the
boom side of JetCon 3701G . Connect the
frame grounding of JetCon 3701G to the
grounding surface to ensure safety and
prevent noise for communicaon interference.
Con
necng to Network
1. Connecng the Gigabit PoE port: The port supports IEEE 802.3at PoE
standard, and offer 2 event PoE behavior. Thus, the PoE port can
offer 15W/30W power, and system offer 60W with DC12V input
under 70C one end of an Ethernet cable into the UTP port of JetCon
3701G , while the other end is connected to the aached networking
device. UTP port support auto MDI/MDIX funcon. The LNK / ACT
LED will turn on and flash to indicate RJ-45 port link and the packets
received and tr
ansmied from RJ-45.
2. Install Gigabit SFP transceiver and make the connecon: Connect
the fiber port on your JetCon 3701G to another Gigabit Fiber
Ethernet device, by following the figures below. Wrong connecon
will cause the fiber port not working properly.
The SFP Fiber port supports 2 LEDs for link/acvity and full duplex/
collision, once the gigabit fiber port is in up, the link LED will be
trigger to”ON”

Korenix Technology Co., Ltd.
(A Beijer Electronics Group Company)
Tel:+886-2-89111000
Fax:+886-2-29123328
Business service:[email protected]
Customer service: koreCARE@korenix.com
www.korenix.com
CPQ000V3701000
Patent No. (Taiwan):
Granted Invenon: I 313547
Granted Invenon: I 321415
Granted Invenon: I 344766
Granted Invenon: I 346480
Granted Invenon: I 356616
Granted Invenon: I 364684
Granted Invenon: I 376118
Granted Invenon: I 393317
Granted Invenon: I 398066
Granted Invenon: I 398125
Granted Invenon: I 459757
Ulity Model: M 339841
Ulity Model: M 339840
客户服务
5年质保
所有Korenix产品的设计、制造及测试都是采用较高的工业标准。
Korenix保证自产品出货日起提供最高5 年之免费保修服务,保修
期间如因零件损坏或制程不良而导致产品故障,我们提供免费维
修服务。自然外力 (火、水、雷灾)所造成的产品故障,或其它
外部因素如电源干扰、不当电源输入、不当接线等造成的损坏,
不列入产品保固范围;此外,产品被误用、未经授权的修理及修
改等行为将造成保固条款失效。
注意! 请勿于电源开启时插拔接线端子
,避免产生火花造成系统
损坏
。
此产品保证完全符合欧盟2003年1月27日电气和电子设备危害物
质限制委员会限用指令2002/95/EC (RoHS)及2011/65/EU(RoHS
2.0)。
Korenix售后服务
KoreCARE 是Korenix科技全球服务中心,我们专业的技术人员随
时准备解答您的疑问。
Korenix全球服务中心 EMAIL: [email protected]
业务服务: [email protected]
官网: www.korenix.com.cn
安装
Din-Rail支架:
将JetCon 3701G背面的Din-rail夹子安装在DIN导轨。有关DIN
导轨安装的信息请参考用户手册。
JetCon 3701G 接地:
JetCon 3701G底部有一个接地螺丝。
将JetCon 3701G连接框架接地以保
证安全,防止噪音用于通信干扰。
输入电源接线:
1.将正极和负极线插入端子块连接器上的V +和V-触点。(如上图)
2.拧紧电线夹螺钉,防止电源线松动。
注意:
推荐的输入电压为DC 48V。 (可输入范围:DC10〜60V)
接线输出
继电器输出触点位于连接器端子中间,如下所示。 透过将警报功能
的DIP开关插入到“ON”,继电器输出报警将检测端口或电源故障,
并形成短路。 有关更多信息,请参阅手册章节了解更多详细信息。
注意:
继电器触点仅支持
1A电流,DC 24V
。 不建议使用超过
本规范的更高的电
压和电流。
注意:
1. 这是1类激光/ LED产品。 不要盯着激光/ LED 光束。
DIP拨码开关设定
Dipswitch 描述
Switch 1 On: 启动电源报警
Off: 关闭电源报警
Switch #2 On: SFP 速度设定为 100Mbps
Off: SFP 速度设定为 1000Mbps
Switch #3 On: 启动 Link Loose Forwarding 功能
LLF
Off: 关闭 Link Loose Forwarding 功能
版权
版权所有©2014保留所有权利。 未经供应商书面许可,不得将
本出版物的任何部分复制,改编,存储在检索系统中,翻译成任
何语言,或以任何形式或方式传播。
关于快速安装指南
本“快速安装指南”旨在指导专业安装人员安装和配置JetCon
3701G V2。 它涵盖了帮助您避免意外问题的程序。
常规
警告: 此符号表示您必须遵守的警告
注意: 此符号表示您必须注意的重要注意事项。
介绍
JetCon 3701G 是单端口快速以太网到光纤介质转换器符合
802.1af/at JetCon 3701G具有冗余电源输入,具有宽范围
DC10〜60V。 JetCon 3701G的光纤端口也支持单模或多模,
最高高达30KM的延长距离传输。
打開包裝,檢查下列配件
• JetCon 3701G工业媒体转换器*1
• 快速安装指南*1
连接到网络
1. 连接以太网端口:将以太网电缆的一端连接到JetCon 3701G
的UTP端口,另一端连接到所连接的网络设备。 UTP端口支持
自动MDI/ MDIX功能。 LNK / ACT LED将亮起并闪烁,表示
RJ-45端口链路和从RJ-45接收和发送的数据包。
2. 连接光纤端口:将JetCon 3701G
上的光纤端口连接到另一个光纤
太网设备,如图所示。 连接错误
或光缆类型会导致光纤端口工
作不正常。
-
 1
1
-
 2
2


Korenix JetCon 3701G Quick Installation Manual
- カテゴリー
- ネットワークスイッチ
- タイプ
- Quick Installation Manual
他の言語で
- English: Korenix JetCon 3701G
関連論文
-
Korenix JetCon 3401G V2 Quick Installation Manual
-
-
-
-
-
-
-
-
-
