Korg MiniPitch 取扱説明書

タイプ
取扱説明書

Korg MiniPitch は、ウクレレのチューニングを行うための小型で軽量なクリップ式チューナーです。電源ボタンを押し、チューニングしたい弦を弾くと、弦の名前を示すインジケーター LED が点灯し、LED メーターの中央が点灯するまで、楽器をチューニングします。また、オートガイドモードを使用すると、4弦(G)から順に、弦がチューニングされると次の弦のチューニングに移行し、初心者でも簡単にチューニングを行うことができます。

Korg MiniPitch は、ウクレレのチューニングを行うための小型で軽量なクリップ式チューナーです。電源ボタンを押し、チューニングしたい弦を弾くと、弦の名前を示すインジケーター LED が点灯し、LED メーターの中央が点灯するまで、楽器をチューニングします。また、オートガイドモードを使用すると、4弦(G)から順に、弦がチューニングされると次の弦のチューニングに移行し、初心者でも簡単にチューニングを行うことができます。

1
Thank you for purchasing the Korg MiniPitch ukulele tuner.
Merci d'avoir choisi l'accordeur pour ukulele MiniPitch de Korg.
Vielen Dank, dass Sie sich für ein MiniPitch Ukulele-Stimmgerät
von Korg entschieden haben.
Gracias por comprar el anador de ukulele MiniPitch de Korg.
このたびは、コルグ・ウクレレ・チューナー MiniPitch をお買
い上げいただきまして、まことにありがとうございます。
Owner’s Manual
Manuel d’utilisation
Bedienungsanleitung
Manual del usuario
2019
www.korg.com
Published 3/2019 Printed in Vietnam
アフターサービス
修理および商品のお取り扱いについてのご質問、ご相談は、お客
様相談窓口へお問い合わせください。
お客様相談窓口
受付時間:月曜~金曜 10:00 17:00(祝祭日、窓口休業日
を除く)
PHS 等一部の電話ではご利用できません。固定電話または
携帯電話からおかけください。
●サービスセンター:
168-0073 東京都杉並区下高井戸 1-18-16 2F
■お願い
1. 保証書に販売年月日等の記入がない場合は無効となります。記入で
きないときは、お買い上げ年月日を証明できる領収書等と一緒に保
管してください。
2. 保証書は再発行致しませんので、紛失しないように大切に保管して
ください。
コルグ MiniPitch 保証書
本保証書は、上記の保証規定により無償修理をお約束する
ものです。
お買い上げ日:
販売店名:
年   月   日
Precautions
Location
Using the unit in the following locations can result in a malfunction.
In direct sunlight
Locations of extreme temperature or humidity
Excessively dusty or dirty locations
Locations of excessive vibration
Close to magnetic elds
Power supply
Be sure to turn the power switch to OFF when the unit is not in use.
Remove the baery in order to prevent it from leaking when the unit is
not in use for extended periods.
Interference with other electrical devices
Radios and televisions placed nearby may experience reception inter-
ference. Operate this unit at a suitable distance from radios and televi-
sions.
Handling
To avoid breakage, do not apply excessive force to the switches or controls.
Care
If the exterior becomes dirty, wipe it with a clean, dry cloth. Do not use
liquid cleaners such as benzene or thinner, or cleaning compounds or
ammable polishes.
Keep this manual
After reading this manual, please keep it for later reference.
Keeping foreign matter out of your equipment
Never set any container with liquid in it near this equipment. If liquid
gets into the equipment, it could cause a breakdown, re, or electrical
shock. Be careful not to let metal objects get into the equipment.
THE FCC REGULATION WARNING (for USA)
NOTE:
This equipment has been tested and found to comply with the
limits for a Class B digital device, pursuant to Part 15 of the FCC Rules.
These limits are designed to provide reasonable protection against
harmful interference in a residential installation. This equipment gener-
ates, uses, and can radiate radio frequency energy and, if not installed
and used in accordance with the instructions, may cause harmful inter-
ference to radio communications. However, there is no guarantee that
interference will not occur in a particular installation. If this equipment
does cause harmful interference to radio or television reception, which
can be determined by turning the equipment off and on, the user is
encouraged to try to correct the interference by one or more of the fol-
lowing measures:
Reorient or relocate the receiving antenna.
Increase the separation between the equipment and receiver.
Connect the equipment into an outlet on a circuit dierent from that
to which the receiver is connected.
Consult the dealer or an experienced radio/TV technician for help.
If items such as cables are included with this equipment, you must use
those included items.
Unauthorized changes or modication to this system can void the user’s
authority to operate this equipment.
Notice regarding disposal (EU only)
If this symbol is shown on the product, manual, battery, or
package, you must dispose of it in the correct manner to avoid
harm to human health or damage to the environment. Contact
your local administrative body for details on the correct dispos-
al method. If the baery contains heavy metals in excess of the
regulated amount, a chemical symbol is displayed below the
symbol on the baery or baery package.
CALIFORNIA USA ONLY
Perchlorate Material–special handling may apply, See www.dtsc.ca.gov/
hazardouswaste/perchlorate.
SUPPLIER’S DECLARATION OF CONFORMITY (for USA)
Responsible Party : KORG USA INC.
Address : 316 SOUTH SERVICE ROAD, MELVILLE, NY
Telephone : 1-631-390-6500
Equipment Type : UKULELE TUNER
Model : MiniPitch
This device complies with Part 15 of FCC Rules. Operation is subject to
the following two conditions:
(1) This device may not cause harmful interference, and (2) this device
must accept any interference received, including interference that may
cause undesired operation.
IMPORTANT NOTICE TO CONSUMERS
This product has been manufactured according to strict specications
and voltage requirements that are applicable in the country in which
it is intended that this product should be used. If you have purchased
this product via the internet, through mail order, and/or via a tele-
phone sale, you must verify that this product is intended to be used in
the country in which you reside.
WARNING: Use of this product in any country other than that for
which it is intended could be dangerous and could invalidate the man-
ufacturer’s or distributor’s warranty. Please also retain your receipt as
proof of purchase otherwise your product may be disqualied from
the manufacturer’s or distributor’s warranty.
MiniPitch
UKULELE TUNER
Ja
En
2
Parts of the MiniPitch
C
E
G
A
Battery tray
Clip
Power
button
String name
indicator LED
LED meter
Display
10‒15
mm
C
E
A
G
Since the MiniPitch is small and lightweight, infants may
try to put it in their mouths. Keep the MiniPitch out of the
reach of infants.
Installing the battery
Make sure to turn the power off
before you replace the baery.
When the battery runs low, the
LED meter will no longer operate
smoothly. Replace the battery as
soon as possible to ensure accurate
tuning.
1. Slide out the baery tray, which
is combined with the display.
2. Insert the baery, making sure to
observe the correct polarity.
3. Return the battery tray to its
original position.
Attaching to the instrument and range of motion
The MiniPitch tunes by picking up
the vibrations of the instrument.
For the most accurate tuning, be
sure to aach the MiniPitch to the
head stock of your instrument.
In addition, the display can be
moved as shown below, so that it
is easier to read.
110°
The MiniPitch may be damaged if you apply excessive
force within its range of motion, or aempt to move it be-
yond its intended range of motion.
Please carefully aach the MiniPitch to your instrument.
Leaving the MiniPitch aached for a long time may dam-
age or mark the instrument's surface.
Depending on various factors such as agerelated change
or the surface nish, there is a possibility that your instru-
ment may be damaged by aaching this product.
Tuning
1. Press the power buon to turn on the power.
2. Play a single note with the string that you want to tune.
3. Roughly tune the string until the string name indicator
LED for the string you're playing lights up.
4. Tune the instrument until the center of the LED meter
lights up. The lower side of the LED meter will light up if
your instrument is at, and the upper side will light up if
your instrument is sharp.
C
E
G
A
5. To turn o the power, press the power buon.
If approximately three minutes pass without the MiniPitch
detecting any sound, the power will turn o automatically
(Auto power-o).
The meter may respond to vibrations it picks up from the
environment; however, this will not affect tuning of the
instrument.
Autoguide mode
In Autoguide mode, you can move on to tuning the following
string once a string is in tune, starting from the 4th string (G).
This mode helps reduce tuning time and allows ukulele begin-
ners to tune with condence.
1. Press the power buon to turn on the MiniPitch.
2. Hold down the power buon to enter the Autoguide mode,
and a string name indicator LED (G) blinks.
3. Play the string indicated by the blinking string name indica-
tor LED and tune it.
4. When the center of the LED meter lights up to indicate that
the string is tuned, the next string name indicator LED (C)
blinks.
5. Repeat these steps until all four strings are tuned.
6. When
all strings have been tuned,
Autoguide mode is exited.
TIP
To cancel Autoguide mode, breiy press the power buon.
Autoguide mode does not support Low-G tuning.
Specications
CR2032
+
This device complies with Part 15 of the FCC Rules.
Operation is subject to the following two conditions: (1) This device
may not cause harmful interference, and (2) this device must accept any
interference received, including interference that may cause undesired
operation.
CAN ICES-3 B / NMB-3 B.
Scale
12-note equal temperament (A4=440Hz, xed)
Detection
range
compatible with standard G, C, E and A tuning,
and Low-G tuning (except in Autoguide mode)
(sine wave) G3 (196.00Hz)–A6 (1760.00Hz)
Precision
+/-1 cent
Power supply
coin-type lithium baery (CR2032) x 1
Baery life
approximately 100 hours (continuous A4 input)
Dimensions
(W x D x H)
43 × 29 × 24 mm / 1.69 × 1.14 × 0.94 inches
Weight
13 g / 0.46 oz. (including baery)
Included
items
Owner’s manual, coin-type lithium battery
(CR2032) x 1
* Specifications and appearance are subject to change without
notice for improvement.
En
3
安全上のご注意
火災・感電・人身障害の危険を防止するには以下の指示を守ってください
警告
この注意事項を無視した取り扱いをすると、
死亡や重傷を負う可能性が予想されます
・次のような場合には、直ちに電池を抜く。
○異物が内部に入ったとき  ○製品に異常や故障が生じたとき
修理が必要なときは、コルグお客様相談窓口へ修理を依頼してください。
・本製品を分解したり改造したりしない。
・修理 / 部品の交換などで、取扱説明書に書かれていること以外は絶
対にしない。
・本製品に異物(燃えやすいもの、硬貨、針金など)を入れない。
・温度が極端に高い場所(直射日光の当たる場所、暖房機器の近く、
発熱する機器の上など)での使用や保管をしない。
・振動の多い場所で使用や保管をしない。
・ホコリの多い場所で使用や保管をしない。
・風呂場、シャワー室で使用や保管をしない。
雨天時の野外などのような湿気の多い場所で、使用や保管をしない。
・本製品の上に液体の入ったもの(水や薬品等)を置かない。
・本製品に液体をこぼさない。
・濡れた手で本製品を使用しない。
・電池は乳幼児の手の届くところに置かない。
電池を飲み込んだ場合は、すぐに医師に相談する。
注意
この注意事項を無視した取り扱いをすると、傷害を負う
可能性、または物理的損害が発生する可能性があります
・正常な通気が妨げられない所に設置して使用する。
・ラジオ、テレビ、電子機器などから十分に離して使用する。ラジ
やテレビ等に接近して使用すると、本製品が雑音を受けて誤動作す
る場合があります。また、ラジオ、テレビ等に雑音が入ることがあ
ります。
・外装のお手入れは、乾いた柔らかい布を使って軽く拭く。
・長時間使用しないときは、電池の液漏れを防ぐために電池を抜く。
・電池を過度の熱源(日光、火など)にさらさない。
ボタンやツマミに必要以上の力を加えない。故障の原因になります。
外装のお手入れに、ベンジンやシンナー系の液体、コンパウンド質、
強燃性のポリッシャーは使用しない。
・不安定な場所に置かない。
保証規定(必ずお読みください)
本保証書は、保証期間中に本製品を保証するもので、付属品類(ヘッドホ
ンなど)は保証の対象になりません。保証期間内に本製品が故障した場合は、
保証規定によって無償修理いたします
1. 本保証書の有効期間はお買い上げ日より 1 か年です。
2. 次の修理等は保証期間内であっても有償修理となります。
消耗部品(電池など)の交換。
・お取扱い方法が不適当のために生じた故障。
天災(火災、浸水等)によって生じた故障。
故障の原因が本製品以外の他の機器にある場合。
不当な改造、調整、部品交換などにより生じた故障または損傷。
保証書にお買い上げ日、販売店名が未記入の場合、または字句が書き
替えられている場合。
本保証書の提示がない場合。尚、当社が修理した部分が再度故障した
場合は、保証期間外であっても、修理した日より 3 月以内に限り無
償修理いたします。
3. 本保証書は日本国内においてのみ有効です。
This warranty is valid only in Japan.
4.
お客様が保証期間中に移転された場合でも、保証は引き続きお使い
いただけます。詳しくは、お客様相談窓口までお問い合わせください。
5. 修理、運送費用が製品の価格より高くなることもありますので、あ
らかじめお客様相談窓口へご相談ください。発送にかかる費用は、
お客様の負担とさせていただきます。
6. 修理中の代替品、商品の貸し出し等は、いかなる場合においても一
切行っておりません。
本製品の故障、または使用上生じたお客様の直接、間接の損害につきまし
ては、弊社は一切の責任を負いかねますのでご了承ください。本保証書は、
保証規定により無償修理をお約束するためのもので、これによりお客様の
法律上の権利を制限するものではありません。
Précautions
Emplacement
L'utilisation de cet instrument dans les endroits suivants peut en en-
traîner le mauvais fonctionnement.
• En plein soleil.
• Endroits très chauds ou très humides.
• Endroits sales ou fort poussiéreux.
• Endroits soumis à de fortes vibrations.
A proximité de champs magnétiques.
Alimentation
Lorsque vous n’utilisez pas l’appareil, n’oubliez pas de le mere hors
tension. Retirez les piles pour éviter toute fuite lorsque l’appareil ne
sera pas utilisé pendant de longues périodes de temps.
Interférences avec d'autres appareils électriques
Les postes de radio et de télévision situés à proximité peuvent par
conséquent sourir d'interférences à la réception. Veuillez dès lors faire
fonctionner cet appareil à une distance raisonnable de postes de radio
et de télévision.
Maniement
Pour éviter de les endommager, manipulez les commandes et les bou-
tons de cet instrument avec soin.
Entretien
Lorsque l'instrument se salit, neoyez-le avec un chion propre et sec.
Ne vous servez pas d'agents de neoyage liquides tels que du benzène
ou du diluant, voire des produits inammables.
Conservez ce manuel
Après avoir lu ce manuel, veuillez le conserver soigneusement pour
toute référence ultérieure.
Evitez toute intrusion d'objets ou de liquide
Ne placez jamais de récipient contenant du liquide près de l'instru-
ment. Si le liquide se renverse ou coule, il risque de provoquer des
dommages, un court-circuit ou une électrocution. Veillez à ne pas lais-
ser tomber des objets métalliques dans le boîtier (trombones, par ex.).
Note concernant les dispositions (Seulement EU)
Si ce symbole apparait sur le produit, le manuel, les piles
ou les packs de piles, cela signie que vous devez le recy-
cler d’une manière correcte an de prévenir les dommages
pour la santé humaine et les dommages potentiels pour
l’environnement. Contactez votre administration locale
pour de plus amples renseignements concernant la bonne
méthode de recyclage. Si la pile contient des métaux lourds
au-delà du seuil réglementé, un symbole chimique est a-
ché en dessous du symbole de la poubelle barrée d’une
croix sur la pile ou le pack de piles.
REMARQUE IMPORTANTE POUR LES CLIENTS
Ce produit a été fabriqué suivant des spécifications sévères et des
besoins en tension applicables dans le pays où ce produit doit être
utilisé. Si vous avez acheté ce produit via l’internet, par vente par
correspondance ou/et vente par téléphone, vous devez vérier que ce
produit est bien utilisable dans le pays où vous résidez.
ATTENTION: L’utilisation de ce produit dans un pays autre que celui
pour lequel il a été conçu peut être dangereuse et annulera la garantie
du fabricant ou du distributeur. Conservez bien votre récépissé qui
est la preuve de votre achat, faute de quoi votre produit ne risque de
ne plus être couvert par la garantie du fabricant ou du distributeur.
Fr
Ja
4
Vorsichtsmaßnahmen
Aufstellungsort
Vermeiden Sie das Aufstellen des Geräts an Orten, an denen
• es direkter Sonneneinstrahlung ausgeset ist;
• hohe Feuchtigkeit oder Extremtemperaturen auftreten können;
• Staub oder Schmu in großen Mengen vorhanden sind;
• das Gerät Erschüerungen ausgeset sein kann.
• in der Nähe eines Magnetfeldes.
Stromversorgung
Stellen Sie den Netzschalter auf OFF, wenn das Gerät nicht benutzt
wird. Wenn Sie das Gerät über einen längeren Zeitraum nicht benut-
zen, nehmen Sie die Baerien heraus, damit sie nicht auslaufen.
Störeinüsse auf andere Elektrogeräte
Dieser kann bei in der Nähe aufgestellten Rundfunkempfänger oder
Fernsehgeräten Empfangsstörungen hervorrufen. Betreiben Sie solche
Geräte nur in einem geeigneten Abstand von diesem Erzeugnis.
Bedienung
Vermeiden Sie bei der Bedienung von Schaltern und Reglern unange-
messenen Kraftaufwand.
Reinigung
Bei auftretender Verschmuung können Sie das Gehäuse mit einem
trockenen, sauberen Tuch abwischen. Verwenden Sie keinerlei Flüs-
sigreiniger wie beispielsweise Reinigungsbenzin, Verdünner oder
Spülmiel. Verwenden Sie niemals brennbare Reiniger.
Bedienungsanleitung
Bewahren Sie diese Bedienungsanleitung gut auf, falls Sie sie später
noch einmal benötigen.
Flüssigkeiten und Fremdkörper
Stellen Sie niemals Behältnisse mit Flüssigkeiten in der Nähe des Ge-
räts auf. Wenn Flüssigkeit in das Gerät gelangt, können Beschädigung
des Geräts, Feuer oder ein elektrischer Schlag die Folge sein. Beachten
Sie, dass keinerlei Fremdkörper in das Gerät gelangen.
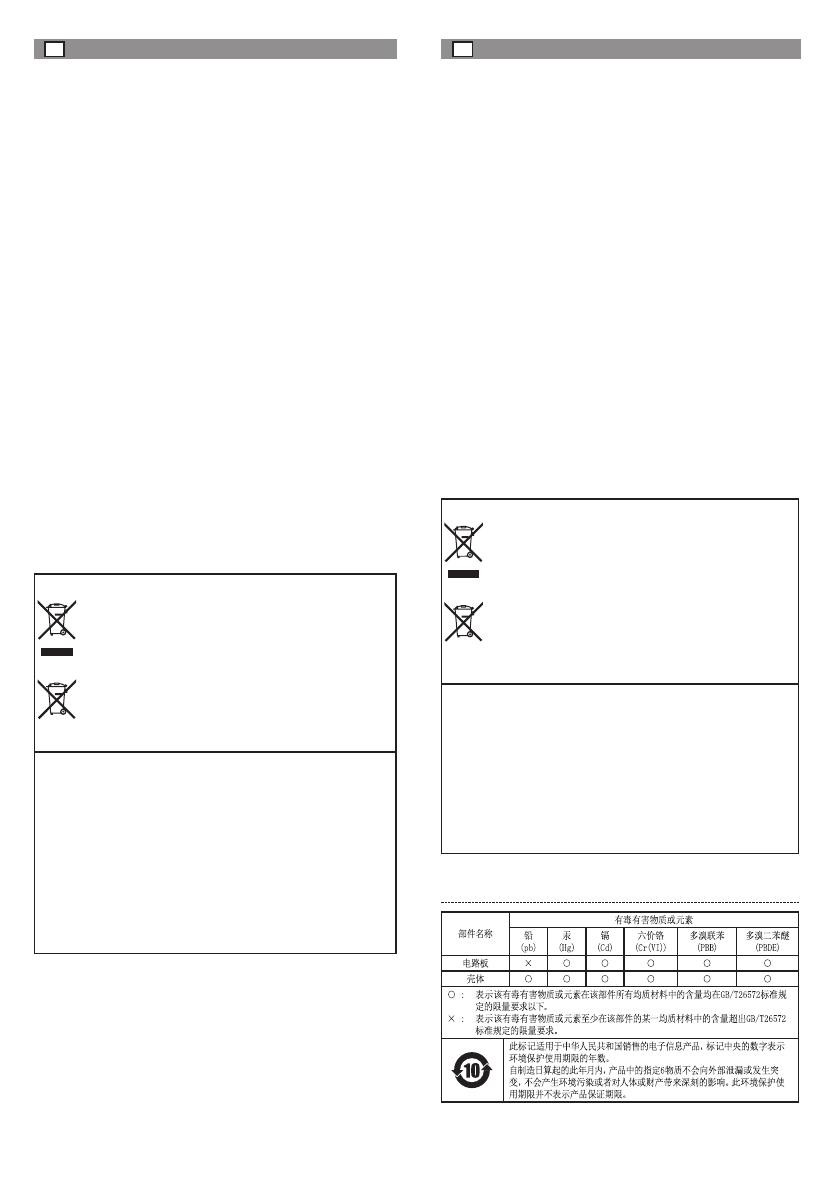
Hinweis zur Entsorgung (Nur EU)
Wenn Sie das Symbol mit der „durchgekreuzten Müllton-
ne“ auf Ihrem Produkt, der dazugehörigen Bedienungsan-
leitung, der Batterie oder der Verpackung sehen, müssen
Sie das Produkt in der vorgeschriebenen Art und Weise
entsorgen um Schäden an der menschlichen Gesundheit
und der Umwelt zu vermeiden. Baerien oder Akkus, die
Schadstoffe enthalten, sind auch mit dem Symbol einer
durchgekreuzten Mülltonne gekennzeichnet. In der Nähe
zum Mülltonnensymbol befindet sich die chemische Be-
zeichnung des Schadstoes.
WICHTIGER HINWEIS FÜR KUNDEN
Dieses Produkt wurde unter strenger Beachtung von Spezikationen
und Spannungsanforderungen hergestellt, die im Bestimmungsland
gelten. Wenn Sie dieses Produkt über das Internet, per Postversand
und/oder mit telefonischer Bestellung gekauft haben, müssen Sie
bestätigen, dass dieses Produkt für Ihr Wohngebiet ausgelegt ist.
WARNUNG: Verwendung dieses Produkts in einem anderen Land
als dem, für das es bestimmt ist, verwendet wird, kann gefährlich
sein und die Garantie des Herstellers oder Importeurs hinfällig
lassen werden. Bie bewahren Sie diese Quiung als Kaueleg auf,
da andernfalls das Produkt von der Garantie des Herstellers oder
Importeurs ausgeschlossen werden kann.
Precauciones
Ubicación
El uso de la unidad en las siguientes ubicaciones puede dar como re-
sultado un mal funcionamiento:
• Expuesto a la luz directa del sol.
• Zonas de extremada temperatura o humedad.
• Zonas con exceso de suciedad o polvo.
• Zonas con excesiva vibración.
• Cercano a campos magnéticos.
Fuente de alimentación
Apague la unidad cuando no la use. Retire las pilas si no va a usar la
unidad durante un tiempo largo.
Interferencias con otros aparatos
Las radios y televisores situados cerca pueden experimentar interfe-
rencias en la recepción. Opere este dispositivo a una distancia pruden-
cial de radios y televisores.
Manejo
Para evitar una rotura, no aplique excesiva fuerza a los conmutadores
o controles.
Cuidado
Si exterior se ensucia, límpiese con un trapo seco. No use líquidos lim-
piadores como disolvente, ni compuestos inamables.
Guarde este manual
Después de leer este manual, guárdelo para futuras consultas.
Mantenga los elementos externos alejados del equipo
Nunca coloque ningún recipiente con líquido cerca de este equipo,
podría causar un cortocircuito, fuero o descarga eléctrica. Cuide de
que no caiga ningún objeto metálico dentro del equipo.
Nota respecto a residuos y deshechos (solo UE)
Si aparece el símbolo del cubo de basura tachado sobre un
producto, su manual del usuario, la batería, o el embalaje
de cualquiera de éstos, signica que cuando tire dichos ar-
tículos a la basura, ha de hacerlo en acuerdo con la norma-
tiva vigente de la Unión Europea para prevenir daños a la
salud pública y al medioambiente. Le rogamos que se pon-
ga en contacto con su oficina o ministerio de medioam-
biente para más detalles. Si la batería contiene metales pe-
sados por encima del límite permitido, habrá un símbolo
de un material químico, debajo del símbolo del cubo de basura ta-
chado.
NOTA IMPORTANTE PARA EL CONSUMIDOR
Este producto ha sido fabricado de acuerdo a estrictas especicacio-
nes y requerimientos de voltaje aplicables en el país para el cual está
destinado. Si ha comprado este producto por internet, a través de co-
rreo, y/o venta telefónica, debe usted vericar que el uso de este pro-
ducto está destinado al país en el cual reside. AVISO: El uso de este
producto en un país distinto al cual está destinado podría resultar
peligroso y podría invalidar la garantía del fabricante o distribuidor.
Por favor guarde su recibo como prueba de compra ya que de otro
modo el producto puede verse privado de la garantía del fabricante
o distribuidor.
EsDe
5
Parties du MiniPitch
C E
G
A
Tiroir de la pile
Pince
Bouton
d'alimentation
Indicateur LED
du nom de la corde
Indicateur à diodes
Ecran
10 15
mm
Vu la petite taille et le poids plume du MiniPitch, les en-
fants en bas âge risquent de le mere en bouche. Conser-
vez le MiniPitch hors de portée des enfants en bas âge.
Mise en place de la pile
Coupez toujours l'alimentation avant de changer la pile.
Quand la pile faiblit, l'indicateur
à diodes ne fonctionne plus
correctement. Remplacez la pile
aussi vite que possible.
1. Ouvrez le tiroir de la pile si-
tué au dos de l'écran.
2. Insérez la pile fournie en
respectant les indications de
polarité.
3. Refermez le tiroir de la pile.
Fixation sur l'instrument et plage
de manœuvre de l'accordeur
Le MiniPitch détermine l’accordage en captant les vibra-
tions de l'instrument.
Veillez donc à fixer le Mi-
niPitch sur la tête de votre
instrument pour garantir un
accordage able.
Vous pouvez en outre pivo-
ter l'écran comme illustré
ci-dessous pour obtenir une
visibilité optimale.
110°
Vous risquez d'endommager le MiniPitch si vous le ma-
nipulez avec une force excessive ou si vous tentez de le
manipuler en dehors de sa plage de manœuvre.
S'il vous plait, attachez soigneusement le MiniPitch à
votre instrument. Le laisser aaché pendant un long mo-
ment, peut rayer la surface de votre instrument.
Dépendant de plusieurs facteurs comme le changement
à l'âge de l'instrument ou la nition de la structure, il
y a une possibilité que votre instrument soit endommagé
par le système d'aache par pince.
Accordage
1. Appuyez sur le bouton d’alimentation pour mere l’appareil
sous tension.
2. Jouez une note avec la corde que vous désirez accorder.
3. Accordez la corde jusqu’à ce que l’indicateur LED du nom
de la corde jouée s’allume.
4. Accordez l’instrument jusqu’à ce que le centre de l’indicateur
à diode s’allume. Si la note est trop basse, le dessous de
l’indicateur à diodes s’allume, et si la note est trop haute, le
dessus de l’indicateur à diodes s’allume.
C
E
G
A
5. Pour mere le MiniPitch hors tension, appuyez sur le bou-
ton d’alimentation.
Si après environ trois minutes, le MiniPitch n’a détecté au-
cun son, il se met automatiquement hors tension (Mise hors
tension automatique).
Il se pourrait que l'accordeur réagisse à des vibrations ambiantes
qu'il capte; cela n'aecte toutefois pas l'accord de l'instrument.
Mode Autoguide
En mode Autoguide, vous pouvez accorder successivement
chaque corde sans transition, en commençant par la quatrième
corde (G). Ce mode permet de réduire le temps d’accordage et
aidera les novices à accorder leur ukulélé en conance.
1. Appuyez sur le bouton d’alimentation pour mere le Mini-
Pitch sous tension.
2. Maintenez enfoncé le bouton d’alimentation pour activer le
mode Autoguide. L’indicateur LED du nom de la corde (G)
clignote alors.
3. Jouez la corde indiquée par l’indicateur LED du nom de la
corde clignotant et accordez-la.
4. Quand le centre de l’indicateur à diodes s’allume pour indi-
quer que la corde est accordée, l’indicateur LED du nom de
la corde suivant (C) clignote.
5. Répétez ces étapes jusqu’à ce que les quatre cordes soient
accordées.
6. Quand toutes les cordes sont accordées, le mode Autoguide
est désactivé.
ASTUCE
Pour annuler le mode Autoguide, appuyez brièvement sur le
bouton d’alimentation.
Le mode Autoguide ne prend pas en charge Low-G.
Spécications
CR2032
+
Gamme
12 notes tempérament égal (A4=440Hz, xe)
Plage de détection
compatible avec les accords G, C, E, et A ~Sol, Mi,
Do, La
e
t l’accord en sol grave (sauf en mode Autoguide)
(sinusoïde) G3 (196.00 Hz)~A6 (1760.00 Hz)
Précision ±1 cent
Alimentation Pile bouton au lithium CR2032 x 1
Autonomie de la pile
Environ 100 heures
(entrée continue de la note A4)
Dimensions (L x P x H)
43 x 29 x 24 mm
Poids 13g (pile comprise)
Accessoires fournis
Manuel d’utilisation, Pile bouton au lithium
CR2032 x 1
* Les caractéristiques et l’aspect du produit sont susceptibles d’être modi és
sans avis préalable en vue d’une amélioration.
Fr
6
Teile des MiniPitch
C
E
G
A
Batteriefach
Clip
Einschalttaste
Anzeige-LED
der Saitennamen
LED-Meter
Display
10‒15
mm
Das MiniPitch ist klein und leicht, sodass Kleinkinder es in
den Mund stecken könnten. Bewahren Sie das MiniPitch
außerhalb der Reichweite von Kleinkindern auf.
Einsetzen der Batterie
Deaktivieren Sie den Einschalaste,
bevor Sie die Baerie auswechseln.
Wenn die Batterie nahezu erschöpft
ist, beginnt die LED-Meter unge-
wohnt verhält. Wechseln Sie die Bat-
terie also so schnell wie möglich aus.
1. Schieben Sie das mit dem Display
kombinierte Baeriefach auf.
2. Legen Sie die Baerie ein und ach-
ten Sie auf die korrekte Polung.
3. Schließen Sie das Baeriefach wie-
der.
Anbringen am Instrument
und Bewegungsspielraum
Das MiniPitch stimmt Ihr Instru-
ment, indem es dessen Schwingun-
gen aufnimmt. Aus diesem Grund
sollte das MiniPitch zum Stimmen
an der Kopfplatte Ihres Instru-
ments angebracht werden.
Für eine bessere Lesbarkeit lässt
sich zudem das Display wie unten
gezeigt bewegen.
110°
Das MiniPitch kann beschädigt werden, wenn innerhalb
des Bewegungsspielraums übermäßige Kraft auf das Gerät
ausgeübt wird bzw. wenn versucht wird, es über den Be-
wegungsspielraum hinaus zu bewegen.
Bie befestigen sie das MiniPitch vorsichtig an Ihrem Inst-
rument. Wenn sie das MiniPitch für längere Zeit an Ihrem
Instrument befestigt lassen, kann dies zu Veränderungen
an der Oberäche des Instruments führen.
Abhängig von verschiedenen Faktoren wie z. B. altersbe-
dingte Veränderungen der Lackierung/Oberfläche Ihres
Instrumentes, kann es vorkommen dass ein Anbringen
dieses Geräts zu einer Beschädigung führt.
Tuning
1. Drücken Sie die Einschalaste, um das Gerät einzuschalten.
2. Spielen Sie eine Einzelnote mit der Saite, die Sie stimmen wollen.
3. Stimmen Sie die Saite grob, bis die Anzeige-LED für die
gespielte Saite aueuchtet.
4. Stimmen Sie das Instrument, bis die LED-Meter in der Mit-
te aueuchtet. Die Unterseite der LED-Meter leuchtet auf,
wenn Ihr Instrument zu tief gestimmt ist, und die Obersei-
te, wenn es zu hoch gestimmt ist.
C
E
G
A
5. Zum Ausschalten des MiniPitch drücken Sie die Einschalt-
taste. Wenn der MiniPitch länger als 3 Minuten kein Signal
erkennt, schaltet er sich automatisch aus (Energiesparfunk-
tion).
Das Stimmgerät kann auf Schwingungen aus der Umge-
bung reagieren. Dies beeinträchtigt allerdings nicht den
Stimmvorgang des Instruments.
Autoguide-Modus
Im Autoguide-Modus können Sie – beginnend mit der 4. Saite
(G) nach dem Stimmen einer Saite sofort die nächste stim-
men. Somit spart Ihnen dieser Modus Zeit beim Stimmen und
eignet sich besonders gut für Anfänger.
1. Drücken Sie den Einschalaste, um das MiniPitch einzu-
schalten.
2. Halten Sie die Einschalttaste gedrückt, um den Autogui-
de-Modus aufzurufen nun blinkt die Anzeige-LED der
Saitennamen (G).
3. Stimmen Sie nun die Saite, die der blinkenden Anzei-
ge-LED der Saitennamen entspricht.
4. Sobald die Mie der LED-Meter aueuchtet und die kor-
rekte Stimmung anzeigt, blinkt die nächste Anzeige-LED
der Saitennamen (C).
5. Wiederholen Sie diese Schritte, bis alle vier Saiten gestimmt
sind.
6. Nachdem alle Seiten gestimmt worden sind, wird der Auto-
guide-Modus beendet.
TIPP
Zum Abbrechen des Autoguide-Modus drücken Sie kurz die
Einschalaste.
Der Autoguide-Modus unterstüt keine Low-G-Stimmung.
Technische Daten
CR2032
+
Skala
12 Noten gleichschwebende Stimmung
(A4=440Hz, fest)
Erkennungsbereich
mit der Standard-Stimmung G-C-E-A identisch
und Low-G-Stimmung (außer im Autoguide-Modus)
(Sinuswelle) G3 (196,00 Hz)–A6 (1760,00 Hz)
Genauigkeit ±1 cent
Stromversorgung CR2032 Lithium-Knopaerie x 1
Baerielaufzeit ±100 Stunden (konstante A4-Eingabe)
Abmessungen
(B x T x H)
43 x 29 x 24 mm
Gewicht 13g (inklusive Baerie)
Lieferumfang
Bedienungsanleitung,
CR2032 Lithium-Knopaerie x 1
* Änderungen der technischen Daten und des Designs ohne vorherige
Ankündigung vorbehalten.
De
7
Partes del MiniPitch
C E
G
A
Bandeja
de la batería
Clip
botón
de encendido
Indicador LED de
nombre de la cuerda
Medidor LED
Pantalla
10‒15
mm
Debido a que el MiniPitch es tan pequeño y ligero, es posi-
ble que los niños intenten metérselo en la boca. Mantenga
el MiniPitch fuera del alcance de los niños.
Instalación de la pila
Apague la unidad antes de re-
emplazar la pila.
Cuando la pila está baja, el medidor
LED ya no funcionará suavemente.
Reemplace la pila tan pronto como
sea posible.
1. Deslice la bandeja de la pila, que
está combinada con la pantalla.
2. Inserte la pila y asegúrese de res-
petar la polaridad correcta.
3. Vuelva a colocar la bandeja de la
pila en su posición original.
Colocación en el instrumento
e intervalo de movimiento
El sistema MiniPitch realiza la
anación recogiendo las vibra-
ciones del instrumento.
Por ello, asegúrese de colocar el
MiniPitch en el cabezal del ins-
trumento para poder anarlo.
Además, la pantalla se puede
desplazar como se muestra a con-
tinuación, para facilitar la lectura.
110°
El MiniPitch puede resultar dañado si ejerce una fuerza
excesiva en su intervalo de movimiento, o si intenta des-
plazarlo más allá de su intervalo de movimiento previsto.
Por favor sujete con cuidado e MiniPitch a su instrumento.
Si deja el MiniPitch sujeto al instrumento durante un largo
periodo, puede dañar la supercie del instrumento.
Dependiendo de varios factores, como el envejecimiento
del acabado de la supercie, existe la posibilidad de que su
instrumento pueda dañarse por la colocación del anador.
Procedimiento de Anación
1. Pulse el botón de encendido para encender la unidad.
2. Toque un solo nota con la cuerda que desee anar.
3. Ane la cuerda de manera aproximada hasta que el indicador
LED de nombre de la cuerda que está tocando se ilumine.
4. Ane el instrumento hasta que el centro del medidor LED
se ilumine. Se iluminará la parte inferior del medidor LED
si el instrumento está por debajo del tono de anación y se
iluminará la parte superior si el instrumento está por enci-
ma del tono de anación.
C
E
G
A
5. Para apagar el MiniPitch, pulse el botón de encendido.
Si pasan aproximadamente tres minutos sin que MiniPitch
detecte sonido, la unidad se apagará automáticamente
(Apagado automático).
El medidor puede responder a las vibraciones que recoge
del entorno; sin embargo, eso no afectará a la anación del
instrumento.
Modo de Autoguía
En el modo de Autoguía, se puede pasar a la anación de la
siguiente cuerda una vez que una cuerda está anada, empe-
zando desde la 4ª cuerda (G) (sol). Este modo ayuda a reducir
el tiempo de afinación y permite a los principiantes en el
ukelele anar con conanza.
1. Pulse el botón de encendido para encender el MiniPitch.
2. Mantenga pulsado el botón de encendido para acceder al
modo de Autoguía, y parpadeará un indicador LED de
nombre de la cuerda (G) (sol).
3. Toque la cuerda indicada por el indicador LED de nombre
de la cuerda que parpadea y afínela.
4. Cuando se ilumine el centro del medidor LED para indicar
que la cuerda está anada, parpadeará el siguiente indica-
dor LED de nombre de la cuerda (C) (do).
5. Repita estos pasos hasta que estén anadas las cuatro cuerdas.
6. Una vez afinadas todas las cuerdas, se sale del modo de
Autoguía.
CONSEJO
Para cancelar el modo de Autoguía, pulse brevemente el
botón de encendido.
El modo de Auto
guía no admite Low-G.
Especicaciones
CR2032
+
Escala 12 notas, temperamento igual (A4=440Hz, ja)
Rango de detección
compatible con anación G, C, E y A estándar
y G grave (excepto en el modo de Autoguía)
(onda sinusoidal) G3 (196,00 Hz)–A6 (1760,00 Hz)
Precisión +/-1 centésimas
Alimentación Pila de litio tipo botón (CR2032) x 1
Duración de la Pila
aproximadamente 100 horas (entrada continua
nota A4)
Dimensiones
(Anch. x Prof. x Alt.)
43 x 29 x 24 mm
Peso 13g (incluyendo pila)
Elementos incluidos
Manual del usuario, Pila de litio tipo botón
(CR2032) x 1
* Las especicaciones y el aspecto están sujetas a cambios sin previo
aviso por mejora.
Es
8
各部の名称
電池ケース
クリップ
電源ボタン
弦表示 LED
LED メーター
ディスプレイ
10 15
mm
C
E
A
G
本製品は小型軽量のため幼児が誤飲する恐れがあります。
幼児の手の届かない場所に保管してください。
電池の入れ方
電池を交換するときは、本機
の電源を切って行ってくださ
。付属の電池は動作確認用
ですので、寿命が短い場合が
あります。
電池が消耗してくると、LED メー
ターがスムーズに動作しなくなり
ます。速やかに新しい電池と交換
してください。
1. ディスプレイ部分にある電池
ケースをスライドさせます。
2. 極性に注意して電池を入れます。
3. 電池ケースを元に戻します。
楽器への取り付けと可動範囲
本機は楽器本体の振動を拾って
チューニングを行います。その
ため、必ずご使用になる楽器の
ヘッド部分に取り付けて、チュー
ニングを行ってください。
また、本機は下図のようにディ
スプレイ部分を動かすことに
よって、表示を見やすいよう
に調節することができます。
110°
可動範囲内であっても、過度な力で無理に向きを変えると
破損する恐れがあります。
楽器への取り付け、取り外しはていねいに行ってください。
また、長時間取り付けたままにすると、取り付け跡が残る
場合があります。
楽器の経年変化や塗装などの状態によっては、本機の装着
により損傷を与える恐れがあります。
チューニング方法
1. 電源ボタンを押して電源を入れます。
2. チューニングしたい弦を単音で鳴らします。
3. 鳴らした弦と同じ位置の弦表示 LED が点灯するように大
まかにチューニングします。
4. LED メーターの中央が点灯するように、ウクレレをチュー
ニングします。
音が低いときは LED メーターの下側が、音が高いときは
LED メーターの上側が点灯します。
C
E
G
A
5. 電源を切るときは、電源ボタンを押します。
電源が入ったまま、音を約 3 分間認識しなかったときは、
自動的に電源が切れます(オート・パワー・オフ)
周囲の環境によっては振動を拾いメーターが反応する場合が
ありますが、楽器のチューニングには影響ありません。
オートガイド・モード
オートガイド・モードでは 4 弦(G)から順番に、チューニ
ングが合うと自動で次の弦のチューニングに移ることができ
ます。チューニング時間の短縮に役立つほか、ウクレレ初心
者の方も迷わずにチューニングすることができます。
1. 電源ボタンを押して電源を入れます。
2. 再度、電源ボタンを長押しすると、弦表示 LED(G)が点
滅しオートガイド・モードに入ります。
3. 点滅している弦表示 LED が示す弦を弾きながらチューニン
グします。
4. メーターがセンターを示し、チューニングが安定すると
次の弦表示 LED(C)が点滅します。
5. 操作 3、4 を繰り返し、4 本の弦をチューニングします。
6. すべての弦のチューニングが完了すると、オートガイド・
モードを抜けます。
TIP オートガイド・モードを中止する場合、電源ボタンを短く押します。
オートガイド・モードは Low-G チューニングには対応してい
ません。
仕様
CR2032
+
音律 12 平均律(A4=440Hz、固定)
測定範囲
標準的な C チューニング (G, C, E, A)
および Low-G
チューニングに対応(オートガイド・モード除く)
(サイン波)G3(196.00Hz)~ A6(1760.00Hz)
測定精度 ± 1 セント以内
電源 コイン型リチウム電池(CR2032)x 1
電池寿命 100 時間(A4 連続入力時)
外形寸法
(幅x奥行x高さ)
43 x 29 x 24 mm
質量 13 g(電池含む)
付属品
取扱説明書
動作確認用コイン型リチウム電池(CR2032) x 1
仕様および外観は、改良のため予告なく変更する場合があります。
Ja
  • Page 1 1
  • Page 2 2
  • Page 3 3
  • Page 4 4
  • Page 5 5
  • Page 6 6
  • Page 7 7
  • Page 8 8

Korg MiniPitch 取扱説明書

タイプ
取扱説明書

Korg MiniPitch は、ウクレレのチューニングを行うための小型で軽量なクリップ式チューナーです。電源ボタンを押し、チューニングしたい弦を弾くと、弦の名前を示すインジケーター LED が点灯し、LED メーターの中央が点灯するまで、楽器をチューニングします。また、オートガイドモードを使用すると、4弦(G)から順に、弦がチューニングされると次の弦のチューニングに移行し、初心者でも簡単にチューニングを行うことができます。

その他のドキュメント