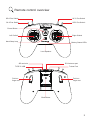
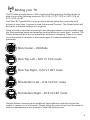
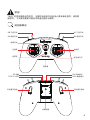
Radiomaster T8は、初心者からプロまで幅広く使用できる多機能な2.4GHz帯域のリモコンです。最大8チャンネルに対応し、航空機の種類に合わせてモデルタイプを選択し、さまざまなミキシング機能を使用することができます。プロポ本体には、高精度な4軸ベアリングポテンショメータセンサージンバルが搭載されており、滑らかな操作性を実現します。また、SDカードスロットを備え、音声サポートにも対応しています。
Radiomaster T8は、さまざまな航空機に対応しており、固定翼機、グライダー、ヘリコプター、マルチコプターなど、幅広く使用することができます。また、オプションのアクセサリーを使用することで、OpenTX T8 Proファームウェアにアップグレードすることも可能です。これにより、より高度な設定や機能を利用することができるようになります。 送信機は、D8、D16 v1 FCC、D16 v1 LBT、D16 v2 FCC、D


-
 1
1
-
 2
2
-
 3
3
-
 4
4
-
 5
5
-
 6
6
-
 7
7
-
 8
8
-
 9
9
-
 10
10
-
 11
11
-
 12
12
-
 13
13


Radiomaster T8 ユーザーマニュアル
- タイプ
- ユーザーマニュアル
- このマニュアルも適しています
Radiomaster T8は、初心者からプロまで幅広く使用できる多機能な2.4GHz帯域のリモコンです。最大8チャンネルに対応し、航空機の種類に合わせてモデルタイプを選択し、さまざまなミキシング機能を使用することができます。プロポ本体には、高精度な4軸ベアリングポテンショメータセンサージンバルが搭載されており、滑らかな操作性を実現します。また、SDカードスロットを備え、音声サポートにも対応しています。
Radiomaster T8は、さまざまな航空機に対応しており、固定翼機、グライダー、ヘリコプター、マルチコプターなど、幅広く使用することができます。また、オプションのアクセサリーを使用することで、OpenTX T8 Proファームウェアにアップグレードすることも可能です。これにより、より高度な設定や機能を利用することができるようになります。 送信機は、D8、D16 v1 FCC、D16 v1 LBT、D16 v2 FCC、D
他の言語で
- English: Radiomaster T8 User manual
関連論文

その他のドキュメント
-
 Boost Auto Parts 9906PCB-2 ユーザーガイド
-
phrozen Beam Care ユーザーマニュアル
-
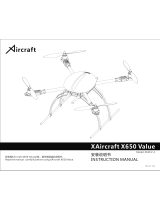 Aircraft Modelers Research XAircraft X650 Value ユーザーマニュアル
-
BetaFPV LiteRadio 3 ユーザーマニュアル
-
FS GMR00 Mini 4-channel receiver ユーザーマニュアル
-
RadioLink T4EUT4Updf ユーザーマニュアル
-
dji Pilot クイックスタートガイド
-
dji Assistant 2 クイックスタートガイド
-
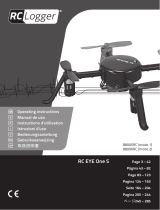 RC Logger 88005RC ユーザーマニュアル
-
ViewSonic VG810S ユーザーマニュアル


