Focal Trio6 Be ユーザーマニュアル

カテゴリー
車のスピーカー
タイプ
ユーザーマニュアル
TRIO6 BE
User manual / Manuel d’utilisation / Manual del usuario /
用戶手冊 / 사용자 설명서 / ユーザーマニュアル
English page 11
Français page 21
Español página 31
中文41
日本の51ページ
한국어 61
A LIRE EN PREMIER !
INSTRUCTIONS DE SÉCURITÉ IMPORTANTES !
F
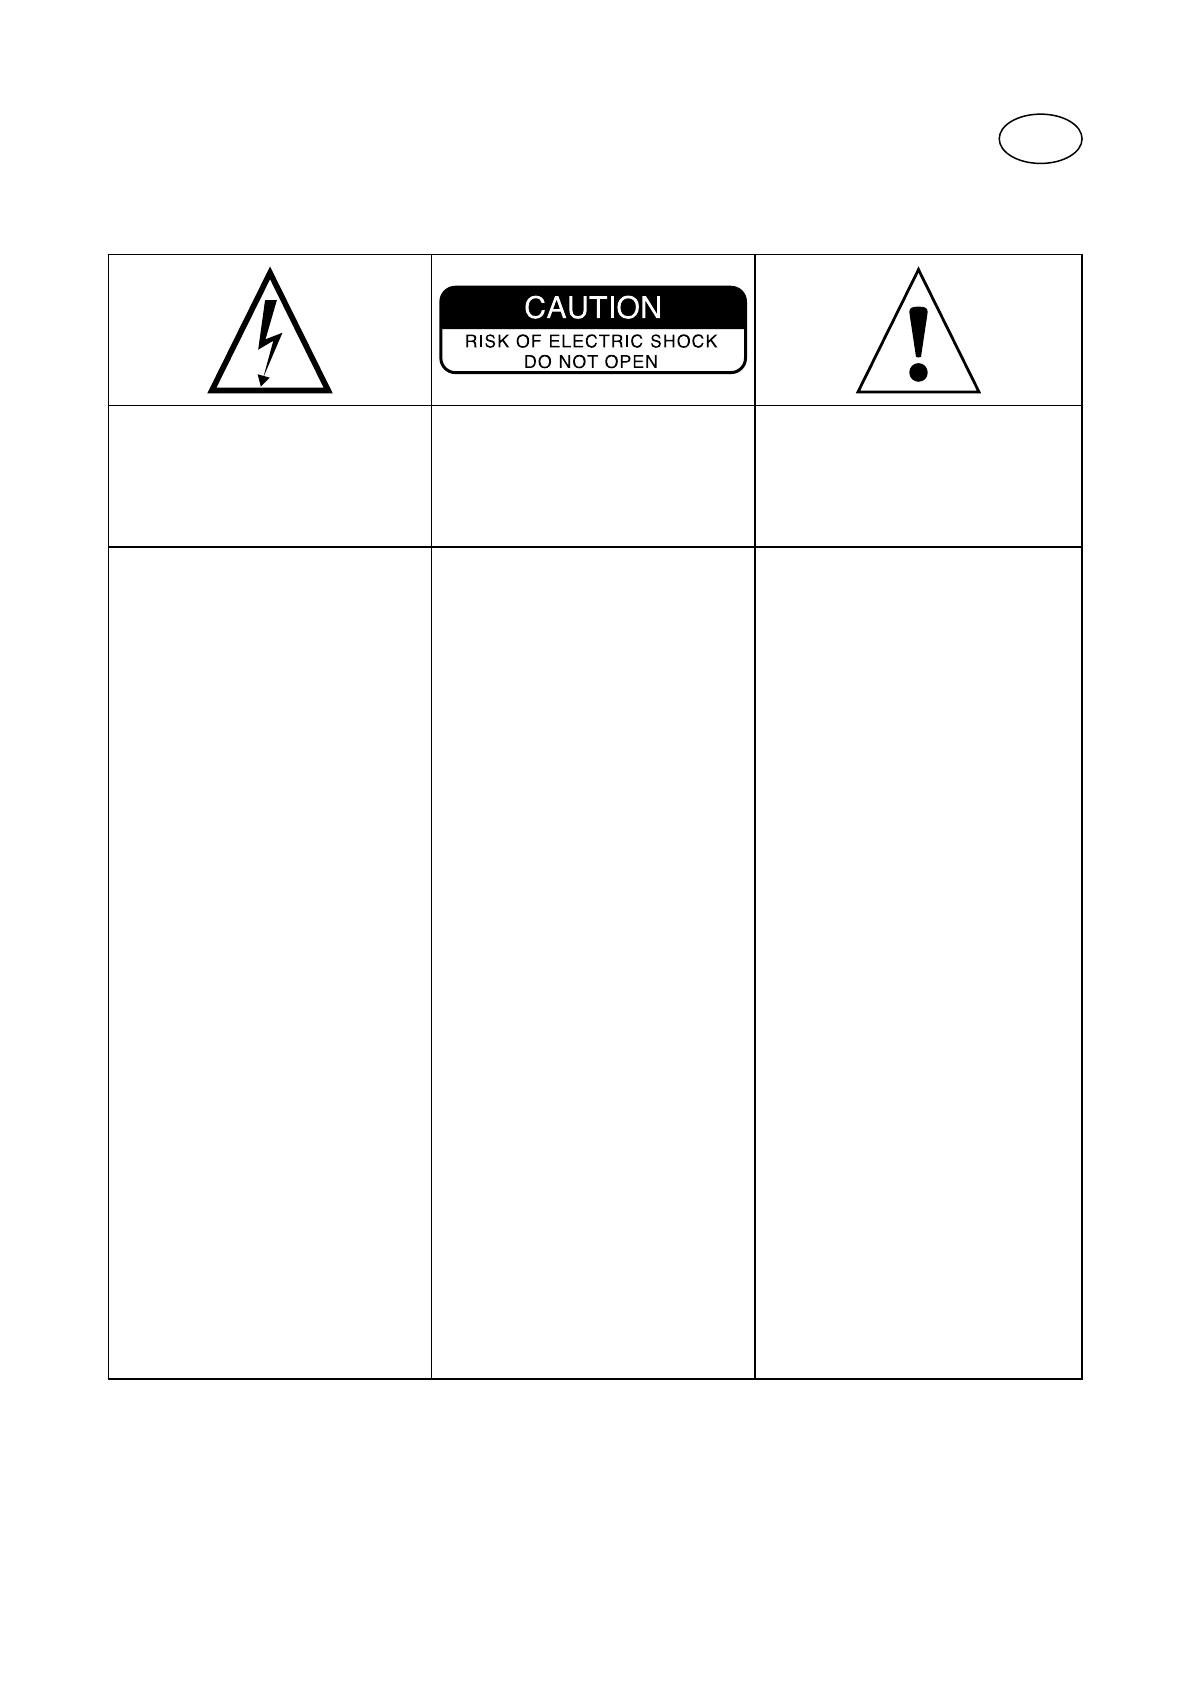
L’éclair représenté par le symbole flèche et
contenu dans un triangle équilatéral, a pour
objet de prévenir l’utilisateur de la présence de
tension élevée au sein de l’appareil pouvant en-
traîner un risque de choc électrique.
Attention: Afin de prévenir tout risque de choc
électrique, ne pas enlever le capot (ou l’arrière)
de cet appareil. Aucune pièce n’est remplaçable
par l’utilisateur. Pour entretien ou réparation,
veuillez contacter une personne qualifiée.
Le point d’exclamation contenu dans un triangle
équilatéral, a pour objet de prévenir l’utilisateur
de la présence d’instructions importantes men-
tionnées dans le mode d’emploi et relatives à la
mise en oeuvre et à l’entretien de l’appareil.
1. Lire ces instructions.
2. Conserver ces instructions.
3. Prendre en considération les mises en garde.
4. Suivre toutes les instructions.
5. Ne pas utiliser cet appareil en présence
d’eau.
6. Nettoyer uniquement avec un chiffon sec.
7. N’obstruer aucun orifice de ventilation.
Installer l’appareil en suivant les instructions du
fabricant.
8. Ne pas installer l’appareil à proximité d’une
source de chaleur tel un radiateur, une cui-
sinière, une bouche de chauffage ou tout autre
appareil (y compris les amplificateurs) dissipant
de la chaleur.
9. Respecter les instructions de sécurité con-
cernant le cordon d’alimentation secteur. Le
cordon d’alimentation présente deux lames
dont l’une est plus large que l’autre. Un cordon
avec mise à la terre contient deux lames ainsi
qu’une troisième pour la connection à la terre.
La lame la plus large ou la troisième lame ont
pour objet d’assurer votre sécurité. Si le cordon
d’alimentation ne s’adapte pas à votre prise
d’alimentation secteur, consultez un électricien
et remplacez la prise secteur désuette.
10. Assurez-vous que le câble d’alimentation
ne puisse être piétiné, écrasé ou pincé. Une at-
tention toute particulière doit être accordée à
la fiche d’alimentation et à la liaison du cordon
avec l’appareil.
11. N’utiliser que les accessoires recommandés
par le fabricant.
12. N’utiliser que les appareils de manuten-
tion, pieds, trépieds, supports ou tables recom-
mandés par le fabricant ou ceux vendus avec
l’appareil.
Lorsqu’un chariot est utilisé,redoublez de pru-
dence lors du déplacement de l’ensemble char-
iot/appareil afin d’éviter toutes blessures par
basculement.
13. Débranchez l’appareil en cas d’orage ou
pendant de longues périodes pendant lequel
l’appareil n’est pas utilisé.
14. Toute tâche de maintenance doit être réali-
sée par un personnel qualifié. Une maintenance
est nécessaire à la suite de tout dommage oc-
casionné à l’appareil tels que la détérioration
du câble ou de la fiche d’alimentation, le dé-
versement de liquide ou l’insertion d’objets à
l’intérieur de l’appareil, l’exposition à la pluie ou
à l’humidité, le mauvais fonctionnement ou le
renversement de l’appareil.
15. Ne pas utiliser d’accessoires non recom-
mandés par le fabricant de l’appareil afin
d’éviter tout risque.
16. Ce produit doit être raccordé unique-
ment au type d’alimentation secteur indiqué
sur l’étiquette figurant sur l’appareil. En cas
d’hésitation sur le type d’alimentation de votre
installation électrique, consultez le vendeur de
votre produit ou votre fournisseur d’électricité.
Pour les appareils prévus pour une utilisa-
tion à partir d’une batterie ou d’une autre
source d’alimentation, se référer au manuel
d’utilisation.
17. Si une antenne extérieure ou un réseau
câblé est connecté à votre appareil, assurez-
vous que l’antenne ou le câble soit raccordé
à la terre afin de garantir une protection con-
tre les surcharges électriques et les effets de
l’électricité statique. Les informations rela-
tives à la façon de relier correctement le mât
à la terre, ainsi que le fil d’antenne à l’unité de
décharge, la section des conducteurs, la posi-
tion du système de décharge, la connection et
les spécifications de l’électrode de terre sont
contenues dans l’article 810 de la norme Na-
tional Electrique, ANSI/ NFPA 70.
18. Une antenne extérieure doit toujours être
tenue à l’écart des lignes haute tension ou des
circuits électriques et d’éclairage de forte inten-
sité ainsi que de l’endroit où elle serait suscepti-
ble de tomber sur de telles lignes haute tension
ou circuits électriques. Lors de l’installation
d’une antenne extérieure, un soin tout particu-
lier doit être pris afin d’éviter tout contact avec
de tels circuits, ceuxci pouvant présenter un
risque mortel.
19. Ne surchargez pas les prises murales, les
rallonges électriques ou les prises multiples.
Il pourrait en résulter incendies ou chocs élec-
triques.
20. Ne jamais insérer un quelconque objet par
les trous de ventilation de l’appareil. Il pourrait
entrer en contact avec des composants soumis à
de hautes tensions ou les court-circuiter et ainsi
occasionner un incendie ou un choc électrique.
Ne jamais répendre de liquide sur l’appareil.
21. Ne tentez pas de réparer cet appareil par
vos propres moyens; l’ouverture de cet appareil
peut vous exposer à des tensions dangereuses
ou à d’autres risques. Pour toute intervention
de maintenance, adressez-vous à un personnel
qualifié.
22. Lorsque le remplacement de composants
est nécessaire, assurez-vous que le technicien
de maintenance utilise les composants spéci-
fiés par le fabricant ou présentant des carac-
téristiques identiques à ceux correspondant
à l’exemplaire d’origine. Des composants non
conformes peuvent provoquer incendies, chocs
électriques ou autres risques.
23. Après toute intervention ou réparation sur
l’appareil, demandez au technicien de mainte-
nance de procéder à des tests afin de vérifier que
le produit fonctionne en toute sécurité.
24. L’appareil ne doit être monté sur un mur ou
au plafond que si le constructeur le prévoit, et
uniquement selon les Fil d’antenne -
25. Le commutateur On/Off situé à l’arrière
du produit est le dispositif de sectionnement
de l’alimentation. Il permet de déconnecter
l’électronique du secteur. Il doit toujours rester
accessible pour l’utilisateur.
26. ATTENTION : Danger d’explosion si la pile
n’est pas remplacée correctement. Ne remplac-
er que par le même type ou un type équivalent.
READ FIRST !
IMPORTANT SAFETY INSTRUCTIONS !
GB
The lightning flash with arrowhead symbol
within an equilateral triangle, is intended
to alert the user to the presence of uninsu-
lated “dangerous voltage” within the prod-
uct’s enclosure that may be of sufficient
magnitude to constitute a risk of electric shock
to persons.
Caution : to prevent the risk of electric shock, do
not remove cover (or back). No user-serviceable
parts inside. Refer servicing to qualified service
personnel.
The exclamation point within an equilateral tri-
angle is intended to alert the user to the pres-
ence of important operating and maintenance
(servicing) instructions in the literature accom-
panying the product.
1. Read these instructions.
2. Keep these instructions.
3. Take these warnings into consideration.
4. Follow all the instructions.
5. Do not use this equipment around water.
6. Only clean with a dry cloth.
7. Do not cover ventilation outlets. Follow
manufacturer’s instructions when installing the
equipment.
8. Do not install the equipment near a source
of heat, a cooker, a heating duct or other
equipment (including amplifiers) which gives
off heat.
9. Respect safety instructions for power cable.
The power cable has two prongs, one of which is
larger than the other. A grounded cable has two
prongs as well as a third which is the grounding
prong. The largest or third prong is there for
your safety. If the power cable doesn’t fit your
power socket, seek the advice of an electrician
and replace the old power socket.
10. Make sure the cable cannot be stepped on,
crushed or pinched. Extreme care must be paid
to the plug and the connection of the cable to
the equipment.
11. Only use accessories recommended by the
manufacturer.
12. Only use handling equipment, legs, tripods,
supports or tables recommended by the
manufacturer or those sold with the equipment.
When using a cart, take extra care when moving
the cart and equipment to avoid injury in case
something falls.
13. Disconnect the equipment in case of a
thunderstorm or if left unused for extended
periods of time.
14. All maintenance must be carried out by a
qualified professional. Maintenance is required
following any damage caused to the equipment
such as deterioration of the power cable or plug,
spillage of liquid or insertion of objects inside
the equipment, exposure to rain or humidity,
poor functioning or physical damage.
15. Do not use any accessories which aren’t
recommended by the manufacturer to avoid any
risk.
16. This product should only be connected to
the type of power supply as indicated on the
label on the equipment. In case of uncertainty
as to the type of power supply of your electrical
installation, consult the manufacturer of
the product or your electricity provider. For
equipment requiring a battery or another power
source, consult the user manual.
17. Do not overload power sockets, extension
cables or power strips. This could lead to fire or
electric shock.
18. Never insert objects in the ventilation outlets
of the equipment. The object may come in con-
tact with components exposed to high voltages
or cause short-circuiting and lead to fire or elec-
tric shock. Never spill liquid on the equipment.
19. Never try to repair this equipment yourself;
opening the equipment may expose you to high
voltages or other risks. For all maintenance,
consult a qualified professional.
20. In case a replacement part is required, make
sure the maintenance technician uses parts
specified by the manufacturer or which have
identical specifications to the original part. Non-
compliant parts may lead to fire or have other
risks.
21. Following any intervention or repair to the
equipment, ask the technician to carry out tests
to verify the product works safely.
22. The equipment must not be mounted to the
wall or ceiling unless the manufacturer has
intended it to, and only depending on antenna
cables.
23. The ON/OFF switch situated at the back of
the product is the power supply cut-off device.
The equipment must always be accessible to the
user.
24. Do not expose to dripping water or splashing.
25. CAUTION : May cause an explosion if battery
is incorrectly replaced. Replace only with the
same or equivalent type.
LÉASE PRIMERO.
IMPORTANTES INSTRUCCIONES DE SEGURIDAD
ES
El símbolo del relámpago con punta de flecha,
dentro de un triángulo equilátero, alerta
al usuario de la presencia de una «tensión
peligrosa» sin aislar en el interior del producto,
que puede ser de la suficiente magnitud como
para constituir un riesgo de descarga eléctrica
para las personas.
PRECAUCIÓN: Para reducir el riesgo de
descarga eléctrica, no retire la tapa (ni la
cubierta posterior). En el interior no hay piezas
utilizables por el usuario. Cualquier reparación
deberá ser realizada por personal técnico
cualificado.
El signo de exclamación dentro de un
triángulo equilátero alerta al usuario de la
existencia de importantes instrucciones sobre
funcionamiento y mantenimiento (asistencia) en
la documentación que acompaña al equipo.
1. Lea las instrucciones.
2. Guarde las instrucciones.
3. Observe todas las advertencias.
4. Siga todas las instrucciones.
5. No utilice este equipo cerca del agua.
6. Limpie el equipo únicamente con un paño
seco.
7. No bloquee las aberturas de ventilación.
Realice la instalación de acuerdo con las
instrucciones del fabricante.
8. No instale el equipo cerca de ninguna fuente
de calor, tales como radiadores, estufas u
otros aparatos que generen calor, incluidos los
amplificadores.
9. No anule la función de seguridad del conector
polarizado o con toma de tierra. El conector
polarizado tiene dos patillas, una más ancha
que la otra. El conector con toma de tierra
tiene dos patillas y una tercera de conexión a
tierra. La lámina ancha o tercera patilla son una
medida de seguridad. Si no encaja en la base,
consulte a un electricista la sustitución de la
toma obsoleta.
10. El cable de alimentación debe protegerse
para que no resulte aplastado o pellizcado,
especialmente en los conectores, bases
múltiples y punto de salida del equipo.
11. Utilice exclusivamente los accesorios
indicados por el fabricante.
12. Instale el producto únicamente en el
carro, estante, trípode, soporte o mueble
que recomiende el fabricante o acompañe al
producto. Si utiliza un soporte con ruedas,
extreme las precauciones cuando traslade el
conjunto para evitar daños en caso de vuelco.
13. Desconecte el equipo durante las tormentas
eléctricas y cuando no se vaya a utilizar durante
un periodo prolongado.
14. Las tareas de servicio técnico deberán ser
realizadas por personal cualificado. Dicha
asistencia será precisa cuando la unidad haya
resultado dañada de alguna forma, como por
ejemplo: cable o conector de alimentación
dañados, entrada de líquido o cuerpo extraño
en la unidad, exposición a la lluvia o humedad,
funcionamiento anómalo o caída del equipo.
15. Para evitar posibles riesgos, no utilice
accesorios que no hayan sido recomendados
por el fabricante.
16. Este producto deberá alimentarse
únicamente con el suministro indicado en
el etiquetado. Si no está seguro del tipo de
suministro de su hogar, consulte al distribuidor
del equipo o a su compañía eléctrica. En el caso
de los productos concebidos para funcionar con
pilas u otras fuentes de alimentación, consulte
las instrucciones de uso.
17. Si se conecta una antena exterior o sistema
de cable al equipo, compruebe que disponen de
puesta a tierra como protección contra subidas
de tensión y cargas estáticas acumuladas. El
Artículo 810 del National Electrical Code, ANSI/
NFPA 70, ofrece información sobre la correcta
conexión a tierra del poste y la estructura de
soporte, la conexión a tierra del cable de entrada
a una unidad de descarga de antena, el tamaño
de los conductores de tierra, la situación de la
unidad de descarga de antena, la conexión a los
electrodos de toma de tierra, y los requisitos del
electrodo de toma de tierra.
18. Un sistema de antena exterior no deberá
instalarse en la proximidad de tendidos
eléctricos aéreos ni de otros circuitos de
iluminación o corriente, ni en lugares en los que
pueda interferir con dichas líneas de tensión o
circuitos. Cuando instale un sistema de antena
exterior, extreme las precauciones para evitar el
contacto con las líneas o circuitos eléctricos, ya
que podría tener consecuencias fatales.a
19. No sobrecargue las tomas murales, cables
alargadores o bases múltiples, y así evitará
posibles riesgos de incendio o descarga
eléctrica.
20. No introduzca objetos de ninguna clase en el
equipo a través de sus aberturas, ya que podrían
hacer contacto con puntos de tensión peligrosos
o cortocircuitar piezas, con el consiguiente
riesgo de incendio o descarga eléctrica.
No permita que se derrame ninguna clase de
líquido sobre el equipo.
21. No intente realizar tareas de asistencia
técnica por su cuenta, toda vez que la apertura o
retirada de las cubiertas podría entrañar riesgos
de exposición a tensiones peligrosas o de otra
naturaleza.
Cualquier tarea de servicio técnico deberá ser
realizada por personal cualificado.
22. En caso de que se necesiten piezas de
repuesto, asegúrese de que el técnico de servicio
utiliza recambios especificados por el fabricante
o de las mismas características que la pieza
original. Los recambios sin autorización pueden
ocasionar riesgos de incendio o descarga
eléctrica, entre otros.
23. Tras completar cualquier tarea de servicio o
reparación en este producto, solicite al técnico
que efectúe las comprobaciones de seguridad
necesarias para determinar que el producto se
encuentra en perfecto estado de funcionamiento.
24. El producto se montará en pared o techo
únicamente siguiendo las recomendaciones del
fabricante.
请先阅读!
重要安全说明!
CN
三角形内闪电箭头符号是为了警示用户产
品外壳中存有未绝缘“危险电压”;这种
电压强度较大,会构成对人体触电危险。
注意:为防止发生触电危险,请不要拆除
盖体或后壳。本产品中不含有由用户自行
维护的部件 , 需要时请联络合格之维
修人员。
三角形感叹符号是为了提示用户注意随
产品资料中包含操作和维护(服务) 说
明书。
1. 阅读这些重要说明;
2. 保存这些重要说明;
3. 注意所有警告内容;
4. 遵守这些说明的要求;
5. 切莫在靠近水的地方使用本设备;
6. 请使用干燥的布清洁;
7. 请不要堵塞任何通风孔。请按照生产商
提供的指南进行安装;
8.切匆将本产品安装在靠近任何有热源的地
方,譬如:散热器、换热器、火炉或其它
可能产生热量的装置(包括放大器);
9.不要忽视定位插头或接地型插头的安全
作用。定位插头有两个插脚,一个宽一个
窄;接地型插头有两个插脚和一条中线插
脚。较宽插脚或第三条中线插脚具有安全
保护功能。若所提供的插头不适合于您的
插座,请咨询电工更换掉过时的插座;
10.请妥善保护好电源线,以免被践踏或挤
压,尤其是插头处、预留空间方便插座处
以引出设备;
11.仅可使用本产品生产商指定的配件或附
件;
12.仅可使用本产品生产商指定的、或与本
产品一同出售的运货手推车、底座、三脚
架、支架或桌子。若使用货运小推车时,
在推动过程中务必小心,防止发生倾翻造
成的伤害;
1 3.在雷雨天气或当本产品长时间不使用
时,请拔下本产品的插头;
1 4.所有维修事宜,请向有资格的维修人
员进行咨询。若本产吕出现以下损坏情形
的,必须给予维修,即:电源线或插头损
破、液体溢出或有物件落入本产品内、本
产品被暴露在雨水或潮湿的环境中、不能
正常使用、或本产品被跌落;
15.警告: 不要将本产品暴露于滴落物或泼洒
物中,确保本产品上面不要放置任何装满
液体,譬如花瓶等的物件;
16.若要将本产品完全断开交流电源,必须
将电源线插头从交流插座上取下;
17.电源供应线上的插头应保持运作;
18.不要暴露本产品在滴水或溅水之处。
ご使用前に以下の安全上重要な注意事項
を必ずお読みください。
J
正三角形に電光と矢印がある記号は、製品
ケース内に絶縁されていない「高圧電流」が
流れ、感電の危険があることを警告するもの
です。
<注意>感電事故の防止のため、本装置の
カバー(または背面カバー)は絶対に開けな
いでください。お客様ご自身による部品交換
は一切できません。保守点検または修理など
は、専門業者までお問い合わせください
正三角形に感嘆符のある記号は、本装置の取扱
説明書に記載されている操作と保守の重要な指
示への注意を喚起するものです
1.ご使用前に必ずこの取扱説明書をお読みく
ださい。;
2.取扱説明書はいつでも見られるところに保
管してください。
3.すべての警告をお守りください。
4.取扱説明書のすべての指示に従ってくださ
い。
5.本機を水気の近くで使用しないでください。
6.普段のお手入れは、乾拭きだけにしてくだ
さい。
7.通風孔を絶対にふさがないでください。本
体の設置は、製造者の指示に従ってくださ
い。
8.ラジエーター、ヒート・レジスター、スト
ーブ、またはその他の熱発生源(アンプを
含む)の近くに本装置を設置しないでくださ
い。
9.AC電源コードの安全性に関する指示に従っ
てください。電源コードのプラグにはブレー
ドが2つあり、片方は他方より幅広いです。
アースプラグ付コードは、2つのブレードと
1つのアース・ブレードがあります。一番幅
広いブレードまたはアース・ブレードは安全
を保障するためにあります。提供された電源
コードがコンセントに合わない場合に、 その
コンセントを交換する際は、電気技術者に相
談してください。
10.電源コードの上を歩いたり、または電源コ
ードが押しつぶされたり、挟まれたりされな
いようにお気を付けください。 特に、電源プ
ラグや電源コードと機械の接続部分の損傷に
ご注意ください。
11.メーカーが指定する付属品だけをご使用く
ださい。
12.本機と一緒に販売されている、またはメー
カーが指定する荷役機械、スタンド、三脚、
ブラケット(土台)、テーブルのみを使用し
てください。
商品をカートで移動する場合、カートが転倒
した際に損傷を受けないよう十分ご注意くだ
さい。
13.雷が鳴り始めたり、本装置を長時間使用し
ない場合は電源プラグを抜いてください
14.すべて保守作業は、資格を有する専門家
によって行う必要があります。コードやプラ
グの劣化、液体浸入、異物侵入、雨や湿気へ
の暴露、誤動作や機械の転倒など、本機に損
傷が起きた場合は、保守点検が必要とされま
す。
15.危険を避けるために、メーカーにより推
奨されていない付属品は使用しないでくださ
い。
16.本製品は、ラベルに記載されている種類の
電源タイプのみをご使用ください。もし使用
できる電源タイプが定かではない場合は、ご
購入先もしくはお近くの電力会社にご相談く
ださい。バッテリまたは別の電源を必要とす
る機械については、取扱説明書をご参照くだ
さい。
17.屋外アンテナまたはケーブルシステムが本
機に接続されている場合は、サージ電流や静
電気の影響に対する安全を確保するために、
アンテナまたはケーブルが接地されているこ
とを確認してください。マストの適切な接地
方法、放電ユニットとアンテナ線の接続方
法、導体セクション、放電システムの位置、
接続、接地電極の仕様についての情報は Na-
tional Electrique, ANSI / NFPA 70規格の第810
条に含まれています 。
18.屋外アンテナは、高圧線、電気回路や高強
度の照明回路 またはこのような高圧線や電気
回路に近づく可能性がある場所からは常に遠
ざけてください。これらの回路が致命的な危
険をもたらす可能性があるため、屋外アンテ
ナを設置する際には上記の回路との接触を
けるよう特別な注意が必要です。
19.コンセント、延長コード、マルチタップに
過負荷をかけないでください。火災や感電の原
因になる場合があります
20.本製品の換気口から異物を絶対に入れない
でください。
高電圧にさらされた電気部品に接触、またはシ
ョートの可能性もあり、その結果、火災や感電
の原因となります。機械に液体をこぼさないで
ください。
21.自分で本機を修理することはおやめくださ
い。 カバーを開けたり取り外したりすると、
高電圧やその他の危険にさらされることになり
ます。保守点検については、専門技術者にお問
い合わせください
22.部品交換が必要な場合、製造者が指定する
部品、もしくは元の部品と同じ特性を持つ部品
を保守技術者が使用している事を確認してくだ
さい。
指定以外の交換部品を使用すると、火災、感
電、その他の危害が発生することがあります
23.本機の技術介入や修理の後、製品が安全に
動作することを確認するためのテストを実施す
るように保守技術者に依頼してください。
24.本機は、例えアンテナケーブルの状況が良
好でも、メーカーが指定しないかぎり、壁また
は天井に取り付けられません。
25。サブウーファーの背面に位置するオン/オ
フスイッチは、電源遮断装置です。この装置
は、電気配線の接続から電子機器を断線するこ
とができます。
ユーザーは常にこの装置にアクセス可能でなけ
ればなりません。
26.本機を水の滴りや水しぶきなどにさらさな
いでください。
27.<警告>:不適切な電池交換を行うと爆発
の恐れがあります。 同じタイプまたは同等タ
イプの電池と交換してください。
주의깊게 읽어주십시오!
안전 수칙은 매우 중요합니다!
주의깊게 읽어주십시오!
안전 수칙은 매우 중요합니다!
정삼각형 안에 표시된 화살표는 기기 내에
험전압으로 사용 전기 감전의 위험이 발생
수도 있다는 것을 소비자에게 알리기 위한
표시입니다. 。
조심: 모든 전기 감전의 위험을 예방하기 위해,
기기의 커버(또는 뒷부분)를 걷지 마실 것을
장합니다. 기기의 어떤 부품도 소비자에 의해
대체되어서는 안됩니다. 기기의 점검과 수선은
기술자에게 의뢰하십시오.
정삼각형 안에 표시된 느낌표는 사용설명서와
기기의 사용, 유지 상에서 반드시 주의해야 할,
주요 항목들이 존재함을 소비자에게 알리기
한 표시입니다.
1. 다음의 안전수칙을 읽어주십시오.
2.안전수칙을 잘 보관해 주십시오.
3.설명서에 표시된 주의사항들을 염두에 두
십시오.
4.모든 수칙을 따라주십시오.
5.이 기기를 물이 있는 곳에서 사용하지 마십
시오.。
6.건조한 천으로만 닦아주십시오.
7.통풍기의 어떤 부분도 막히지 않게 주의하십
시오. 제조자의 설명서에 따라 기기를 설치하
십시오.
8.래디에이터, 개스 래인지, 난방기구 출구
는 열기를 포함하는 모든 기기들(앰프 포함)
처에 이 기기를 설치하지 마십시오.
9. 전선에 관한 안전수칙을 잘 따르십시오.
전선은 두 중 하나가 넓은 두개의 접지단
자를 포함합니다. 지면 용 전선은 개의 접지
단자와 지면 접속을 위한 세번째 접지단자를
함합니다. 가장 넓은 접지단자와 세번째 접지단
자는 사용자의 안전 보장용입니다. 만약 전선이
귀하의 전기 콘센트에 적합치 않으면, 전기
술자에게 의뢰하든 지 아니면 낡은 전기 콘센트
를 교체하십시오.
10.전선이 밟히지 않고, 찌그러지거나, 손상되
지 않게 조심하십시오.
제품에 코드와 전선의 접속 보다 세심한
의가 필요합니다.
11.제조자가 권장하는 부품 만 사용하십시오.
12. 스탠드, 삼발이, 써포트 등과 같은 취급
비는 제조자가 권장하거나, 기기와 함께 판매된
부품들 만을 사용하십시오.
카트를 사용할 경우, 카트의 운반물/기기 가 넘
어가 발생할 수 있는 사고를 예방하기 위해,
히 조심하십시오.
13.천둥번개가 치거나, 오랜 기간 동안 기기를
사용하지 않을 경우, 기기의 콘센트를 빼십시
오.
14.모든 기기의 점검은 기술자에 의해 이뤄져
야 합니다. 다음과 같은 경우, 기기의 점검은
필요합니다. 전선 또는 코드의 파손, 액체와의
접촉, 기기 내부의 사물 첨가, 비 또는 습기에
출된 경우, 기기의 원활하지 않은 작동, 기기가
바닥에 떨어졌을 경우.
15.모든 위험을 예방하기 위해 제품 제조업자
들이 권장하지 않는 부품은 사용하지 마십시오.
16.이 제품은 반드시 제품에 부착된 라벨에 표
시된 전원장치에만 연결되어야 합니다. 전원장
치에 대한 의문이 생길 경우, 판매자나 귀하의
전기 공급자에게 문의하십시오. 배터리 또는
다른 전원의 사용이 예정된 제품의 경우, 사용
설명서를 참조하십시오.
17.외부 안테나 또는 전선 망이 귀하의 기기에
접속되었을 경우, 전기의 과전과 정전기 효과
대항 보호 조치를 위해 접속 안테나와 전선이
접지되었는 지를 확인하십시오. 접지 방식,
테나 방전 단위 접속, 전도체 단면도, 방전
스템 위치, 접속, 접지 전류의 특성 등의 관련
보는 국내 전기 규격 ANSI/ NFPA 70
제 810 항에 의거합니다.
18.외부 안테나는 항상 고압선, 전기회로, 강력
조명과 적정 거리에 설치되어야 합니다. 또,
안테나가 고압선 또는 전기 회로에 떨어지지
장소 등을 고려하여 설치되어야 합니다.
부 안테나의 설치 시, 위의 열거된 모든 전선 회
로 등과의 접촉을 피하도록 특별히 조심해야
는 이유는 사망의 위험이 있기 때문입니다.
19.벽면의 플러그, 전기 연장선 또는 멀티 플러
등을 과적하지 마십시오. 화재 또는 전기
크의 원인이 될 수 있습니다.
20.제품의 통풍기 통로에 어떤 물체도 삽입하
지 마십시오.
삽입된 물체가 기기 내의 고압 부품과의 접촉
또는 전기 합선을 일으켜 화재 또는 감전의
험이 생길 있습니다. 제품 위에 액체를
지 마십시오.
21.스스로 제품수리를 하지 마십시오: 기기의
개방으로 귀하께서는 전압 감전 또는 다른 위험
에 처할 수 있습니다.
모든 제품 점검 시에는 전문가에게 의뢰하십시
오.
22.기기의 부품 교체가 필요한 경우, 정비
술자가 제조자가 설정한 부품 또는 원래 부품
동일한 특성을 지닌 부품을 사용하는 지를
확인하십시오. 규범에 어긋나는 부품의 사용은
화재, 전기 쇼크 또는 기타의 위험을 발생시킬
수 있습니다.
23.기기 관련한 모든 수선 또는 정비의 경우,
기기가 안전상태에서 제대로 작동하는지를
인하기 위해 점검 기술자에게 테스트를 의뢰하
십시오.
24. 기기는 제조자가 미리 예정한 경우에만
또는 천장에 조립될 수 있습니다. 이 경우, 오직
안테나 용 선에 의해서.
25。On/Off 스위치는 배전 절단기인 서브우퍼
뒷편에 위치합니다. 전원 장치의 전원 차단
을 가능하게 합니다. 스위치는 항상 사용자에게
접근가능하여야 합니다.
26.물이 떨어지는 곳이나 튀는 곳에 두지 마십
시오.
27.<경고>:건전지가 제대로 교체되지 않은
경우 폭발의 위험이 있습니다. 교체 같은
류, 또는 동일한 건전지만 사용하십시오.
KR
8
TRIO6 BE
Beryllium
The Trio6 Be use a tweeter equipped with a Beryllium dome, allowing a frequency range extending beyond 40kHz. In its solid
form, Beryllium is harmless. However, due to its nature, certain special precautions should be observed to avoid exposure to
unnecessary risk:
Under no circumstances should the Beryllium dome be subjected to any form of abrasive action. To ensure no accidental
damage to the tweeter dome it is advised to carefully replace the protection covers while not in use.
In the unlikely case of damage to the dome, of any form, a wide piece of adhesive tape should be immediately used to seal
the whole front surface of the tweeter. The protective cover should then be replaced and also taped securely in place. You
should then inform the dealer from whom you purchased the product so that the tweeter can be removed by a professional
and returned to the product distributor for replacement.
If the dome is broken in any way giving rise to loose particles of Beryllium, these should be carefully collected with the use
of an adhesive tape and sealed in a zip-top bag to be returned with the tweeter.
For further information, please contact Focal-JMlab directly: [email protected]om
Les Trio6 Be utilisent un tweeter à dôme inversé en Béryllium pur, capable d’étendre la bande passante à plus de
40 kHz. Sous sa forme solide, ce matériau est inoffensif. Toutefois, de par sa nature, certaines précautions doivent être
appliquées pour ne pas s’exposer à des risques inutiles :
• Le dôme Béryllium ne doit jamais être au contact d’une matière abrasive.
• Si le dôme Béryllium est endommagé sous quelque forme que ce soit, le recouvrir dès que possible sur toute sa surface de
la bande adhésive de protection fournie. Vous la trouverez dans le sachet plastique contenant la notice dédiée au tweeter à
dôme inversé en Béryllium pur. Prendre contact avec le revendeur afin de démonter et de remplacer le tweeter auprès d’un
service compétent chez le distributeur.
• Si le dôme est brisé, les particules éventuelles de Béryllium doivent être récupérées avec soin au moyen d’un ruban adhésif
puis être placées dans un sac plastique hermétiquement clos renvoyé en même temps que l’enceinte au revendeur.
Pour plus d’informations, veuillez nous contacter directement à l’adresse suivante : beryllium@focal.com
El Trio6 puede utilizar un altavoz de agudos equipado con una cúpula de berilio, permitiendo un rango de frecuencias que
se extiende más allá de 40 kHz. En su forma sólida, berilio es inofensivo. Sin embargo, debido a su naturaleza, se deben
observar ciertas precauciones especiales para evitar la exposición a riesgos innecesarios:
• Por ningún motivo la cúpula berilio ser sometido a ninguna forma de acción abrasiva. Para asegurar que ningún daño
accidental a la cúpula del tweeter se aconseja sustituir cuidadosamente las tapas de protección mientras no esté en uso.
• En el caso poco probable de daños a la cúpula, de cualquier forma, una amplia trozo de cinta adhesiva debe utilizarse
inmediatamente para sellar toda la superficie frontal del altavoz de agudos. La cubierta protectora debe entonces ser
reemplazado y también grabó firmemente en su lugar. A continuación, debe informar al distribuidor donde adquirió el
producto para que el tweeter puede ser removido por un profesional y devuelto al distribuidor de productos para el reemplazo.
• Si el domo se rompe de alguna manera dando lugar a partículas sueltas de berilio, éstos se deben recoger con cuidado con
el uso de una cinta adhesiva y se sellan en una bolsa zip-top que ser devuelto con el tweeter.
Para más información, póngase en contacto focal-JMlab directamente: [email protected]om
Trio6 Be 采用配有铍球顶的高音单元,频率范围可达40千赫兹以上。固体铍无害,然而由于其性质,应遵守某些特定的预防
措施以避免暴露,造成不必要的风险:
在任何情况下,铍球顶都不要受到任何形式的磨蚀作用。为了确保不对高音单元球顶造成意外损坏,建议在不使用时小
心更换保护罩。
无论球顶发生任何形式的损坏,请务必立即用宽胶带封住高音单元的整个表面。保持胶带密封良好的情况下,通知产品
经销商并由专业人员拆下高音单元,退回分销商对防护罩进行更换。
如果球顶出现任何损坏,造成铍颗粒脱落,应用胶带小心收集并装在顶部有拉链的袋中密封,随高音单元一起退回。
如需进一步的信息,请直接联系 Focal-JMlab[email protected]om
GB
F
CN
ES
9
TRIO6 BE
Beryllium
TRIO6 Be は、40kHzを超える周波数範囲を可能にする、ベリリウムドーム・ツイーターを使用しています。固体の状態で
はベリリウムは健康に害を与えませんが、性質による不要なリスクを避けるために特別な注意が必要です。
󰙏 いかなる状況においても、ベリリウムドームに研磨作用を起こす刺激を与えないでください。ツイータードームを偶発
的損傷から保護するため、使用しないときはカバーを取り付けてください。
󰙏 いかなる場合であれドームに損傷が加わった際は、直ちにツイーターの全前面を幅広タイプの粘着テープで密封してく
ださい。次に、保護カバーを取り付けて、所定位置にしっかりとテープで固定してください。ツイーターを専門業者が引
き取り代理店に送って交換するためには、製品を購入した販売店に通知する必要があります。
󰙏 ドームの損傷でベリリウムの粉じんが散乱した場合、これらを慎重に粘着テープで収集してください。その後、チャッ
ク付きポリ袋に入れ密封し、ツイーターと共に送り返してください。
詳細についてはFocal-JMlabまで直接お問い合わせください:[email protected]om
TRIO6 Be 은 주파수 범위를 40kHz이상 확장할 수 있도록 해주는 Beryllium dome tweeter가 장착되어있습니다. Beryllium
은 무해합니다. 그러나, 본연의 성질 때문에 불필요한 위험에 노출되는 것을 막기 위해 사전에 몇 가지 사항에 대한 주의가
요구됩니다.
*어떠한 경우에도 Beryllium dome이 연마작용을 받아서는 안됩니다. Tweeter dome이 파손되는 것을 막기 위해서는
사용하지 않을시 보호 커버를 씌워두어야 합니다.
*Dome이 파손되었을 시에는 즉시 넓은 접착테이프로 Tweeter의 앞면 전체를 봉해야만 합니다.
그리고 보호커버를 씌워 안전한 곳에 두어야 합니다. 그런 다음 제품을 구매한 딜러에게 연락하여 전문가에 의해 Tweeter
제거될 있도록 그들을 통해 반송, 교체될 있도록 해야만 합니다. 만약 Dome이 깨져 Beryllium의 입자들이
흩어졌다면 주의깊게 접착테이프로 입자들을 모은 후 zip Bag에 넣은 후 Tweeter와 함께 반송하여야 합니다.
더 많은 정보를 원하시면, Focal-JMlab로 직접 연락 주시길 바랍니다. : [email protected]om
J
KR
10
Nous vous remercions d’avoir choisi les enceintes Focal et de partager avec nous notre philosophie "Listen Beyond". Ces
enceintes de haute technicité intègrent les ultimes perfectionnements Focal en matière de conception de haut-parleurs à
destination des studios et des professionnels de l’audio. Afin d’exploiter toutes leurs performances, nous vous conseillons de
lire les instructions de ce livret puis de le conserver avec précaution pour vous y référer ultérieurement.
F
Thank you for choosing Focal loudspeakers. We are pleased to share with you our philosophy : Listen Beyond”. These
high-tech loudspeakers benefit from the last Focal improvements in terms of speaker drivers design for studios and audio
professionals. In order to enjoy the maximum of their performance, we advise you to read this user’s manual and to keep it
carefully so that you can consult it later.
GB
ES
Gracias por elegir sistemas de altavoces de Focal. Nos complace compartir con usted nuestra filosofía: "Listen Beyond". Estos
altavoces de alta tecnología se benefician de los desarrollos más recientes de Focal en diseño de transductores para estudios
y profesionales del audio. Con el objetivo de que disfrute al máximo de las prestaciones de los equipos le recomendamos lea
este manual detenodamente y conserve el mismo para futuras consultas.
CN
祝贺和感谢您购买法国 TRIO6 Be 扬声器。我们很高兴能与您分享我们的理念:「Listen Beyond」。
这些高科技扬声器,受益于 Focal 最近为专业工作室和音频专业用户在扬声器单元设计上的改进。为了能享受产品的最佳表
现,我们建议您阅读本用户手册,并妥善保存以便您随时参考。
この度はフォーカルスピーカーをお買い上げいただき有り難うございます"Listen Beyond”(サウンドの精神)と
いう私たちの哲学を共有していただけたことに感謝申し上げます
最高のパフォーマンスで楽しんでいただくために同梱のユーザーマニュアルを良くお読みください また後々参照
していただけるようにマニュアルを大切に保管されることをおすすめいたします
J
Focal 스피커를 구입해주셔서 감사합니다. 우리의 철학인 “Listen Beyond”를 공유하게 되어서 기쁘게 생각합니다.
본 제품은 뛰어난 성능과 디자인 면에서 Focal의 최신 기술을 사용해 개발했습니다. 본 제품을 최대한 즐길 수 있게, 설명
서를 읽어주시고 후에 참조할 수 있도록 보관해 주십시오.
KR
TRIO6 BE
Introduction
TRIO6 BE
User manual
English
Conditions of guarantee
All Focal loudspeakers are covered by guarantee drawn up by the official Focal distributor in your country. Your distributor
can provide all details concerning the conditions of guarantee. Guarantee cover extends at least to that granted by the legal
guarantee in force in the country where the original purchase invoice was issued.
Package contents
Each monitor is provided with the following items (besides this manual):
1 power cable
• 4 rubber feet
• 1 N° 4 Allen key
• 1 warranty card
• 2 protective grilles
Check none of these items are missing, and remove all the accessories from the box. To avoid damaging your product when
removing it from the packaging, proceed as follows: open the flaps of the box fully, folding them over to the side. Then, remove
the polystyrene protection. Carefully lift the monitor out of the box. Inspect the packaging for any possible damage. If there are
signs of damage, contact the carrier and the supplier. It is important to conserve the packaging for possible future use.
Recommandations
We insist on emphasising that your equipment can generate high sound pressure levels, especially in a 5.1 configuration. As
the distortion levels remain low and the auditory fatigue incurred on the user is minimal, it is not always easy to realise how
high the sound pressure level actually is. Remember that exposure to high volumes over a sustained period of time may lead
to permanent hearing loss.
Register your product online at www.focal.com/warranty and get your warranty certificate.
12
Quick set-up guide:
1. First of all, check that the monitors and all audio sources (mixing console...) are turned off and that all settings at the rear
panel of the monitor are set to 0.
2. Connect the audio signal from the source to the monitors using the XLR input.
3. Check that the correct voltage is selected according to the mains power voltage chosen using the voltage selector, check
the fuse and replace if necessary. The amperage of the fuse depends on the operating voltage (see fuse characteristics in
specifications table). The monitor speakers absolutely must be grounded using the power cable provided. See page 18 for
more information.
4. Turn on the audio source and check that the output level of the audio source connected to the monitor is set to -∞ or to a
very low level.
5. Turn on the power to your monitors. The monitors are now in “Standby” mode.
6. Turn up the output level of the audio source until a signal is detected by the monitors in order for them to turn on automatically.
After turning on the power to the monitors, and once the automatic Standby mode has been activated (see page 18
for more information on this mode), the audio signal detection circuit within the monitor will automatically switch
from “Standby” to “On” after a few seconds.
7. Once you have finished recording, mixing or mastering, we recommend turning off your equipment in the following order:
a. Turn off the monitors
b. Turn off the audio sources
TRIO6 Be
TRIO6 Be is a professional near-field monitor with 2 monitor speakers within the same cabinet. TRIO6 Be is composed of
an 8-inch subwoofer with a “W” composite sandwich cone, a 5-inch woofer with “W” composite sandwich cone and a 1-inch
pure Beryllium inverted dome tweeter.
In 3-way mode, the monitor has a frequency response of 35Hz to 40kHz (+/- 3dB) and 40Hz to 20kHz (+/- 1dB). In 2-way mode,
only the 5-inch woofer and the tweeter are activated. The 2-way monitor speaker has a frequency response of 90Hz to 20kHz
(+/- 3 dB) and is very efficient for checking the transfer quality of mixes carried out using systems with a limited bass range
frequency response. These modes are controlled using a footswitch (see page 17).
The TRIO6 Be monitor speaker is equipped with 3 internal amplifiers:
1 x 200W powering the 8-inch subwoofer
1 x 150W powering the 5-inch woofer
1x 100W powering the 1-inch tweeter
A
TRIO6 BE
User manual
13
Installation
Mains power
Your products absolutely must be grounded using the power cable.
Positioning
TRIO 6 Be monitors are near-field professional monitoring loudspeakers which require positioning facing the listener at a
distance between 1 and 3 meters (3 to 10 feet) They can perfectly be positioned on a mixing console or they can be mounted
to appropriate stands. Whichever position you choose, it is highly recommended that the tweeter be at about the same height
as the listener’s ears.
Positioning of the rubber feet
TRIO6 Be monitor speakers are supplied with 4 rubber feet so that the monitor can be detached from its support (mixing
console, stand...). We recommend positioning the rubber feet as to keep the distance between them as big as possible
according to the dimensions of the support (fig. B).
Orientation of the midrange/tweeter plate
The midrange/tweeter plate on the TRIO6 Be monitor speaker can be rotated 360°, 90° at a time. This allows the user to
optimise the set-up according to the room acoustics and installation constraints.
Procedure for rotating the midrange/tweeter plate
1) Keep the protective grille on the tweeter to keep it protected during this manoeuvre.
2) Remove the 4 screws using the n° 4 Allen key (fig. C).
3) Pull the plate 10 cm out whilst inclining it (fig. D).
4) Using the vents, rotate the plate to the desired position. Check that the retention pins are in line with the holes on the plate
to ensure the screws are perfectly in line with the holes on the plate (fig. E).
5) For a proper implementation of the horn, always observe the following 3 points:
5.1. Position the horn. Place and tighten by hand the 4 screws respecting the order shown on the opposite diagram.
5.2. Respecting the order in cross, tighten the screws again. Adjust the screwdriver on a low speed.
5.3. Still respecting the order in cross, tighten more. Adjust the screwdriver to a faster speed now. Then, make sure the
screws are tighten enough.
6) The monitor speaker is now ready to use.
TRIO6 BE
User manual
B
C D E F
14
Stereo position
We recommend positioning the monitors to form an equilateral triangle with the listening area. The listener being at one
corner and the left and right monitors at the other two corners (fig. G). The pure Beryllium inverted dome tweeter has one
major advantage: its very low directivity. When using the monitors at less than 1.5 m (5 ft) away, it is highly recommended to
widen the stereo image by increasing the distance between the two monitor speakers (the distance from tweeter to tweeter)
to between 1.8 m and 2 m (6 ft and 6.5 ft) so as to balance integration constraints and working precision.
If needed, point the tweeters outwards to increase the width of the stereo image.
Multichannel position
When using a 5.1 configuration, we recommend positioning the monitors
around the listener so that the monitors are equal distance away from
the listening position. Position the centre channel at 0°, the front right
channel at 30°, the back right channel at 110°, the back left channel at
250° and the front left channel at 330° (fig. H).
30°
110°
250°
330°
H
G
TRIO6 BE
User manual
15
Breaking-in
The transducers used in the TRIO6 Be monitors are complex mechanical elements which require a breaking-in period to
operate at their best and to become acclimatised to the temperature and humidity of the environment. The length of time this
takes can vary depending on the conditions, and can sometimes last several weeks. Avoid listening at high volume during the
first few hours of use. In order to shorten the breaking-in period, we advise you to let your equipment operate for about twenty
hours at medium volume with programmes having significant low-frequency content. Once the transducers’ characteristics
have totally stabilised, you will be able to enjoy the full performance of your Focal products.
Settings and connections
1 -INPUT
The XLR connector enables you to connect a source with a balanced signal and has a standard wiring layout:
Pin 1 = ground (cable shield)
Pin 2 = in-phase signal (aka hot)
Pin 3 = reverse-phase signal (aka cold)
2 - INPUT SENSITIVITY
This selector allows you to adjust the input sensitivity of the monitor speaker according to the source (mixing console, sound
card...). If the source transmits an audio signal via an unbalanced line, set the input sensitivity of the monitor speaker to -10
dBV. If the audio signal is transmitted via a balanced line, set the input sensitivity of the monitor speaker to +4dBu.
3 - LF SHELVING
The LF SHELVING potentiometer allows you to activate or deactivate the volume correction below 250Hz. We recommend
setting the LF SHELVING potentiometer to +2dB when the acoustics of the listening room naturally soften that frequency
range. We recommend setting the LF SHELVING potentiometer to 0 when the acoustics of the listening room are neutral. We
recommend setting the LF SHELVING potentiometer to -2dB when the monitors are placed near a wall or a corner.
4 - LMF EQ
This potentiometer allows you to adjust the level of the low-mid frequencies. The centre frequency is 160Hz and the Q factor
is 1. The corrections are made on a range of +/- 3dB. This correction is also useful if the monitor speaker is installed on top
of a mixing console. Activating this function will diminish the reflections generated by the mixing console.
5 - HF SHELVING
The HF SHELVING potentiometer allows you to activate or deactivate the volume correction above 4.5kHz. We recommend
setting the HF SHELVING potentiometer to +2dB when the acoustics of the listening room naturally soften this frequency
range (mat environment). We recommended setting the LF SHELVING potentiometer to 0 when the acoustics of the listening
room are neutral. We recommend setting the LF SHELVING potentiometer to -2dB or -3dB when the acoustics of the listening
room naturally increase this frequency range (clear environment).
TRIO6 BE
User manual
16
11
12
TRIO6 BE
User manual
17
FOCUS MODE
6 - INPUT
This input is for connecting the footswitch controller or for receiving the signal from the OUTPUT of the FOCUS mode of a
TRIO6 Be monitor.
7 - OUTPUT
This output is for connecting a TRIO6 Be monitor to another TRIO6 Be monitor.
Make sure you use an instrument-type cable with 2x 6.35 mm mono jacks to connect the footswitch to a TRIO6 Be, and to
connect two TRIO6 Be monitors.
TRIO6 BE
User manual
18
INPUT
EQ’S
FOCUS
8 - ON/OFF
The ON/OFF switch turns the internal amplifiers on or off.
Automatic Standby mode
TRIO6 Be monitors feature a “Standby” mode. When you turn on the power to the monitors, they are already in “Standby”
mode. To switch from “Standby” mode to “On”, send an audio signal to the monitor by gradually increasing the volume of the
audio source. After 15 minutes without an audio signal, the monitors automatically go into “Standby”. When the “Standby”
mode is activated, power consumption is inferior to 0.5W.
9 - VOLTAGE SELECTION
This slide switch allows you to select the voltage according to the mains power supply depending on the country you’re in.
There are two options: 115V or 230V. To change the voltage, proceed as follows:
1) Turn off the monitor and unplug the power cable
2) Using a flat-head screwdriver, remove the fuse situated below the power socket (11).
3) Replace the fuse with one having the appropriate values:
a. 115V: class T fuse, value 3.15A
b. 230V: class T fuse, value 1.6A
4) Using a Phillips screwdriver, slightly loosen the screws (12), and remove the protection cover from the voltage selector.
5) Switch the voltage selector (9) to the appropriate setting using a flat-head screwdriver.
6) Using a Phillips screwdriver, put the protection cover for the voltage selector back into place and slightly tighten the screws (12).
7) Reconnect the power cable (10).
8) Turn on the power to the monitor using the Power ON/OFF switch (8).
10 - POWER SOCKET
Connect the power supply cable supplied to this connector socket.
11 – FUSE HOUSING
This is where the fuse is located to protect the monitor. If necessary, replace the fuse as explained in section 9 - VOLTAGE
SELECTION.
TRIO6 Be FOCUS mode diagram.
TRIO6 BE
User manual
19
12 - SCREWS
Two screws protect access to the voltage selector (9).
13 – POWER LED (front panel)
There are three possible states for the POWER LED:
- Off: no power/monitor off
- Green: monitor on
- Red: the limiter is activated
14 – FOCUS LED (front panel)
There are three possible states for the FOCUS LED:
- Off: the monitor is in standby mode or in 3-way mode
- Green: the monitor is in FOCUS mode
- Red: the monitor’s heat protection is activated
State of the TRIO6 Be monitor
POWER
FOCUS
I
Colour State Solution
POWER LED Illuminated green Monitor ON -
Illuminated red The limiter is activated Reduce volume
FOCUS LED OFF The monitor is in 3-way
mode or standby mode OR
it is in standby in FOCUS
mode
Send an audio signal to turn on
OR
Press the footswitch to activate FOCUS mode
Illuminated green FOCUS mode activated Press the footswitch to activate 3-way mode
Illuminated red Heat protection Reduce volume
TRIO6 BE
User manual
20
Electronics
• Inputs Type /Impedance
Connectors
Sensitivity
Electronically balanced / 10 KOhms
XLR
Adjustable, +4dBu ou -10dBv
• Bass
• Midrange
• Treble
200W, class G
150W, class G
100W, class AB
• Power supply Mains voltage
Wiring
230V (class T fuse 1.6A fuse rating) - 115V (class T fuse
3.5 A fuse rating)
Detachable IEC power cable
• Indicators and controls Rear panel Input sensitivity selector (+4dBu/-10dBV)
Low frequency shelving (+/- 3dB from 35 to 250Hz)
High frequency shelving (+/- 3dB from 4.5 to 40kHz)
EQ low-mid frequencies (+/- 3dB at 160Hz, Q factor = 1)
FOCUS input / FOCUS output
• LED Focus mode on, audio clipping and protection indicated by LED on front panel
Transducers
• Subwoofer 8W64701
8-inch Focal driver with W composite sandwich cone
• Woofer 5W04701
5-inch Focal driver with W composite sandwich cone
• Tweeter TB872,
1-inch Focal pure Beryllium inverted dome tweeter
Cabinet
• Structure 22mm (0.86 in) reinforced panels
Dimensions including 4 rubber feet
(HxWxD)
20
1/2
" x 10
15/16
" x 14
3/16
" (520 x 278 x 360mm)
• Weight 44 lbs (20 kg)
Due to constant technological advances, Focal reserves its right to modify specifications without notice. Images may not conform exactly to specific product.
Performance
• Frequency response 3-way mode 35Hz - 40kHz (+/- 3dB)
2-way mode (Focus) 90Hz - 20kHz (+/- 3dB)
• Maximum SPL 3-way mode 115dB SPL (peak at 1m)
2-way mode (Focus) 105dB SPL (peak at 1m)
TRIO6 BE
User manual
  • Page 1 1
  • Page 2 2
  • Page 3 3
  • Page 4 4
  • Page 5 5
  • Page 6 6
  • Page 7 7
  • Page 8 8
  • Page 9 9
  • Page 10 10
  • Page 11 11
  • Page 12 12
  • Page 13 13
  • Page 14 14
  • Page 15 15
  • Page 16 16
  • Page 17 17
  • Page 18 18
  • Page 19 19
  • Page 20 20
  • Page 21 21
  • Page 22 22
  • Page 23 23
  • Page 24 24
  • Page 25 25
  • Page 26 26
  • Page 27 27
  • Page 28 28
  • Page 29 29
  • Page 30 30
  • Page 31 31
  • Page 32 32
  • Page 33 33
  • Page 34 34
  • Page 35 35
  • Page 36 36
  • Page 37 37
  • Page 38 38
  • Page 39 39
  • Page 40 40
  • Page 41 41
  • Page 42 42
  • Page 43 43
  • Page 44 44
  • Page 45 45
  • Page 46 46
  • Page 47 47
  • Page 48 48
  • Page 49 49
  • Page 50 50
  • Page 51 51
  • Page 52 52
  • Page 53 53
  • Page 54 54
  • Page 55 55
  • Page 56 56
  • Page 57 57
  • Page 58 58
  • Page 59 59
  • Page 60 60
  • Page 61 61
  • Page 62 62
  • Page 63 63
  • Page 64 64
  • Page 65 65
  • Page 66 66
  • Page 67 67
  • Page 68 68
  • Page 69 69
  • Page 70 70
  • Page 71 71
  • Page 72 72

Focal Trio6 Be ユーザーマニュアル

カテゴリー
車のスピーカー
タイプ
ユーザーマニュアル