Product Introduction
Aqara Single Switch Module T1 (With Neutral) is a relay control module based on
Zigbee 3.0 wireless communication protocol, which can control the on/off status of
the light, fan, and other devices. With the Aqara Hub, it can realize the remote
control through the app, timing control, power detection, power consumption
statistics, etc., and can match other smart devices to realize more smart scenes.
* This device requires a compatible Zigbee 3.0 hub.
* To work with HomeKit, a specific hub is required.
Visit www.aqara.com/support for more details.
* This product is for indoor use only.
Single Press:Turn on/off
Long Press for 8s:Reset/
Connect to Network
Triple Press:Effective Range Test
* When the external switch is connected,
please turn it on and off 5 times, and then it enters the networking status.
01
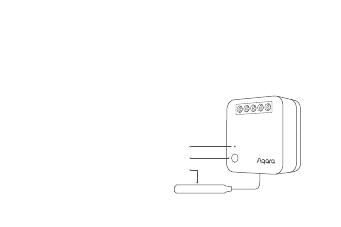
Indicator Light
Button
Antenna


 AVATTO KA25-0501000BS ユーザーマニュアル


