Nikon AF-S DX NIKKOR 16-80mm f/2.8-4E ED VR ユーザーマニュアル
- カテゴリー
- カメラレンズ
- タイプ
- ユーザーマニュアル

Français
Avant d’utiliser cet objectif, veuillez lire attentivement ces instructions et le
manuel de l’appareil photo.
Remarque: les objectifs DX sont destinés aux refl ex numériques de format
DX, comme le D7200 ou le D5500. L’angle de champ d’un objectif fi xé sur
un appareil photo de format DX est égal à environ 1,5 × celui d’un objectif
fi xé sur un appareil photo 24 × 36 mm.
Cet objectif n’est pas compatible avec les refl ex argentiques ou avec les
refl ex numériques de gamme D2, gamme D1, D200, D100, D90, D80,
gammeD70, D60, D50, gamme D40 ou D3000.
Pour votre sécurité
Pour votre sécurité
A
A
AVERTISSEMENTS
AVERTISSEMENTS
• Ne démontez pas ou ne modi ez pas le produit. En cas de dysfonctionnement,
ce produit ne doit être réparé que par un technicien qualifi é. Si ce produit
se casse suite à une chute ou à un autre accident, évitez de toucher
les parties exposées. Le non-respect de ces consignes de sécurité peut
provoquer un choc électrique ou d’autres blessures.
• En cas de dysfonctionnement, mettez immédiatement l’appareil photo hors tension.
En cas d’apparition de fumée ou d’une odeur inhabituelle provenant
du matériel, débranchez immédiatement l’adaptateur secteur et retirez
l’accumulateur de l’appareil photo, en faisant attention de ne pas vous
brûler. Continuer d’utiliser le matériel risque de provoquer un incendie ou
des blessures. Une fois l’accumulateur retiré, apportez votre matériel à un
centre Nikon agréé pour le faire contrôler.
• Gardez le produit au sec. N’exposez pas ce produit à l’eau ou ne le manipulez
pas avec les mains mouillées. Le non-respect de cette consigne de
sécurité peut provoquer un incendie ou un choc électrique.
• N’utilisez pas le matériel en présence de gaz in ammables. La manipulation du
matériel dans des stations-service ou en présence de propane, d’autres gaz
infl ammables ou de poussière peut provoquer une explosion ou un incendie.
• Ne regardez pas le soleil à travers l’objectif ou le viseur de l’appareil photo. L’observation
du soleil ou de toute autre source lumineuse puissante à travers l’objectif ou
le viseur peut provoquer des troubles irrémédiables de la vision.
A
A
MISES EN GARDE
MISES EN GARDE
• Conservez hors de portée des enfants. Le non-respect de cette consigne de
sécurité peut provoquer des blessures ou le dysfonctionnement du produit.
• Ne focalisez pas les rayons du soleil à travers l’objectif. Les rayons du soleil
focalisés à travers l’objectif peuvent provoquer un incendie. Lorsque vous
photographiez des sujets à contre-jour, maintenez le soleil loin du cadre ;
si vous n’avez pas l’intention d’utiliser l’objectif avant longtemps, remettez
en place ses bouchons et rangez-le à l’abri de la lumière directe du soleil.
• Ne surchau ez pas le produit. Ne laissez pas ce produit dans des lieux exposés
à des températures très élevées, comme dans une voiture fermée en plein
soleil. N’emballez pas ce produit dans une serviette, un mouchoir ou ne
le recouvrez pas de quelque manière que ce soit lorsque vous l’utilisez. Le
non-respect de ces consignes de sécurité peut provoquer un incendie ou
le dysfonctionnement du produit.
■
■
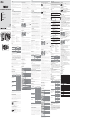
Parties de l’objectif
Parties de l’objectif
q
Parasoleil
w
Repère de verrouillage du parasoleil
e
Repère d’alignement du parasoleil
r
Commande de déverrouillage du
parasoleil
t
Repère de montage du parasoleil
y
Bague de zoom
u
Repère de l’échelle des focales
i
Indicateur de distance de mise
au point
o
Repère de distance de mise au
point
!0
Bague de mise au point
!1
Repère de montage de l’objectif
!2
Joint en caoutchouc de la
monture d’objectif
!3
Contacts du microprocesseur
!4
Échelle des focales
!5
Commutateur du mode de mise
au point
!6
Commutateur de réduction de
vibration
!7
Commutateur du mode de
réduction de vibration
■
■
Mise au point
Mise au point
Les modes de mise au point pris en charge sont indiqués dans le tableau
suivant (pour en savoir plus sur les modes de mise au point de l’appareil
photo, consultez le manuel de ce dernier).
Mode de mise au point
Mode de mise au point
de l’appareil photo
de l’appareil photo
Mode de mise au point de l’objectif
Mode de mise au point de l’objectif
M/A
M/A
M
M
AF Autofocus à priorité manuelle
Mise au point manuelle avec
télémètre électronique
MF
Mise au point manuelle avec télémètre électronique
M/A (Autofocus à priorité manuelle)
M/A (Autofocus à priorité manuelle)
Pour faire la mise au point en utilisant l’autofocus à priorité manuelle (M/A) :
z
Positionnez le commutateur du mode de mise au point de l’objectif
sur M/A.
x
Eff ectuez la mise au point.
Si vous le souhaitez, vous pouvez désactiver l’autofocus en
pivotant la bague de mise au point de l’objectif avec le déclencheur
appuyé à mi-course (ou avec la commande AF-ON appuyée, si
l’appareil photo est pourvu d’une commande AF-ON). Pour refaire
la mise au point avec l’autofocus, appuyez à mi-course sur le
déclencheur ou appuyez de nouveau sur la commande AF-ON.
n Zoom et profondeur de champ
n Zoom et profondeur de champ
Avant de faire la mise au point, tournez la bague de zoom pour régler la
focale et cadrer la photographie. Si l’appareil photo off re un aperçu de la
profondeur de champ (fermeture du diaphragme), il est possible d’avoir un
aperçu de la profondeur de champ dans le viseur.
Remarque: la focale diminue au fur et à mesure que la distance de mise au
point se raccourcit.
Remarquez que la distance affi chée par l’indicateur de distance de mise au point
n’est donnée qu’à titre indicatif et peut ne pas correspondre précisément à la
distance réelle du sujet, et peut, en raison de la profondeur de champ ou d’autres
facteurs, ne pas affi cher ∞ alors que le sujet mis au point est éloigné.
■
■
Ouverture
Ouverture
Réglez l’ouverture à l’aide des commandes de l’appareil photo. La cadence
de prise de vue peut ralentir à certaines ouvertures.
Zoom et ouverture maximale
Zoom et ouverture maximale
Modifi er le zoom peut altérer l’ouverture maximale jusqu’à 1IL.
■
■
Flash intégré
Flash intégré
Les distances minimales de mise au point auxquelles l'objectif peut être
utilisé avec les fl ashes intégrés des appareils photo sans créer de vignettage
sont indiquées ci-dessous.
Appareil photo
Appareil photo
Focale
Focale
Utiliser à des distances de
Utiliser à des distances de*
D7200/D7100/D7000
D7200/D7100/D7000
18 mm 1,0 m ou plus
24 mm 0,6 m ou plus
35 mm 0,6 m ou plus
50 mm 0,6 m ou plus
80 mm 0,6 m ou plus
D5500/D5300/D5200/D5100/
D5500/D5300/D5200/D5100/
D5000/D3300/D3200/D3100
D5000/D3300/D3200/D3100
24 mm 1,0 m ou plus
35 mm 0,6 m ou plus
50 mm 0,6 m ou plus
80 mm 0,6 m ou plus
Gamme D300
Gamme D300
18 mm 1,5 m ou plus
24 mm 0,6 m ou plus
35 mm 0,6 m ou plus
50 mm 0,6 m ou plus
80 mm 0,6 m ou plus
* Parasoleil non monté.
Le vignettage fait référence aux ombres créées à l'endroit où l'extrémité de
l'objectif occulte le fl ash intégré. Pour obtenir les dernières informations
sur le vignettage avec cet objectif, reportez-vous au manuel de l'appareil
photo.
■
■
Réduction de vibration (VR)
Réduction de vibration (VR)
La fonction de réduction de vibration (VR) atténue les phénomènes de fl ou
provoqués par le bougé de l’appareil photo, ce qui permet de recourir à des
vitesses d’obturation jusqu’à 4,0 fois plus lentes que celles normalement
utilisées et d’augmenter ainsi le nombre de vitesses possibles. Les eff ets de
la fonction VR sur la vitesse d’obturation sont mesurés en mode NORMAL
selon les normes de la CIPA (Camera and Imaging Products Association) ;
les mesures des objectifs de format FX sont eff ectuées à l’aide d’appareils
photo numériques de format FX, celles des objectifs de format DX à l’aide
d’appareils photo de format DX. Les mesures des zooms sont eff ectuées en
position de zoom maximale.
Utilisation du commutateur de réduction de vibration
Utilisation du commutateur de réduction de vibration
• Sélectionnez ON (ACTIVÉ) pour activer la réduction de vibration.
La réduction de vibration est activée lorsque vous appuyez
à mi-course sur le déclencheur, réduisant ainsi les eff ets
du bougé d’appareil pour vous permettre d’améliorer le
cadrage et la mise au point.
• Sélectionnez OFF (DESACTIVE) pour désactiver la réduction de vibration.
Utilisation du commutateur du mode de réduction de vibration
Utilisation du commutateur du mode de réduction de vibration
Le commutateur du mode de réduction de vibration permet de sélectionner le
mode de réduction de vibration lorsque la réduction de vibration est activée.
• Sélectionnez NORMAL pour optimiser la réduction de
vibration lorsque vous photographiez des sujets immobiles.
La réduction de vibration s’active lorsque vous appuyez sur
le déclencheur à mi-course.
• Sélectionnez ACTIVE pour réduire les eff ets des vibrations
lorsque vous photographiez depuis un véhicule en
mouvement et dans d’autres situations où le mouvement
de l’appareil photo est important. La réduction de vibration
s’active lorsque vous appuyez sur le déclencheur à mi-course.
Utiliser la réduction de vibration : Remarques
Utiliser la réduction de vibration : Remarques
• Lorsque vous utilisez la réduction de vibration, appuyez sur le déclencheur à
mi-course et attendez que l’image se stabilise dans le viseur avant d’appuyer
sur le déclencheur jusqu’en fi n de course.
• Lorsque la réduction de vibration est activée, l’image dans le viseur peut être
fl oue une fois le déclencheur relâché. Cela n’indique pas un dysfonctionnement.
• Positionnez le commutateur du mode de réduction de vibration sur NORMAL
pour eff ectuer des fi lés panoramiques. Lorsque vous eff ectuez un fi lé
panoramique, la réduction de vibration s’applique uniquement au mouvement
ne faisant pas partie du fi lé (par exemple, si l’appareil photo est utilisé pour faire
un fi lé horizontal, la réduction de vibration ne s’applique qu’au tremblement
vertical). Il est ainsi beaucoup plus facile de réaliser de longs fi lés panoramiques.
• Ne mettez pas l’appareil photo hors tension et ne retirez pas l’objectif pendant
que la réduction de vibration est activée. Si l’alimentation de l’objectif est
coupée alors que la réduction de vibration est activée, l’objectif peut vibrer s’il
est secoué. Il ne s’agit pas d’un dysfonctionnement et cela peut être corrigé en
refi xant l’objectif et en mettant l’appareil photo sous tension.
• Si l’appareil photo est équipé d’un fl ash intégré, la réduction de vibration est
désactivée pendant que le fl ash se charge.
• ON est généralement recommandé lorsque l’appareil photo est monté sur
un monopode ou un trépied équipé d’une tête non sécurisée, même si OFF
peut être préférable dans certaines conditions de prise de vue et avec
certains
types de trépieds.
■
■
Parasoleil
Parasoleil
Le parasoleil protège l’objectif et bloque la lumière diff use pouvant causer
de la lumière parasite ou une image fantôme.
Fixation du parasoleil
Fixation du parasoleil
Alignez le repère de montage du
parasoleil (●) sur le repère d’alignement
du parasoleil (
), puis tournez le
parasoleil (
w
) jusqu’à ce que le repère ●
soit aligné sur le repère de verrouillage
du parasoleil (—).
Lors de la fi xation ou du retrait du parasoleil, tenez-le près du symbole
sur sa base, et évitez de le serrer trop fermement. Un vignettage peut se
produire si le parasoleil n’est pas correctement attaché.
Le parasoleil peut être retourné et monté sur l’objectif lorsqu’il n’est pas utilisé.
Retrait du parasoleil
Retrait du parasoleil
Appuyez sur la commande de
déverrouillage du parasoleil (
q
),
tournez ce dernier dans le sens indiqué
par la èche (
w
) et retirez-le comme le
montre l’illustration (
e
).
■
■
Entretien de l’objectif
Entretien de l’objectif
• L’objectif retrouve son ouverture maximale après avoir été retiré de
l’appareil photo. Pour protéger l’intérieur de l’objectif, rangez-le à l’abri de
la lumière directe du soleil ou remettez en place ses bouchons.
• Ne prenez pas ou ne tenez pas l’objectif ou l’appareil photo en saisissant
uniquement le parasoleil.
• Maintenez les contacts du microprocesseur propres.
• Si le joint en caoutchouc de la monture d’objectif est endommagé, cessez
immédiatement toute utilisation et confi ez l’objectif à un centre Nikon
agréé pour le faire réparer.
• Utilisez une souffl ette pour enlever la poussière et les peluches sur la
surface de l’objectif.
• Les lentilles avant et arrière traitées au fl uor du téléconvertisseur peuvent
être nettoyées simplement en les essuyant avec un chiff on sec. Les taches
et les traces de doigt peuvent être eff acées avec un tissu propre et doux
en coton ou une lingette nettoyante pour objectif ; nettoyez avec un
mouvement circulaire à partir du centre vers l’extérieur, tout en prenant soin
de ne pas laisser de traces, ni de toucher le verre avec les doigts. Pour retirer
les taches tenaces, essuyez délicatement avec un chiff on doux et imbibé
d’une petite quantité d’eau distillée, d’éthanol ou de nettoyant pour objectif.
Les taches en forme de goutte présentes sur les lentilles traitées au fl uor
(hydrofuges et oléofuges) peuvent être retirées avec un chiff on sec.
• N’utilisez jamais de solvants organiques comme un diluant à peinture ou
du benzène pour nettoyer l’objectif.
• Le parasoleil ou les fi ltres NC peuvent être utilisés pour protéger la lentille avant.
• Fixez les bouchons avant et arrière avant de ranger l’objectif dans son étui.
• Si vous n’avez pas l’intention d’utiliser l’objectif pendant une période
prolongée, rangez-le dans un endroit frais et sec pour éviter la moisissure
et la rouille. Ne le rangez pas à la lumière directe du soleil ou avec des
boules antimites de naphtaline ou de camphre.
• Tenez l’objectif au sec. La formation de rouille sur le mécanisme interne
peut causer des dégâts irréparables.
• Laisser l’objectif dans des endroits extrêmement chauds peut
endommager ou déformer les éléments composés de plastique renforcé.
■
■
Accessoires fournis
Accessoires fournis
• Bouchon avant d’objectif encliquetable 72 mm LC-72
• Bouchon arrière d’objectif LF-4
• Parasoleil à baïonnette HB-75
■
■
Accessoires compatibles
Accessoires compatibles
• Filtres à vis 72 mm
• Étui pour objectif CL-1218
■
■
Caractéristiques
Caractéristiques
Type
Type
Objectif AF-S DX de type E avec microprocesseur
intégré et monture F
Focale
Focale
16 – 80 mm
Ouverture maximale
Ouverture maximale
f/28 – 4
Construction optique
Construction optique
17 lentilles en 13 groupes (dont 4 lentilles en verre ED, 3
lentilles asphériques et des lentilles avec traitement nanocristal ou
au uor)
Angle de champ
Angle de champ
83
°
– 20
°
Échelle des focales
Échelle des focales
Graduée en millimètres (16, 24, 35, 50, 80)
Information de
Information de
distance
distance
Communiquée au boîtier de l’appareil photo
Zoom
Zoom
Zoom manuel utilisant une bague de zoom indépendante
Mise au point
Mise au point
Système de mise au point interne de Nikon (IF,
Internal Focusing) avec autofocus commandé par
un moteur ondulatoire silencieux (SWM) et bague
de mise au point pour mise au point manuelle
Réduction de vibration
Réduction de vibration
Décentrement avec voice coil motors (VCMs)
Indicateur de distance
Indicateur de distance
de mise au point
de mise au point
0,35 m – ∞
Distance minimale de
Distance minimale de
mise au point
mise au point
0,35 m depuis le plan focal
Lamelles de diaphragme
Lamelles de diaphragme
7 (diaphragme circulaire)
Diaphragme
Diaphragme
Contrôle automatique et électronique de l’ouverture
Plage des ouvertures
Plage des ouvertures
• Focale 16 mm : f/2.8 – 22
• Focale 80 mm : f/4 – 32
Mesure
Mesure
Pleine ouverture
Diamètre de xation
Diamètre de xation
pour ltre
pour ltre
72 mm (P = 0,75 mm)
Dimensions
Dimensions
Environ 80 mm de diamètre maximum × 85,5 mm
(distance à partir du plan d’appui de la monture d’objectif de
l’appareil photo)
Poids
Poids
Environ 480 g
Nikon se réserve le droit de modifi er les caractéristiques du matériel décrit dans
ce manuel à tout moment et sans préavis.
En
User’s Manual
Fr
Manuel d’utilisation
Sc
使用说明书
Tc
使用說明書
Id
Manual bagi Pengguna
Ar
AF-S DX NIKKOR 16-80mm f/2.8-4E ED VR
wqertuy io!0 !1 !2 !3
!6 !7!5!4
English
Before using this product, please carefully read both these instructions and
the camera manual.
Note: DX lenses are for use with DX-format digital single-lens refl ex cameras
such as the D7200 or D5500. The angle of view of a lens on a DX-format
camera is equivalent to that of a lens with a focal length about 1.5 × longer
mounted on a 35 mm format camera.
This lens does not support D2- or D1-series, D200, D100, D90, D80,
D70-series, D60, D50, D40-series, or D3000 digital SLR cameras or fi lm SLR
cameras.
For Your Safety
For Your Safety
A
A
WARNINGS
WARNINGS
• Do not disassemble or modify. In the event of malfunction, the product should
be repaired only by a qualifi ed technician. Should the product break open
as the result of a fall or other accident, avoid touching exposed parts. Failure
to observe these precautions could result in electric shock or other injury.
• Turn the camera o immediately in the event of malfunction. Should you notice
smoke or an unusual smell coming from the equipment, immediately unplug
the AC adapter and remove the camera battery, taking care to avoid burns.
Continued operation could result in fi re or injury. After removing the battery,
take the equipment to a Nikon-authorized service center for inspection.
• Keep dry. Do not expose the product to water or handle with wet hands.
Failure to observe this precaution could result in fi re or electric shock.
• Do not use in the presence of ammable gas. Operating the equipment at fi lling
stations or in the presence of propane or other fl ammable gas or dust
could result in explosion or fi re.
• Do not look at the sun through the lens or the camera view nder. Viewing the sun
or other bright light source through the lens or viewfi nder could cause
permanent visual impairment.
A
A
CAUTIONS
CAUTIONS
• Keep out of reach of children. Failure to observe this precaution could result in
injury or product malfunction.
• Do not focus sunlight through the lens. Sunlight focused through the lens
could cause fi re. When shooting backlit subjects keep the sun well out of
the frame; if the lens will not be used for an extended period, replace the
lens caps and store out of direct sunlight.
• Do not overheat. Do not leave the product in locations exposed to extreme-
ly high temperatures, such as in an enclosed vehicle in direct sunlight,
or wrap the product in a towel or handkerchief or otherwise cover the
product while it is in use. Failure to observe these precautions could result
in fi re or product malfunction.
■
■
Parts of the Lens
Parts of the Lens
q
Lens hood
w
Lens hood lock mark
e
Lens hood alignment mark
r
Lens hood lock release button
t
Lens hood mounting mark
y
Zoom ring
u
Focal length mark
i
Focus distance indicator
o
Focus distance mark
!0
Focus ring
!1
Lens mounting mark
!2
Rubber lens-mount gasket
!3
CPU contacts
!4
Focal length scale
!5
Focus-mode switch
!6
Vibration reduction switch
!7
Vibration reduction mode switch
■
■
Focus
Focus
Supported focus modes are shown in the following table (for information
on camera focus modes, see the camera manual).
Camera focus mode
Camera focus mode
Lens focus mode
Lens focus mode
M/A
M/A
M
M
AF
Autofocus with manual
override
Manual focus with
electronic rangefi nder
MF Manual focus with electronic rangefi nder
M/A (Autofocus with Manual Override)
M/A (Autofocus with Manual Override)
To focus using autofocus with manual override (M/A):
z
Slide the lens focus-mode switch to M/A.
x
Focus.
If desired, autofocus can be over-ridden by rotating the lens
focus ring while the shutter-release button is pressed halfway
(or, if the camera is equipped with an AF-ON button, while the
AF-ON button is pressed). To refocus using autofocus, press the
shutter-release button halfway or press the AF-ON button again.
■
■
Zoom and Depth of Field
Zoom and Depth of Field
Before focusing, rotate the zoom ring to adjust the focal length and frame
the photograph. If the camera off ers depth-of-fi eld preview (stop down),
depth of fi eld can be previewed in the viewfi nder.
Note: Focal length decreases as the focus distance shortens.
Note that the focus distance indicator is intended only as a guide and may not
accurately show the distance to the subject and may, due to depth of fi eld or other
factors, not show ∞ when the camera is focused on a distant object.
■
■
Aperture
Aperture
Aperture is adjusted using camera controls. The frame rate may drop at
some apertures.
Zoom and Maximum Aperture
Zoom and Maximum Aperture
Changes to zoom can alter the maximum aperture by up to 1EV.
■
■
Built-in Flash Units
Built-in Flash Units
The minimum focus distances at which the lens can be used with built-in cam-
era fl ash units without vignetting are given below.
Camera
Camera
Focal length
Focal length
Use at ranges of
Use at ranges of *
D7200/D7100/D7000
D7200/D7100/D7000
18 mm 1.0 m/3 ft 4 in. or more
24 mm 0.6 m/2 ft or more
35 mm 0.6 m/2 ft or more
50 mm 0.6 m/2 ft or more
80 mm 0.6 m/2 ft or more
D5500/D5300/D5200/D5100/D5000/
D5500/D5300/D5200/D5100/D5000/
D3300/D3200/D3100
D3300/D3200/D3100
24 mm 1.0 m/3 ft 4 in. or more
35 mm 0.6 m/2 ft or more
50 mm 0.6 m/2 ft or more
80 mm 0.6 m/2 ft or more
D300 series
D300 series
18 mm 1.5 m/5 ft or more
24 mm 0.6 m/2 ft or more
35 mm 0.6 m/2 ft or more
50 mm 0.6 m/2 ft or more
80 mm 0.6 m/2 ft or more
* Lens hood not attached.
“Vignetting” refers to shadows created where the end of the lens obscures
the built-in fl ash. For the latest information on vignetting with this lens, see
the camera manual.
■
■
Vibration Reduction (VR)
Vibration Reduction (VR)
Vibration reduction (VR) reduces blur caused by camera shake, allowing
shutter speeds up to 4.0 stops slower than would otherwise be the case,
increasing the range of shutter speeds available. The eff ects of VR on shutter
speed are measured in NORMAL mode according to Camera and Imaging
Products Association (CIPA) standards; FX-format lenses are measured us-
ing FX-format digital cameras, DX-format lenses using DX-format cameras.
Zoom lenses are measured at maximum zoom.
Using the Vibration Reduction Switch
Using the Vibration Reduction Switch
• Select ON to enable vibration reduction. Vibration reduction
is activated when the shutter-release button is pressed
halfway, reducing the eff ects of camera shake for im-
proved framing and focus.
• Select OFF to turn vibration reduction off .
Using the Vibration Reduction Mode Switch
Using the Vibration Reduction Mode Switch
The vibration reduction mode switch is used to select the vibration reduc-
tion mode when vibration reduction is on.
• Select NORMAL for enhanced vibration reduction when pho-
tographing stationary subjects.
• Select ACTIVE to reduce the eff ects of vibration when
shooting from a moving vehicle, and in other situations
with active camera motion.
Using Vibration Reduction: Notes
Using Vibration Reduction: Notes
• When using vibration reduction, press the shutter-release button halfway
and wait for the image in the viewfi nder to stabilize before pressing the
shutter-release button the rest of the way down.
• When vibration reduction is active, the image in the viewfi nder may be
blurred after the shutter is released. This does not indicate a malfunction.
• Slide the vibration reduction mode switch to NORMAL for panning shots.
When the camera is panned, vibration reduction applies only to motion
that is not part of the pan (if the camera is panned horizontally, for ex-
ample, vibration reduction will be applied only to vertical shake), making
it much easier to pan the camera smoothly in a wide arc.
• Do not turn the camera off or remove the lens while vibration reduction is
in eff ect. If power to the lens is cut while vibration reduction is on, the lens
may rattle when shaken. This is not a malfunction, and can be corrected
by reattaching the lens and turning the camera on.
• If the camera is equipped with a built-in fl ash, vibration reduction will be
disabled while the fl ash charges.
• ON is generally recommended when the camera is mounted on a mono-
pod or a tripod with an unsecured head, although OFF may be preferred
depending shooting conditions and the type of tripod.
■
■
The Lens Hood
The Lens Hood
The lens hoods protect the lens and block stray light that would otherwise
cause fl are or ghosting.
Attaching the Hood
Attaching the Hood
Align the lens hood mounting mark (●)
with the lens hood alignment mark (
)
and then rotate the hood (
w
) until the
● mark is aligned with the lens hood
lock mark (—).
When attaching or removing the hood, hold it near the symbol on its
base and avoid gripping it too tightly. Vignetting may occur if the hood is
not correctly attached.
The hood can be reversed and mounted on the lens when not in use.
Detaching the Hood
Detaching the Hood
Press the lens hood lock release button
(
q
), rotate the hood in the direction
shown by the arrow (
w
), and remove it
as shown (
e
).
■
■
Lens Care
Lens Care
• The lens returns to maximum aperture when removed from the camera.
To protect the interior of the lens, store it out of direct sunlight or replace
the lens caps.
• Do not pick up or hold the lens or camera using only the lens hood.
• Keep the CPU contacts clean.
• Should the rubber lens-mount gasket be damaged, cease use immedi-
ately and take the lens to a Nikon-authorized service center for repair.
• Use a blower to remove dust and lint from the lens surfaces.
• The fl uorine-coated front and rear elements of the teleconverter can be
cleaned simply by wiping them with a dry cloth. Smudges and fi nger-
prints can be removed using a soft, clean cotton cloth or lens cleaning
tissue; clean from the center outwards using a circular motion, taking
care not to leave smears or touch the glass surface with your fi ngers. To
remove stubborn stains, wipe gently using a soft cloth dampened with
a small amount of distilled water, ethanol, or lens cleaner. Drop-shaped
stains on the water- and oil-repellent fl uorine-coated elements can be
removed with a dry cloth.
• Never use organic solvents such as paint thinner or benzene to clean the
lens.
• The lens hood or NC fi lters can be used to protect the front lens element.
• Attach the front and rear caps before placing the lens in its fl exible pouch.
• If the lens will not be used for an extended period, store it in a cool, dry
location to prevent mold and rust. Do not store in direct sunlight or with
naphtha or camphor moth balls.
• Keep the lens dry. Rusting of the internal mechanism can cause irrepa-
rable damage.
• Leaving the lens in extremely hot locations could damage or warp parts
made from reinforced plastic.
■
■
Supplied Accessories
Supplied Accessories
• 72 mm snap-on Front Lens Cap LC-72
• Rear Lens Cap LF-4
• Bayonet Hood HB-75
■
■
Compatible Accessories
Compatible Accessories
• 72 mm screw-on fi lters
• Lens Case CL-1218
■
■
Specifi cations
Specifi cations
Type
Type Type E AF-S DX lens with built-in CPU and F mount
Focal length
Focal length 16 – 80 mm
Maximum aperture
Maximum aperture f/2.8 – 4
Lens construction
Lens construction 17 elements in 13 groups (including 4 ED elements,
3 aspherical elements, and elements with Nano-Crystal or uo-
rine coatings)
Angle of view
Angle of view 83° – 20°
Focal length scale
Focal length scale Graduated in millimeters (16, 24, 35, 50, 80)
Distance information
Distance information Output to camera
Zoom
Zoom Manual zoom using independent zoom ring
Focusing
Focusing Nikon Internal Focusing (IF) System with autofo-
cus controlled by Silent Wave Motor and separate
focus ring for manual focus
Vibration reduction
Vibration reduction Lens shift using voice coil motors (VCMs)
Focus distance indicator
Focus distance indicator 0.35 m – ∞
Minimum focus distance
Minimum focus distance 0.35 m (1.15 ft) from focal plane
Diaphragm blades
Diaphragm blades 7 (rounded diaphragm opening)
Diaphragm
Diaphragm Automatic electronic aperture control
Aperture range
Aperture range • 16 mm focal length: f/2.8 – 22
• 80 mm focal length: f/4 – 32
Metering
Metering Full aperture
Filter-attachment size
Filter-attachment size 72 mm (P = 0.75 mm)
Dimensions
Dimensions Approx. 80 mm maximum diameter × 85.5 mm
(distance from camera lens mount ange)
Weight
Weight Approx. 480 g (1 lb 1 oz)
Nikon reserves the right to change the fi cations of the hardware described in
this manual at any time and without prior notice.
中文版(简体)
使用产品前请仔细阅读本使用说明书,并请妥善保管。
注意
:
DX
镜头适用于
DX
格式数码单镜反光照相机(如
D
7200
或
D
5500
)。
DX
格式照相机上镜头的视角,相当于安装在
35
mm
格
式照相机上焦距约为该镜头
1
.
5
倍的镜头的视角。
本镜头不支持
D
2
系列和
D
1
系列、
D
200
、
D
100
、
D
90
、
D
80
、
D
70
系列、
D
60
、
D
50
、
D
40
系列以及
D
3000
数码单镜反光照相机
和胶卷单镜反光照相机。
安全须知
为预防发生伤害、损失或其他事故,请在使用本产品前仔细阅读
“安全须知”,并以正确的方法使用。请在阅读之后妥善保管本说明
书,以便随时查阅。
A
警告
(有可能造成人员死亡或负重伤的事项)
A
注意
(有可能造成人身伤害或物品损害的事项)
图示和符号的实例
F
禁止
(不允许进行的行为)符号。
C
执行
(必须进行的行为)符号。
A
警告
F
禁止 切勿自行拆解、修理或改装。
F
禁止
当产品由于跌落而破损使得内部外露时,切勿用手触碰
外露部分。
否则将会导致触电或受伤。
C
执行
当发现产品变热、冒烟或发出焦味等异常时,请立刻取
出照相机中的电池或切断照相机电源(电源适配器)。
若放任不管,将会导致起火或烫伤。
取出电池或切断电源时,请小心勿被烫伤。
请委托尼康授权的维修服务中心进行修理。
F
禁止
切勿使产品被水淋湿。
勿用湿手触碰。
否则将导致触电或起火。
F
禁止
切勿在有可能起火、爆炸的场所使用。
在液化石油气站、汽油加油站等会产生易燃性气体、粉
尘的场所使用产品,将会导致起火或爆炸。
F
禁止
切勿使用镜头或照相机直接观看太阳或强光。
否则将会导致失明或视觉损伤。
A
注意
C
执行
切勿在婴幼儿伸手可及之处保管本产品。
否则将会导致受伤或故障。
C
执行
进行背光拍摄时,务必使太阳充分偏离视角。
不使用时,请盖上镜头盖,或者存放在没有阳光照射处。
阳光会聚焦,并将导致起火。
F
禁止
切勿置于高温的地方(如夏天封闭的车内或直射阳光
下)。
切勿将产品用手帕或毛巾包裹着使用。
否则将会导致故障或起火。
■
镜头部件
q
镜头遮光罩
w
镜头遮光罩锁定标记
e
镜头遮光罩对齐标记
r
镜头遮光罩锁定解除按钮
t
镜头遮光罩安装标记
y
变焦环
u
焦距标记
i
对焦距离指示
o
对焦距离标记
!0
对焦环
!1
镜头安装标记
!2
镜头卡口橡胶垫圈
!3
CPU
接点
!4
焦距刻度
!5
对焦模式切换器
!6
减震开关
!7
减震模式切换器
■
对焦
所支持的对焦模式如下表所示
(有关照相机对焦模式的信息,请参
阅照相机使用说明书)。
照相机对焦模式
镜头对焦模式
M/A M
AF
手动优先的自动对焦
带有电子测距仪的手
动对焦
MF
带有电子测距仪的手动对焦
M/A
(手动优先的自动对焦)
使用手动优先的自动对焦(
M/A
)进行对焦的步骤如下 :
z
将镜头对焦模式切换器推至
M/A
。
x
对焦。
若有需要,您可在半按快门释放按钮期间(或者,若照相机配
备有一个
AF-ON
按钮,则在按下
AF-ON
按钮期间)旋转镜头
对焦环来使手动对焦优先于自动对焦。若要使用自动对焦以重
新对焦,请再次半按快门释放按钮或再次按下
AF-ON
按钮。
■
变焦和景深
对焦之前,请旋转变焦环调整焦距并进行构图。若照相机支持景深
预览(光圈缩小),则景深可在取景器中进行预览。
注意
:
焦距随对焦距离的缩短而减小。
对焦距离指示仅可作为指南,可能无法准确显示离拍摄对象的距离,
并且由于 景深 或 其他因素的 影 响,照相机 对焦于远 距离 物体 时可能 不
会显示
∞
。
■
光圈
请使用照相机控制调整光圈。在某些光圈下,每秒幅数可能会降低。
变焦和最大光圈
更改变焦可将最大光圈最多改变
1
EV
。
■
内置闪光灯组件
镜头可与照相机的内置闪光灯组件一起使用而不产生渐晕的最近对
焦距离如下。
照相机
照相机对焦模式
镜头对焦模式
*
D
7200
/D
7100
/D
7000
18
mm
1
.
0
m
或以上
24
mm
0
.
6
m
或以上
35
mm
0
.
6
m
或以上
50
mm
0
.
6
m
或以上
80
mm
0
.
6
m
或以上
D
5500
/D
5300
/D
5200
/
D
5100
/D
5000
/D
3300
/
D
3200
/D
3100
24
mm
1
.
0
m
或以上
35
mm
0
.
6
m
或以上
50
mm
0
.
6
m
或以上
80
mm
0
.
6
m
或以上
D
300
系列
18
mm
1
.
5
m
或以上
24
mm
0
.
6
m
或以上
35
mm
0
.
6
m
或以上
50
mm
0
.
6
m
或以上
80
mm
0
.
6
m
或以上
*
未安装镜头遮光罩。
“渐晕”是指因镜头末端遮挡内置闪光灯光线所产生的阴影。有关
使用本镜头时的渐晕的最新信息,请参阅照相机说明书。
■
减震(
VR
)
减震(
VR
)可减少照相机震动所引起的模糊,从而使快门速度可比
一般情况时最多降低
4
.
0
档,同时增加可用快门速度的范围。减震
对快门速度的影响是在
NORMAL
(标准)模式下根据相机影像器
材工业协会(
CIPA
)标准所测量 ;测量
FX
格式镜头时使用的是
FX
格式数码照相机,测量
DX
格式镜头时使用的是
DX
格式照相机。
变焦镜头是在最大变焦设定下进行的测量。
使用减震开关
•
选择
ON
(开启)启用减震。
减震将在您半按快门释
放按钮时激活,从而减少照相机震动的影响以改善
构图和对焦。
•
选择
OFF
(关闭)可关闭减震。
使用减震模式开关
减震模式开关用于减震处于开启状态时选择减震模式。
•
选择
NORMAL
(标准)可在拍摄静止拍摄对象时增强
减震。半按快门释放按钮时减震生效。
•
选择
ACTIVE
(动态)可减少从行驶的车辆上以及照
相机移动量较大的其他情况下拍摄时震动的影响。
半按快门释放按钮时减震生效。
使用减震 :注意事项
•
使用减震时,请先半按快门释放按钮,然后待取景器中的图像稳
定之后再完全按下快门释放按钮。
•
启用减震时,取景器中的图像在您释放快门后可能会变得模糊。
这并非故障。
•
转动照相机进行拍摄时,请将减震模式切换器滑动至
NORMAL
(标准)。转动照相机时,减震仅应用于非转动部分的动作(例如,
若照相机进行水平转动,则减震将仅应用于垂直方向的震动),因
而更易于以较大幅度平稳地转动照相机。
•
减震处于有效状态时,请勿关闭照相机,也不要取下镜头。若在
减震处于有效状态时切断镜头电源,镜头在摇动时将可能发出嘎
嘎声。这并非故障,重新安装镜头并开启照相机即可解决该问题。
•
若照相机配备有内置闪光灯,闪光灯充电时减震将无法使用。
•
当照相机固定于单脚架或云台不稳固的三脚架时,一般推荐选择
ON
,但根据拍摄环境和三脚架类型的不同,有时可能选择
OFF
更合适。
■
镜头遮光罩
镜头遮光罩可保护镜头并阻挡可能导致杂光或鬼影的散射光线。
安装遮光罩
将镜头遮光罩安装标记(
●
)与镜头
遮光罩对齐标记(
)对齐,然后
旋转遮光罩(
w
)直至
●
标记与镜头
遮光罩锁定标记(
—
)对齐。
安装或取下遮光罩时,请在其底部的
标记附近将其握住,并避
免握得太紧。若未正确安装好遮光罩,则可能会产生渐晕。
不使用时,可将遮光罩反转并固定在镜头上。
取下遮光罩
按下镜头遮光罩锁定解除按钮(
q
),
如箭头所示方向旋转遮光罩(
w
),然
后如图所示将其取下(
e
)。
■
镜头保养
•
镜头从照相机取下后会恢复至最大光圈。为保护镜头内部,请将
其存放在没有阳光照射的地方,或者重新盖上镜头盖。
•
拿起或持握镜头或照相机时,切勿仅持拿镜头遮光罩。
•
保持
CPU
接点清洁。
•
若镜头卡口橡胶垫圈损坏,请立即停止使用并将镜头送至尼康授
权的维修服务中心进行维修。
•
用吹气球去除镜头表面的灰尘和浮屑。
•
望远倍率镜的氟涂层前后部组件可简单地使用干布进行清洁。污
点和指纹可使用一块干净的软棉布或镜头清洁纸去除 ;清洁时以
圆周运动方式从里向外擦拭,注意不要留下污渍,也不要用手指
触碰玻璃表面。清除顽渍时,请使用一块沾有少许蒸馏水、乙醇
或镜头清洁剂的软布轻轻擦拭。拒水、拒油的氟涂层组件上的滴
状污渍可使用干布去除。
•
切勿使用涂料稀释剂或苯等有机溶剂清洁镜头。
•
镜头遮光罩或
NC
滤镜可用于保护前部镜片组件。
•
将镜头放入半软镜头袋之前,请盖好镜头前后盖。
•
若在较长时间内不使用镜头,请将其存放在阴凉干燥的地方以防
止发霉和生锈。切不可存放在直射阳光下,也不可与石脑油或樟
脑丸一起存放。
•
保持镜头干燥。内部构造生锈将导致无法挽回的损坏。
•
将镜头放置在过于炎热的地方将会使强化塑料部件受损或变形。
•
运输产品时,请在包装箱内装入足够多的缓冲材料,以减少(避
免) 由 于 冲 击 导 致 产 品 损 坏 。
■
随附配件
•
72
mm
搭扣式镜头前盖
LC-
72
•
镜头后盖
LF-
4
•
卡口式镜头遮光罩
HB-
75
■
兼容的配件
•
72
mm
旋入式滤镜
•
镜头套
CL-
1218
■
技术规格
类型
带内置
CPU
和
F
卡口的
E
型
AF-S DX
镜头
焦距
16
–
80
mm
最大光圈
f/
2
.
8
–
4
镜头结构
13
组
17
片(
包括
4
枚
ED
组件、
3
枚非球面组件以
及带纳米结晶涂层或氟涂层的组件
)
视角
83
°
–
20
°
焦距刻度
以毫米为单位
(
16
、
24
、
35
、
50
、
80
)
距离信息
输出到照相机
变焦
使用独立变焦环的手动变焦
对焦
尼康内部对焦(
IF
)系统(可进行由宁静波动马
达控制的自动对焦,具备用于手动对焦的独立对
焦环)
减震
使用音圈马达(
VCM
)的镜头位移
对焦距离指示
0
.
35
m –
∞
最近对焦距离
0
.
35
m
(至焦平面)
光圈叶片
7
片(圆形光圈孔)
光圈
自动电子光圈控制
光圈范围
•
16
mm
焦距 :
f/
2
.
8
–
22
•
80
mm
焦距 :
f/
4
–
32
测光
全开光圈测光
滤镜附件尺寸
72
mm
(
P =
0
.
75
mm
)
尺寸
约
80
mm
(最大直径)×
85
.
5
mm
(从照相机镜
头卡口边缘开始的距离)
重量
约
480
g
尼康公司保留可随时更改说明书内载之硬件技术规格的权利,而无
须事先通知。
Printed in Thailand
7MA0276C-01

©
2015 Nikon Corporation
Sebelum menggunakan produk ini, mohon membaca dengan seksama
baik petunjuk ini maupun buku petunjuk kamera.
Catatan: Lensa DX adalah untuk penggunaan bersama kamera digital
format-DX refl eks lensa tunggal seperti D7200 atau D5500. Sudut gambar
dari lensa pada kamera format-DX adalah setara lensa dengan panjang fokal
sekitar 1,5 × lebih panjang yang terpasang pada kamera format 35mm.
Lensa ini tidak mendukung seri-D2 atau -D1, D200, D100, D90, D80,
seri-D70, D60, D50, seri-D40, atau kamera SLR digital D3000 atau kamera
SLR fi lm.
Demi Keamanan Anda
Demi Keamanan Anda
A
A
PERINGATAN
PERINGATAN
• Jangan membongkar atau memodi kasi. Apabila terjadi kegagalan fungsi,
produk sebaiknya diperbaiki hanya oleh teknisi berpengalaman. Apabila
produk pecah terbelah akibat dari terjatuh atau kecelakaan lainnya,
hindari menyentuh bagian yang terbuka. Gagal mematuhi pencegahan
ini dapat menimbulkan sengatan listrik atau cedera lainnya.
• Segera matikan kamera apabila terjadi kegagalan fungsi. Apabila Anda melihat
ada asap atau bau tidak biasa muncul dari unit produk, segera cabut
adaptor AC dan keluarkan baterai kamera, sambil berhati-hati agar tidak
terbakar. Melanjutkan pengoperasian dapat menyebabkan kebakaran
atau cedera. Setelah melepas baterai, bawalah unit produk ke pusat servis
resmi Nikon untuk pemeriksaan.
• Jaga agar tetap kering. Jangan paparkan produk ke air atau menangani
dengan tangan basah. Gagal mematuhi pencegahan ini dapat
menyebabkan kebakaran atau sengatan listrik.
• Jangan gunakan di daerah yang mengandung gas mudah terbakar. Menggunakan
unit produk di pom bensin atau saat ada gas propana atau gas mudah
terbakar lain atau debu dapat memicu ledakan atau kebakaran.
• Jangan melihat langsung ke matahari melalui lensa atau jendela bidik kamera.
Memandang ke matahari atau sumber cahaya kuat lainnya melalui lensa
atau jendela bidik dapat menyebabkan gangguan penglihatan menetap.
A
A
PERINGATAN
PERINGATAN
• Jauhkan dari jangkauan anak-anak. Gagal mematuhi pencegahan ini dapat
menyebabkan cedera atau kegagalan fungsi produk.
• Jangan memfokus cahaya matahari melalui lensa. Cahaya matahari yang
terfokus melalui lensa dapat menimbulkan kebakaran. Saat memotret
subjek diterangi dari belakang, sebisanya jauhkan cahaya matahari dari
bingkai; jika lensa tidak akan digunakan untuk jangka panjang, pasang
kembali penutup lensa dan simpan di tempat yang tidak kena cahaya
matahari langsung.
• Jangan biarkan kepanasan. Jangan tinggalkan produk di lokasi yang
terpapar pada suhu teramat tinggi, seperti dalam kendaraan tertutup
dengan cahaya matahari langsung, atau membungkus produk dengan
handuk atau saputangan ataupun menutupi produk selama penggunaan.
Gagal mematuhi pencegahan ini dapat menyebabkan kebakaran atau
kegagalan fungsi produk.
■
■
Bagian-bagian Lensa
Bagian-bagian Lensa
q
Tudung lensa
w
Tanda kunci tudung lensa
e
Tanda kesejajaran tudung lensa
r
Tombol pelepas kunci tudung lensa
t
Tanda pemasangan tudung lensa
y
Cincin zoom
u
Tanda panjang fokal
i
Indikator jarak fokus
o
Tanda jarak fokus
!0
Cincin fokus
!1
Tanda pemasangan lensa
!2
Gasket karet pemasangan lensa
!3
Kontak CPU
!4
Skala panjang fokal
!5
Switch mode fokus
!6
Switch pengurang guncangan
!7
Switch mode pengurang guncangan
■
■
Fokus
Fokus
Mode fokus yang didukung ditunjukkan dalam tabel berikut (untuk
informasi tentang mode fokus kamera, bacalah buku petunjuk kamera).
Mode fokus kamera
Mode fokus kamera
Mode fokus lensa
Mode fokus lensa
M/A
M/A
M
M
AF
Fokus otomatis dengan
pengaturan manual
Fokus manual dengan jendela
jangkauan elektronik
MF
Fokus manual dengan jendela jangkauan elektronik
M/A (Fokus otomatis dengan Pengaturan Manual)
M/A (Fokus otomatis dengan Pengaturan Manual)
Untuk memfokus menggunakan fokus otomatis dengan pengaturan
manual (M/A):
z
Geser switch mode-fokus lensa ke M/A.
x
Fokus.
Jika diinginkan, fokus otomatis dapat dibatalkan dengan
memutar cincin fokus lensa sambil menekan setengah tombol
pelepas rana (atau, jika kamera dilengkapi dengan tombol
AF-ON, sementara tombol AF-ON ditekan). Untuk memfokus
ulang menggunakan fokus otomatis, tekan setengah tombol
pelepas rana atau tekan tombol AF-ON kembali.
■
■
Zoom dan Kedalaman Bidang
Zoom dan Kedalaman Bidang
Sebelum memfokus, putar cincin zoom untuk menyetel panjang fokal dan
bingkailah foto. Apabila kamera menawarkan pratinjau jarak fokus (stop
down), kedalaman bidang dapat dipratinjau di jendela bidik.
Catatan: Panjang fokal menurun seiring pemendekan jarak fokus.
Catat bahwa indikator jarak fokus dimaksudkan hanya sebagai panduan
dan mungkin tidak dapat secara tepat menunjukkan jarak ke subjek serta
kemungkinan, oleh karena kedalaman bidang atau faktor lainnya, tidak
menampilkan ∞ saat kamera difokus pada objek jauh.
■
■
Bukaan Diafragma
Bukaan Diafragma
Bukaan disesuaikan menggunakan kontrol kamera. Kecepatan bingkai
dapat menurun pada beberapa bukaan.
Zoom dan Bukaan Diafragma Maksimal
Zoom dan Bukaan Diafragma Maksimal
Perubahan pada zoom dapat merubah bukaan diafragma maksimal hingga
1EV.
■
■
Unit Lampu Kilat Terpasang
Unit Lampu Kilat Terpasang
Jarak fokus minimal, yang mana lensa dapat digunakan dengan unit lampu
kilat kamera terpasang tanpa vinyet, dinyatakan di bawah ini.
Kamera
Kamera
Panjang fokal
Panjang fokal
Penggunaan pada jarak
Penggunaan pada jarak*
D7200/D7100/D7000
D7200/D7100/D7000
18 mm 1,0 matau lebih
24 mm 0,6 matau lebih
35 mm 0,6 matau lebih
50 mm 0,6 matau lebih
80 mm 0,6 matau lebih
D5500/D5300/D5200/D5100/
D5500/D5300/D5200/D5100/
D5000/D3300/D3200/D3100
D5000/D3300/D3200/D3100
24 mm 1,0 matau lebih
35 mm 0,6 matau lebih
50 mm 0,6 matau lebih
80 mm 0,6 matau lebih
Seri D300
Seri D300
18 mm 1,5 matau lebih
24 mm 0,6 matau lebih
35 mm 0,6 matau lebih
50 mm 0,6 matau lebih
80 mm 0,6 matau lebih
* Tudung lensa tidak dipasang.
“Vinyet” merujuk pada bayangan yang tercipta di mana ujung dari lensa
menghalangi lampu kilat terpasang. Untuk informasi terbaru mengenai
vinyet pada lensa ini, simak buku petunjuk kamera.
■
■
Pengurang Guncangan (VR)
Pengurang Guncangan (VR)
Pengurang guncangan (VR) mengurangi pengaburan disebabkan oleh
kamera goyang, yang memungkinkan kecepatan rana hingga 4,0 berhenti
lebih lambat daripada yang seharusnya terjadi, yang meningkatkan rentang
kecepatan rana yang tersedia. Efek dari VR pada kecepatan rana diukur di
mode NORMAL menurut standar Asosiasi Produk Pencitraan dan Kamera
(CIPA); lensa format-FX diukur menggunakan kamera digital format-FX,
lensa format-DX menggunakan kamera format-DX. Lensa zoom diukur
pada zoom maksimal.
Menggunakan Switch Pengurang Guncangan
Menggunakan Switch Pengurang Guncangan
• Pilih ON untuk mengaktifkan pengurang guncangan.
Pengurang guncangan diaktifkan ketika tombol pelepas
rana ditekan setengah, mengurangi efek dari guncangan
kamera untuk meningkatkan pembingkaian dan fokus.
• Pilih OFF untuk mematikan pengurang guncangan.
Menggunakan Switch Mode Pengurang Guncangan
Menggunakan Switch Mode Pengurang Guncangan
Switch mode pengurang guncangan digunakan untuk memilih mode
pengurang guncangan saat pengurang guncangan aktif.
• Pilih NORMAL demi menambah efek pengurang guncangan
saat memfoto subjek tidak bergerak. Pengurang
guncangan akan aktif saat tombol pelepas rana ditekan
setengah.
• Pilih ACTIVE guna mengurangi efek dari getaran saat
memotret dari kendaraan bergerak, dan dalam situasi
lainnya dengan pergerakan kamera aktif. Pengurang
guncangan akan aktif saat tombol pelepas rana ditekan
setengah.
Menggunakan Pengurang Guncangan: Catatan
Menggunakan Pengurang Guncangan: Catatan
• Ketika menggunakan pengurang guncangan, tekan tombol pelepas rana
setengah dan tunggu hingga gambar di jendela bidik stabil sebelum
menekan tombol pelepas rana sepenuhnya.
• Ketika pengurang guncangan sedang aktif, gambar pada jendela bidik
mungkin mengabur setelah rana dilepaskan. Ini tidak mengindikasikan
kegagalan fungsi.
• Geser switch mode pengurang guncangan ke NORMAL bagi bidikan
liputan. Saat kamera diliput, pengurang guncangan berlaku hanya ke
gerakan yang bukan merupakan bagian dari liputan (jika kamera diliput
secara horisontal, sebagai contoh, pengurang guncangan hanya akan
diberlakukan pada goyangan vertikal), menjadikannya jauh lebih mudah
untuk meliput kamera dengan lancar pada sudut lebar.
• Jangan mematikan kamera atau melepaskan lensa ketika pengurang
guncangan sedang aktif. Apabila daya ke lensa diputus selama pengurang
guncangan aktif, lensa mungkin akan berdesis saat diguncang. Ini
bukanlah kegagalan fungsi, dan dapat diperbaiki dengan memasang
ulang lensa dan menghidupkan kamera.
• Apabila kamera dilengkapi dengan lampu kilat terpasang, pengurang
guncangan akan dinonaktifkan ketika lampu kilat diisi dayanya.
• ON (HIDUP) biasanya disarankan saat kamera didudukkan pada monopod
atau tripod dengan kepala yang tidak terkunci, meskipun begitu OFF
(MATI) mungkin lebih dipilih tergantung kondisi pemotretan dan jenis
tripod.
■
■
Tudung Lensa
Tudung Lensa
Tudung lensa melindungi lensa dan mencegah masuknya berkas cahaya
yang dapat menyebabkan silau atau gambar ganda.
Memasang Tudung
Memasang Tudung
Sejajarkan tanda pemasangan tudung
lensa (●) dengan tanda garis arah tudung
lensa ( ) dan lalu putar tudungnya (
w
)
hingga tanda ● sejajar dengan tanda
pengunci tudung lensa (—).
Saat memasang atau melepaskan tudung, peganglah di dekat simbol
pada dasarnya dan hindari menggenggam terlalu kencang. Vinyet dapat
terbentuk jika tudung tidak terpasang dengan benar.
Tudung dapat dibalik dan dipasang pada lensa saat tidak digunakan.
Melepaskan Tudung
Melepaskan Tudung
Tekan tombol pelepas kunci tudung
lensa (
q
), putar tudungnya ke arah
yang ditunjukkan oleh tanda panah
(
w
), dan lepaskan seperti petunjuk (
e
).
■
■
Perawatan Lensa
Perawatan Lensa
• Lensa kembali ke bukaan diafragma maksimal saat dilepas dari kamera.
Untuk melindungi bagian dalam lensa, simpanlah jauh dari cahaya
matahari langsung atau pasang kembali penutup lensa.
• Jangan memungut atau memegang lensa atau kamera hanya pada
tudung lensanya.
• Jaga agar kontak CPU tetap bersih.
• Apabila gasket karet pemasangan lensa rusak, hentikan segera
penggunaan dan bawalah lensa ke pusat servis resmi Nikon untuk
diperbaiki.
• Gunakan blower untuk menghilangkan debu dan kotoran dari permukaan
lensa.
• Elemen depan dan belakang konverter tele dengan lapisan fl uorine dapat
dibersihkan hanya dengan menyekanya dengan kain kering. Bercak dan
sidik jari dapat dihilangkan menggunakan kain katun lembut dan bersih
atau menggunakan tisu pembersih lensa dan bersihkan dari tengah
bergerak melingkar ke luar, usahakan agar tidak meninggalkan noda
atau menyentuh kaca dengan jari Anda. Untuk menghilangkan noda
yang susah hilang, seka dengan lembut menggunakan kain lembut yang
dibasahi dengan sedikit air bersih, ethanol, atau cairan pembersih lensa.
Noda tetesan pada elemen dengan lapisan air dan fl uorine tahan minyak
dapat dihilangkan dengan kain kering.
• Jangan gunakan pelarut organik seperti tiner cat atau bensin untuk
membersihkan lensa.
• Tudung lensa atau fi lter NC dapat digunakan untuk melindungi elemen
lensa depan.
• Pasang tutup depan dan belakang sebelum meletakkan lensa dalam
kantung fl eksibelnya.
• Apabila lensa tidak akan digunakan dalam waktu lama, simpanlah di
tempat yang sejuk dan kering untuk mencegah jamur dan karat. Jangan
menyimpan di tempat yang terkena cahaya matahari langsung atau
bersama nafta atau kapur barus.
• Jaga lensa agar tetap kering. Karat pada mekanisme internal dapat
menyebabkan kerusakan yang tidak dapat diperbaiki.
• Meninggalkan lensa di tempat yang sangat panas dapat merusak atau
melengkungkan bagian yang terbuat dari plastik penguatan.
■
■
Aksesori yang Disertakan
Aksesori yang Disertakan
• Tutup Lensa Depan 72 mm snap-on LC-72
• Tutup Lensa Belakang LF-4
• Tudung Bayonet HB-75
■
■
Aksesori Kompatibel
Aksesori Kompatibel
• Filter ulir 72 mm
• Kotak Lensa CL-1218
■
■
Spesifi kasi
Spesifi kasi
Tipe
Tipe Lensa tipe E AF-S DX dengan CPU terpasang dan
dudukan F
Panjang fokal
Panjang fokal 16 – 80 mm
Bukaan diafragma
Bukaan diafragma
maksimal
maksimal
f/2.8 – 4
Konstruksi lensa
Konstruksi lensa 17 elemen dalam 13 grup (termasuk 4 elemen
ED, 3 elemen asferik, dan elemen dengan lapisan
Nano-Crystal atau fl uorine)
Sudut gambar
Sudut gambar 83° – 20°
Skala panjang fokal
Skala panjang fokal Gradasi dalam milimeter (16, 24, 35, 50, 80)
Informasi jarak
Informasi jarak Output ke kamera
Zoom
Zoom Zoom manual menggunakan cincin zoom mandiri
Memfokus
Memfokus
Sistem Pemfokusan Internal (IF) Nikon dengan fokus
otomatis yang dikendalikan oleh Silent Wave Motor
dan cincin fokus terpisah untuk fokus manual
Pengurang guncangan
Pengurang guncangan Pergeseran lensa menggunakan voice coil motor
(VCM)
Indikator jarak fokus
Indikator jarak fokus 0,35 m – ∞
Jarak fokus minimum
Jarak fokus minimum 0,35 m dari bidang fokal
Bilah diafragma
Bilah diafragma 7 (bukaan diafragma lingkaran)
Diafragma
Diafragma Kontrol bukaan elektronik otomatis
Kisaran bukaan
Kisaran bukaan • Panjang fokal 16 mm: f/2.8 – 22
• Panjang fokal 80 mm: f/4 – 32
Pengukuran
Pengukuran Bukaan penuh
Ukuran tambahan lter
Ukuran tambahan lter 72 mm (P = 0,75 mm)
Dimensi
Dimensi Garis tengah maksimum sekitar 80 mm × 85,5 mm
(jarak dari kelepak pemasangan lensa kamera)
Berat
Berat Sekitar 480 g
Nikon memiliki hak untuk mengubah spesifi kasi dari perangkat keras
sebagaimana dijelaskan dalam buku petunjuk ini kapan saja dan tanpa
pemberitahuan terlebih dahulu.
INDONESIAN
.ǃƄƶƵŽȚ Țnjƀ ȳȚNjƈƄŴȚ ǚƃŻ ǀƁƾƶƯŮ ȚǍƸžƾƳŽȚ ǚƸŽȢȶ ȝƾƵƸƴƯƄŽȚ ȵnjƀ ȜȔȚǍŻ ǟűǍƁ
DX ǀưƸǧ ȜNjŲȚȶ ǀŴNjŸ ǏżƾƯŮ ǀƸƵŻȤ ȝȚǍƸžƾż Ǖž DX ȝƾŴNjŸ ȳNjƈƄƉ
Ƚ
ů :ǀƮŲǾž
ȴǞƳů DX ǀưƸǧ ȚǍƸžƾż ǟƴŸ ǀŴNjƯŽ ȜȤǞƫŽȚ ǀƁȶȚȥ .D5500 ȶȖ D7200 ȚǍƸžƾƳŽȚ ǚƅž
ǀưƸƫŮ ȚǍƸžƾż ǟƴŸ ǀƃ
dž
żǍž ȲǞŶȖ ×1.5 ǠŽȚǞŲ ȸȤƻŮ ȲǞƭŮ ǀŴNjƯŽ ȜȤǞƫŽȚ ǀƁȶȚǎŽ ǀƁȶƾƉž
.Ǜž 35
ȶȖ D70 ȶȖ D80 ȶȖ D90 ȶȖ D100 ȶȖ D200 ǀƴƉƴŴ ȶȖ D1 ȶȖ D2 ǀƴƉƴŴ ǛŸNjů ǽ ǀŴNjƯŽȚ
.SLR ǛƴƸź ȝȚǍƸžƾż ȶȖ D3000 ǀƸƵŻǍŽȚ SLR ȝȚǍƸžƾż ȶȖ D60, D50, D40 ǀƴƉƴŴ
ǙƄžǾŴ ǚűȖ ǜž
A ȝȚǍƁnjƇů
• Ǡƶź NjƁ ǟƴŸ ǃƄƶƵŽȚ ǀſƾƸǧ ƿƆƁ ȆǚƭŸ ȞȶNjŲ ǀŽƾŲ Ǡź
.ƾƷŽ
ȿ
NjƯů ȶȖ ǀƁȤƾƭƃŽȚ ǙƳƱů ǽ
ǏƵƴů ǽ ȆǍųȕ ȞȢƾƇŽ ȶȖ ȪǞƲƉŽ ǀƆƸƄſ ǝŲƾƄƱſȚȶ ǃƄƶƵŽȚ ǍƉż ǀŽƾŲ Ǡź .ǓƲź ǚƀƻž
ȶȖ ǀƸŮǍƷż ǀžNjǧ ȞȶNjŲ Ǡź ƿƃƉƄƁ NjŻ ȝƾŶƾƸƄŲǽȚ ȵnjƀ ȬƾƃůȚ ȳNjŸ .ǀźǞƪƳƵŽȚ ȔȚǎűLjȚ
.ȷǍųȖ ǀŮƾǧȘ
• ȞƾƯƃſȚ ǀƮŲǾž ǀŽƾŲ Ǡź
.ǃƄƶƵŽȚ Ǡź ǚƭŸ ȞȶNjŲ ǀŽƾŲ Ǡź ȜǍŵƾƃž ȚǍƸžƾƳŽȚ ǘƴŹȚ
ȚǍƸžƾƳŽȚ ǀƁȤƾƭŮ ȬǎſȚȶ ȢȢǍƄƵŽȚ ȤƾƸƄŽȚ ȲǞƇž ǚƫźȚ ȆȥƾƷƆŽȚ ǜž ǀƁȢƾŸ ǍƸŹ ǀƇǣȚȤ ȶȖ ȴƾųȢ
Ǡź ȤȚǍƵƄŴǽȚ ȸȢƻƁ NjŻ .ȰȶǍƇŮ ǀŮƾǧȁȚ ƿƶƆƄŽ ȤnjƇŽȚ ǠųǞů ƿƆƁ ȆȤǞƱŽȚ ǟƴŸ
ȚǍƸžƾƳŽƾŮ ǝűǞů ȆǀƁȤƾƭƃŽȚ ǀŽȚȥȘ NjƯŮ .ǘƁǍŲ țǞƪſ ȶȖ ǀŮƾǧȂŽ ȩǍƯƄŽȚ ǟŽȘ ȳȚNjƈƄŴǽȚ
.ǑƇƱƴŽ NjƵƄƯž ȴǞƳƸſ ǀžNjų ǎżǍž ǟŽȘ
• Țnjƀ ȬƾƃůȚ ȳNjŸ .ȴƾƄƴƄƃž ȱȚNjƁȶ ǝƉƵƴů ȶȖ ȔƾƵƴŽ ǃƄƶƵŽȚ ȩ
ȿ
ǍƯů ǽ
.ƾ
ȹ
źƾű ǝƸƴŸ ǔźƾŲ
.ǀƸǣƾŮǍƷż ǀžNjǧ ȶȖ ǘƁǍŲ ǟŽȘ ȸȢƻƁ NjŻ ǝƸƃƶƄŽȚ
• Ǡź ȥƾƷƆŽȚ ǚƸưƪů ȸȢƻƁ NjŻ
.ȲƾƯƄŵǾŽ ǀƴŮƾŻ ȝȚȥƾŹ ǓŴȶ ǃƄƶƵŽȚ ȳNjƈƄƉů ǽ
ǟŽȘ ȤƾƃưŽȚ ȶȖ ȲƾƯƄŵǾŽ ǀƴŮƾŻ ȷǍųȖ ȝȚȥƾŹ ȶȖ ȴƾŮȶǍƃŽȚ ȢǞűȶ Ǡź ȶȖ ǀƂƃƯƄŽȚ ȝƾƭƇž
.ǘƁǍŲ ȶȖ ȤƾƆƱſȚ
• ǍƮƶŽȚ
.ȚǍƸžƾƳŽƾŮ ȨƾƈŽȚ ǍƮƶƵŽȚ ǜƸƯž ȶȖ ǀŴNjƯŽȚ ȲǾų ǜž ǏƵƪŽȚ ǟŽȘ ǍƮƶů ǽ
NjŻ ǍƮƶƵŽȚ ǜƸƯž ȶȖ ǀŴNjƯŽȚ ȲǾų ǜž ȷǍųLjȚ ǀƯŶƾƉŽȚ ȔǞƬŽȚ ȤȢƾƫž ȶȖ ǏƵƪŽȚ ǟŽȘ
.ȤƾƫŮȁȚ ǟƴŸ ȜȤNjƲŽȚ Ǡź ǀƵǣȚȢ ǀŮƾǧȘ ǟŽȘ ȸȢƻƁ
A ȝƾƷƸƃƶů
• ȶȖ ǀŮƾǧȘ Ǡź ƿƃƉƄƁ NjŻ ȝƾƵƸƴƯƄŽȚ ȵnjƀ ȬƾƃůȚ ȳNjŸ
.ȲƾƱŶLjȚ ȲȶƾƶƄž ǜŸ Ț
ȹ
NjƸƯŮ ǔƱƇƁ
.ǃƄƶƵŽȚ ǚƭŸ Ǡź
• ȵǎƸżǍů ǛƄƁ ȸnjŽȚ ǏƵƪŽȚ ȔǞǤ ƿƃƉƄƁ NjŻ .
ǀŴNjƯŽȚ ǍƃŸ ǏƵƪŽȚ ȔǞǤ ǎżǍů ǽ
ǚƯűȚ ǀƸƱƴƈŽȚ ȜȔƾǤȁȚ ȝȚȣ ȯȚNjƀLjȚ ǍƁǞƫů NjƶŸ .ǘƁǍŲ țǞƪſ Ǡź ǀŴNjƯŽȚ ǀƭŴȚǞŮ
ǀƸƭŹȖ ȲNjƃƄŴȚ ȆǀƴƁǞŶ ȜǍƄƱŽ ȳNjƈƄƉƄ
Ƚ
Ŵ ǀŴNjƯŽȚ ǜƳů ǛŽ ȚȣȘ ȑȤƾŶȁȚ ȟȤƾų ǏƵƪŽȚ
.ǍŵƾƃƵŽȚ ǏƵƪŽȚ ȔǞǤ ǜŸ Ț
ȹ
NjƸƯŮ ƾƷſǎųȶ ǀŴNjƯŽȚ
• ȆȚ
ȹ
Njű ǀƸŽƾŸ ȜȤȚǍŲ ȝƾűȤNjŽ ǀǤǍƯž ǜżƾžȖ Ǡź ǃƄƶƵŽȚ ȱǍƄů ǽ
.ȜNjǣȚǎŽȚ ȜȤȚǍƇŽȚ ƿƶƆů
ȶȖ ǚƁNjƶž ȶȖ ǀƱƪƶƵŮ ǃƄƶƵŽȚ Ǡƭưů ȶȖ ǍŵƾƃƵŽȚ ǏƵƪŽȚ ȔǞǤ Ǡź ǀƲƴưž ȜȤƾƸŴ ǚƅž
ǚƭŸ ȶȖ ǘƁǍŲ ǟŽȘ ȸȢƻƁ NjŻ ȝƾƷƸƃƶƄŽȚ ȵnjƀ ȬƾƃůȚ ȳNjŸ .ǝžȚNjƈƄŴȚ ȔƾƶŰȖ ǃƄƶƵŽȚ Ǡƭưů
.ǃƄƶƵŽƾŮ
■ ǀŴNjƯŽȚ ȔȚǎűȖ
ȸȤƻƃŽȚ ǎƸżǍƄŽȚ ǀƲƴŲ !0
ǀŴNjƯŽȚ ƿƸżǍů ǀžǾŸ !1
ǀŴNjƯŽȚ ƿƸżǍƄŽ ǀƸŶƾƭƵŽȚ ǀƸƪƇŽȚ !2
CPU ȜNjŲȶ ǚƸǧǞů ȯȚǍŶȖ !3
ȸȤƻƃŽȚ ȲǞƭŽȚ ȷǞƄƉž !4
ȸȤƻƃŽȚ ǎƸżǍƄŽȚ ǕǤȶ ȠƾƄƱž !5
ȥȚǎƄƀǽȚ ǚƸƴƲů ȠƾƄƱž !6
ȥȚǎƄƀǽȚ ǚƸƴƲů ǕǤȶ ȠƾƄƱž !7
ǀŴNjƯŽȚ ǀƸŻȚȶ q
ǀŴNjƯŽȚ ǀƸŻȚȶ ǚƱŻ ǀžǾŸ w
ǀŴNjƯŽȚ ǀƸŻȚȶ ǀžƾƲƄŴȚ ǀžǾŸ e
ǀŴNjƯŽȚ ǀƸŻȚȶ ǚƱŻ ǍƁǍƇů Ȥȥ r
ǀŴNjƯŽȚ ǀƸŻȚȶ ƿƸżǍů ǀžǾŸ t
ȳȶǎŽȚ ǀƲƴŲ y
ȸȤƻƃŽȚ ȲǞƭŽȚ ǀžǾŸ u
ȸȤƻƃŽȚ ǎƸżǍƄŽȚ ǀźƾƉž Ǎŵƻž i
ȸȤƻƃŽȚ ǎƸżǍƄŽȚ ǀźƾƉž ǀžǾŸ o
■ ȸȤƻƃŽȚ ǎƸżǍƄŽȚ
ǎƸżǍƄŽȚ ȬƾǤȶȖ ǜŸ ȝƾžǞƴƯƵŽ) ǀžǞŸNjƵŽȚ ȸȤƻƃŽȚ ǎƸżǍƄŽȚ ȬƾǤȶȖ ǠŽƾƄŽȚ ȲȶNjƆŽȚ ȩǍƯƁ
.(ȚǍƸžƾƳŽȚ ǚƸŽȢ ǍƮſȚ ȆȚǍƸžƾƳŽƾŮ ǀǧƾƈŽȚ ȸȤƻƃŽȚ
ǀŴNjƯƴŽ ȸȤƻƃŽȚ ǎƸżǍƄŽȚ ǕǤȶ ȸȤƻƃŽȚ ǎƸżǍƄŽȚ ǕǤȶ
ȚǍƸžƾƳƴŽMM/A
Ǖž ȸȶNjƁ ȸȤƻŮ ǎƸżǍů
ǠſȶǍƄƳŽȘ ȷNjž ǜƸƯž
ǠǣƾƲƴů ȔƾưŽȘ Ǖž ǠǣƾƲƴů ȸȤƻŮ ǎƸżǍů
(AF ǀƁǞŽȶȖ)
AF
ǠſȶǍƄƳŽȘ ȷNjž ǜƸƯž Ǖž ȸȶNjƁ ȸȤƻŮ ǎƸżǍů MF
(ȸȶNjƁ ǚƁNjƯů Ǖž ǠǣƾƲƴů ȸȤƻŮ ǎƸżǍů) M/A
:(M/A) ȸȶNjƸŽȚ ǚƁNjƯƄŽȚ Ǖž ǠǣƾƲƴƄŽȚ ȸȤƻƃŽȚ ǎƸżǍƄŽȚ ȳȚNjƈƄŴƾŮ ǎƸżǍƄŽȚ ǓƃƬŽ
.
M/A ǕǤǞŽȚ ǟƴŸ ǀŴNjƯƴŽ ȸȤƻƃŽȚ ǎƸżǍƄŽȚ ǕǤȶ ȠƾƄƱž ǓƃǤȚ
z
.ȸȤƻƃŽȚ ǎƸżǍƄŽȚ ǓƃǤȚ
x
ǎƸżǍƄŽȚ ǀƲƴŲ ȜȤȚȢȘ ȲǾų ǜž ǠǣƾƲƴƄŽȚ ȸȤƻƃŽȚ ǎƸżǍƄŽȚ ǚƁNjƯů ȆǀƃŹǍŽȚ NjƶŸ ȆǜƳƵƁ
ǁſƾż ȚȣȘ ȶȖ) ǗƫƄƶƵŽȚ ǟƄŲ ǘŽƾưŽȚ ǍƁǍƇů Ȥȥ ǟƴŸ ǓưƬŽȚ ȔƾƶŰȖ ǀŴNjƯƴŽ ȸȤƻƃŽȚ
ǎƸżǍƄŽȚ ǓƃǤ ȜȢƾŸȁ
.(AF-ON ȤǎŽȚ ǟƴŸ ǓưƬŽȚ ȔƾƶŰȖ ȆAF-ON ȤǎŮ ȜǎƷƆž ȚǍƸžƾƳŽȚ
ǗƫƄƶƵŽȚ ǟƄŲ ǘŽƾưŽȚ ǍƁǍƇů Ȥȥ ǓưǤȚ ȆǠǣƾƲƴƄŽȚ ȸȤƻƃŽȚ ǎƸżǍƄŽȚ ȳȚNjƈƄŴƾŮ ȸȤƻƃŽȚ
.ȷǍųȖ ȜǍž
AF-ON ȤǎŽȚ ǓưǤȚ ȶȖ
■ ȰƾƭƶŽȚ ǘƵŸȶ ȳȶǎŽȚ
ǚųȚȢ ȜȤǞƫŽȚ ǓƃǤȶ ȸȤƻƃŽȚ ȲǞƭŽȚ ǚƁNjƯƄŽ ȳȶǎŽȚ ǀƲƴŲ ȤȢȖ ȆȸȤƻƃŽȚ ǎƸżǍƄŽȚ ǓƃǤ ǚƃŻ
.ȰƾƭƶŽȚ ǘƵƯŽ ǀƶƁƾƯž ǍźǞů ȚǍƸžƾƳŽȚ ǁſƾż ȚȣȘ
.ȤƾŶȁȚ
.ȸȤƻƃŽȚ ǎƸżǍƄŽȚ ǀźƾƉž ȲǞŶ ȩƾƱƈſȚ Ǖž ȸȤƻƃŽȚ ȲǞƭŽȚ ǚƲƁ :ǀƮŲǾž
ȩǍƯƁ ǽ NjŻȶ ǚƸŽNjż ǓƲź ȳȚNjƈƄŴǾŽ NjƯž ȸȤƻƃŽȚ ǎƸżǍƄŽȚ ǀźƾƉž Ǎŵƻž ȴȖ ǔŲǽ
ǽ ȆȷǍųȖ ǚžȚǞŸȶ ȰƾƭƶŽȚ ǘƵƯŽ ǀƆƸƄſ ȴƾƸŲLjȚ ǒƯŮ Ǡźȶ ȆǀŻNjŮ ȯȚNjƀLjȚ NjƯŮ ǀźƾƉž
.NjƸƯŮ ȯNjƀ ǟƴŸ ȸȤƻƃŽȚ ǎƸżǍƄŽȚ ȚǍƸžƾƳŽȚ ǓƃƬů ƾžNjƶŸ ∞ ǎžǍŽȚ ȩǍƯƁ
■ ǀƇƄƱŽȚ
ǒƱƈƶƁ NjŻ .ȚǍƸžƾƳŽƾŮ ǀǧƾƈŽȚ ǛƳƇƄŽȚ ljƸůƾƱž ȳȚNjƈƄŴƾŮ ǀŴNjƯŽȚ ǀƇƄź ǚƁNjƯů ǛƄƁ
.ȝƾƇƄƱŽȚ ǒƯŮ NjƶŸ ȤƾŶȁȚ ȤǞƫŽȚ ǚƸƆƉů ȲNjƯž
ǀƇƄƱƴŽ ǟƫŻLjȚ NjƇŽȚȶ ȳȶǎŽȚ
.1 EV ȲNjƯƵŮ ǀƇƄƱƴŽ ǟƫŻLjȚ NjƇŽȚ ǍƸƸưů ǟŽȘ ȸȢƻƁ ȳȶǎŽȚ ȲNjƯž Ǡź ǍƸƸưƄŽȚ
■ ǀƸƴųȚNjŽȚ ȧǾƱŽȚ ȝȚNjŲȶ
ȝȚNjŲȶ Ǖž ƾƷƯž ǀŴNjƯŽȚ ȳȚNjƈƄŴȚ ǜƳƵƁ ǠƄŽȚ ƾƸſNjŽȚ ȸȤƻƃŽȚ ǎƸżǍƄŽȚ ȝƾźƾƉž ǠƴƁ ƾƵƸź
.ǀźǍųȥ ȴȶNjŮ ȚǍƸžƾƳƴŽ ǠƴųȚNjŽȚ ȧǾƱŽȚ
*ȝƾŻƾƭſ NjƶŸ ȳNjƈƄŴȚ ȸȤƻƃŽȚ ȲǞƭŽȚ ȚǍƸžƾƳŽȚ
ǍƅżȖ ȶȖ ǍƄž 1.0 Ǜž 18
D7000/D7100/D7200
ǍƅżȖ ȶȖ ǍƄž 0.6 Ǜž 24
ǍƅżȖ ȶȖ ǍƄž 0.6 Ǜž 35
ǍƅżȖ ȶȖ ǍƄž 0.6 Ǜž 50
ǍƅżȖ ȶȖ ǍƄž 0.6 Ǜž 80
ǍƅżȖ ȶȖ ǍƄž 1.0 Ǜž 24
/D5000/D5100/D5200/D5300/D5500
D3100/D3200/D3300
ǍƅżȖ ȶȖ ǍƄž 0.6 Ǜž 35
ǍƅżȖ ȶȖ ǍƄž 0.6 Ǜž 50
ǍƅżȖ ȶȖ ǍƄž 0.6 Ǜž 80
ǍƅżȖ ȶȖ ǍƄž 1.5 Ǜž 18
D300 ǀƴƉƴŴ
ǍƅżȖ ȶȖ ǍƄž 0.6 Ǜž 24
ǍƅżȖ ȶȖ ǍƄž 0.6 Ǜž 35
ǍƅżȖ ȶȖ ǍƄž 0.6 Ǜž 50
ǍƅżȖ ȶȖ ǍƄž 0.6 Ǜž 80
*.ǀƃżǍž ǍƸŹ ǀŴNjƯŽȚ ǀƸŻȚȶ
ǀŴNjƯŽȚ ȯǍŶ ǝƸź ǠƭưƁ ȸnjŽȚ ȴƾƳƵŽȚ Ǡź ȴǞƳƄů ǠƄŽȚ ȲǾƮŽȚ ǟŽȘ "ǀźǍųǎŽȚ" ǍƸƪů
ǍƮſȚ ȆǀŴNjƯŽȚ ȵnjƀ Ǖž ǀźǍųǎŽȚ ȲǞŲ ȝƾžǞƴƯƵŽȚ ȞNjŲȖ ǟƴŸ ȲǞƫƇƴŽ .ǠƴųȚNjŽȚ ȧǾƱŽȚ
.ȚǍƸžƾƳŽȚ ǚƸŽȢ
■ (VR) ȥȚǎƄƀǽȚ ǚƸƴƲů
ȠƾƵƉƴŽ ȚǍƸžƾƳŽȚ ȥȚǎƄƀȚ ǝƃƃƉƁ ȸnjŽȚ ǐƁǞƪƄŽȚ ǚƸƴƲů ǟƴŸ ȥȚǎƄƀǽȚ ǚƸƴƲů ǀƸǧƾų ǚƵƯů
ȆǙŽȣ ǍƸŹ Ǡź ȲƾƇŽȚ ǝƸƴŸ ȴǞƳƸŴ ƾƵž ƺƭŮȖ ǗŻǞů ȝȚǍž 4.0 ǟŽȘ ǘŽƾưŽȚ ȝƾŸǍŴ ȲǞǧǞŮ
ǀŸǍŴ ǟƴŸ ȥȚǎƄƀǽȚ ǚƸƴƲů ȝȚǍƸŰƺů ȦƾƲ
Ƚ
ů .ǀŲƾƄƵŽȚ ǘŽƾưŽȚ ȝƾŸǍŴ Ȱƾƭſ ǜž NjƁǎƁ ƾƵž
ȚǍƸžƾƳŽȚ ǀƸƯƵƆŽ ǀƸŴƾƸƲŽȚ ȝƾƱǧȚǞƵƴŽ ƾ
ȹ
ƲƃŶ (ȸȢƾŸ) NORMAL ǕǤǞŽȚ Ǡź ǘŽƾưŽȚ
ȦƾƲ
Ƚ
ů ƾƵż ȑ(CIPA) Camera and Imaging Products Association ǍƁǞƫƄŽȚ ȝƾƆƄƶžȶ
DX ǀưƸƫŮ ȝƾŴNjƯŽȚȶ ȆFX ǀưƸƫŮ ǀƸƵŻǍŽȚ ȝȚǍƸžƾƳŽȚ ȳȚNjƈƄŴƾŮ FX ǀưƸƫŮ ȝƾŴNjƯŽȚ
.ǍƸƃƳů ǟƫŻȖ NjƶŸ ȳȶǎŽȚ ȝƾŴNjŸ ȦƾƲ
Ƚ
ů .DX ǀưƸƫŮ ȝȚǍƸžƾƳŽȚ ȳȚNjƈƄŴƾŮ
ȥȚǎƄƀǽȚ ǚƸƴƲů ȠƾƄƱž ȳȚNjƈƄŴȚ
• ǚƸƴƲů ǚƸƯƱů ǛƄƁ .ȥȚǎƄƀǽȚ ǚƸƴƲů ǚƸƯƱƄŽ (ǚƸưƪů) ON ǍƄųȚ
ǂƸƇŮ ȆǗƫƄƶƵŽȚ ǟƄŲ ǘŽƾưŽȚ ǍƁǍƇů Ȥȥ ǟƴŸ ǓưƬŽȚ NjƶŸ ȥȚǎƄƀǽȚ
.ȸȤƻƃŽȚ ǎƸżǍƄƴŽȶ ȜȤǞƫƴŽ ǚƬźȖ ǓƃƬŽ ȚǍƸžƾƳŽȚ ȥȚǎƄƀȚ ǍƸŰƺů ǚƴƲƁ
•.ȥȚǎƄƀǽȚ ǚƸƴƲů ǚƸưƪů ȯƾƲƁȁ (ȯƾƲƁȘ) OFF ǍƄųȚ
ȥȚǎƄƀǽȚ ǚƸƴƲů ǕǤȶ ȠƾƄƱž ȳȚNjƈƄŴȚ
ǚƸƴƲů ǚƸưƪů ȔƾƶŰȖ ȥȚǎƄƀǽȚ ǚƸƴƲů ǕǤȶ ȤƾƸƄųǽ ȥȚǎƄƀǽȚ ǚƸƴƲů ǕǤȶ ȠƾƄƱž ȳNjƈƄƉƁ
.ȥȚǎƄƀǽȚ
• ǍƁǞƫů NjƶŸ ǜ
dž
ƉƇ
Ƚ
ƵŽȚ ȥȚǎƄƀǽȚ ǚƸƴƲů ǚűȖ ǜž (ȸȢƾŸ) NORMAL ȢNjŲ
ǍƁǍƇů Ȥȥ ǟƴŸ ǓưƬŽȚ NjƶŸ ȥȚǎƄƀǽȚ ǚƸƴƲů ǍŰȖ ǍƷƮƁ .ǀƄŮƾƅŽȚ ȯȚNjƀLjȚ
.ǗƫƄƶƵŽȚ ǟƄŲ ǘŽƾưŽȚ
• ǜž ǍƁǞƫƄŽȚ NjƶŸ ȥȚǎƄƀǽȚ ȝȚǍƸŰƺů ǚƸƴƲƄŽ (Ǔƪſ) ACTIVE ǍƄųȚ
ǍƷƮƁ .ȚǍƸžƾƳŽȚ ȱǍƇů ȔƾƶŰȖ ȷǍųLjȚ ǗŻȚǞƵŽȚ Ǡź ȶȖ ǀżǍƇƄž ǀƃżǍž
.ǗƫƄƶƵŽȚ ǟƄŲ ǘŽƾưŽȚ ǍƁǍƇů Ȥȥ ǟƴŸ ǓưƬŽȚ NjƶŸ ȥȚǎƄƀǽȚ ǚƸƴƲů ǍŰȖ
ǀƸŮǍƯŽȚ
ȝƾƮŲǾž :ȥȚǎƄƀǽȚ ǚƸƴƲů ȳȚNjƈƄŴȚ
• ǟƄŲ ǍƮƄſȚȶ ǀƭưǤ Ǘƫſ ǘŽƾưŽȚ ǍƁǍƇů Ȥȥ ǓưǤȚ ȆȥȚǎƄƀǽȚ ǚƸƴƲů ȳȚNjƈƄŴȚ NjƶŸ
.ǀƁƾƷƶŽȚ ǟƄŲ ǘŽƾưŽȚ ǍƁǍƇů Ȥȥ ǟƴŸ ǓưƬŽȚ ǚƃŻ ǍƮƶƵŽȚ ǜƸƯž Ǡź ȜȤǞƫŽȚ ǍƲƄƉů
• ǍƁǍƇů NjƯŮ ǀŵǞƪž ǍƮƶƵŽȚ ǜƸƯž Ǡź ȜȤǞƫŽȚ ȴǞƳů NjŻ ȆȥȚǎƄƀǽȚ ǚƸƴƲů ǚƵŸ ȔƾƶŰȖ
.ȔȚȢLjȚ Ǡź ȤǞƫŻ ȶȖ ǚƭŸ ǟƴŸ Țnjƀ ȲNjƁ ǽ .ǘŽƾưŽȚ
• ǍƁȶNjů NjƶŸ .ȝƾƭƲƴŽȚ ǍƁȶNjƄŽ (ȸȢƾŸ) NORMAL ǟƴŸ ȥȚǎƄƀǽȚ ǚƸƴƲů ǕǤȶ ȠƾƄƱž ǓƃǤȚ
ǍƁȶNjů ǜž Ȕǎű NjƯů ǽ ǠƄŽȚ ǀżǍƇŽȚ ǟƴŸ ǓƲź ȥȚǎƄƀǽȚ ǚƸƴƲů ǘƸƃƭů ǛƄƁ ȆȚǍƸžƾƳŽȚ
ǘƸƃƭů ǛƄƸŴ ȆȲƾƅƵŽȚ ǚƸƃŴ ǟƴŸ ȆǠƲźȖ ǚƳƪŮ ȚǍƸžƾƳŽȚ ǍƁȶNjů ǀŽƾŲ Ǡź) ȚǍƸžƾƳŽȚ
ȚǍƸžƾƳŽȚ ǍƁȶNjů NjƶŸ ǚƷŴȖ ǍžLjȚ ǚƯƆƁ ƾž Ȇ(ǓƲź ǀƸŴȖǍŽȚ ǀżǍƇŽȚ ǟƴŸ ȥȚǎƄƀǽȚ ǚƸƴƲů
.ǍƸƃż ǠŴǞŻ ǚƳƪŮ ǀŴǾƉŮ
• ǀŻƾƭŽȚ ȬƾƭƲſȚ ǀŽƾŲ Ǡź .ȥȚǎƄƀǽȚ ǚƸƴƲů ǚƵŸ ȔƾƶŰȖ ǀŴNjƯŽȚ ǙƱů ȶȖ ȚǍƸžƾƳŽȚ ǘƴưů ǽ
NjƶŸ ǀŴNjƯŽȚ ǜŸ ǀƈƪƈŵ ȝǞǧ ȤNjƫƁ NjŻ ȆȥȚǎƄƀǽȚ ǚƸƴƲů ǚƵŸ ȔƾƶŰȖ ǀŴNjƯŽȚ ǜŸ
ƿƸżǍů ȜȢƾŸȘ ǘƁǍŶ ǜŸ ǍžLjȚ ljƸƇƫů ǜƳƵƁȶ ȆȔȚȢLjȚ Ǡź ȤǞƫŻ ǏƸŽ Țnjƀ .ƾƀȥȚǎƄƀȚ
.ȚǍƸžƾƳŽȚ ǚƸưƪůȶ ǀŴNjƯŽȚ
• ǜƇŵ ȔƾƶŰȖ ȥȚǎƄƀǽȚ ǚƸƴƲů ȯƾƲƁȘ ǛƄƸŴ ȆǠƴųȚȢ ȧǾƱŮ ȜǎƷƆž ȚǍƸžƾƳŽȚ ǁſƾż ȚȣȘ
.ȧǾƱŽȚ
• ǠŰǾŰ ǚžƾŲ ȶȖ ȸȢƾŲȖ ǚžƾŲ ǟƴŸ ȚǍƸžƾƳŽȚ ƿƸżǍů NjƶŸ (ǚƸưƪů) ON ȮŮ ǀžƾŸ ǟǧǞƁ
ǙŽȣȶ (ȯƾƲƁȘ)
OFF ȳȚNjƈƄŴȚ ǚƬƱ
Ƚ
Ɓ NjŻ ǝſȖ ǜž ǛŹǍŽȚ ǟƴŸ Ȇǁƃƅž ǍƸŹ ȦȖȤ Ǖž ǚűȤǽȚ
.ǚűȤǽȚ ǠŰǾŰ ǚžƾƇŽȚ ȬǞſȶ ǍƁǞƫƄŽȚ ȲȚǞŲȖ ƿƉŲ ǟƴŸ
■ ǀŴNjƯŽȚ ǀƸŻȚȶ
ȶȖ ǃƀǞƄŽȚ ƿƃƉů NjŻ ǠƄŽȚ ȜǍŰƾƶƄƵŽȚ ȜȔƾǤȁȚ ƿƆƇůȶ ǀŴNjƯƴŽ ǀƁƾƵŲ ǀŴNjƯŽȚ ǀƸŻȚȶ ǍźǞů
.ȜȤǞƫŽȚ ȵǞƪů
ǀŴNjƯŽȚ ǀƸŻȚȶ ǀƃƸżǍů
Ǖž (●) ǀŴNjƯŽȚ ǀƸŻȚȶ ƿƸżǍů ǀžǾŸ ȸȣƾŲ
ǀƸŻȚȶ ȤȢȖ ǛŰ (
) ǀŴNjƯŽȚ ǀƸŻȚȶ ǀžƾƲƄŴȚ ǀžǾŸ
Ǖž ● ǀžǾŸ ȜȚȣƾƇž ǛƄů ȴȖ ǟŽȘ (
w) ǀŴNjƯŽȚ
.(
—{) ǀŴNjƯŽȚ ǀƸŻȚȶ ǚƱŻ ǀžǾŸ
ƾƷůNjŸƾŻ ǟƴŸ ȢǞűǞƵŽȚ ǎžǍŽȚ ǜž țǍƲŽƾŮ ƾƷƳƉžȖ ȆǀŴNjƯŽȚ ǀƸŻȚȶ Ǚź ȶȖ ƿƸżǍů NjƶŸ
ǚƳƪŮ ǀƸŻȚǞŽȚ ƿƸżǍů ȳNjŸ ǀŽƾŲ Ǡź ǀźǍųȥ ǍƷƮů NjŻ
.ǗƶƯŮ ƾƷŮ ȱƾƉžȁȚ ƿƶƆůȶ
.ljƸƇǧ
.ȳȚNjƈƄŴǽȚ ȳNjŸ ǀŽƾŲ Ǡź ǀŴNjƯŽȚ ǟƴŸ ƾƷƃƸżǍůȶ ǀƸŻȚǞŽȚ ǏƳŸ ǜƳƵƁ
ǀŴNjƯŽȚ ǀƸŻȚȶ Ǚź
Ȇ(q) ǀŴNjƯŽȚ ǀƸŻȚȶ ǚƱŻ ǍƁǍƇů Ȥȥ ǟƴŸ ǓưǤȚ
ǛƷƉŽƾŮ ljǤǞƵŽȚ ȵƾƆůǽȚ Ǡź ǀŴNjƯŽȚ ǀƸŻȚȶ ȤȢȖȶ
.(
e) ljǤǞž Ǟƀ ƾƵż ƾƷűǍųȖȶ (w)
■ ǀŴNjƯŽƾŮ ǀƁƾƶƯŽȚ
• ƿſƾƆŽȚ ǀƁƾƵƇŽ .ȚǍƸžƾƳŽȚ ǜž ƾƷƄŽȚȥȘ NjƶŸ ǀŴNjŸ ǀƇƄź ǟƫŻȖ ǟŽȘ ǀŴNjƯŽȚ ȢǞƯů
ȲNjƃƄŴȚ ȶȖ ȜǍŵƾƃƵŽȚ ǏƵƪŽȚ ǀƯŵȖ ǜŸ Ț
ȹ
NjƸƯŮ ƾƷƮƱƇŮ ǛŻ ȆǀŴNjƯŽȚ ǜž ǠƴųȚNjŽȚ
.ǀŴNjƯŽȚ ǀƸƭŹȖ
•.ǓƲź ǀŴNjƯŽȚ ǀƸŻȚȶ ȳȚNjƈƄŴƾŮ ȚǍƸžƾƳŽȚ ȶȖ ǀŴNjƯŽȚ ǙƉƵů ȶȖ ǓƲƄƴů ǽ
•.CPU ȜNjŲȶ ǚƸǧǞů ȯȚǍŶȖ ǀźƾƮſ ǟƴŸ ǔźƾŲ
• ȜǍŵƾƃž ȲƾƵƯƄŴǽȚ ǜŸ ǗŻǞů ȆǀŴNjƯŽȚ ƿƸżǍƄŽ ǀƸŶƾƭƵŽȚ ǀƸƪƇŽȚ Ǘƴů ǀŽƾŲ Ǡź
.ǀſƾƸƫƴŽ NjƵƄƯž ȴǞƳƸſ ǀžNjų ǎżǍž ǟŽȘ ǀŴNjƯŽƾŮ ǝűǞůȶ
•.ǀŴNjƯŽȚ ljƭŴ ǟƴŸ ǜž ǀŽƾƉƶŽȚȶ ǀŮǍůLjȚ ǜž ǑƴƈƄƴŽ ǀŲȶǍž ȳNjƈƄŴȚ
• ȲǞƇž Ǡź ǜƁȤǞƴƱŽȚ ǀƲƃƭŮ ȜƾƭưƵŽȚ ǀƸƱƴƈŽȚȶ ǀƸžƾžLjȚ ǍǧƾƶƯŽȚ ǗƸƮƶů ǜƳƵƁ
ǕƲƃŽȚ ǜž ǑƴƈƄŽȚ ǜƳƵƁ .ǀźƾű ȧƾƵŻ ǀƯƭŻ ȳȚNjƈƄŴƾŮ ƾƷƇƉƵŮ ǀŶƾƉƃŮ ƿƁǍƲƄŽȚ
ǗƸƮƶů ǚƁNjƶž ȶȖ ǀƱƸƮſȶ ǀƵŸƾſ ǀƸƶƭŻ ȧƾƵŻ ǀƯƭŻ ȳȚNjƈƄŴƾŮ ǕŮƾǧLjȚ ȝƾƵƫŮȶ
ȱǍů ȳNjƯŽ ȵƾƃƄſǽȚ Ǖž ȆǀƁǍǣȚȢ ǀżǍŲ Ǡź ȟȤƾƈŽȚ ǞƇſ ǎżǍƵŽȚ ǜž ǀŴNjƯŽȚ ǗƮſȶ ȑǀŴNjŸ
ǀƯƭŻ ȳȚNjƈƄŴƾŮ ƾƷƇƉžȚ ȆȜNjƸƶƯŽȚ ǕƲƃŽȚ ǀŽȚȥȁ .ǙƯŮƾǧƺŮ ȟƾűǎŽȚ ǏƵŽ ȶȖ NJƭƴů
ǕƲƃŽȚ ǀŽȚȥȘ ǜƳƵƁ .ȝƾŴNjƯŽȚ ǗƮƶž ȶȖ ȲǞſƾƅƁȘ ȶȖ ǍƭƲž ȔƾƵŮ
ȹ
ǾƸƴŻ ǀƴƴƃž ǀƵŸƾſ ȧƾƵŻ
ǁƁǎŽȚȶ ȔƾƵƴŽ ȜȢȤƾƭŽȚ ǜƁȤǞƴƱŽȚ ǀƲƃƭŮ ȜƾƭưƵŽȚ ǍǧƾƶƯŽȚ ǟƴŸ ȝȚǍƭŻ ǚƳŵ ǟƴŸ ǠƄŽȚ
.ǀźƾű ȧƾƵŻ ǀƯƭŻ ȳȚNjƈƄŴƾŮ
•.ǀŴNjƯŽȚ ǗƸƮƶů ȩǍưŮ ǜƁǎƶƃŽȚ ȶȖ ȴƾƀNjŽȚ ǗƱƈž ǚƅž ȸǞƬŸ ƿƁnjž
ȹ
ȚNjŮȖ ȳNjƈƄƉů ǽ
•.ǠžƾžLjȚ ǀŴNjƯŽȚ ǍƫƶŸ ǀƁƾƵƇŽ NC ȝƾƇŵǍž ȶȖ ǀŴNjƯŽȚ ǀƸŻȚȶ ȳȚNjƈƄŴȚ ǜƳƵƁ
•.ǀſǍž ǀƃƸƲŲ Ǡź ǀŴNjƯŽȚ ǕǤȶ ǚƃŻ ǠƱƴƈŽȚȶ ǠžƾžLjȚ ǜƁȔƾƭưŽȚ ƿżȤ
• ȯƾűȶ ȢȤƾŮ ȴƾƳž Ǡź ƾƷŮ ǔƱƄŲȚ ȆȜNjƄƵž ȜǍƄƱŽ ǀŴNjƯŽȚ ȳȚNjƈƄŴȚ ǛƄƁ ǜŽ ǀŽƾŲ Ǡź
ȝȚǍż ȶȖ ƾƄźƾſ Ǖž ȶȖ ǍŵƾƃƵŽȚ ǏƵƪŽȚ ȔǞǤ Ǡź ƾƷſǎƈů ǽ
.ȖNjǧ ȶȖ ǜƱŸ ȴǞƳů ƿƶƆƄŽ
.ǀƅƯŽȚ ȤǞźƾż
• ǽ Ǘƴů ȬǞŻȶ Ǡź ƿƃƉƄƁ NjŻ ǀƸƴųȚNjŽȚ ǚƵƯŽȚ ǀƸŽȕ ȖNjǧ
.ǀźƾű ǀŴNjƯŽȚ ǠƴŸ ǔźƾŲ
.ǝŲǾǧȘ ǜƳƵƁ
• ǜž ǀŸǞƶƫƵŽȚ ȔȚǎűLjȚ ȵǞƪƁ ȶȖ ǗƴƄƁ NjŻ ȜȤȚǍƇŽȚ ȜNjƁNjŵ ǕŻȚǞž Ǡź ǀŴNjƯŽȚ ȱǍů
.ȷǞƲƵŽȚ ǙƸƄŴǾƃŽȚ
■ ǀƲźǍƵŽȚ ȝȚȤȚǞƉƉżȁȚ
•Ǜž 72 ǍƭŻ LC-72 ȥȚǍŶ ǓưǤ ǠžƾžȖ ǀŴNjŸ ȔƾƭŹ
•LF-4 ȥȚǍŶ ǠƱƴų ǀŴNjŸ ȔƾƭŹ
•HB-75 ȥȚǍŶ ǀƶƶƉž ȜNjŸƾƲŮ ǀŴNjŸ ǀƸŻȚȶ
■ ǀƲźȚǞƄƵŽȚ ȝȚȤȚǞƉƉżȁȚ
•ǀƸƃŽǞŽ ǀŴNjƯƴŽ ȝƾƇŵǍž Ǜž 72
•CL-1218 ǀŴNjƯŽȚ ǀƃƸƲŲ
■ ȝƾƱǧȚǞƵŽȚ
ȜNjŸƾŻȶ CPU ȜNjŲǞŮ ȜǎƷƆž E ȬǞƶŽȚ ǜž AF-S DX ǀŴNjŸ
F ƿƸżǍů
ȬǞƶŽȚ
Ǜž 80-16
ȸȤƻƃŽȚ ȲǞƭŽȚ
4 – f/2.8
ǀƇƄƱƴŽ ǟƫŻLjȚ NjƇŽȚ
ǍǧƾƶŸ 3 ȶ ȆED ǍǧƾƶŸ 4 ǚƵƪƁ) ǀŸǞƵƆž 13 Ǡź ǍƫƶŸ 17
( ǜƁȤǞƴź ȝȚȔǾŶ ȶȖ ȲƾƄƉƁǍż Ǟſƾſ ȝȚȔǾƭŮ ǍǧƾƶŸȶ ȆǀƁȶǍż ǝƃŵ
ǀŴNjƯŽȚ ǜƁǞƳů
°20- °83
ȜȤǞƫŽȚ ǀƁȶȚȥ
• ( 80 Ȇ50 Ȇ35 Ȇ24 Ȇ16) ȸǍƄƵƸƴƴž ȟȤNjů
ȸȤƻƃŽȚ ȲǞƭŽȚ ȷǞƄƉž
ȚǍƸžƾƳŽȚ ǟŽȘ ȟǍų
ǀźƾƉƵŽȚ ȝƾžǞƴƯž
ǀƴƲƄƉž ȳȶȥ ǀƲƴŲ ȳȚNjƈƄŴƾŮ ȸȶNjƁ ȳȶȥ
ȳȶȥ
Internal Focusing ȴǞƳƸſ ǠƴųȚNjŽȚ ȸȤƻƃŽȚ ǎƸżǍƄŽȚ ȳƾƮſ
ǀƭŴȚǞŮ ǝƸź ǛƳƇƄŽȚ ǛƄƁ ǠǣƾƲƴů ȸȤƻŮ ǎƸżǍů Ǖž (IF)
ǓƃƬŽ ǀƴƫƱƶž ȸȤƻŮ ǎƸżǍů ǀƲƴŲȶ ǁžƾǧ ǠűǞž ȱǍƇž
ȹ
ƾƁȶNjƁ ȸȤƻƃŽȚ ǎƸżǍƄŽȚ
ȸȤƻƃŽȚ ǎƸżǍƄŽȚ
(VCMs) ǠůǞǧ Ǘƴž ȝƾżǍƇƵŮ ǀŴNjŸ ǙƁǍƇů
ȥȚǎƄƀǽȚ ǚƸƴƲů
∞
–
ǍƄž 0.35
ǎƸżǍƄŽȚ ǀźƾƉž Ǎŵƻž
ȸȤƻƃŽȚ
ǀƁȤƻƃŽȚ ǀźƾƉƵŽȚ ǜž ǍƄž 0.35
ǀźƾƉƵŽ ǟſȢLjȚ NjƇŽȚ
ǎƸżǍƄŽȚ
(ǀƁǍǣȚȢ ƿűƾŲ ǀƇƄź) 7
ǀƇƄƱŽȚ ƿűƾŲ ȝȚǍƱŵ
ǀƸǣƾƲƴƄŽȚ ǀƸſȶǍƄƳŽȁȚ ǀƇƄƱŽȚ Ǡź ǛƳƇƄŽȚ ǀƇƄƱŽȚ ƿűƾŲ
•22 – f/ 2.8 :Ǜž 16 ȸȤƻŮ ȲǞŶ
•32 – f/ 4 :Ǜž 80 ȸȤƻŮ ȲǞŶ
ǀƇƄƱŽȚ Ȱƾƭſ
ǀƴžƾż ǀƇƄƱŽȚ
ȜǍƁƾƯƵŽȚ
(Ǜž 0.75=P) Ǜž 72
ljŵǍƵŽȚ ǍƭŻ ȦƾƸŻ
ǀƱŵ ǜž ǀźƾƉƵŽȚ)
ȹ
ƾƃƁǍƲů Ǜž 85.5 × ǍƭŻ ǟƫŻȖ Ǜž 80
(ȚǍƸžƾƳŽȚ ǟƴŸ ǀŴNjƯŽȚ ƿƸżǍů
ȢƾƯŮLjȚ
ȹ
ƾƃƁǍƲů ȳȚǍű 480
ȴȥǞŽȚ
ȸȖ Ǡź ǚƸŽNjŽȚ Țnjƀ Ǡź ȜȢȤȚǞŽȚ ȜǎƷűLjƾŮ ǀǧƾƈŽȚ ȝƾƱǧȚǞƵŽȚ ǍƸƸưů Ǡź ǘƇŽƾŮ ȴǞƳƸſ ǔƱƄƇů
.ǘƃƉž ȤƾƭųȘ ȴȶNjŮȶ ǁŻȶ
wqertuy io!0 !1 !2 !3
!6 !7!5!4
在使用本產品前,請仔細閱讀這些指南和相機說明書。
注意:DX 鏡頭適用於 DX 格式數碼單鏡反光相機(如 D7200 或
D5500
)。DX 格式相機上鏡頭的畫角,相當於安裝在 35 mm 格式相機
上焦距約為該鏡頭 1.5 倍的鏡頭的畫角。
本鏡頭不支援
D2 系列和 D1 系列、D200、D100、D90、D80、
D70系列、D60、D50、D40 系列以及 D3000 數碼單鏡反光相機和菲
林單鏡反光相機。
安全須知
A
警告
•
勿自行拆解或改裝。遇到故障時,本產品只能由有資格的維修技師進
行修理。若本產品因為跌落或其他意外事故造成破損,請不要觸碰外
露的零件,否則可能導致觸電或其他傷害事故。
•
發生故障時立刻關閉相機。當您發現本裝置冒煙或發出異味時,請立
刻拔下
AC 變壓器的插頭並取出相機電池,注意避免被灼傷。若在此
情形下繼續使用,將可能導致火災或受傷。請在取出電池後,將裝置
送到尼康授權維修服務中心進行檢查維修。
•
保持乾爽。切勿使本產品接觸到水,也不要用濕手接觸,否則可能導
致火災或觸電。
•
勿在易燃氣體環境中使用。在加油站或者有丙烷氣或其他易燃氣體或
粉塵的環境中操作本裝置可能導致爆炸或火災。
•
勿透過鏡頭或相機觀景器觀看太陽。透過鏡頭或觀景器觀看太陽或
其他明亮光源,可能會導致永久性的視覺損傷。
A
注意事項
•
勿在兒童伸手可及之處保管本產品。若不遵守此注意事項,可能會導
致受傷或產品故障。
•
勿透過鏡頭聚焦陽光。陽光透過鏡頭聚焦可能會引起火災。拍攝逆光
主體時,請不要讓太陽進入構圖範圍;若將在較長時間內不使用鏡頭,
請蓋好鏡頭蓋並將其存放在遠離直射陽光的地方。
•
勿加熱。請勿將本產品置於極其高溫的場所(如直射陽光下封閉的車
內),也不要在使用期間用毛巾或手帕裹住本產品或者遮蓋本產品,
否則可能導致火災或產品故障。
■
鏡頭部件
q
遮光罩
w
遮光罩鎖定標記
e
遮光罩對齊標記
r
遮光罩鎖定釋放按鍵
t
遮光罩接環標記
y
變焦環
u
焦距標記
i
對焦距離指示器
o
對焦距離標記
!0
對焦環
!1
鏡頭接環標記
!2
橡膠鏡頭接環密封墊
!3
CPU接點
!4
焦距尺
!5
對焦模式切換器
!6
減震開關
!7
減震模式切換器
■
對焦
所支援的對焦模式如下表所示(有關相機對焦模式的資訊,請參見相機
使用說明書)。
相機對焦模式
鏡頭對焦模式
M/A M
AF 自動對焦(連手動優先)
帶有電子測距器的手動對焦
MF 帶有電子測距器的手動對焦
M/A
(自動對焦(連手動優先))
使用自動對焦(連手動優先)(M/A)進行對焦的步驟如下:
z
將鏡頭對焦模式切換器推至 M/A。
x
對焦。
若有需要,您可在半按快門釋放按鍵期間(或者,若相機配備有一
個
AF-ON
按鍵,則在按下
AF-ON
按鍵期間)旋轉鏡頭對焦環來使
手動對焦優先於自動對焦。若要使用自動對焦以重新對焦,請再次
半按快門釋放按鍵或再次按下
AF-ON
按鍵。
■
變焦和景深
對焦之前,請旋轉變焦環調整焦距並進行構圖。若相機支援景深預覽
(光圈縮小),則景深可在觀景器中進行預覽。
注意:
焦距隨對焦距離的縮短而減小。
對焦距離指示器僅可作為指南,可能無法準確顯示離主體的距離,並
且由於景深或其他因素的影響,相機對焦於遠距離物體時可能不會顯
示
∞
。
■
光圈
請使用相機控制調整光圈。在某些光圈下,每秒拍攝幅數可能會降低。
變焦和最大光圈
更改變焦可將最大光圈最多改變1 EV。
■
內置閃光燈元件
鏡頭可與相機的內置閃光燈元件一起使用而不產生邊暈的最短對焦距
離如下。
相機 焦距 使用範圍 *
D7200/D7100/D7000
18 mm 1.0 m
或以上
24 mm 0.6 m 或以上
35 mm 0.6 m 或以上
50 mm 0.6 m 或以上
80 mm 0.6 m或以上
D5500/D5300/D5200/D5100/
D5000/D3300/D3200/D3100
24 mm 1.0 m
或以上
35 mm 0.6 m 或以上
50 mm 0.6 m 或以上
80 mm 0.6 m或以上
D300 系列
18 mm 1.5 m 或以上
24 mm 0.6 m 或以上
35 mm 0.6 m 或以上
50 mm 0.6 m 或以上
80 mm 0.6 m或以上
* 未安裝遮光罩。
“邊暈”是指因鏡頭末端遮擋內置閃光燈光線所產生的陰影。有關使用
本鏡頭時的邊暈的最新資訊,請參見相機的說明書。
■
減震(
VR)
減震(VR)可減少相機震動所引起的模糊,從而使快門速度可比一般
情況時最多降低 4.0 檔,同時增加可用快門速度的範圍。減震對快門
速度的影響是在
NORMAL(標準)模式下根據相機與影像產品協會
(
CIPA)標準所測量;測量 FX 格式鏡頭時使用的是 FX 格式數碼相機,
測量 DX 格式鏡頭時使用的是 DX 格式相機。變焦鏡頭是在最大變焦
設定下進行的測量。
使用減震開關
•
選擇
ON
(開啟)啟用減震。減震將在您半按快門釋放按
鍵時啟動,從而減少相機震動的影響以改善構圖和對焦。
•
選擇
OFF
(關閉)可關閉減震。
使用減震模式切換器
減震模式切換器用於減震處於開啟狀態時選擇減震模式。
•
選擇
NORMAL
(標準)可在拍攝靜止主體時增強減震。
半按快門釋放按鍵時減震生效。
•
選擇
ACTIVE
(動態)可減少從行駛的車輛上以及相機
移動量較大的其他情況下拍攝時震動的影響。
半按快
門釋放按鍵時減震生效。
使用減震:注意事項
•
使用減震時,請先半按快門釋放按鍵,然後待觀景器中的影像穩定之
後再完全按下快門釋放按鍵。
•
啟用減震時,觀景器中的影像在您釋放快門後可能會變得模糊。這並
非故障。
•
進行搖攝時,請將減震模式切換器滑動至
NORMAL
(標準)。當相機
進行搖攝時,減震僅套用於非搖攝部分的動作(例如,若相機進行水
平搖攝,則減震將僅套用於垂直方向的震動),因而更易於以較大幅
度平穩地移動相機。
•
減震處於有效狀態時,請勿關閉相機,也不要取下鏡頭。若在減震處
於有效狀態時切斷鏡頭電源,震動時鏡頭將可能發出嘎嘎聲。這並非
故障,重新安裝鏡頭並開啟相機即可解決該問題。
•
若相機配備有內置閃光燈,閃光燈充電時減震將無法使用。
•
當相機固定於單腳架或雲台不穩固的三腳架時,一般建議選擇
ON
,
但根據拍攝條件和三腳架類型的不同,有時可能選擇
OFF
更合適。
■
遮光罩
遮光罩可保護鏡頭並阻擋可能導致眩光或鬼影的散射光線。
安裝遮光罩
將遮光罩接環標記(
●
)與遮光罩對齊
標記( )對齊,然後旋轉遮光罩(
w
)
直至
●
標記與遮光罩鎖定標記(
—
)
對齊。
安裝或取下遮光罩時,請在其底部的 標記附近將其握住,並避免握
得太緊。若未正確安裝好遮光罩,則可能會產生邊暈。
不使用時,可將遮光罩反轉並固定在鏡頭上。
取下遮光罩
按下遮光罩鎖定釋放按鍵(
q
),如箭
頭所示方向旋轉遮光罩(
w
),然後如
圖所示將其取下(
e
)。
■
鏡頭保養
•
鏡頭從相機取下後會恢復至最大光圈。為保護鏡頭內部,請將其存放
在沒有陽光照射處,或者重新蓋上鏡頭蓋。
•
拿起或持握鏡頭或相機時,切勿僅持拿遮光罩。
•
保持 CPU接點清潔。
•
若橡膠鏡頭接環密封墊損壞,請立即停止使用並將鏡頭送至尼康授
權維修服務中心進行維修。
•
用吹氣球去除鏡頭表面的灰塵和浮屑。
•
增距鏡的氟塗層前後部元件可簡單地使用乾布進行清潔。污點和指
紋可使用一塊乾淨的軟棉布或鏡頭清潔紙去除;清潔時以圓周運動
方式從裡向外擦拭,注意不要留下污漬,也不要用手指觸碰玻璃表面。
清除頑漬時,請使用一塊沾有少許蒸餾水、乙醇或鏡頭清潔劑的軟布
輕輕擦拭。拒水、拒油的氟塗層元件上的滴狀污漬可使用乾布去除。
•
切勿使用塗料稀釋劑或苯等有機溶劑清潔鏡頭。
•
遮光罩或
NC 濾鏡可用於保護前部鏡片元件。
•
將鏡頭放入軟鏡袋之前,請蓋好鏡頭前後蓋。
•
若在較長時間內不使用鏡頭,請將其存放在陰涼乾爽的地方以防止
發霉和生銹。切不可存放在直射陽光下,也不可與石腦油或樟腦丸一
起存放。
•
保持鏡頭乾爽。內部構造生銹將導致無法挽回的損壞。
•
將鏡頭放置在過於炎熱的地方將會使強化塑膠部件受損或變形。
■
隨附配件
•
72 mm 扣入式鏡頭前蓋 LC-72
•
鏡頭後蓋
LF-4
•
刺刀式遮光罩
HB-75
■
兼容的配件
•
72 mm 旋入式濾鏡
•
鏡頭套
CL-1218
■
技術規格
類型 帶內置 CPU和 F接環的E型 AF-S DX 鏡頭
焦距 16 – 8 0 mm
最大光圈 f/2.8– 4
鏡頭結構 13 組 17 片(包括 2 個 ED 元件,1 個非球面 ED 元
件,
3 個非球面元件,1 個高折射率元件以及帶納
米結晶塗層或氟塗層的元件)
畫角
83° – 20°
焦距尺 以毫米為單位(16、24、35、50、80)
距離資訊 輸出主體與相機之間的距離資訊
變焦 使用獨立變焦環的手動變焦
對焦 尼康內部對焦(IF)系統(可進行由寧靜波動馬達
控制的自動對焦,也具備用於手動對焦的獨立對
焦環)
減震 使用音圈馬達(VCM)的鏡片移動
對焦距離指示器 0.35 m – ∞
最短對焦距離 0.35 m(至焦平面)
光圈葉片 7 片(圓形光圈孔)
光圈 自動電子光圈控制
光圈範圍
•
16 mm 焦距:f/2.8 – 22
•
80 mm焦距:f/4 – 32
測光 全開光圈測光
濾鏡接口大小 72 mm(P = 0.75 mm)
尺寸 約 80 mm(最大直徑)×85.5 mm(從相機鏡頭接
環邊緣開始的距離)
重量 約 480 g
尼康公司保留可隨時更改說明書內載之硬件技術規格的權利,而無須
事先通知。
繁體中文
-
 1
1
-
 2
2


Nikon AF-S DX NIKKOR 16-80mm f/2.8-4E ED VR ユーザーマニュアル
- カテゴリー
- カメラレンズ
- タイプ
- ユーザーマニュアル
他の言語で
関連論文
-
Nikon AFSDXVR16-80 ユーザーマニュアル
-
-
Nikon AF-S DX NIKKOR 18-140mm f/3.5-5.6G ED VR ユーザーマニュアル
-
-
-
 Nikon France AF-S DX 18-55mm f/3.5-5.6GVR ED ユーザーマニュアル
-
Nikon AF-S NIKKOR 200-500mm f/5.6E ED VR ユーザーマニュアル
-
-
-
