
CMT-MX500i.GB/CS.4-189-334-84(1)
WARNING
To reduce the risk of re, do not cover the ventilation
opening of the apparatus with newspapers, tablecloths,
curtains, etc. Do not place the naked ame sources such
as lighted candles on the apparatus.
To reduce the risk of re or electric shock, do not expose
this apparatus to dripping or splashing, and do not place
objects lled with liquids, such as vases, on the apparatus.
Do not install the appliance in a conned space, such as a
bookcase or built-in cabinet.
As the main plug is used to disconnect the unit from the
mains, connect the unit to an easily accessible AC outlet.
Should you notice an abnormality in the unit, disconnect
the main plug from the AC outlet immediately.
Do not expose batteries or apparatus with battery-
installed to excessive heat such as sunshine, re or the
like.
e unit is not disconnected from the mains as long as it
is connected to the AC outlet, even if the unit itself has
been turned o.
CAUTION
e use of optical instruments with this product will
increase eye hazard.
Except for customers in the U.S.A. and
Canada
is appliance is classied
as a CLASS 1 LASER
product. is marking
is located on the rear
exterior.
Note on DualDiscs
A DualDisc is a two sided disc product which mates
DVD recorded material on one side with digital
audio material on the other side. However, since the
audio material side does not conform to the Compact
Disc (CD) standard, playback on this product is not
guaranteed.
Music discs encoded with copyright
protection technologies
is product is designed to playback discs that conform
to the Compact Disc (CD) standard. Recently, various
music discs encoded with copyright protection
technologies are marketed by some record companies.
Please be aware that among those discs, there are some
that do not conform to the CD standard and may not be
playable by this product.
License and Trademark Notice
iPod is a trademark of Apple Inc., registered in the U.S.
and other countries.
iPhone is a trademark of Apple Inc.
MPEG Layer-3 audio coding technology and patents
licensed from Fraunhofer IIS and omson.
Windows Media is either a registered trademark or
trademark of Microso Corporation in the United
States and/or other countries.
is product is protected by certain intellectual
property rights of Microso Corporation. Use or
distribution of such technology outside of this product
is prohibited without a license from Microso or an
authorized Microso subsidiary.
All other trademarks and registered trademarks are of
their respective holders. In this manual,
™
and
®
marks
are not specied.
Operations
Notes
When placing or removing the iPod/iPhone, handle the iPod/iPhone
in the same angle as that of the iPod/iPhone connector on the unit
and do not twist or sway the iPod/iPhone to prevent connector
damage.
Do not carry the unit with an iPod/iPhone set on the connector.
Doing so may cause a malfunction.
When placing or removing the iPod/iPhone, brace the unit with one
hand and take care not to press the controls of the iPod/iPhone by
mistake.
Before disconnecting the iPod/iPhone, pause playback.
Hold down /
to fast-forward (fast-rewind) while
playing video if /
does not function.
When the iPhone is connected to the system and you receive a call
during playback, playback will pause and you can take an incoming
call.
To change the volume level, use VOLUME +/
. e volume level
does not change even if adjusted on the iPod/iPhone.
is system is designed for iPod/iPhone only. You cannot connect
any other portable audio players.
To use an iPod/iPhone, refer to the user’s guide of your iPod/iPhone.
Sony cannot accept responsibility in the event that data recorded to
iPod/iPhone is lost or damaged when using an iPod/iPhone with this
unit.
Playing a le of the USB device
e audio format that can be played back on this system
is MP3*/WMA*/AAC*.
* Files with DRM (Digital Rights Management) copyright protection
cannot be played back on this system.
Files downloaded from an online music store may not be played
back on this system.
You can use an optional USB device with this system,
connecting to the (USB) port on the unit. Make
sure you use CCC-certied USB devices.
Note on the usage of CCC-certied USB devices
Compatibility with CCC (China Compulsory Certication)-certied
USB devices on this system is not fully guaranteed. is is because the
USB device specications may dier depending on the manufacturers.
For more information on how to use a USB device, see the operation
manual supplied with the USB device.
1 Select the USB function.
Press FUNCTION +/
repeatedly.
2 Connect the USB device to the (USB) port
.
3 Start playback.
Press
.
Other operations
To Press
Pause playback
. To resume play, press the
button again.
Stop playback
. To resume play, press
*. To cancel resume play, press
again.
Select a folder
+/
repeatedly.
Select a le
/
.
Find a point in
a le
Hold down /
during
playback, and release the button at
the desired point.
Select Repeat Play
REPEAT
repeatedly until “REP”
or “REP1” appears.
Remove the USB
device
Hold down
on the unit until
“No Device” appears, then remove
the USB device.
* When playing a VBR MP3/WMA le, the system may resume
playback from a dierent point.
To change the play mode
Press PLAY MODE
repeatedly while the USB device
is stopped. You can select normal play (“ ” for all les
in the folder on the USB device), shue play (“SHUF” or
“ SHUF”), or program play (“PGM”).
Note on Repeat Play
“REP” indicates that all audio les on a USB device are repeated until
you stop playback.
Note on shue play mode
When you turn o the system, the selected shue play mode (“SHUF”
or “ SHUF”) is cleared and the play mode returns to normal play
mode (“ ”).
To select a memory on the USB device
If the USB device has more than one memory (for
example, internal memory and a memory card), you can
select which memory to use and then start playback.
You cannot select a memory during playback. Make sure
to select a memory before starting playback.
Use buttons on the unit to select a memory on the USB
device.
1 Press FUNCTION
repeatedly to select the USB
function.
2 Connect the USB device to the (USB) port
.
3 Press TOOL MENU
, and then press ENTER
.
4 Press /
repeatedly to select a memory
number.
Proceed to step 5 if only one memory can be selected.
To cancel this operation, press
.
5 Press ENTER
.
Getting Started
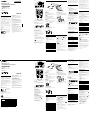
Unit
Remote
is manual mainly explains operations using the
remote, but the same operations can also be performed
using the buttons on the unit having the same or similar
names.
To use the remote
Slide and remove the battery compartment lid, and insert
the two supplied R6 (size AA) batteries, side rst,
matching the polarities shown below.
Notes on using the remote
With normal use, the batteries should last for about six months.
Do not mix an old battery with a new one or mix dierent types of
batteries.
If you do not use the remote for a long period of time, remove the
batteries to avoid damage from battery leakage and corrosion.
When carrying this system
Use buttons on the unit.
1 Remove a disc to protect the CD mechanism.
2 Press FUNCTION repeatedly to select the CD
function.
3 While holding down TOOL MENU , hold down
(power)
until “STANDBY” appears.
4 After “LOCK” appears, unplug the power cord.
To set the clock
1 Press
to turn on the system.
2 Press TIMER MENU
to select the clock set mode.
If “PLAY SET?” ashes, press /
repeatedly to
select “CLOCK SET?,” and then press (enter)
.
3 Press /
repeatedly to set the hour, then press
.
4 Use the same procedure to set the minutes.
Note
e clock settings are lost when you disconnect the power cord or if a
power failure occurs.
To display the clock when the system is o
Press DISPLAY
. e clock is displayed for about
8 seconds.
FM antenna
Find a location and an orientation that provide good
reception, and then set up the antenna.
Keep the antennas away from the speaker cords and the
power cord to avoid picking up noise.
Power
Connect the power cord to a wall outlet.
e demonstration appears in the display. When
you press
, the system turns on and the
demonstration automatically ends.
If the plug does not t the wall outlet, detach the supplied
plug adaptor (only for models equipped with an adaptor).
Speakers
Connect the speaker cords to the SPEAKERS jacks on the
unit, and then connect the other end of the speaker cords
to the terminals on the speakers as shown below.
Insert only the stripped portion
of the speaker cords.
Red ()
To attach the speaker pads
Attach the supplied speaker pads to the bottom of the
speakers to prevent slipping.
Notes on playing multisession discs
If the rst session on the disc is a CD-DA session, the other sessions
on the disc cannot be recognized regardless of the session format;
only CD-DA tracks in the rst session can be played back.
If the session format for the rst session is CD-ROM and the
following sessions are recorded in the same format, the system will
continue to play back MP3 les accordingly in multiple sessions
until the system encounters another session recorded in a dierent
format.
Listening to the radio
1 Select “FM.”
Press FUNCTION +/
repeatedly.
2 Perform tuning.
For automatic scanning
Press TUNING MODE
repeatedly until “AUTO”
appears, and then press +/
. Scanning stops
automatically when a station is tuned in, and
“TUNED” and “STEREO” (for stereo programs only)
light up in the display.
If “TUNED” does not light up and the scanning
for an FM station does not stop, press
to stop
scanning, then perform manual tuning (below).
For manual tuning
Press TUNING MODE
repeatedly until “AUTO”
and “PRESET” disappear, and then press +/
repeatedly to tune in the desired station.
Tip
To reduce static noise on a weak FM stereo station, press FM MODE
repeatedly until “MONO” appears to turn o stereo reception.
Presetting radio stations
1 Tune in the desired station.
2 Press TUNER MEMORY
to select the tuner
memory mode.
3 Press +/
repeatedly to select the desired preset
number.
If another station is already assigned to the selected
preset number, the station is replaced by the new
station.
4 Press
to store the station.
5 Repeat steps 1 through 4 to store other stations.
You can preset up to 20 FM stations.
6 To call up a preset radio station, press TUNING
MODE
repeatedly until “PRESET” appears, and
then press +/
repeatedly to select the desired
preset number.
Playing the iPod/iPhone
1 Select the iPod function.
Press FUNCTION +/
repeatedly.
2 Place the iPod/iPhone.
3 Start playback.
Press
.
To control the iPod/iPhone
To Press
Pause playback
/
.
Scroll up/down
the iPod menus
/
.
Select a track
or chapter of
audiobook/
podcast
/
. To fast-forward or
fast-rewind, hold down the button.
Choose the
selected item
/
.
Find a point in a
track or chapter
of audiobook/
podcast
Hold down
/
during
playback, and release the button at
the desired point.
Return to the
previous menu or
select a menu
/TOOL MENU /RETURN
(return)
.
To use the system as a battery charger
You can use the system as a battery charger for the iPod/
iPhone when the system is on.
e charging begins when the iPod/iPhone is placed on
the iPod/iPhone connector . e charge status appears
in the iPod/iPhone display. For details, see the user’s
guide of your iPod/iPhone.
To stop charging the iPod/iPhone
Remove the iPod/iPhone. Turning o the system also
stops charging the iPod/iPhone.
Playing a CD/MP3 disc
1 Select the CD function.
Press FUNCTION +/
repeatedly.
2 Place a disc.
Press (open)
on the unit, and place a disc with
the label side up on the disc tray
.
To close the disc tray, press
on the unit.
3 Start playback.
Press (play)
.
Other operations
To Press
Pause playback
(pause)
. To resume play, press
the button again.
Stop playback
(stop)
.
Select a folder on
an MP3 disc
(select folder) +/
repeatedly.
Select a track or
le
(go back)/
(go forward)
.
Find a point in a
track or le
Hold down
(rewind)/
(fast
forward)
during playback, and
release the button at the desired
point.
Select Repeat Play
REPEAT
repeatedly until “REP”
or “REP1” appears.
To change the play mode
Press PLAY MODE
repeatedly while the player is
stopped. You can select normal play (“ ” for all MP3
les in the folder on the disc), shue play (“SHUF”
or “ SHUF*” for folder shue), or program play
(“PGM”).
* When playing a CD-DA (audio) disc, (SHUF) Play performs the
same operation as normal (SHUF) Play.
Notes on Repeat Play
All tracks or les on a disc are played repeatedly up to ve times.
“REP1” indicates that a single track or le is repeated until you stop
playback.
Note on shue play mode
When you turn o the system, the selected shue play mode (“SHUF”
or “ SHUF”) is cleared and the play mode returns to normal play
mode (“ ”).
Notes on playing MP3 discs
Do not save other types of tracks or les, or unnecessary folders on a
disc that has MP3 les.
Folders that have no MP3 les are skipped.
MP3 les are played back in the order that they are recorded onto
the disc.
e system can only play MP3 les that have a le extension of
“.mp3”.
Even when le name has the “.mp3” le extension, if the actual
le diers, playing this le may generate a loud noise which could
damage the speaker system and the system may malfunction.
e maximum number of:
folders is 255 (including the root folder).
MP3 les is 511.
MP3 les and folders that can be contained on a single disc is 512.
folder levels (the tree structure of les) is 8.
Compatibility with all MP3 encoding/writing soware, recording
device, and recording media cannot be guaranteed. Incompatible
MP3 discs may produce noise or interrupted audio or may not play
at all.
FM lead antenna (Extend it horizontally.)
To wall outlet
To use the iPod/iPhone
Open the panel where it says “PULL OPEN”
, and
insert a Dock Adapter into the Dock before use. When
using an iPod model, use the Dock Adapter supplied with
your iPod. When using an iPhone model, use the Dock
Adapter supplied with the system.
Dock Adapter
iPod/iPhone Connector
To remove the Dock Adapter, pull it up with your
ngernail or a at object using the slot inside the adapter.
To close the panel, slide the release lever
to the
UNLOCK position, and then close the panel.
To left speaker
To right speaker
注意
为了减少火灾危险,请勿用报纸、桌布、窗帘等
覆盖本装置的通风口。请勿将明火源(如点燃的蜡
烛)放在本装置上。
为了减少火灾或触电的危险,请勿将本装置暴露
于滴水或溅水中,并不要把装有液体的物品(如花
瓶)放在本装置上。
请勿将本机安放在书橱或壁橱等狭窄封闭处。
由于电源插头用于断开主机与电源的连接,请将
主机连接到容易插拔的交流电源插座上。如果发现
主机发生异常,请立即将电源插头从交流电源插座
上拔下。
请勿将电池或装有电池的装置暴露在阳光、火焰
或类似的过热热源附近。
即使关闭本机自身的电源,只要其电源线仍插在
交流电源插座上,便未脱离电源。
警告
与光学仪器一起使用本产品将会增加眼睛受伤的
危险。
美国和加拿大的用户除外
本装置属于1类激光
(CLASS 1 LASER)产
品。本标签位于背面外
壳上。
制造商:索尼公司
原产地:中国
总经销商:索尼(中国)有限公司
地址:北京市朝阳区太阳宫中路12号楼冠城大厦701
出版日期:2012年1月
有关DualDisc的注意事项
DualDisc是一种双面光盘产品,它一面含有符合
录制DVD的素材,另一面为数字音频素材。但是,由
于音频素材一面不符合Compact Disc(CD)标准,
无法保证在本产品上播放。
用版权保护技术编码的音乐光盘
本产品被设计用于播放符合Compact Disc(CD)
标准的光盘。近来,一些唱片公司在出售各种用版
权保护技术编码的音乐光盘。请注意,这些光盘中
有一些光盘不符合CD标准而可能无法用本产品播放。
许可和商标须知
iPod是Apple Inc.在美国和其他国家注册的商标。
iPhone是Apple Inc.的商标。
MPEG Layer-3音频编码技术和专利由Fraunhofer
IIS和Thomson授权。
Windows Media是Microsoft Corporation在美国
和/或其它国家的注册商标或商标。
本产品受Microsoft Corporation的某些知识产权
的保护。未经Microsoft或Microsoft的授权分支机
构的许可,禁止超出本产品的范围使用或发行这类
技术。
所有其他商标和注册商标是其相应持有者的商标或
注册商标。在本手册中,并未标明
TM
和
®
标记。
操作
注意
当放置或取下iPod/iPhone时,按照与主机上的iPod/iPhone连
接器相同的角度操作iPod/iPhone,请勿扭曲或摇摆iPod/
iPhone以防止连接器受损。
请勿在iPod/iPhone安放在连接器上的状态下携带主机。这样
做可能会导致故障。
当放置或取下iPod/iPhone时,用一只手固定主机并小心不要
误按下iPod/iPhone的控制器。
断开iPod/iPhone的连接之前,请暂停播放。
如果/
不工作,在播放视频期间按住/
以快进(快倒)。
当iPhone与本系统连接并在播放期间接到电话时,播放会暂
停,您可以接打来的电话。
要改变音量电平时,使用VOLUME +/
。即使在iPod/iPhone
上进行调节,音量电平也不改变。
本系统专为iPod/iPhone设计。不可以连接任何其他便携式音
频播放机。
要使用iPod/iPhone时,请参阅iPod/iPhone的用户指南。
在本机上使用iPod/iPhone时,如果记录在iPod/iPhone上的数
据丢失或受损,Sony恕不承担任何责任。
播放USB设备的文件
可在本系统上播放的音频格式为MP3*/WMA*/
AAC*。
* 本系统不能播放带有DRM(Digital Rights Management(数码
权限管理))版权保护的文件。
本系统可能无法播放从在线音乐商店下载的文件。
通过将选购USB设备连接到主机上的 (USB)端
口,可以在本系统上使用该设备。确保使用CCC认
证的USB设备。
有关使用CCC认证的USB设备的注意事项
不完全保证本系统与CCC(中国强制性产品认证)认证的
USB设备的兼容性。这是由于根据制造商的不同,USB设备的规格
可能有所不同。
有关使用USB设备的方法的详细信息,请参阅随USB设备附带
的操作手册。
1 选择USB功能。
反复按FUNCTION +/
。
2 将USB设备连接到 (USB)端口
。
3 开始播放。
按
。
其它操作
要 按
暂停播放
。要恢复播放时,再次按该
按钮。
停止播放
。要恢复播放时,按
*
。要取消恢复播放时,再次按
。
选择一个文件夹
反复按 +/
。
选择一个文件
/
。
找到文件中的一
点
在播放期间按住
/
,然
后在想要的位置释放该按钮。
选择反复播放
反复按REPEAT
直到出现
“REP” 或“REP1”为止。
卸除USB设备
按住主机上的
直到出现“No
Device”,然后卸除USB设备。
* 播放VBR MP3/WMA文件时,本系统可能会从不同的位置恢复播
放。
要改变播放模式时
在USB设备停止播放时,反复按PLAY MODE
。
可以选择正常播放(“ ”用于播放USB设备上的文
件夹中的所有文件)、任选播放(“SHUF”或“
SHUF”)或编程播放(“PGM”)。
有关反复播放的注意事项
“REP”表示反复播放USB设备上的所有音频文件,直到您停
止播放为止。
有关任选播放模式的注意事项
当关闭系统的电源时,所选任选播放模式(“SHUF”或“
SHUF”)被清除,播放模式返回到正常播放模式(“ ”)。
要选择USB设备上的存储器时
如果USB设备具有一个以上的存储器(例如:内部
存储器和存储卡),可以选择要使用的存储器,然
后开始播放。
不能在播放期间选择存储器。确保在开始播放之
前选择存储器。
用主机上的按钮选择USB设备上的存储器。
1 反复按FUNCTION
选择USB功能。
2 将USB设备连接到 (USB)端口
。
3 按TOOL MENU
,然后按ENTER
。
4 反复按/
选择存储器号码。
如果只能选择一个存储器,进入步骤5。
要取消此操作时,按
。
5 按ENTER
。
使用前的准备工作
主机
遥控器
本手册主要说明使用遥控器的操作,但使用主机
上具有相同或相似名称的按钮也可以进行相同的操
作。
要使用遥控器时
滑动并取下电池舱盖,然后插入附带的两节R6
(AA 尺寸)电池,先插入侧,使极性与下图所示
一致。
使用遥控器时的注意事项
通常使用情况下,电池可以使用大约6个月。
不要将新旧电池或不同类型的电池混合使用。
如果长时间不使用遥控器,请将电池取出,以避免电池漏液和
腐蚀可能造成的损害。
在搬运本系统时
使用主机上的按钮。
1 取出光盘以保护CD机械装置。
2 反复按FUNCTION 选择CD功能。
3 在按住TOOL MENU 的同时,按住(电源)
直到出现“STANDBY”。
4 出现“LOCK”后,拔下电源线。
要设定时钟时
1 按
接通系统电源。
2 按TIMER MENU
选择时钟设定模式。
如果“PLAY SET?”闪烁,反复按/
选择
“CLOCK SET?”,然后按 (输入)
。
3 反复按/
设定小时,然后按
。
4 进行相同操作设定分钟。
注意
当您拔下电源线或发生停电时,时钟设置会丢失。
要在系统关闭时显示时钟
按DISPLAY
。时钟会显示约8秒钟。
FM天线
找到一个接收状态良好的位置和方向,然后设置
天线。
令天线远离扬声器导线和电源线,以避免受到噪
音干扰。
电源
连接电源线至墙上电源插座。
显示窗中出现演示。当您按
时,系统接通
电源并且演示自动结束。
如果插头不适合墙上电源插座,请拔下附带的插
头适配器(仅限于装备有适配器的机型)。
扬声器
如下图所示,将扬声器导线连接到主机上的
SPEAKERS插孔,然后将扬声器导线的另一端连接到
扬声器上的端子。
仅插入扬声器导线的
裸露部分。
红色()
要安装扬声器垫片时
在扬声器底面安装附带的扬声器垫片以防止扬声
器滑动。
有关播放多区段光盘的注意事项
如果光盘上的第一区段是CD-DA区段,不管区段格式如何,
光盘上的其他区段都不会被识别,只会播放第一区段中的
CD-DA曲目。
如果第一区段的区段格式为CD-ROM并且接下来的区段也以相同
格式记录,系统将依次连续播放多区段中的MP3文件,直到系
统遇到以不同格式记录的其他区段为止。
收听广播
1 选择“FM”。
反复按FUNCTION +/
。
2 执行调谐。
对于自动扫描
反复按TUNING MODE
直到出现“AUTO”,然后
按+/
。当调到电台时扫描自动停止,并且显
示窗中“TUNED”和“STEREO”(仅限于立体声节
目)点亮。
如果“TUNED”不点亮或者FM电台扫描不停止,按
停止扫描,然后执行手动调谐(下述)。
对于手动调谐
反复按TUNING MODE
直到“AUTO”和
“PRESET”消失,然后反复按+/
调入想要
的电台。
提示
要减少信号微弱的FM立体声电台的静电噪音时,反复按FM
MODE
直到出现“MONO”以关闭立体声接收。
预设广播电台
1 调入希望的电台。
2 按TUNER MEMORY
选择调谐器存储模式。
3 反复按+/
选择想要的预设号码。
如果所选预设号码已被其它电台使用,已存在的
电台会被新电台替换。
4 按
存储电台。
5 重复步骤1至4存储其它电台。
最多可以预设20个FM电台。
6 要调出预设电台时,反复按TUNING MODE
直到
出现“PRESET”,然后反复按+/
选择想要的
预设号码。
播放iPod/iPhone
1 选择iPod功能。
反复按FUNCTION +/
。
2 放置iPod/iPhone。
3 开始播放。
按
。
要控制iPod/iPhone时
要 按
暂停播放
/
。
向上/下滚动iPod
菜单
/
。
选择有声读物/播
客的曲目或章节
/
。要快进或快倒
时,按住该按钮。
选择所选项目
/
。
搜索有声读物/播
客的曲目或章节
中的一点
在播放期间按住
/
,然
后在想要的位置释放该按钮。
返回上一个菜单
或选择菜单
/TOOL MENU
/RETURN
(返回)
。
要将本系统作为电池充电器使用时
当系统电源打开时,可将本系统作为iPod/
iPhone的电池充电器使用。
当iPod/iPhone放在iPod/iPhone连接器上时,
充电开始。充电状态显示在iPod/iPhone的显示窗
中。有关详细说明,请参见iPod/iPhone的用户指
南。
要停止给iPod/iPhone充电时
取下iPod/iPhone。关闭系统电源也会停止给
iPod/iPhone充电。
播放CD/MP3光盘
1 选择CD功能。
反复按FUNCTION +/
。
2 放入光盘。
按主机上的(打开)
,将光盘标签面朝上放
在光盘托盘上
。
要关闭光盘托盘时,按主机上的
。
3 开始播放。
按(播放)
。
其它操作
要 按
暂停播放
(暂停)
。要恢复播放时,
再次按该按钮。
停止播放
(停止)
。
选择MP3光盘上的
文件夹
反复按 (选择文件夹)+/
。
选择曲目或文件
(后退)/
(前进)
。
寻找曲目或文件
中的一点
在播放期间按住
(快倒)
/
(快进)
,然后在想要
的位置释放该按钮。
选择反复播放
反复按REPEAT
直到出现
“REP” 或“REP1”为止。
要改变播放模式时
当播放机停止播放时,反复按PLAY MODE
。可
以选择正常播放(“ ”用于播放光盘上的文件夹
中的所有MP3文件)、任选播放(“SHUF”或文件夹
任选用“ SHUF*”)或编程播放(“PGM”)。
* 当播放CD-DA(音频)光盘时, (SHUF)播放执行与正常
(SHUF)播放相同的操作。
有关反复播放的注意事项
最多可反复播放5次光盘上的全部曲目或文件。
“REP1”表示反复播放单一曲目或文件,直到您停止播放为
止。
有关任选播放模式的注意事项
当关闭系统的电源时,所选任选播放模式(“SHUF”或“
SHUF”)被清除,播放模式返回到正常播放模式(“ ”)。
有关播放MP3光盘的注意事项
不要在含有MP3文件的光盘上保存其它类型的曲目、文件或多
余的文件夹。
不含有MP3文件的文件夹将被略过。
MP3文件以其在光盘上录制的顺序播放。
本系统只能播放具有“.mp3”文件扩展名的MP3文件。
即使文件名具有“.mp3”文件扩展名,如果实际文件不同,播
放该文件可能会产生损坏扬声器系统的强大噪音并且系统可能
会发生故障。
最大数目:
255个文件夹(包括根文件夹在内)。
511个MP3文件。
单张光盘可包含的MP3文件和文件夹的总数为512。
8个文件夹级别(文件的树状结构)。
不保证与所有MP3编码/写入软件、录制设备以及录制媒体兼
容。不兼容的MP3光盘可能会发出噪音或发生音频中断或可能
根本无法播放。
FM导线天线(将其水平延伸。)
至墙上电源插座
要使用iPod/iPhone时
使用之前,在标有“PULL OPEN”
的位置打开
面板,然后将基座适配器插入基座。当使用iPod机
型时,请使用随iPod附带的基座适配器。当使用
iPhone机型时,请使用随本系统附带的基座适配器。
基座适配器
iPod/iPhone连接器
要卸下基座适配器时,把手指甲或扁平物体插入
适配器内侧的凹槽将其拉起。
要关闭面板时,将释放杆
滑动到UNLOCK位置,
然后关闭面板。
至左扬声器
至右扬声器
产品中有毒有害物质或元素的名称及含量
(︰不含有,︰含有)
部件名称
有毒有害物质或元素
铅
(Pb)
汞
(Hg)
镉
(Cd)
六价铬
(Cr
(VI))
多溴联苯
(PBB)
多溴二苯醚
(PBDE)
内置线路板
外壳
光学块
驱动单元
扬声器
附件
︰ 表示该有毒有害物质在该部件所有均质材料中的含量均在SJ/T11363-2006
标准规定的限量要求以下。
︰ 表示该有毒有害物质至少在该部件的某一均质材料中的含量超出SJ/
T11363-2006标准规定的限量要求。
4-189-334-
84
(1)
CMT-MX500i
© 2010 Sony Corporation Printed in China
Micro HI-FI
Component System
迷你音响组合
使用产品前请仔细阅读本使用说明书,并请妥善保管
CS
使用说明书
4-189-334-
84
(1)
CMT-MX500i
© 2010 Sony Corporation Printed in China
Micro HI-FI
Component System
迷你音响组合
使用产品前请仔细阅读本使用说明书,并请妥善保管
GB
Operating Instructions
CS
使用说明书

CMT-MX500i.GB/CS.4-189-334-84(1)
Notes
When USB cable connection is necessary, connect the USB cable
supplied with the USB device to be connected. See the operation
manual supplied with the USB device to be connected for details on
the operation method.
It may take about 10 seconds before “Reading” appears depending
on the type of USB device connected.
Do not connect the system and the USB device through a USB hub.
When the USB device is inserted, the system reads all the les on the
USB device. If there are many folders or les on the USB device, it
may take a long time to nish reading the USB device.
With some connected USB devices, aer an operation is performed,
there may be a delay before it is performed by this system.
Compatibility with all encoding/writing soware cannot be
guaranteed. If audio les on the USB device were originally encoded
with incompatible soware, those les may produce noise or
interrupted audio, or may not play at all.
is system cannot play audio les on the USB device in the
following cases;
when the number of audio les in a folder exceeds 999.
when the total number of audio les on a USB device exceeds 999.
when the number of folders on a USB device exceeds 999
(including the “ROOT” folder and empty folders).
ese numbers may vary depending on the le and folder structure.
Do not save other types of les or unnecessary folders on a USB
device that has audio les.
e system can play back to a depth of 8 folders only.
is system does not necessarily support all the functions provided
in a connected USB device.
Resume play is cancelled when you turn o the system.
Folders that have no audio les are skipped.
e audio formats that you can listen to with this system are as
follows:
MP3: le extension “.mp3”
WMA: le extension “.wma”
AAC: le extension “.m4a”
Note that even when le name has the correct le extension, if the
actual le diers, the system may produce noise or may malfunction.
To use the system as a battery charger
You can use the system as a battery charger for USB
devices that have a rechargeable function when the
system is on.
e charging begins when the USB device is connected
to the (USB) port
. e charge status appears in
the USB device display. For details, see the user’s guide of
your USB device.
Creating your own program
(Program Play)
1 Select the CD or USB function.
Press FUNCTION +/
repeatedly.
2 Select the play mode.
Press PLAY MODE
repeatedly until “PGM”
appears while the player is stopped.
3 Select the desired track or le number.
Press /
repeatedly until the desired track
or le number appears.
When programming audio les, press +/
repeatedly to select the desired folder, and then select
the desired le.
Selected track or le number Total playing time of the selected
track or le
4 Program the selected track or le.
Press
to enter the selected track or le.
5 Repeat steps 3 through 4 to program additional
tracks or les, up to a total of 25 tracks or les.
6 To play your program of tracks or les, press
.
e program remains available until you open the disc
tray or remove the USB device.
To play the same program again, press
.
To cancel Program Play
Press PLAY MODE
repeatedly until “PGM”
disappears while the player is stopped.
To delete the last track or le of the program
Press CLEAR
while the player is stopped.
To view program information
Press DISPLAY
repeatedly.
Using optional audio components
1 Prepare the sound source.
Connect additional audio component to the AUDIO
IN jack
on the unit using an audio analog cord
(not supplied).
2 Turn down the volume.
Press VOLUME
.
3 Select the AUDIO IN function.
Press FUNCTION +/
repeatedly.
4 Start playback.
Start playback of the connected component and adjust
the volume.
Note
e system may enter standby mode automatically if the volume
level of the connected component is too low. Adjust the component’s
volume accordingly. See “To turn o the automatic standby function.”
Adjusting the sound
To Press
Adjust the volume
VOLUME +/
.
Generate a more
dynamic sound
(Dynamic Sound
Generator X-tra)
DSGX on the unit.
Set the sound
eect
EQ
repeatedly to select “BASS”
or “TREBLE,” and then press
/
to adjust the level.
Changing the display
To Press
Change
information on
the display
1)
DISPLAY
repeatedly when the
system is on.
Change Display
mode (see below.)
DISPLAY
repeatedly when the
system is o.
2)
1)
For example, you can view CD/MP3 disc information or the USB
device information, such as;
track or le number during normal play.
track or le name (“ ”) during normal play.
artist name (“ ”) during normal play.
album or folder name (“ ”) during normal play.
total playing time and total number of tracks on the CD-DA
disc (only when normal play mode is selected and the player is
stopped).
total number of folders (albums) on the MP3 disc or the USB
device (only when normal play mode is selected and the player is
stopped).
volume label if it exists on the MP3 disc or the USB device (only
when normal play mode is selected and the player or USB device is
stopped).
2)
e STANDBY indicator
on the unit lights up when the system is
o.
e system oers the following display modes.
Display mode When the system is o
1)
,
Demonstration e demonstration is turned on.
Power Saving
Mode
2)
e display is turned o to conserve
power. e timer and clock continue
to operate.
Clock
3)
e clock is displayed.
1)
e STANDBY indicator
on the unit lights up when the system is
o.
2)
You cannot set the clock in Power Saving Mode.
3)
e clock display automatically turns to Power Saving Mode aer 8
seconds.
Notes on the display information
Characters that cannot be displayed appear as “_”.
e following are not displayed;
total playing time for an MP3 disc and a USB device.
remaining playing time for an MP3 le.
e following are not displayed correctly;
elapsed playing time of an MP3 le encoded using VBR (variable
bit rate).
folder and le names that do not follow either the ISO9660
Level 1, Level 2 or Joliet in the expansion format.
e following are displayed;
remaining playing time for a track.
ID3 tag information for MP3 les when ID3 version 1 and
version 2 tags are used (ID3 version 2 tag information display has
priority when both ID3 version 1 and version 2 tags are used for a
single MP3 le).
Using the timers
e system oers two timer functions. If you use both
timers, the Sleep Timer has priority.
Sleep Timer:
You can fall asleep to music. is function works even if
the clock is not set.
Press SLEEP
repeatedly. If you select “AUTO,” the
system automatically turns o aer the current disc or
USB device stops, or within 100 minutes.
Play Timer:
You can wake up to CD, FM reception, iPod/iPhone or
USB device at a preset time. Make sure you have set the
clock.
1 Prepare the sound source.
Prepare the sound source, and then press VOLUME
+/
to adjust the volume.
To start from a specic CD track or audio le, create
your own program.
2 Select the timer set mode.
Press TIMER MENU
.
3 Set the play timer.
Press /
repeatedly to select “PLAY SET?,” then
press
.
4 Set the time to start playback.
Press /
repeatedly to set the hour, then press
. Use the procedure above to set the minutes.
5 Use the same procedure as in step 4 to set the time
to stop playback.
6 Select the sound source.
Press /
repeatedly until the desired sound
source appears, then press
.
7 Turn o the system.
Press
. e system automatically turns on
before the preset time.
If the system is on at the preset time, the Play Timer
will not play. Do not operate the system from the time
the system turns on until the playback starts.
To check the setting
1 Press TIMER MENU
.
2 Press
/
repeatedly to select “TIMER SEL?,” and
then press
.
3 Press
/
repeatedly to select “PLAY SEL?,” and
then press .
To cancel the timer
Repeat the same procedure as above until “TIMER OFF?”
appears in step 3, and then press
.
To change the setting
Start over from step 1.
Notes for the iPod/iPhone user
Make sure the iPod/iPhone is not playing when using the Play
Timer.
e Play Timer may not be activated depending on the status of the
connected iPod/iPhone.
Tip
e Play Timer setting remains as long as the setting is not cancelled
manually.
Troubleshooting
1 Make sure the power cord and speaker cords are
correctly and rmly connected.
2 Find your problem in the checklist below, and take
the indicated corrective action.
If the issue persists, contact your nearest Sony dealer.
If the STANDBY indicator ashes
Immediately unplug the power cord, and check the
following items.
Are the + and speaker cords short-circuited?
Is anything blocking the ventilation holes of the
system?
Is the iPod/iPhone connector
short-circuited?
Aer the STANDBY indicator
stops ashing,
reconnect the power cord, and turn on the system. If
the issue persists, contact your nearest Sony dealer.
General
The demonstration appears in the display after
plugging in the power cord even though the
system is not turned on.
Press DISPLAY
once while the system is o. e
demonstration disappears.
The system does not turn on.
Is the power cord plugged in?
The system has entered standby mode
unexpectedly.
is is not a malfunction. e system enters standby
mode automatically in about 30 minutes when there is
no operation or audio signal output. See “To turn o
the automatic standby function.”
The clock setting or the Play Timer operation
has been cancelled unexpectedly.
If about a minute elapses with no operation, the clock
setting or Play Timer setting is cancelled automatically.
Perform the operation again from the beginning.
There is no sound.
Are the + and speaker cords short-circuited?
Are you using only the supplied speakers?
Is anything blocking the ventilation holes of the system?
e specied station may have temporarily stopped
broadcast.
Sound comes from one channel, or the left and
right volumes are unbalanced.
Place the speakers as symmetrically as possible.
Connect only the supplied speakers.
Severe hum or noise.
Move the system away from sources of noise.
Connect the system to a dierent wall outlet.
Install a noise lter (available separately) to the power
cord.
The remote does not function.
Remove any obstacles between the remote and the
remote sensor
on the unit, and position the unit
away from uorescent lights.
Point the remote at the system’s sensor.
Move the remote closer to the system.
The STANDBY indicator
remains lit after
unplugging the power cord.
e STANDBY indicator
may not turn o
immediately aer unplugging the power cord. e
indicator will turn o aer about 40 seconds. is is not
a malfunction.
Erroneous display
Send the music data to the USB device again, as the
data stored in the USB device may have been corrupted.
e character codes that can be displayed by this system
are numbers and alphabets only. Other characters are
not displayed correctly.
The USB device is not recognized.
Turn o the system and reconnect the USB device, then
turn on the system.
e USB device does not work properly. Refer to the
USB device operation manual for how to deal with this
problem.
Play does not start.
Turn o the system and reconnect the USB device, then
turn on the system.
Press
to start playback.
Play does not start from the rst track.
Set the play mode to Normal Play mode.
Files cannot be played back.
e audio le does not have the extension “.mp3,”
“.wma” or “.m4a”.
e data is not stored in MP3/WMA/AAC format.
USB storage devices formatted with le systems other
than FAT16 or FAT32 are unsupported.*
If you use a partitioned USB storage device, only les
on the rst partition can be played.
Files that are encrypted or protected by passwords, etc.
cannot be played back.
* is system supports FAT16 and FAT32, but some USB storage
devices may not support all of these FAT. For details, see the
operation manual of each USB storage device or contact the
manufacturer.
Tuner
Severe hum or noise, or stations cannot be
received. (“TUNED” or “STEREO” ashes on the
display.)
Connect the antenna properly.
Find a location and an orientation that provide good
reception, and then set up the antenna again.
Keep the antennas away from the speaker cords and the
power cord to avoid picking up noise.
Turn o nearby electrical equipment.
To improve tuner reception
Turn o CD player power by using the system’s power
management function. By default, CD player power is
turned on.
Use buttons on the unit to turn o the CD player power.
1 Press FUNCTION
repeatedly to select the CD
function.
2 Press
to turn o the system.
3 After “STANDBY” stops ashing, press DISPLAY
to display the clock, and then press
while
holding down +
, until “CD POWER OFF”
appears.
With CD player power turned o, access time is
increased. To turn on CD player power, repeat the
procedure until “CD POWER ON” appears.
To reset the system to factory settings
If the system still does not operate properly, reset the
system to factory settings.
Use buttons on the unit to reset the unit to its factory
default settings.
1 Disconnect and reconnect the power cord, and then
turn on the system.
2 While holding down ENTER
, hold down
until “RESET” appears.
All user-congured settings, such as preset radio
stations, timer, and the clock, are deleted.
To turn o the automatic standby function
is system is equipped with an automatic standby
function. With this function, the system enters standby
mode automatically in about 30 minutes when there is no
operation or audio signal output.
By default, the automatic standby function is turned on.
Use buttons on the unit to turn o the automatic standby
function.
Hold down
while the system is on, until
“AUTO STBY OFF” appears.
To turn on the function, repeat the procedure until
“AUTO STBY ON” appears.
Notes
“AUTO STBY” appears in the display for 2 minutes before the
system enters standby mode.
e automatic standby function is invalid for the tuner function
(FM), even when you have enabled it.
e system may not enter standby mode automatically in the
following cases;
while an audio signal is being detected.
during playback of audio tracks or les.
while the preset Play Timer or Sleep Timer is in process.
Messages
CD Over : You have reached the end of the disc while
pressing
during playback or pause.
Data Error : You tried to play an unplayable le on the
USB device.
Error : e USB device could not be recognized or an
unknown device is connected.
LOCKED : e disc tray does not open. Contact your
nearest Sony dealer.
No Device : No USB device is connected or the
connected USB device has been stopped.
No Disc : ere is no disc in the player, or you have
loaded a disc that cannot be played.
No Memory : e memory media which you have
selected as playback source is not inserted in the USB
device.
No Step : All of the programmed tracks have been
erased.
No Track : Playable le on the USB device is not loaded
in the system.
Not in Use : You tried to perform a specic operation
under conditions where that operation is prohibited.
Not Supported : An unsupported USB device is
connected.
Push STOP! : You pressed PLAY MODE
during
playback.
Step Full! : You tried to program more than 25 tracks or
les (steps).
TIME NG! : e Play Timer start and end times are set to
the same time.
Precautions
Discs that this system CAN play
Audio CD
CD-R/CD-RW (audio data/MP3 les)
Discs that this system CANNOT play
CD-ROM
CD-R/CD-RW other than those recorded in music CD
format or MP3 format conforming to ISO9660 Level
1/Level 2, Joliet
CD-R/CD-RW recorded in multisession that have not
ended by “closing the session”
CD-R/CD-RW of poor recording quality,
CD-R/CD-RW that have scratches or are dirty,
or CD-R/CD-RW recorded with an incompatible
recording device
CD-R/CD-RW which is nalized incorrectly
Discs containing les other than MPEG 1 Audio Layer-
3 (MP3) les
Discs of non-standard shape (for example, heart,
square, star)
Discs that have adhesive tape, paper, or sticker attached
to them
Rental or used discs with attached seals where the glue
extends beyond the seal
Discs that have labels printed using ink that feels tacky
when touched
Notes on discs
Before playing, wipe the disc with a cleaning cloth from
the center out to the edge.
Do not clean discs with solvents, such as benzine,
thinner, or commercially available cleaners or anti-
static spray intended for vinyl LPs.
Do not expose discs to direct sunlight or heat sources
such as hot air ducts, nor leave it in a car parked in
direct sunlight.
On safety
Completely disconnect the power cord (mains lead)
from the wall outlet (mains) if it is not going to be used
for an extended period of time. When unplugging the
unit, always grip the plug. Never pull the cord itself.
Should any solid object or liquid get into the system,
unplug the system, and have it checked by qualied
personnel before operating it again.
e AC power cord can be changed only by a qualied
service facility.
On placement
Do not place the system in an inclined position or in
locations that are extremely hot, cold, dusty, dirty, or
humid or lacking adequate ventilation, or subject to
vibration, direct sunlight or a bright light.
Be careful when placing the unit or speakers on
surfaces that have been specially treated (for example,
with wax, oil, polish) as staining or discoloration of the
surface may result.
If the system is brought directly from a cold to a warm
location or is placed in a very damp room, moisture
may condense on the lens inside the CD player, and
cause the system to malfunction. In this situation,
remove the disc, and leave the system turned on for
about an hour until the moisture evaporates.
On heat buildup
Heat buildup on the unit during operation is normal
and is not cause for alarm.
Do not touch the cabinet if it has been used
continuously at a high volume because the cabinet may
have become hot.
Do not obstruct the ventilation holes.
On the speaker system
is speaker system is not magnetically shielded, and
the picture on nearby TV sets may become magnetically
distorted. In this situation, turn o the TV, wait 15 to
30 minutes, and turn it back on.
If there is no improvement, move the speakers far away
from the TV.
Cleaning the cabinet
Clean this system with a so cloth slightly moistened
with a mild detergent solution. Do not use any type of
abrasive pads, scouring powder, or solvents, such as
thinner, benzine, or alcohol.
Specications
Main unit
Amplier section
DIN power output (rated): 20 watts + 20 watts (6 ohms at 1 kHz, DIN)
Continuous RMS power output (reference): 25 watts + 25 watts (6 ohms at
1 kHz, 10% THD)
Input
AUDIO IN (stereo mini jack): Impedance 47 kilohms
Outputs
SPEAKERS: Accepts impedance of 6 ohms
CD player section
System: Compact disc and digital audio system
Laser Diode Properties
Emission Duration: Continuous
Laser Output*: Less than 44.6µW
* is output is the value measurement at a distance of 200mm from the
objective lens surface on the Optical Pick-up Block with 7mm aperture.
Tuner section
FM tuner section:
FM stereo, FM superheterodyne tuner
Tuning range:
87.5 MHz 108.0 MHz (50 kHz step)
Antenna: FM lead antenna
Antenna terminals: 75 ohms unbalanced
Intermediate frequency: 10.7 MHz
iPod/iPhone section
Compatible iPod/iPhone models:
iPod touch 2nd generation
iPod touch 1st generation
iPod classic 120 GB, 160 GB (2009)
iPod classic 160 GB (2007)
iPod classic 80 GB
iPod nano 5th generation (video camera)
iPod nano 4th generation (video)
iPod nano 3rd generation (video)
iPod nano 2nd generation (aluminum)
iPod nano 1st generation
iPod 5th generation (video)
iPod 4th generation (color display)
iPod 4th generation
iPod mini
iPhone 3G
iPhone 3GS
USB section
Supported bit rate:
MP3 (MPEG 1 Audio Layer-3): 32 kbps 320 kbps, VBR
WMA: 48 kbps 192 kbps, VBR
AAC: 48 kbps 320 kbps
Sampling frequencies:
MP3 (MPEG 1 Audio Layer-3): 32/44.1/48 kHz
WMA: 44.1 kHz
AAC: 44.1 kHz
(USB) port: Type A, maximum current 500 mA
Speaker
Speaker system: 2 way speaker system, Bass reex
Speaker units:
Woofer 100 mm, cone type
Tweeter 40 mm, cone type
Rated impedance: 6 ohms
Dimensions (W/H/D):
Approx. 150 mm × 240 mm × 220 mm
Mass: Approx. 2.0 kg net per speaker
General
Power requirements:
AC 220 V 240 V, 50 Hz/60 Hz
Power consumption: 33 watts
Dimensions (W/H/D) (excl. speakers):
Approx. 309 mm × 122 mm × 247 mm
Mass (excl. speakers): Approx. 2.9 kg
Supplied accessories: Remote Commander (1), R6 (Size AA) batteries (2), FM
lead antenna (1), Speaker cords (2), Speaker pads (8), Dock Adapter for iPhone
models (1)
Design and specications are subject to change without notice.
Standby power consumption: 0.5 W
Halogenated ame retardants are not used in the certain printed
wiring boards.
Please contact the following to obtain customer support for this
system.
Sony China Customer Support Center
TEL: 400-810-9000
http://www.sony.com.cn/
CD/MP3 player
The sound skips, or the disc will not play.
Wipe the disc clean, and replace it.
Move the system to a location away from vibration (for
example, on top of a stable stand).
Move the speakers away from the system, or place them
on separate stands. At high volume, speaker vibration
may cause the sound to skip.
Play does not start from the rst track.
Return to Normal Play by pressing PLAY MODE
repeatedly until both “PGM” and “SHUF” disappear.
Starting playback takes more time than usual.
e following discs can increase the time it takes to
start playback;
a disc recorded with a complicated tree structure.
a disc recorded in multisession mode.
a disc that has not been nalized (a disc to which data
can be added).
a disc that has many folders.
iPod/iPhone
There is no sound.
Make sure the iPod/iPhone is connected securely.
Make sure the iPod/iPhone is playing music.
Adjust the volume.
The sound is distorted.
Make sure the iPod/iPhone is connected securely.
Turn down the volume.
Set the “EQ” setting of the iPod/iPhone to “O ” or
“Flat.”
The iPod/iPhone does not function.
Make sure the iPod/iPhone is connected securely.
Make sure the iPod/iPhone is updated with the latest
soware. If not, update the iPod/iPhone before using
with the system.
Because the operation of the system and the iPod/
iPhone are dierent, you may not operate the iPod/
iPhone using buttons on the remote or unit. In this
case, use the control buttons on the iPod/iPhone.
The iPod/iPhone cannot be charged.
Make sure the iPod/iPhone is connected securely.
You can use the system as a battery charger for iPod/
iPhone only when the system is on.
The ring volume of the iPhone does not
change.
Adjust the ring volume on the iPhone.
USB device
The connected iPod/iPhone or USB device is
not being charged, when both are connected at
the same time.
You cannot charge an iPod/iPhone and the USB device
at the same time.
Are you using a supported USB device?
If you connect an unsupported USB device, the
following problems may occur.
e USB device is not recognized.
File or folder names are not displayed on this system.
Playback is not possible.
e sound skips.
ere is noise.
A distorted sound is output.
“Over Current!” appears.
A problem has been detected with the level of electrical
current from the (USB) port
. Turn o the system
and remove the USB device from the (USB) port
. Make sure there is no problem with the USB device.
If this display pattern persists, contact your nearest
Sony dealer.
There is no sound.
e USB device is not connected correctly. Turn o the
system, then reconnect the USB device.
There is noise, skipping, or distorted sound.
Turn o the system, then reconnect the USB device.
e music data itself contains noise, or the sound is
distorted. Noise may have been entered when creating
music data due to the conditions of the computer.
Create the music data again.
e bit rate used when encoding the les was low. Send
les encoded with higher bit rates to the USB device.
“Reading” is displayed for an extended time, or
it takes a long time before playback starts.
e reading process can take a long time in the
following cases.
ere are many folders or les on the USB device.
e le structure is extremely complex.
e memory capacity is excessive.
e internal memory is fragmented.
注意
需要USB电缆连接时,请用附带的USB电缆连接要连接的USB设
备。有关使用方法的详细说明,请参阅随要连接的USB设备附
带的操作手册。
根据所连接USB设备类型的不同,到出现“Reading”为止,可
能需要大约10秒钟。
请勿经由USB集线器连接本系统和USB设备。
当插入USB设备时,系统读取USB设备上的所有文件。如果
USB设备上有许多文件夹或文件,到完成USB设备读取为止可能
需要较长时间。
对于某些连接的USB设备,执行某一操作后到本系统执行该操
作为止,可能会有一些迟延。
不保证与所有编码/写入软件兼容。如果USB设备上的音频文件
最初采用不兼容的软件编码,这些文件可能会产生噪音、音频
中断或完全无法播放等现象。
在下列情况下,本系统无法播放USB设备上的音频文件:
当文件夹中的音频文件数目超过999时。
当USB设备上的音频文件总数超过999时。
当USB设备上的文件夹数超过999时(包括“ROOT”文件夹和
空文件夹)。
根据文件和文件夹构造的不同,这些数目可能有所不同。请勿
在含有音频文件的USB设备上保存其它类型的文件或不必要的
文件夹。
本系统只能播放到8层文件夹深度。
本系统未必支持所连接的USB设备所提供的全部功能。
关闭系统电源时,恢复播放被取消。
没有音频文件的文件夹会被跳过。
可以用本系统收听的音频格式如下:
MP3:文件扩展名“.mp3”
WMA:文件扩展名“.wma”
AAC:文件扩展名“.m4a”
请注意,即使文件名具有正确的文件扩展名,如果实际文件不
同,本系统可能会发出噪音或可能发生故障。
要将本系统作为电池充电器使用时
当系统电源打开时,可将本系统作为具有充电功
能的USB设备的电池充电器。
当USB设备连接到 (USB)端口
时充电开始。
充电状态显示在USB设备显示窗中。有关详细说明,
请参见USB设备的用户指南。
创建自己的程序(编程播放)
1 选择CD或USB功能。
反复按FUNCTION +/
。
2 选择播放模式。
在播放机停止播放时,反复按PLAY MODE
直到
出现“PGM”。
3 选择想要的曲目或文件号码。
反复按/
直到出现想要的曲目或文件
号码。
在编制音频文件时,反复按 +/
选择想要
的文件夹,然后选择想要的文件。
所选曲目或文件号码 所选曲目或文件的总播
放时间
4 编制所选的曲目或文件。
按
输入所选曲目或文件。
5 重复步骤3至4编制其它曲目或文件,最多可编制
总计25个曲目或文件。
6 要播放编程的曲目或文件时,按
。
到打开光盘托盘或卸除USB设备为止,程序将
保持有效。
要再次播放相同的程序时,按
。
要取消编程播放时
在播放机停止播放时,反复按PLAY MODE
直
到“PGM”消失。
要删除编程的最后一个曲目或文件时
在播放机停止播放时,按CLEAR
。
要浏览程序信息时
反复按DISPLAY
。
使用选购音频组件
1 准备音源。
用音频模拟导线(非附件)将附加的音频组件连
接到主机上的AUDIO IN插孔
。
2 调小音量。
按VOLUME
。
3 选择AUDIO IN功能。
反复按FUNCTION +/
。
4 开始播放。
开始播放连接的组件并调节音量。
注意
如果连接组件的音量电平过低,本系统可能自动进入待机
模式。请相应地调节组件的音量。参见“要关闭自动待机功能
时”。
调节音质
要 按
调节音量
VOLUME +/
。
生成更有活力的
声音(Dynamic
Sound Generator
X-tra)
主机上的DSGX
。
设定声音效果
反复按EQ
选择“BASS”或
“TREBLE”,然后按
/
调节
电平。
改变显示
要 按
改变显示窗中的
信息
1)
在系统电源打开时反复按DISPLAY
。
改变显示模式
(参见下述。)
当系统关闭时,反复按DISPLAY
。
2)
1)
例如,可观看如下CD/MP3光盘信息或USB设备信息:
正常播放期间的曲目或文件号码。
正常播放期间的曲目或文件名(“ ”)。
正常播放期间的艺术家名(“ ”)。
正常播放期间的作品集或文件夹名(“ ”)。
CD-DA光盘上曲目的总播放时间和曲目总数(仅限于选择了
正常播放模式并且播放机停止播放时)。
MP3光盘或USB设备上的文件夹(作品集)总数(仅限于选择
了正常播放模式并且播放机停止播放时)。
(如果存在的话)MP3光盘或USB设备上的卷次标签(仅限于
选择了正常播放模式并且播放机或USB设备停止播放时)。
2)
当系统电源关闭时,主机上的STANDBY指示灯
点亮。
本系统提供下列显示模式。
显示模式 当系统电源关闭时
1)
,
演示 演示打开。
节电模式
2)
关闭显示以节省电力。定时器和
时钟继续工作。
时钟
3)
显示时钟。
1)
当系统电源关闭时,主机上的STANDBY指示灯
点亮。
2)
无法在节电模式下设定时钟。
3)
8秒钟后时钟显示自动变为节电模式。
有关显示信息的注意事项
无法显示的字符作为“_”出现。
不显示下列内容:
MP3光盘以及USB设备的总播放时间。
MP3文件的剩余播放时间。
下列内容不正确显示:
采用VBR(可变比特率)编码的MP3文件的已经过播放时间。
不符合ISO9660等级1、等级2或扩展格式Joliet标准的文件
夹和文件名。
显示下列内容:
曲目的剩余播放时间。
使用ID3版本1和版本2标签时,显示MP3文件的ID3标签信息
(当一个MP3文件同时使用了ID3版本1和版本2标签时,优先
显示ID3版本2标签信息)。
使用定时器
本系统提供两种定时器功能。如果同时使用两个
定时器,入睡定时器具有优先权。
入睡定时器:
您可以听着音乐入睡。即使没有设定时钟,本功
能仍然有效。
反复按SLEEP
。如果选择“AUTO”,本系统
将在播放完当前的光盘、USB设备停止播放后或在
100分钟以内自动关闭电源。
播放定时器:
可以让CD、FM广播、iPod/iPhone或USB设备在预
设的时间唤醒您。确保已经设定了时钟。
1 准备音源。
准备音源,然后按VOLUME +/
调节音量。
要从指定的CD曲目或音频文件开始播放时,创建
您自己的程序。
2 选择定时器设定模式。
按TIMER MENU
。
3 设定播放定时器。
反复按/
选择“PLAY SET?”,然后按
。
4 设定开始播放的时间。
反复按/
设定小时,然后按
。使用上
述步骤设定分钟。
5 用与步骤4相同的方法设定停止播放的时间。
6 选择音源。
反复按/
直到出现想要的音源,然后按
。
7 关闭系统电源。
按
。系统会在预设时间之前自动接通电
源。
如果本系统在预设时间处于开启状态,则播放定
时器将不工作。从系统接通电源到播放开始为止
的期间请勿操作系统。
要查看设置时
1 按TIMER MENU
。
2 反复按
/
选择“TIMER SEL?”,然后按
。
3 反复按
/
选择“PLAY SEL?”,然后按
。
要取消定时器时
重复与上述步骤相同的操作直到在步骤3中出
现“TIMER OFF?”,然后按
。
要改变设置时
从步骤1开始。
iPod/iPhone用户注意事项
当使用播放定时器时,请确保iPod/iPhone未处于播放状态。
根据连接的iPod/iPhone的状态,播放定时器可能不会被激
活。
提示
只要没有手动取消设置,将一直保留播放定时器设置。
故障排除
1 确保电源线和扬声器导线正确且牢固地连接。
2 从下面的故障排除清单中找出您的问题并执行所
指示的纠正措施。
如果仍然存在问题,请向就近的Sony代理商咨
询。
如果STANDBY指示灯闪烁
立即拔下电源线并查看下列项目。
+和扬声器导线是否短路?
是否有物品堵塞系统的通风孔?
iPod/iPhone连接器
是否短路?
在STANDBY指示灯
停止闪烁后,重新连接电
源线并打开系统电源。如果仍然存在问题,请向
就近的Sony代理商咨询。
总体
插上电源线后,即使不接通系统电源,也在显示
窗中出现演示。
在系统关闭时按一次DISPLAY
。演示会消失。
无法打开系统电源。
是否插好了电源线?
系统意外地进入待机模式。
这不是故障。当没有任何操作或音频信号输出时,
系统将在大约30分钟后自动进入待机模式。参
见“要关闭自动待机功能时”。
时钟设置或播放定时器操作被意外取消。
如果大约1分钟没有任何操作,时钟设置或播放定
时器设置会被自动取消。再次从头进行操作。
没有声音。
+和扬声器导线是否短路?
是否只使用了附带的扬声器?
是否有物品堵塞系统的通风孔?
指定的电台可能暂时停止了广播。
只有一个声道有声音,或左右音量不均衡。
将扬声器摆放得尽可能对称。
请只连接附带的扬声器。
严重的嗡嗡声或噪音。
将本系统从噪音源附近移开。
将本系统连接到不同的墙上电源插座。
在电源线上安装噪音滤波器(另售)。
遥控器不工作。
清除遥控器和主机上的遥控传感器
之间的障碍
物,并将主机放在远离荧光灯的位置。
把遥控器指向本系统的传感器。
使遥控器靠近本系统。
拔下电源线后,STANDBY指示灯
持续点亮。
拔下电源线后,STANDBY指示灯
可能不会立即熄
灭。指示灯将在大约40秒之后熄灭。这不是故障。
错误显示
由于存储在USB设备中的数据可能已经损毁,请再
次向USB设备发送音乐数据。
本系统可以显示的字符代码只有数字和字母。其它
字符不正确显示。
USB设备不被识别。
关闭系统电源并重新连接USB设备,然后打开系统
电源。
USB设备不正确工作。有关如何解决该问题,请参
阅USB设备的操作手册。
播放不开始。
关闭系统电源并重新连接USB设备,然后打开系统
电源。
按
开始播放。
播放不从第一个曲目开始。
将播放模式设定为正常播放模式。
无法播放文件。
音频文件不具有扩展名“.mp3”、“.wma”或
“.m4a”。
未以MP3/WMA/AAC格式存储数据。
以FAT16或FAT32以外的文件系统格式化的USB存储
设备不受支持。*
如果使用分区的USB存储设备,只能播放第一个分
区中的文件。
不能播放加密或受到密码保护等的文件。
* 本系统支持FAT16和FAT32,但是某些USB存储设备可能不支持
所有这些FAT格式。有关详细说明,请参阅各USB存储设备的操
作手册或与制造商联系。
调谐器
有严重的嗡嗡声或噪音,或无法接收电台。
(“TUNED”或“STEREO”在显示窗中闪烁。)
正确连接天线。
寻找接收效果良好的场所和方向,然后重新设置天
线。
令天线远离扬声器导线和电源线,以避免受到噪音
干扰。
关闭附近的电器设备。
要改善调谐器接收效果时
使用系统电源管理功能关闭CD播放机的电源。默
认设置下CD播放机的电源设为开。
用主机上的按钮关闭CD播放机的电源。
1 反复按FUNCTION
选择CD功能。
2 按
关闭系统电源。
3 在“STANDBY”停止闪烁后,按DISPLAY
显示时
钟,然后在按住 +
的同时按
直到出
现“CD POWER OFF”。
当关闭CD播放机的电源时,读取时间会变长。要
接通CD播放机的电源时,请重复上述步骤直到出
现“CD POWER ON”。
要将系统重设为出厂设置时
如果系统仍然无法正常工作,请将系统重设为出
厂设置。
使用主机上的按钮将系统复位为出厂默认设置。
1 拔下并重新连接电源线,然后接通系统的电源。
2 在按住ENTER
期间按住
直到出现
“RESET”。
所有用户配置的设置(如预设电台、定时器和时
钟等)均会被删除。
要关闭自动待机功能时
本系统具有自动待机功能。使用该功能,在没有
任何操作或音频信号输出时,系统在大约30分钟后
自动进入待机模式。
默认设置下自动待机功能设为开。
使用主机上的按钮关闭自动待机功能。
在系统电源打开期间按住
,直到出现
“AUTO STBY OFF”。
要打开该功能时,重复该操作直到出现“AUTO
STBY ON”。
注意
在系统进入待机模式之前,会在显示窗中显示“AUTO STBY”
两分钟。
即使激活了自动待机功能,该功能对调谐器功能(FM)也无
效。
在下列情况下,系统可能不会自动进入待机模式:
当检测到音频信号时。
在播放音频曲目或文件期间。
预设播放定时器或入睡定时器处于工作状态时。
讯息
CD Over : 当在播放或暂停期间按
时,已经到
达了光盘的末尾。
Data Error : 您试图播放USB设备上无法播放的文
件。
Error : 无法识别USB设备或连接了未知设备。
LOCKED : 无法打开光盘托盘。请向就近的Sony代理
商咨询。
No Device : 没有连接USB设备或所连接的USB设备已
停止。
No Disc : 播放机中没有光盘,或您装载了无法播放
的光盘。
No Memory : 未将选作播放源的存储媒体插入USB设
备。
No Step : 所有已编程曲目都被清除。
No Track : USB设备上的可播放文件未被装载到本系
统中。
Not in Use : 您试图在禁止某一操作的条件下执行该
操作。
Not Supported : 连接了不受支持的USB设备。
Push STOP! : 您在播放期间按下了PLAY MODE
。
Step Full! : 您试图编制25个以上的曲目或文件(步
骤)。
TIME NG! : 播放定时器的开始和结束时间设定了同
一时间。
使用须知
本系统能够播放的光盘
音频CD
CD-R/CD-RW(音频数据/MP3文件)
本系统不能播放的光盘
CD-ROM
以音乐CD格式或符合ISO9660等级1/等级2、
Joliet的MP3格式以外的格式录制的CD-R/CD-RW
以多区段录制而未以“关闭区段” 结束的CD-R/
CD-RW
录音质量差的CD-R/CD-RW,有划痕或肮脏的
CD-R/CD-RW,或使用不兼容的录制设备录制的
CD-R/CD-RW
未正常终结化的CD-R/CD-RW
含有MPEG 1 Audio Layer-3(MP3)文件以外文件
的光盘
非标准形状的光盘(例如:心形、方形、星形)
贴有粘性透明胶带、纸或不干胶的光盘
贴有封条的租借光盘或旧光盘而粘胶扩展到了封条
外侧
使用摸上去感到黏的墨水印刷标签的光盘
有关光盘的注意事项
播放前,请用清洁布从中央向外擦拭光盘。
请勿使用诸如汽油、稀释剂、市售洗涤剂或用于乙
烯基LP的防静电喷雾剂等溶剂清扫光盘。
请勿将光盘暴露在直射阳光下或诸如热通风管道一
类的热源附近,也不要放在停放在直射阳光下的汽
车里。
安全须知
若长时间不使用本系统,应从墙上电源插座完全拔
下本系统的电源线。拔下本机电源线时,务必握持
其插头。切勿拉扯电线本身。
万一有物体或液体落入系统内部,应拔下本系统的
电源线,经专业人员检查后方可再次使用。
交流电源线仅可在特约服务处更换。
安放须知
请勿将本系统安放在倾斜位置或极热、极冷、多
尘、肮脏、潮湿或通风不良、或有振动、直射阳光
或明亮光线之处。
当把本机或扬声器放在经过特殊处理(例如:打
蜡、涂油、抛光等)的表面上时,可能会导致表面
着色或褪色,请留意。
如果将本系统从寒冷处直接搬入温暖处或安放在极
为潮湿的房间里,湿气可能会凝结在CD播放机内部
的透镜上,并导致系统故障。这种情况下,请取出
光盘,打开系统电源放置大约一个小时,直到湿气
蒸发掉。
关于蓄热
工作期间本机蓄热是正常现象,这不是故障。
如果在大音量下连续使用本系统,机壳的温度会升
高,因此请您不要触摸机壳。
请勿堵塞通风孔。
关于扬声器系统
本扬声器系统未经过磁屏蔽处理,因此附近的电
视机上的图像可能会发生磁性失真。这种情况下,
请关闭电视机电源,等待15至30分钟后再打开。
如果没有改善,请将扬声器放在远离电视机的位
置。
清洁机壳
请用沾有少许中性清洁剂的软布清洁本系统。请
勿使用任何类型的研磨片、擦洗粉或诸如稀释剂、
汽油或酒精之类的溶剂。
规格
主机
放大器部
DIN功率输出(额定):20 W + 20 W(1 kHz时为6 ohms,DIN)
连续RMS功率输出(参考值):25 W + 25 W(1 kHz时为6 ohms,
10% THD)
输入
AUDIO IN(立体声迷你插孔):阻抗47 kilohms
输出
SPEAKERS:可插接6 ohms的阻抗
CD播放机部
系统:CD光盘和数字音频系统
激光二极管特性
放射持续时间:连续
激光输出*:低于44.6 μW
* 本输出为距离光学拾音单元上的物镜表面200 mm处以7 mm开口测得
的数值。
调谐器部
FM调谐器部:
FM立体声,FM超外差式调谐器
调谐范围:
87.5 MHz 108.0 MHz(50 kHz间隔)
天线:FM导线天线
天线端子:75 ohms非平衡
中频:10.7 MHz
iPod/iPhone部
兼容iPod/iPhone机型:
iPod touch第二代
iPod touch第一代
iPod classic 120 GB, 160 GB(2009)
iPod classic 160 GB(2007)
iPod classic 80 GB
iPod nano第五代(摄像机)
iPod nano第四代(视频)
iPod nano第三代(视频)
iPod nano第二代(铝质)
iPod nano第一代
iPod第五代(视频)
iPod第四代(彩屏)
iPod第四代
iPod mini
iPhone 3G
iPhone 3GS
USB部
支持的比特率:
MP3(MPEG 1 Audio Layer-3):32 kbps 320 kbps, VBR
WMA:48 kbps 192 kbps, VBR
AAC:48 kbps 320 kbps
采样频率:
MP3(MPEG 1 Audio Layer-3):32/44.1/48 kHz
WMA:44.1 kHz
AAC:44.1 kHz
(USB)端口:类型A,最大电流500 mA
扬声器
扬声器系统:2路扬声器系统,低音反射
扬声器单元:
低音扬声器100 mm,锥形
高音扬声器40 mm,锥形
额定阻抗:6 ohms
尺寸(宽/高/深):
约150 mm × 240 mm × 220 mm
质量:每个扬声器净重约2.0 kg
总体
电源要求:
AC 220 V 240 V, 50 Hz/60 Hz
功耗:33 W
尺寸(宽/高/深)(扬声器除外):
约309 mm × 122 mm × 247 mm
质量(扬声器除外):约2.9 kg
附件:遥控器(1),R6(AA尺寸)电池(2),FM导线天线(1),扬声
器导线(2),扬声器垫片(8),iPhone机型基座适配器(1)
设计和规格如有变更,恕不另行通知。
待机时消费电力:0.5 W
某些电路板没有使用卤化阻燃剂。
请拨打如下电话号码以获得本系统的用户支持服务。
索尼中国顾客咨询热线
TEL:400-810-9000
http://www.sony.com.cn/
CD/MP3播放机
声音间断,或无法播放光盘。
擦净光盘,并重新放入光盘。
将本系统移动到没有振动的地方(例如:稳固的架
子上)。
将扬声器从本系统旁移开,或将它们摆放在分开的
架子上。音量较大时,扬声器的振动可能会导致声
音间断。
播放不从第一个曲目开始。
通过反复按PLAY MODE
直到“PGM”和“SHUF”
均消失以返回正常播放。
等待开始播放的时间比平时长。
下列光盘开始播放所需的时间会变长:
以复杂树状结构录制的光盘。
以多区段模式录制的光盘。
未终结化的光盘(可以添加数据的光盘)。
包含许多文件夹的光盘。
iPod/iPhone
没有声音。
确保牢固地连接iPod/iPhone。
确保iPod/iPhone正在播放音乐。
调节音量。
声音失真。
确保牢固地连接iPod/iPhone。
调小音量。
将iPod/iPhone的“均衡器”设置设定为“关
闭”或 “Flat”。
iPod/iPhone不工作。
确保牢固地连接iPod/iPhone。
确保已用最新软件更新了iPod/iPhone。如果尚未
更新,请在本系统上使用之前更新iPod/iPhone。
由于本系统和iPod/iPhone的操作方法不同,可能
无法用遥控器或主机上的按钮操作iPod/iPhone。
在这种情况下,请使用iPod/iPhone上的控制按
钮。
无法为iPod/iPhone充电。
确保牢固地连接iPod/iPhone。
只在系统电源打开时,可将本系统作为iPod/
iPhone的电池充电器使用。
无法改变iPhone的铃声音量。
在iPhone上调节铃声音量。
USB设备
同时连接了iPod/iPhone和USB设备时,不为连接
的iPod/iPhone或USB设备充电。
无法同时为iPod/iPhone和USB设备充电。
正在使用受支持的USB设备吗?
如果连接了不受支持的USB设备,可能发生下列问
题。
USB设备不被识别。
本系统上不显示文件或文件夹名称。
无法播放。
声音间断。
有噪音。
输出失真的声音。
出现“Over Current!”。
从 (USB)端口
检测到电流电平问题。关闭系
统电源并从 (USB)端口
上拔下USB设备。确
保USB设备没有问题。如果该显示信息持续存在,
请与就近的Sony代理商联系。
没有声音。
没有正确连接USB设备。关闭系统电源,然后重新
连接USB设备。
有噪音、声音间断或失真。
关闭系统电源,然后重新连接USB设备。
音乐数据本身包含噪音或声音失真。在制作音乐数
据时,由于计算机的状态因素,可能混入了噪音。
重新制作音乐数据。
编码文件时使用的比特率较低。将以较高比特率编
码的文件发送到USB设备。
长时间显示“Reading”,或到播放开始为止花
费的时间较长。
在下列情况下,读取过程会花费较长时间。
USB设备上有许多文件夹或文件。
文件结构极为复杂。
存储容量非常大。
内部存储器发生了断离现象。
-
 1
1
-
 2
2

