Philips SP9810/19
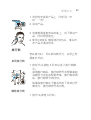
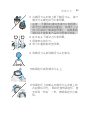
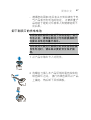
Philips SP9810/19 は、快適で便利なシェービング体験を実現する、先端技術を搭載した電気シェーバーです。3段階の「パーソナルコンフォート設定」により、肌質やひげの濃さに合わせて剃り心地をカスタマイズ可能。また、独自の「スキンコンタクトカミソリヘッド」が肌に優しく密着し、深剃りと肌の保護を両立します。さらに、本体丸洗いや素早い充電など、メンテナンス性にも優れています。
主な特長: ・パーソナルコンフォート設定:肌質やひげの濃さに合わせて、3段階の「コンフォート・ダイナミック・エフィシェンシー」から好みの剃り心地を選択可能。 ・スキンコンタクトカミソリヘッド:肌に優しく密着し、深剃りと肌の保護を両
Philips SP9810/19
Philips SP9810/19 は、快適で便利なシェービング体験を実現する、先端技術を搭載した電気シェーバーです。3段階の「パーソナルコンフォート設定」により、肌質やひげの濃さに合わせて剃り心地をカスタマイズ可能。また、独自の「スキンコンタクトカミソリヘッド」が肌に優しく密着し、深剃りと肌の保護を両立します。さらに、本体丸洗いや素早い充電など、メンテナンス性にも優れています。
主な特長: ・パーソナルコンフォート設定:肌質やひげの濃さに合わせて、3段階の「コンフォート・ダイナミック・エフィシェンシー」から好みの剃り心地を選択可能。 ・スキンコンタクトカミソリヘッド:肌に優しく密着し、深剃りと肌の保護を両


-
 1
1
-
 2
2
-
 3
3
-
 4
4
-
 5
5
-
 6
6
-
 7
7
-
 8
8
-
 9
9
-
 10
10
-
 11
11
-
 12
12
-
 13
13
-
 14
14
-
 15
15
-
 16
16
-
 17
17
-
 18
18
-
 19
19
-
 20
20
-
 21
21
-
 22
22
-
 23
23
-
 24
24
-
 25
25
-
 26
26
-
 27
27
-
 28
28
-
 29
29
-
 30
30
-
 31
31
-
 32
32
-
 33
33
-
 34
34
-
 35
35
-
 36
36
-
 37
37
-
 38
38
-
 39
39
-
 40
40
-
 41
41
-
 42
42
-
 43
43
-
 44
44
-
 45
45
-
 46
46
-
 47
47
-
 48
48
-
 49
49
-
 50
50
-
 51
51
-
 52
52
-
 53
53
-
 54
54
-
 55
55
-
 56
56


Philips SP9810/19
Philips SP9810/19 は、快適で便利なシェービング体験を実現する、先端技術を搭載した電気シェーバーです。3段階の「パーソナルコンフォート設定」により、肌質やひげの濃さに合わせて剃り心地をカスタマイズ可能。また、独自の「スキンコンタクトカミソリヘッド」が肌に優しく密着し、深剃りと肌の保護を両立します。さらに、本体丸洗いや素早い充電など、メンテナンス性にも優れています。
主な特長: ・パーソナルコンフォート設定:肌質やひげの濃さに合わせて、3段階の「コンフォート・ダイナミック・エフィシェンシー」から好みの剃り心地を選択可能。 ・スキンコンタクトカミソリヘッド:肌に優しく密着し、深剃りと肌の保護を両
他の言語で
- English: Philips SP9810/19 User manual