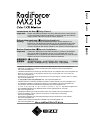
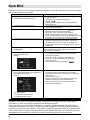
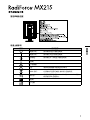
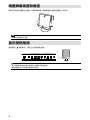
Eizo MX215 は、医療分野での使用を想定した高品質なカラー液晶モニターです。1600x1200の高解像度と、10億7000万色の表示が可能な広色域パネルを採用し、鮮明で美しい画像を表示することができます。また、独自のカラーマネジメント技術により、正確な色再現を実現しています。
Eizo MX215 は、医療画像の表示に最適です。DICOMモードを搭載しており、DICOM規格に準拠した画像を正確に表示することができます。また、CALスイッチを搭載しており、簡単にモニターをキャリブレーションすることができます。
Eizo MX215 は、診察室や手術室など、医療分野のさまざまなシーンでご利用いただけます。高品質な画像表示と、正確な色再現により、医療従事者の業務をサポートします。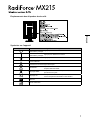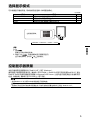


-
 1
1
-
 2
2
-
 3
3
-
 4
4
-
 5
5
-
 6
6
-
 7
7
-
 8
8
-
 9
9
-
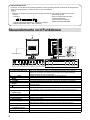 10
10
-
 11
11
-
 12
12
-
 13
13
-
 14
14
-
 15
15
-
 16
16
-
 17
17
-
 18
18
-
 19
19
-
 20
20
-
 21
21
-
 22
22
-
 23
23
-
 24
24
-
 25
25
-
 26
26
-
 27
27
-
 28
28


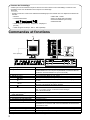
Eizo MX215 は、医療分野での使用を想定した高品質なカラー液晶モニターです。1600x1200の高解像度と、10億7000万色の表示が可能な広色域パネルを採用し、鮮明で美しい画像を表示することができます。また、独自のカラーマネジメント技術により、正確な色再現を実現しています。
Eizo MX215 は、医療画像の表示に最適です。DICOMモードを搭載しており、DICOM規格に準拠した画像を正確に表示することができます。また、CALスイッチを搭載しており、簡単にモニターをキャリブレーションすることができます。
Eizo MX215 は、診察室や手術室など、医療分野のさまざまなシーンでご利用いただけます。高品質な画像表示と、正確な色再現により、医療従事者の業務をサポートします。
他の言語で
- italiano: Eizo MX215 Manuale del proprietario
- Deutsch: Eizo MX215 Bedienungsanleitung
- français: Eizo MX215 Le manuel du propriétaire
- English: Eizo MX215 Owner's manual