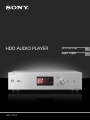
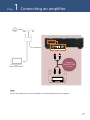
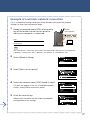
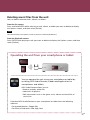
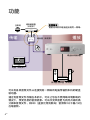
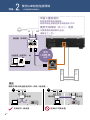
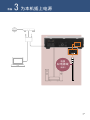
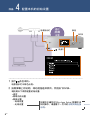
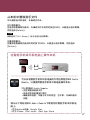
Sony HAP-Z1ES は、音楽愛好家のための高性能オーディオプレイヤーです。ハイレゾ音源の再生に対応しており、CDを超える高音質で音楽を楽しむことができます。また、大容量のハードディスクを搭載しているので、大量の音楽ファイルを保存して、好きなときに再生することができます。さらに、ネットワーク機能にも対応しているので、パソコンやスマートフォンから音楽ファイルを転送して再生することも可能です。
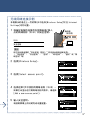
Sony HAP-Z1ES は、音楽を存分に楽しむための様々な機能を搭載した、高性能オーディオプレイヤーです。
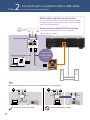
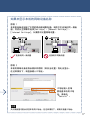
Sony HAP-Z1ES は、音楽愛好家のための高性能オーディオプレイヤーです。ハイレゾ音源の再生に対応しており、CDを超える高音質で音楽を楽しむことができます。また、大容量のハードディスクを搭載しているので、大量の音楽ファイルを保存して、好きなときに再生することができます。さらに、ネットワーク機能にも対応しているので、パソコンやスマートフォンから音楽ファイルを転送して再生することも可能です。
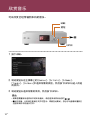
Sony HAP-Z1ES は、音楽を存分に楽しむための様々な機能を搭載した、高性能オーディオプレイヤーです。


-
 1
1
-
 2
2
-
 3
3
-
 4
4
-
 5
5
-
 6
6
-
 7
7
-
 8
8
-
 9
9
-
 10
10
-
 11
11
-
 12
12
-
 13
13
-
 14
14
-
 15
15
-
 16
16
-
 17
17
-
 18
18
-
 19
19
-
 20
20
-
 21
21
-
 22
22
-
 23
23
-
 24
24
-
 25
25
-
 26
26
-
 27
27
-
 28
28
-
 29
29
-
 30
30
-
 31
31
-
 32
32


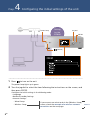
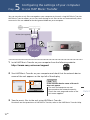
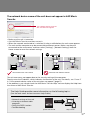
Sony HAP-Z1ES は、音楽愛好家のための高性能オーディオプレイヤーです。ハイレゾ音源の再生に対応しており、CDを超える高音質で音楽を楽しむことができます。また、大容量のハードディスクを搭載しているので、大量の音楽ファイルを保存して、好きなときに再生することができます。さらに、ネットワーク機能にも対応しているので、パソコンやスマートフォンから音楽ファイルを転送して再生することも可能です。
Sony HAP-Z1ES は、音楽を存分に楽しむための様々な機能を搭載した、高性能オーディオプレイヤーです。
他の言語で
- English: Sony HAP-Z1ES Quick start guide