Adata SU800 インストールガイド

タイプ
インストールガイド
INSTALLING AN 2.5” SATA SSD ON A DESKTOP PC
Chinese traditional
Chinese simple
English
German
Japanese
Korean
Portuguese
Russian
Romanian
Spanish
INSTALLING AN 2.5” SATA SSD ON A LAPTOP PC
Chinese traditional
Chinese simple
English
German
Japanese
Korean
Portuguese
Russian
Romanian
Spanish
INDEX
03
07
11
15
19
23
27
31
35
39
43
47
51
55
59
63
67
71
75
79
如何在桌機安裝
2.5 SATA固態硬碟
面產品圖片僅示意,此說明書適用於所有威剛2.5”SSD
更換前準備步驟
1. 準備工具
*請準備一支一般大小的螺絲起子(牙頭直徑歐3.5mm),
用來拆卸機殼。
主機、螺絲起子、新的ADATA 2.5SATA固態硬碟。
2. 備份資料
在更換新的固態硬碟之前,建議先將電腦中的資
料,備份到外接式硬碟中。
3. 請確實關機
完成備份後,請確實將主機關機,避免更換過程
中資料的遺失,或是對系統及各零組件的損害。
4. 關閉主機後方的電源鍵,並將電源
線拔除
*每一台主機的電源鍵位置不盡相同,請參照該主機的使
用者說明書。
此動作是避免微量的電流通過,會造成系統及零
件合資料損害。
*建議另外準備一顆外接式硬碟,讓更換固態硬碟的過程
不會遺失任何重要資料。
*若不知道自己的電腦該如何操作,請查閱該主機的使用
者手冊。
*每一台主機固定硬碟的方式不盡相同,可能會有抽屜式
或是支架式來放置固態硬碟,取下方式就會有拉出托架
或支撐框架。
**卸下支架時,請仔細查看頂部或側面的螺釘,這些螺釘
可能會固定在上面。
安裝固態硬碟步驟
使用正常直徑的螺絲起子,將背板的螺絲取下。
2. 確認2.5吋硬碟插槽位置,並拆下支架
請仔細檢查主機板側面,可以找到未使用到的
2.5吋支架。
3. 取下支架與排線
4. 將排線與支架裝上新的2.5吋固態
硬碟,放回支架或是托盤
*2.5吋排線上的接口有防呆設計,請依固態硬碟金手指與
接口對應之方向插入,如有干涉切勿強行插入,以免造成
產品損壞。
排線上有一排金手指,固態硬碟也是,將相同的
位置對準,表示方向正確,並重新將支架或托盤
放回到插槽中。
1. 將主機機殼卸下
5. 重新裝上機殼
*勿過度拴緊螺絲,造成螺牙或是背蓋毀損。
6. 將電源線重新裝上,並開啟電源
鍵即完成安裝
客戶服務和技術支持
聯絡我們: https://www.adata.com/tw/support/online/
如何在台式電腦安裝
2.5 SATA固態硬盤
封面产品图片仅示意,此说明书适用于所有威刚2.5” SSD。
更換前準備步驟
1. 準備工具
*請准備一支一般大小的螺絲起子(牙頭直徑3.5mm),
用來拆卸外殼。
*建議另外准備一顆外接式硬盤,讓更換固態硬盤的過程
不會遺失任何重要數据。
電腦主机、螺絲起子、新的ADATA 固態硬盤。
2. 備份數據
在更換新的固態硬盤之前,建議先將電腦中的數
據備份到外接式硬盤中。
3. 請確認關機
完成備份后,請確認已將主機完全關閉,而非休
眠。避免更換過程中數據的遺失,或是對系統及
各零組件的損害。
4. 關閉主机后方的電源開關,并將電
源線拔除
*每一台主机的電源開關位置不盡相同,請參照該主机的
用戶說明書。
此動作是避免微量的電流通過,仍會造成系統及
零件和數據損害。
*若不知道自己的電腦該如何操作,請查閱該電腦的用戶
手冊。
*每一台電腦固定硬盤的方式不盡相同,可能有抽屜式
或是支架式來放置固態硬盤,取下方式就會有拉出托架或
支撐框架。
**卸下支架時,請仔細查看頂部或側面的螺釘,這些螺釘
可能會固定在上面。
安裝固態硬盤步驟
使用正常直徑的螺絲起子,將側板上的螺絲
取下。
2. 確認2.5硬盤的插槽位置,并拆下
支架
請仔細檢查主板側面,可以找到未使用到的2.5
支架。
3. 取下支架与扁平電纜
4. 將扁平電纜与支架裝上新的2.5
固態硬盤
*2.5扁平電纜上的接口有防呆設計,請依固態硬盤金手
指与接口對應之方向插入,如有干涉切勿強行插入,以免
造成產品損坏。
扁平電纜上有一排金手指,固態硬盤也是,將相
同的位置對准,表示方向正确,并重新將支架或
托盤放回到插槽中。
1. 將電腦側板卸下
5. 重新裝上机箱側板
*勿過度擰緊螺絲,造成螺牙或是背蓋毀損。
6. 將電源線重新裝上,並開啟電源
鍵即完成安裝
客戶服務和技術支持
聯絡我們: https://www.adata.com/cn/support/online/
INSTALLING
AN 2.5" SATA SSD
ON A DESKTOP PC
The cover product image is for illustration purposes only. This manual is applicable to all ADATA 2.5” SSD products.
1. GATHER THE THINGS YOU'LL
NEED
*Please use a standard Phillips screwdriver (3.5mm) for
disassembling the case.
PC, Phillips screwdriver, and ADATA 2.5" SATA
SSD
2. BACK UP YOUR DATA
Make sure to backup the important data on your
PC to an external device, such as an external
HDD, before starting installation.
3. POWER OFF YOUR PC
After backing up your data, power off your PC
to avoid data loss or damage to other
components during installation.
4. SWITCH OFF THE POWER SWITCH
AND UNPLUG POWER CORD
This action is necessary to discharge residual
power that can damage your PC and its
components.
BEFORE INSTALLATION
*Please check the side of the motherboard to find the
unused 2.5" bracket
*Each PC has different ways to fix drives. There may be
drawers or brackets to place the solid state hard drives.
The way to remove them will involve pulling out the
bracket or support frame.
**When removing the stand, please check the screws on
the top or side carefully, these screws may be fixed on it.
*The slot has a foolproof design. Please insert the SSD
in the direction corresponding to the pins on the solid
state drive and the slot.. Do not insert it forcibly to avoid
damage to the product.
Use the standard Philips screwdriver to remove
the screws and then remove the PC case
2. CONFIRM THE POSITION OF THE
2.5" SLOT AND REMOVE THE
BRACKET
3. REMOVE THE BRACKET AND
CABLE
4. CONNECT CABLES AND ATTACH
BRACKET TO THE NEW 2.5" SATA
SSD. PUT THE BRACKET IN THE
SLOT TO FIX DRIVES
There is a row of pins on the cable as well as on
the SSD. Align to the correct orientation and
place the bracket back into the slot.
1. REMOVE THE PC CASE
INSTALLATION
5. RESEMBLE THE CASE
*Do not overtighten the screws as it may damage the
screws ad back plate
6. PLUG IN THE POWER CORD AND
POWER ON THE PC TO COMPLETE
INSTALLATION
CUSTOMER SERVICE AND TECHNICAL SUPPORT
Contact Us: https://www.adata.com/en/support/online/
EINE 2,5-ZOLL-SATA-SSD AN
EINEM DESKTOP-PC
INSTALLIEREN
Das abgebildete Produktbild dient nur zur Veranschaulichung. Diese Anleitung gilt für alle ADATA 2.5” SSD-Produkte.
VOR DER INSTALLATION
1. ALLES NÖTIGE
ZUSAMMENTRAGEN
*Bitte verwenden Sie zum Demontieren des Gehäuses
einen Standard-Kreuzschraubendreher (3,5 mm).
PC, Kreuzschraubendreher und ADATAs
2,5-Zoll-SATA-SSD
2. IHRE DATEN SICHERN
Denken Sie daran, wichtige Daten auf Ihrem PC
auf einem externen Gerät, wie einer externen
Festplatte, zu sichern, bevor Sie mit der
Installation beginnen.
3. IHREN PC ABSCHALTEN
Schalten Sie nach Sicherung Ihrer Daten Ihren
PC aus, damit während der Installation keine
Daten verlorengehen und andere Komponenten
nicht beschädigt werden.
4.
NETZSCHALTER AUSSCHALTEN
UND NETZKABEL TRENNEN
Dieser Vorgang ist zum Entladen des Reststroms
erforderlich, da andernfalls Ihr PC und seine
Komponenten Schaden nehmen könnten.
*Bitte prüfen Sie die Seite des Motherboards auf eine
nicht verwendete 2,5-Zoll-Halterung
*
Der Steckplatz hat ein narrensicheres Design. Bitte setzen
Sie die SSD entsprechend den Kontakten an Solid-State-Drive
und Steckplatz ein. Setzen Sie sie nicht gewaltvoll ein.
Andernfalls könnte das Produkt beschädigt werden.
*Jeder PC hat andere Methoden zur Anbringung der Laufwerke.
Möglicherweise gibt es Schubladen oder Halterungen zur
Platzierung der Solid-State-Drives. Deren Entfernung beinhaltet
das Herausziehen der Halterung oder des Stützrahmens.
**Bitte prüfen Sie beim Entfernen des Ständers sorgfältig die
Schrauben an der Oberseite oder Seite. Diese Schrauben sind
möglicherweise daran befestigt.
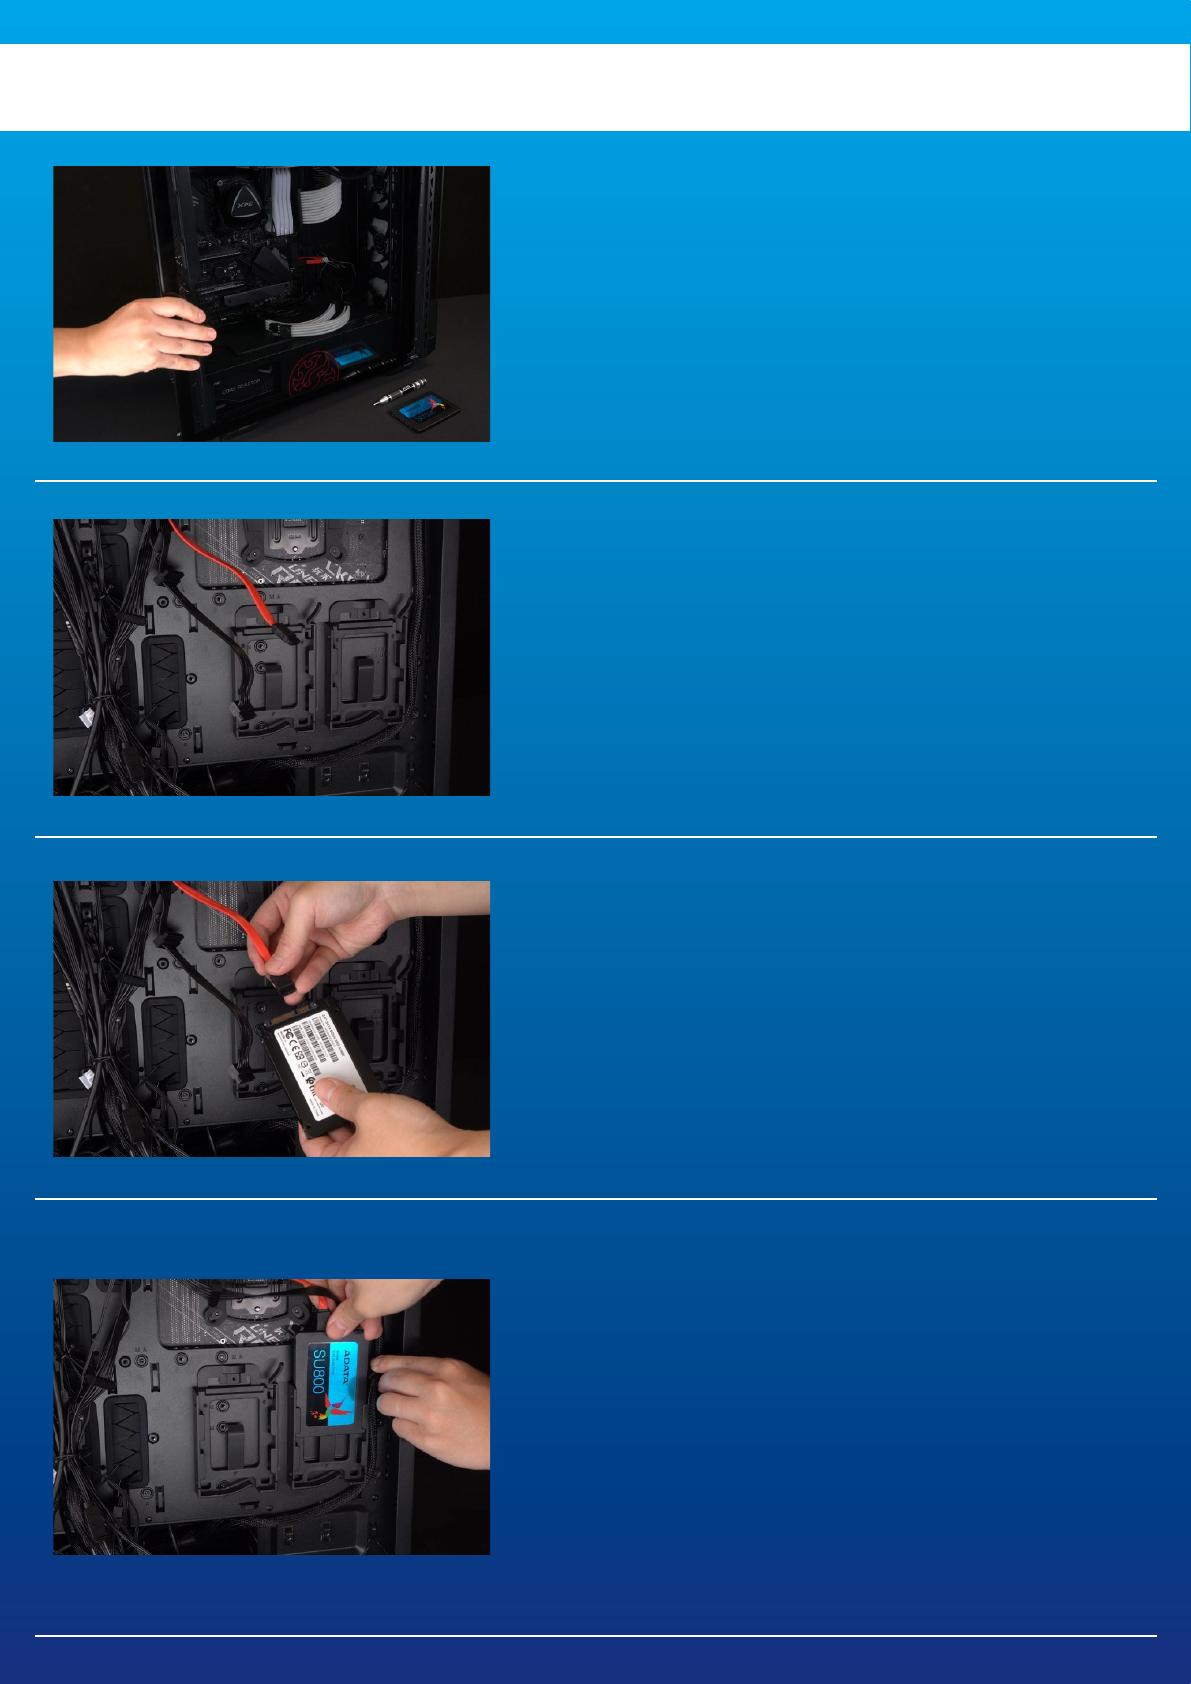
INSTALLATION
Entfernen Sie die Schrauben mit dem Standard-
Kreuzschraubendreher und entfernen Sie dann
das PC-Gehäuse
2.
POSITION DES 2,5-ZOLL-
STECKPLATZES BESTÄTIGEN UND
HALTERUNG ENTFERNEN
4.
SCHLIEßEN SIE DIE KABEL AN UND
BRINGEN SIE DIE HALTERUNG AN DER
NEUEN 2,5-ZOLL-SATA-SSD AN. ZUR
FIXIERUNG DER LAUFWERKE HALTERUNG
IM STECKPLATZ ANBRINGEN
3. HALTERUNG UND KABEL
ENTFERNEN
Es gibt eine Reihe Kontakte am Kabel sowie an
der SSD. Richten Sie es richtig aus und platzieren
Sie die Halterung wieder im Steckplatz.
1. PC-GEHÄUSE ENTFERNEN
5.
GEHÄUSE WIEDER ZUSAMMENBAUEN
*Ziehen Sie die Schrauben nicht zu fest, da andernfalls
Schrauben und Rückplatte beschädigt werden könnten
6. ZUM ABSCHLIEßEN DER
INSTALLATION NETZKABEL
ANSCHLIEßEN UND PC
EINSCHALTEN
KUNDENDIENST UND TECHNISCHER SUPPORT
Kontakt : https://www.adata.com/de/support/online/
2.5 SATA SSD
カバーの商品画像はイメージです。このマニュアルはADATAのすべての2.5” SSD製品に適用されます。
1.
*
3.5mm
ADATA
2.5" SATA SSD
2.
SSD
SSD
3.
4.
*
  • Page 1 1
  • Page 2 2
  • Page 3 3
  • Page 4 4
  • Page 5 5
  • Page 6 6
  • Page 7 7
  • Page 8 8
  • Page 9 9
  • Page 10 10
  • Page 11 11
  • Page 12 12
  • Page 13 13
  • Page 14 14
  • Page 15 15
  • Page 16 16
  • Page 17 17
  • Page 18 18
  • Page 19 19
  • Page 20 20
  • Page 21 21
  • Page 22 22
  • Page 23 23
  • Page 24 24
  • Page 25 25
  • Page 26 26
  • Page 27 27
  • Page 28 28
  • Page 29 29
  • Page 30 30
  • Page 31 31
  • Page 32 32
  • Page 33 33
  • Page 34 34
  • Page 35 35
  • Page 36 36
  • Page 37 37
  • Page 38 38
  • Page 39 39
  • Page 40 40
  • Page 41 41
  • Page 42 42
  • Page 43 43
  • Page 44 44
  • Page 45 45
  • Page 46 46
  • Page 47 47
  • Page 48 48
  • Page 49 49
  • Page 50 50
  • Page 51 51
  • Page 52 52
  • Page 53 53
  • Page 54 54
  • Page 55 55
  • Page 56 56
  • Page 57 57
  • Page 58 58
  • Page 59 59
  • Page 60 60
  • Page 61 61
  • Page 62 62
  • Page 63 63
  • Page 64 64
  • Page 65 65
  • Page 66 66
  • Page 67 67
  • Page 68 68
  • Page 69 69
  • Page 70 70
  • Page 71 71
  • Page 72 72
  • Page 73 73
  • Page 74 74
  • Page 75 75
  • Page 76 76
  • Page 77 77
  • Page 78 78
  • Page 79 79
  • Page 80 80
  • Page 81 81
  • Page 82 82

Adata SU800 インストールガイド

タイプ
インストールガイド