SFX
PSU
SFX
PSU
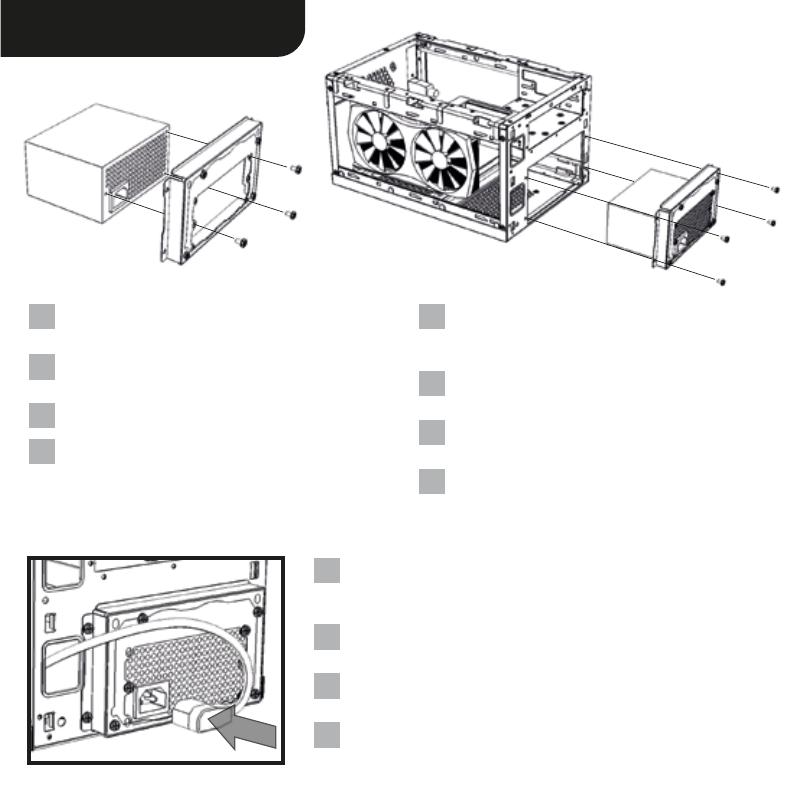
Verschrauben Sie die Netzteil-Halterung mit Ihrem
Netzteil.
Screw the power supply attachment onto the power
supply.
.
DE
EN
CN
JP
Setzen Sie danach das Netzteil in das Gehäuse ein
und schrauben Sie die Netzteil-Halterung am
Gehäuse fest.
Insert the power supply and then secure it by
screwing the power supply attachment to the case.
.
DE
EN
CN
JP
Verbinden Sie den Kaltgerätestecker des Gehäuses mit Ihrem Netzteil. Sollte
das verwendete Netzteil über einen Netzschalter verfügen, schalten Sie
diesen vor der Montage der Frontblende ein.
Connect the internal IEC power cord to the power supply. If the power
supply uses a power switch, turn it on before attaching the front panel.
IEC
啟
IEC
.
DE
EN
CN
JP
Power supply installation (SFX)


