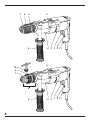
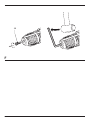
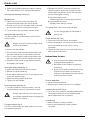
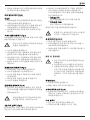
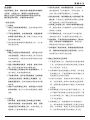
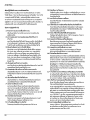
DeWalt D21720 は、回転と打撃の両方の動作ができる強力なパーカッション ドリルです。さまざまな素材に穴を開けることができ、コンクリートやレンガなどの硬い素材を簡単に貫通できます。また、2 段階のギアと回転速度を調整できる機能を備えているため、作業内容に適した速度で作業できます。さらに、安全のためにロックオン ボタンと逆回転スイッチも付いており、安全に使用することができます。
DeWalt D21720 は、プロの職人から週末の DIYer まで、幅広いユーザーに最適なドリルです。頑丈な作りとパワフルなモーターにより、さまざまな作業を楽に行うことができます。
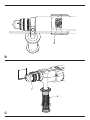
例として、以下のような場合に DeWalt D21720 を使用できます。
- 木材に穴を開けて棚を設置する場合
- コンクリートに穴を開けてアンカーボルトを取り付ける場合
- 金属に穴を開けて
DeWalt D21720 は、回転と打撃の両方の動作ができる強力なパーカッション ドリルです。さまざまな素材に穴を開けることができ、コンクリートやレンガなどの硬い素材を簡単に貫通できます。また、2 段階のギアと回転速度を調整できる機能を備えているため、作業内容に適した速度で作業できます。さらに、安全のためにロックオン ボタンと逆回転スイッチも付いており、安全に使用することができます。
DeWalt D21720 は、プロの職人から週末の DIYer まで、幅広いユーザーに最適なドリルです。頑丈な作りとパワフルなモーターにより、さまざまな作業を楽に行うことができます。
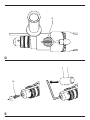
例として、以下のような場合に DeWalt D21720 を使用できます。
- 木材に穴を開けて棚を設置する場合
- コンクリートに穴を開けてアンカーボルトを取り付ける場合
- 金属に穴を開けて


-
 1
1
-
 2
2
-
 3
3
-
 4
4
-
 5
5
-
 6
6
-
 7
7
-
 8
8
-
 9
9
-
 10
10
-
 11
11
-
 12
12
-
 13
13
-
 14
14
-
 15
15
-
 16
16
-
 17
17
-
 18
18
-
 19
19
-
 20
20
-
 21
21
-
 22
22
-
 23
23
-
 24
24
-
 25
25
-
 26
26
-
 27
27
-
 28
28
-
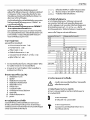 29
29
-
 30
30
-
 31
31
-
 32
32


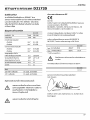
DeWalt D21720 は、回転と打撃の両方の動作ができる強力なパーカッション ドリルです。さまざまな素材に穴を開けることができ、コンクリートやレンガなどの硬い素材を簡単に貫通できます。また、2 段階のギアと回転速度を調整できる機能を備えているため、作業内容に適した速度で作業できます。さらに、安全のためにロックオン ボタンと逆回転スイッチも付いており、安全に使用することができます。
DeWalt D21720 は、プロの職人から週末の DIYer まで、幅広いユーザーに最適なドリルです。頑丈な作りとパワフルなモーターにより、さまざまな作業を楽に行うことができます。
例として、以下のような場合に DeWalt D21720 を使用できます。
- 木材に穴を開けて棚を設置する場合
- コンクリートに穴を開けてアンカーボルトを取り付ける場合
- 金属に穴を開けて