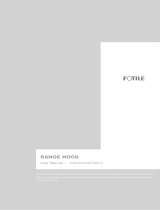
Philco GH1206SNL ユーザーマニュアル

タイプ
ユーザーマニュアル
INSTALLATION
2 mm
Positioning
top of cooking
surface
Fixing dimensions
555/855
230
Ø
272
WARNING!
these instructions may result in electrical hazards.
88
45
0~160
280
20
600/900
Drilling holes
Drill the holes on top of wooden cupboard
drill Ø 7mm hole
drill Ø 16mm hole
cut Ø 196mm hole
Ø7 for hood
fastening screws 86 Ø16 for cable
clearance
Øclearance
33
210
272
252
192
196 for flue
Front of cabinet
Door/hood fascia
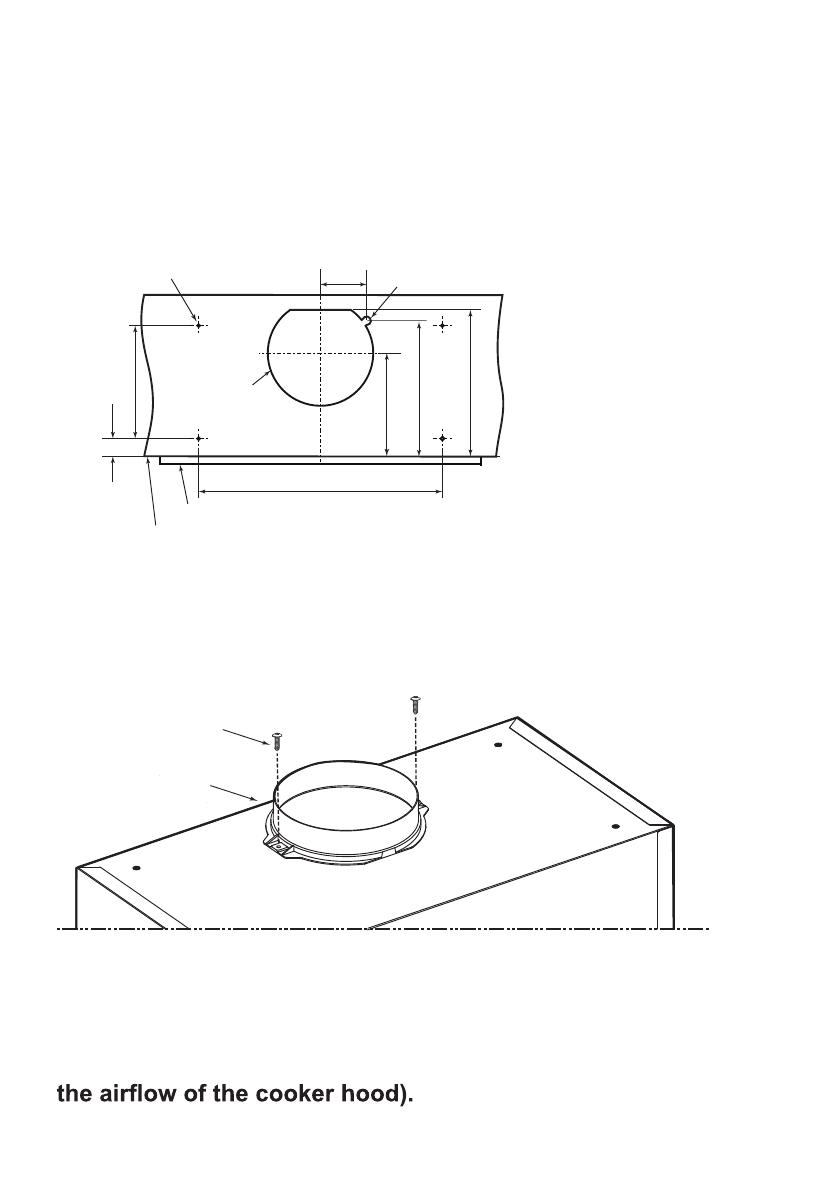
Fixing the ducting adapter
Ø150mm
Ducting adapter
Ø150mm
eht ot retpada mm521 ot 051 eht tcennoc ,yrossecen fI
ducting adapter.
Important! For best performance, Ø150mm ducting is
recommended (Ø125mm ducting can be used, but will reduce
Connect Ø150mm ducting adapter to the blower outlet and
use screws to fix it to the range hood.
Screw ST3.5 x 10mm
ØØ
Fixing the Lateral spacers
Screw Lateral spacer
Mounting the rangehood to the underside of cupboard
Attach the rangehood to wooden support and x it with the 4 screws
supplied.
Cupboard
Screw M4 x 60mm and washers
ST3 x 12mm
Fixing the Rear Spacer
Use suitable Rear Spacer to cover the space between the wall and
the rangehood and x it with 2 screws.
Screw ST3 x 12mm
Fixing exible duct
Connect 150 mm or 125 mm fexible duct to the adapter and
600/900
Rear spacer can be reversed
to suit gap at rear
ØØ
fix it.
2
650
!
555/855
230
Ø
272
88
45
0~160
280
20
600/900
Ø 7
Ø
Ø 196
86 Ø16
Ø
33
210
272
252
192
196
/
Ø150
50 125 150
! 50 (
25 )
16
ST3.5 x 10
Ø
ØØ
Ø
4
ST3 x 12
.
150 125
600/900
ST3 x 12
ØØ
  • Page 1 1
  • Page 2 2
  • Page 3 3
  • Page 4 4
  • Page 5 5
  • Page 6 6
  • Page 7 7
  • Page 8 8

Philco GH1206SNL ユーザーマニュアル

タイプ
ユーザーマニュアル