
HI5900 series
© 2017 Koninklijke Philips N.V.
All rights reserved
4239 001 12132
>75% recycled paper
>75% papier recyclé
User Manual
Manual pengguna
用户手册
使用手冊

2 sec.
2 min.
1 3
6 7
10
9
11
8
4
5
2
1
2
3
4
5
6
7
8
9
10


6
Introduction
Congratulations on your purchase and welcome to Philips! To fully benet from the support that
Philips oers, register your product at www.philips.com/welcome.
Read this user manual, the important information leaet, and the quick start guide carefully before
you use the appliance. Save them for future reference.
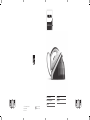
Product overview (Fig. 1)
1 Water supply hose
2 Temperature dial
3 Steam trigger/Steam boost
4 'Iron ready' light
5 CALC-CLEAN button with light
6 Iron platform
7 Water tank release lever
8 Detachable water tank
9 On/o switch
10 Mains cord with plug
11 Smart Calc-Clean container
Important
Perform the descaling process regularly for great steam and a prolonged lifetime of the appliance.
Recommended water to use
Distilled or demineralized water if you live in an area with hard water.
Type of water to use
This appliance has been designed to be used with tap water. However, if you live in an area with hard
water, fast scale build-up may occur. Therefore, it is recommended to use distilled or demineralized
water to prolong the lifetime of the appliance.
Warning: Do not use perfumed water, water from the tumble dryer, vinegar, starch, descaling
agents, ironing aids, chemically descaled water or other chemicals, as they may cause water
spitting, brown staining or damage to your appliance.
Caution: Be careful when you remove the water tank. The area near the tip of the iron may be hot
(Fig. 2).
English

7
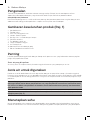
Setting the temperature
To set the required ironing temperature, turn the temperature dial to the appropriate position. The
appliance adjusts the steam automatically, depending on the ironing temperature set.
Temperature setting Automatic setting Fabric type
SYNTH to 1
Synthetic fabrics (e.g., acetate,
acrylic, nylon, polyamide)
2
Wool, viscose, polyester and
silk
3 to LINEN
Cotton, linen
Press and hold the steam trigger to start ironing. For best ironing results, after ironing with steam,
perform the last strokes without steam.
Auto shut-o mode
Specic models in this series have the auto shut-o mode.
- To save energy, the appliance switches o automatically when it has not been used for 5 minutes.
The 'iron ready' light ashes.
- To activate the appliance again, set the on/o switch to ‘o’ position and then to ‘on’ position.The
appliance then starts to heat up again.
Cleaning and maintenance
Smart Calc-Clean System
Your appliance has been designed with a Smart Calc-Clean system to ensure that descaling and
cleaning is done regularly. This helps to maintain a strong steam performance and prevents dirt and
stains coming out of the soleplate over time. To ensure that the cleaning process is performed, the
steam generator gives regular reminders.
Sound and light Calc-Clean reminder
After 1 to 3 months of use, the Calc-Clean light starts ashing and the appliance starts beeping to
indicate that you have to perform the Calc-Clean process (Fig. 3).
Tip: You can continue to dry iron by not pressing the steam trigger.
Besides that, a second defense step to protect the steam generator from scale is integrated: the
steam function gets disabled if descaling is not done. After descaling is done, the steam function will
be restored. This takes place regardless of the type of water used.
Note: The Calc-Clean process can be performed at any time, even when the sound and light reminder
is not activated yet.
English

8
Performing the Calc-Clean process with the Calc-Clean
container
Warning: Do not leave the appliance unattended during the Calc-Clean process.
Caution: Do not interrupt the process by lifting the iron up from the Calc-Clean container, as hot
water and steam will come out of the soleplate.
1 Fill up the water tank halfway (Fig. 4).
Note: Make sure that the appliance is plugged in and switched ON during the Calc-Clean process.
2 Place the Calc-Clean container on the ironing board or any other even, stable surface.
3 Place the iron stably on the Calc-Clean container (Fig. 5).
Note: The Calc-Clean container has been designed to collect scale particles and hot water during
the Calc-Clean process. It is perfectly safe to rest the iron on this container during the entire
process.
4 Press and hold the Calc-Clean button for 2 seconds until you hear short beeps (Fig. 6).
5 During the Calc-Clean process, you hear short beeps and a pumping sound (Fig. 7).
6 When the Calc-Clean process is completed, the iron stops beeping and the CALC-CLEAN light
stops ashing (Fig. 8).
7 Wipe the iron with a piece of cloth and put it back on the base station (Fig. 9).
8 As the Calc-Clean container becomes hot during the Calc-Clean process, wait approx. 5 minutes
before you touch it. Then carry the Calc-Clean container to the sink, empty it and store it for future
use (Fig. 10).
9 If necessary, you can repeat steps 1 to 7. Make sure that you empty the Calc-Clean container before
you start the Calc-Clean process.
Note: During the Calc-Clean process, clean water may come out of the soleplate if no scale has
accumulated inside the iron. This is normal.
Troubleshooting
This chapter summarizes the most common problems you could encounter with the appliance. If you
are unable to solve the problem with the information below, visit www.philips.com/support for a list
of frequently asked questions or contact the Consumer Care Center in your country.
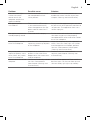
Problem Possible cause Solution
The iron does not
produce any steam.
You have set the temperature
dial to SYNTH to 1.
Turn the temperature dial to 2 or
higher.
The steam function has
been disabled until you have
performed the Calc-Clean
process.
Perform the Calc-Clean process to
restore the steam function. (see chapter
'Cleaning and maintenance')
At the start of your ironing
session, the steam trigger
has not been pressed long
enough.
Press and hold the steam trigger until
steam comes out. It may take up to 30
seconds until steam comes out.
English

9
Problem Possible cause Solution
The Calc-Clean light
ashes. No steam
comes out of the
soleplate and/or the
appliance beeps.
You have not done or have
not completed the Calc-
Clean process.
Perform the Calc-Clean process to
enable the steam function again (see
chapter 'Cleaning and maintenance').
The appliance has
switched o.
The auto shut-o function
is activated automatically
when the appliance has not
been used for more than 5
minutes.
To activate the appliance again, set the
on/o switch to ‘o’ position and then to
‘on’ position. The appliance then starts
to heat up again.
The appliance produces
a loud pumping sound.
The water tank is empty. Fill the water tank with water and press
the steam trigger until the pumping
sound becomes softer and steam comes
out of the soleplate.
Water droplets comes
out of the soleplate.
After the Calc-Clean process
remaining water may drip out
of the soleplate.
Wipe the soleplate dry with a piece of
cloth. If the Calc-Clean light still ashes
and the appliance still beeps, perform
the Calc-Clean process (see chapter
'Cleaning and maintenance').
Dirty water and
impurities (brown stains,
white akes, etc.) come
out of the soleplate.
Impurities or chemicals
present in the water have
deposited in the steam vents
and/or soleplate.
Performs the Calc-Clean process
regularly (see chapter 'Cleaning and
maintenance').
Water ushes out of the
soleplate.
You have accidentally started
the Calc-Clean process
(see chapter 'Cleaning and
maintenance').
Switch o the appliance. Then switch it
back on again. Let the iron heat up until
the 'iron ready' light lights up steadily.
English

10
Bahasa Melayu
Pengenalan
Tahniah atas pembelian anda dan selamat menggunakan Philips! Untuk mendapat manfaat
sepenuhnya daripada sokongan yang ditawarkan oleh Philips, daftarkan produk anda di
www.philips.com/welcome.
Baca manual pengguna ini, risalah maklumat penting dan panduan permulaan ringkas dengan teliti
sebelum anda menggunakan perkakas. Simpan untuk rujukan masa hadapan.
Gambaran keseluruhan produk (Raj. 1)
1 Hos bekalan air
2 Tombol suhu
3 Picu stim/Penggalak stim
4 Lampu 'seterika sedia'
5 Butang CALC-CLEAN dengan lampu
6 Platform seterika
7 Tuil pelepas tangki air
8 Tangki air boleh tanggal
9 Suis hidup/mati
10 Kord sesalur kuasa dengan plag
11 Bekas Pembersihan Kerak Pintar
Penting
Lakukan proses penanggal kerak dengan kerap untuk prestasi stim yang hebat dan memanjangkan
jangka hayat perkakas anda.
Jenis air yang disyorkan
Air suling atau air tanpa mineral jika anda tinggal di kawasan yang mempunyai air liat.
Jenis air untuk digunakan
Perkakas ini telah direka bentuk untuk digunakan dengan air paip. Akan tetapi, jika anda tinggal di
kawasan yang mempunyai air liat, pembentukan kerak yang cepat mungkin akan berlaku. Oleh sebab
itu, anda disyorkan untuk menggunakan air suling atau air tanpa mineral untuk memanjangkan hayat
perkakas.
Amaran: Jangan gunakan air berwangian, air dari mesin pengering pakaian, cuka, kanji, agen
penanggal kerak, bahan bantu penyeterikaan, air yang dinyahkerak secara kimia atau bahan kimia
lain, kerana ini boleh menyebabkan air berdetus, kesan kotoran berwarna perang atau kerosakan
pada perkakas anda.
Awas: Berhati-hati apabila anda mengeluarkan tangki air. Kawasan berhampiran hujung seterika
mungkin panas (Raj. 2).
Menetapkan suhu
Untuk menetapkan suhu seterika yang dikehendaki, putar tombol suhu ke kedudukan yang sesuai.
Perkakas melaraskan stim secara automatik, bergantung pada suhu penyeterikaan yang ditetapkan.

11
Bahasa Melayu
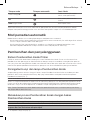
Tetapan suhu Tetapan automatik Jenis fabrik
SYNTH hingga 1
Fabrik sintetik (cth. asetat,
akrilik, nilon, poliamida)
2
Wul, viskos, poliester dan
sutera
3 hingga LINEN
Kain kapas, linen
Tekan dan tahan picu stim untuk memulakan penyeterikaan. Untuk hasil penyeterikaan terbaik,
selepas menyeterika menggunakan stim, teruskan menyeterika tanpa stim untuk beberapa kali.
Mod pematian automatik
Model tertentu dalam siri ini dilengkapi dengan mod pematian automatik.
- Untuk menjimatkan tenaga, perkakas akan dimatikan secara automatik jika tidak digunakan selama
5 minit. Lampu 'seterika sedia' akan bernyala.
- Untuk mengaktifkan semula perkakas, tetapkan suis hidup/mati kepada kedudukan ‘mati’,
kemudian kepada kedudukan ‘hidup’. Perkakas akan menjadi panas sekali lagi.
Pembersihan dan penyelenggaraan
Sistem Pembersihan Kerak Pintar
Perkakas anda telah direka bentuk dengan sistem Pembersihan Kerak Pintar untuk memastikan
pembersihan dan penanggalan kerak dilakukan dengan tetap. Ini membantu mengekalkan prestasi
stim yang kuat dan mengelakkan habuk serta kotoran keluar dari plat tapak dari masa ke masa. Untuk
memastikan proses pembersihan dilakukan, penjana stim akan memberikan peringatan berkala.
Peringatan bunyi dan lampu Pembersihan Kerak
Selepas penggunaan selama 1 hingga 3 bulan, lampu Pembersihan Kerak akan mula bernyala dan
perkakas akan mula mengeluarkan bunyi bip yang menandakan anda perlu melakukan proses
Pembersihan Kerak (Raj. 3).
Petua: Anda boleh terus menyeterika tanpa stim tanpa menekan picu stim.
Selain itu, langkah keselamatan kedua untuk melindungi penjana stim daripada penyepaduan kerak:
fungsi stim akan dinyahdayakan jika penanggalan kerak tidak dilakukan. Selepas penanggalan kerak
dilakukan, fungsi stim akan dipulihkan. Ini berlaku tanpa mengambil kira jenis air yang digunakan.
Nota: Proses Pembersihan Kerak boleh dilakukan pada bila-bila masa, walaupun peringatan bunyi
dan lampu belum diaktifkan lagi.
Melakukan proses Pembersihan Kerak dengan bekas
Pembersihan Kerak
Amaran: Jangan tinggalkan perkakas tanpa dijaga sewaktu proses Pembersihan Kerak.
Awas: Jangan ganggu proses dengan mengangkat seterika dari bekas Pembersihan Kerak, kerana
air panas dan stim akan keluar dari plat tapak.
1 Isi separuh tangki air (Raj. 4).

12
Bahasa Melayu
Nota: Pastikan palam perkakas dimasukkan dan perkakas DIHIDUPKAN sewaktu proses
Pembersihan Kerak.
2 Letakkan bekas Pembersihan Kerak pada papan seterika atau lain-lain permukaan yang stabil dan
rata.
3 Letakkan seterika dengan stabil pada bekas Pembersihan Kerak (Raj. 5).
Nota: Bekas Pembersihan Kerak telah direka bentuk untuk mengumpulkan partikel kerak dan
air panas sewaktu proses Pembersihan Kerak. Anda boleh meletakkan seterika pada bekas ini
sewaktu proses tersebut kerana ini selamat.
4 Tekan dan tahan butang CALC-CLEAN selama 2 saat sehingga anda mendengar bunyi bip singkat
(Raj.6).
5 Sewaktu proses Pembersihan Kerak, anda akan mendengar bunyi bip singkat dan bunyi pam
(Raj. 7).
6 Apabila proses Pembersihan Kerak selesai, seterika akan berhenti berbunyi bip dan lampu CALC-
CLEAN akan berhenti bernyala (Raj. 8).
7 Lap seterika dengan kain dan letakkannya kembali di tapak (Raj. 9).
8 Apabila bekas Pembersihan Kerak menjadi panas sewaktu proses Pembersihan Kerak, tunggu kira-
kira 5 minit sebelum anda menyentuh bekas. Kemudian, bawa bekas Pembersihan Kerak ke singki,
kosongkan dan simpan bekas untuk penggunaan masa hadapan (Raj. 10).
9 Jika perlu, anda boleh mengulangi langkah 1 hingga 7. Pastikan anda mengosongkan bekas
Pembersihan Kerak sebelum memulakan proses Pembersihan Kerak.
Nota: Sewaktu proses Pembersihan Kerak, air yang bersih mungkin keluar dari plat tapak jika tiada
kerak yang terkumpul di dalam seterika. Ini perkara biasa.
Penyelesai Masalah
Bab ini meringkaskan masalah paling lazim yang anda hadapi dengan perkakas. Jika anda tidak
dapat menyelesaikan masalah dengan maklumat di bawah, lawati www.philips.com/support untuk
mendapatkan senarai soalan lazim atau hubungi Pusat Layanan Pelanggan di negara anda.
Masalah Penyebab yang mungkin Penyelesaian
Seterika tidak
menghasilkan stim.
Anda telah menetapkan
tombol suhu kepada SYNTH
hingga 1.
Putar tombol suhu kepada 2 atau
lebih tinggi.
Fungsi stim telah
dinyahdayakan sehingga
anda melakukan proses
Pembersihan Kerak.
Lakukan proses Pembersihan Kerak
untuk memulihkan fungsi stim. (lihat bab
'Pembersihan dan penyelenggaraan')
Pada permulaan sesi
penyeterikaan anda, picu stim
tidak ditekan dengan cukup
lama.
Tekan dan tahan picu stim sehingga
stim keluar. Perkakas mungkin akan
mengambil masa selama 30 saat untuk
mengeluarkan stim.
Lampu Pembersihan
Kerak berkelip. Stim
tidak keluar dari
plat tapak dan/atau
perkakas mengeluarkan
bunyi bip.
Anda tidak melakukan atau
belum melengkapkan proses
Pembersihan Kerak.
Lakukan proses Pembersihan Kerak
untuk mendayakan fungsi stim sekali
lagi (lihat bab 'Pembersihan dan
penyelenggaraan').

13
Bahasa Melayu
Masalah Penyebab yang mungkin Penyelesaian
Perkakas telah mati. Fungsi pematian automatik
diaktifkan secara automatik
apabila perkakas tidak
digunakan selama lebih
5 minit.
Untuk mengaktifkan semula perkakas,
tetapkan suis hidup/mati kepada
kedudukan ‘mati’, kemudian kepada
kedudukan ‘hidup’. Perkakas akan
menjadi panas sekali lagi.
Perkakas mengeluarkan
bunyi mengepam yang
kuat.
Tangki air kosong. Isikan semula tangki air dengan air
dan tekan picu stim sehingga bunyi
mengepam menjadi lebih lembut dan
stim keluar dari plat tapak.
Titisan air menitik keluar
dari plat tapak.
Selepas proses Pembersihan
Kerak, baki air mungkin akan
mengalir keluar dari plat
tapak.
Lap plat tapak dengan sekeping
kain. Jika lampu Pembersihan Kerak
masih berkelip dan perkakas masih
mengeluarkan bunyi bip, lakukan
proses Pembersihan Kerak (lihat bab
'Pembersihan dan penyelenggaraan').
Air kotor dan kotoran
(kotoran perang atau
emping putih dsb)
keluar dari plat tapak.
Kotoran atau bahan kimia
yang ada di dalam air
mungkin telah termasuk di
dalam bolong stim dan/atau
plat tapak.
Lakukan proses Pembersihan Kerak
dengan kerap (lihat bab 'Pembersihan
dan penyelenggaraan').
Air mengalir keluar
daripada plat tapak.
Anda telah memulakan
proses Pembersihan Kerak
secara tidak sengaja (lihat
bab 'Pembersihan dan
penyelenggaraan').
Matikan perkakas. Kemudian,
hidupkannya semula. Biarkan seterika
menjadi panas sehingga lampu 'seterika
sedia' terus bernyala.

14
! Philips
www.philips.com/welcome
( 1)
1
2
3 /
4 '’
5 CALC-CLEAN
6
7
8
9 /
10
11 Smart Calc-Clean
:
:
( 2)

15
SYNTH to 1
(
)
2
3 to LINEN
- 5 '’
- / ‘’ ‘’
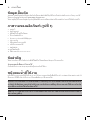
Smart Calc-Clean
1 3
( 3)
:
:

16
:
:
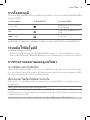
1 ( 4)
:
2
3 ( 5)
:
4 Calc-Clean 2 ( 6)
5 ( 7)
6 CALC-CLEAN ( 8)
7 ( 9)
8 5
( 10)
9 1 7
:
www.philips.com/support
SYNTH to 1.
2
( '
')
30

17
/
( '
')
5
/
‘’ ‘’
(
'')
(
, )
/
(
'')
( '
')
''

18
简体中文
简介
恭喜您购买了您的产品,欢迎您来到
Philips
大家庭!为了能充分享受飞利浦提供的支持,请在
www.philips.com/welcome 上注册您的产品。
使用本产品之前,请仔细阅读本用户手册、重要信息手册和快速入门指南。妥善保管以供日后参考。
产品概述(图
1
)
1 供水软管
2 温度旋钮
3 蒸汽开关
/
蒸汽束喷射
4 “熨斗就绪”指示灯
5 除垢按钮(带指示灯)
6 熨斗架
7 水箱释放杆
8 分离式水箱
9 开
/
关按键
10 带插头的电源线
11 智能除垢容器
重要信息
定期执行除垢过程可获得更出色的蒸汽和更长的产品使用寿命。
建议使用的水
如果您所居住的区域水质非常硬,使用蒸馏水或软化水。
所用水质类型
根据设计,本产品适合使用自来水。但是,如果您所居住的区域水质非常硬,水垢积聚会非常快。因此,建议
使用蒸馏水或软化水,这样可以延长产品的使用寿命。
警告:切勿使用香水、转筒式干燥机中的水、醋、淀粉、除垢剂、熨衣剂、化学除垢水或其他化学品,因为它
们可能会导致喷水、留下褐色污垢或损坏产品。
注意:取下水箱时务必小心。电熨斗尖端附近的区域可能会很烫(图
2
)。
设定温度
要设定所需熨烫温度,请将温度旋钮转到适当位置。根据设定的熨烫温度,本产品将自动调节蒸汽。
温度设定 自动设置 面料类型
合成到
1
合成纤维(如醋酸纤维、丙烯酸、
尼龙、聚酰胺)
2
羊毛、粘胶纤维、聚酯纤维和丝绸

19
简体中文
温度设定 自动设置 面料类型
3
亚麻
棉,亚麻
按住蒸汽开关,开始熨烫。为获得最佳熨烫效果,在蒸汽熨烫后,最后一次采用无蒸汽熨烫。
自动关熄模式
本系列中的特定型号具有自动关熄模式。
- 为了节能,如果
5
分钟没有使用,产品将自动关闭。“熨斗就绪”指示灯闪烁。
- 要重新启动产品,将开
/
关按键设置为“关”位置,然后将其设置为“开”位置。产品将开始再次加热。
清洁和维护
智能除垢系统
您的产品专门设计有智能除垢系统,可确保定期执行除垢和清洁。这有助于保持强劲的蒸汽性能,且随着时间
的推移,防止底板中出现污垢和污渍。要确保执行清洁流程,蒸汽电熨斗会定期提醒。
声音和光线除垢提醒
使用
1
至
3
个月后,除垢指示灯开始闪烁,产品开始发出蜂鸣音,表示您必须执行除垢流程(图
3
)。
提示:您可以不按下蒸汽开关进行干熨。
此外,集成了防止蒸汽电熨斗出现污垢的第二个防护步骤:如果除垢未完成,则蒸汽功能会禁用。除垢过程完
成后,蒸汽功能将恢复。不管使用何种类型的水,都将执行此过程。
注意:可随时执行除垢过程,即使在未启用声音和指示灯提醒时。
使用除垢容器执行除垢流程
警告:除垢期间,切勿离开产品不予看管。
注意:请勿将熨斗从除垢容器上提起以中断进程,因为热水和蒸汽会从底板溢出。
1 中途为水箱加水(图
4
)。
注意:在除垢流程中,请确保本产品已经接入电源并已切换到
ON
(开)。自动关熄
2 将除垢容器放置在熨衣板上或任意其他平整、稳固的表面。
3 将熨斗稳定地置于除垢容器上(图
5
)。
注意:除垢容器专用于在除垢过程中收集水垢颗粒和热水。在整个过程中,将熨斗置于该容器上是非常安
全的。
4 按住除垢按钮
2
秒钟,直到您听到短暂的蜂鸣音(图
6
)。
5 在除垢流程中,您将听到短暂的蜂鸣音和抽水声(图
7
)。
6 除垢流程完成后,熨斗将停止发出蜂鸣音,且除垢指示灯停止闪烁(图
8
)。
7 用一块布擦拭熨斗,然后将其放回底座(图
9
)。

20
简体中文
8 除垢容器在除垢过程中会变热,请等待大约
5
分钟后再接触。然后将除垢容器带到水槽处,将其清空并存
储以备下次使用(图
10
)。
9 如有必要,您可以重复步骤
1
到
7
。请确保在开始除垢程序前已将除垢容器清空。
注意:除垢过程期间,如果没有水垢积聚在熨斗内部,则清水会从底板流出。这是正常的。
故障排除
本章归纳了您在使用产品时最常遇到的问题。如果您无法根据以下信息解决问题,请访问
www.philips.com/support
查阅常见问题列表,或联系您所在国家
/
地区的客户服务中心。
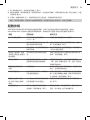
问题 可能的原因 解决方法
熨斗没有蒸汽。
您将温度旋钮设定到为合成到
1。 将温度旋钮转到
2
或更高。
您在执行除垢流程前,蒸汽功能会
被禁用。
执行除垢流程,以恢复蒸汽功能
(见“清
洁和保养”一章)
在熨烫过程开始时,按住蒸汽开关
的时间不足够长。
按住蒸汽开关,直至蒸汽喷出。可能需要
30
秒才能喷出蒸汽。
除垢指示灯闪烁。底板没
有蒸汽冒出和
/
或产品发出
蜂鸣音。
您尚未执行或完成除垢流程。 执行除垢流程,以再次启用蒸汽功能
(见“清洁和保养”一章)。
产品已关闭。 超过
5
分钟未使用产品时,自动
关熄功能将自动启动。
要重新启动产品,将开
/
关按钮设置到“
关”位置,然后再设置到“开”位置。然
后,产品开始重新加热。
产品发出抽水声。 水箱没有水。 为水箱加水,按下蒸汽开关,直至抽水声
变小,底板冒出蒸汽。
底板有水滴冒出。 除垢流程结束后,剩余的水可能从
底板滴出。
使用一块布将底板擦干。如果除垢指示灯
仍然闪烁并且产品仍然发出蜂鸣音,请执
行除垢流程(见“清洁和保养”一章)。
底板有污水和杂质(棕
色污渍、白色水垢等)
冒出。
水中的杂质或化学物质沉积在蒸汽
出口和
/
或底板上。
定期执行除垢流程(见“清洁和保养”
一章)。
水从底板冲出。 您无意中启动了除垢流程(见“清
洁和保养”一章)。
关闭产品。然后,将其重新打开。让熨
斗加热,直至“熨斗就绪”指示灯持续
亮起。

21
繁體中文
簡介
感謝您購買本產品。歡迎來到飛利浦的世界!
請至
www.philips.com/welcome
註冊您的產品,以獲得飛利
浦提供的完整支援。
使用本產品前,請先詳閱本使用手冊、重要資訊手冊及快速入門指南。請妥善保存,以供日後參考。
產品概要
(
圖
1)
1 水源膠管
2 溫度控制轉鈕
3 蒸氣觸動器
/
強力蒸氣
4 「熨斗就緒」指示燈
5
CALC-CLEAN
除鈣清洗按鈕附指示燈
6 熨斗底座
7 水箱釋放壓桿
8 可拆式水箱
9 電源開關
10 電源線附插頭
11 智慧型除鈣盒
重要事項
請定期執行除垢程序,以達到良好蒸氣效果並延長產品壽命。
建議用水
蒸餾水或軟化水
(
若您居住地區的水質偏硬
)
。
使用的水質
本產品專為搭配自來水使用而設計,
但是,如果您居住地區的水質偏硬,產品可能會快速累積水垢。因此,
建議您使用蒸餾水或軟化水,以延長產品的使用壽命。
警告:請勿使用香水、滾筒式烘乾機的水、醋、燙衣漿、除垢劑、熨燙添加劑、經化學除垢的水或其他化學物
質,否則可能造成水噴濺溢漏、產生棕色汙漬或損壞產品。
注意:取出水箱時請格外小心,
熨斗前端附近的區域可能會很燙
(
圖
2)
。
設定溫度
將溫度控制轉鈕轉到適當的位置來設定所需的熨燙溫度。產品會依熨燙溫度設定自動調整蒸氣。
溫度設定 自動設定 布料種類
SYNTH
:1
合成纖維
(
例如:醋酸纖維、壓克力纖維、
尼龍、聚醯胺
)
2
羊毛、人造絲、聚酯纖維和絲織品

22
繁體中文
溫度設定 自動設定 布料種類
3:
LINEN
棉、亞麻布
按住蒸氣觸動器以開始熨燙。為達到最佳熨燙效果,在以蒸氣熨燙之後,請關閉蒸氣來進行最後的熨燙。
自動斷電模式
本系列之特定機型具有自動斷電模式。
- 為節省能源,產品在閒置達
5
分鐘後會自動關閉,「熨斗就緒」指示燈會閃爍。
- 若要再次啟動產品,請先將電源開關設到「關」位置,接著再設到「開」位置,產品隨即重新開始加熱。
清潔與維護
智慧型除鈣系統
您的產品具備智慧型除鈣系統,可確保定期完成除垢及清潔。這有助於維持長時間的強力蒸氣效果,並可避免
經久使用後灰塵與髒污從底盤流出的情況。為確保清潔程序確實執行,蒸氣強化熨斗會定期發出提醒。
音效與指示燈除鈣提醒
在使用
1
至
3
個月後,當除鈣清洗指示燈開始閃爍且產品開始發出嗶聲時,表示您必須進行除鈣清洗程序
(
圖
3)
。
提示:您可以選擇不按下蒸氣觸動器,繼續使用乾式熨燙。
此外,產品也有第二道防護步驟來保護蒸氣強化熨斗不受到水垢的影響:若未執行除垢,蒸氣功能會停用。
在除垢程序完成後,蒸氣功能即會恢復。此作業不受所用水質的影響。
備註:即使音效與指示燈提醒未啟動,仍可隨時執行除鈣清洗程序。
使用除鈣盒執行除鈣清洗程序
警告:請勿在無人看顧產品的情況下進行除鈣清洗程序。
注意:由於熱水和蒸氣會從底盤流出,請勿在過程中將熨斗由除鈣盒中拿起。
1 將水加入水箱至半滿
(
圖
4)
。
備註:除鈣清洗期間,請確保產品插上電源並已開啟。
2 將除鈣盒放在熨燙板上,或任何其他平坦穩固的表面。
3 將熨斗平穩地放在除鈣盒上
(
圖
5)
。
備註:除鈣盒經設計,可於除鈣清洗期間承接鈣垢雜質及熱水。在整個過程中,將熨斗置於此容器上絕對
安全無虞。
4 按住除鈣清洗按鈕
2
秒鐘,直到聽見短嗶聲
(
圖
6)
。
5 除鈣清洗期間,您會聽到短促的嗶聲與汲水聲
(
圖
7)
。
6 除鈣清洗程序完成時,熨斗會停止發出嗶聲且
CALC-CLEAN
除鈣清洗指示燈會停止閃爍
(
圖
8)
。
ページが読み込まれています...
ページが読み込まれています...
-
 1
1
-
 2
2
-
 3
3
-
 4
4
-
 5
5
-
 6
6
-
 7
7
-
 8
8
-
 9
9
-
 10
10
-
 11
11
-
 12
12
-
 13
13
-
 14
14
-
 15
15
-
 16
16
-
 17
17
-
 18
18
-
 19
19
-
 20
20
-
 21
21
-
 22
22


他の言語で
- English: Philips HI5914/30 Owner's manual