Saramonic Blink500 Pro B8 ユーザーマニュアル

タイプ
ユーザーマニュアル

Saramonic Blink500 Pro B8は、4人まで同時に使用できる非常に軽量でコンパクトな4チャンネルワイヤレスマイクシステムです。Blink500 Pro TXS トランスミッター4台とBlink500 Pro 4RXレシーバー1台で構成されています。このマイクは、デジタルオーディオ処理により高品質な音声をDSLR、ミラーレス、ビデオカメラ、スマートフォン、タブレット、コンピューターなどに伝送します。

Blink500 Pro TXSクリップオン送信機には、優れた音質の全指向性マイクが内蔵されています。シャツや衣服にクリップで留めることができ、ゲインとミュートを調整できるため、録音プロセスを制御することができます。

Blink500 Pro 4RXクリップオンレシーバーは、見やすいOLEDディスプレイ、選択可能なモノラルとステレオモード、1回の充電で8時間という優れたランタイムを備えています。2つのLINE OUTジャック

User Manual
用户手册
2.4GHz Four-Channel Wireless
Microphone System
2.4GHz 四通道无线麦克风系统
Blink500 Pro B8
Statement
Please read this manual carefully
before using and strictly operate
and store it in accordance with the
instructions. Please save the manual
for your future reference.
If you need further assistance than
the user manual, please consult your
retailer for help or email us: info@
saramonic.com
Cautions
1. Disintegration of this device
by non-professionals is strictly
prohibited.
2. Please keep it away from heat
sources such as heaters or ovens.
3. Do not remove the battery without
professionals’ help.
4. Please clean the device with only
a soft, dry cloth.
5. When using and storing, please
pay attention to dust and
moisture.
Available Kits
Model In the box
Blink500 Pro B8 4 × Blink500 Pro TXS
1 × Blink500 Pro 4RX
General Introduction
The Saramonic Blink500 Pro B8 kit
is an incredibly lightweight, ultra-
compact, and easy-to-use four-
channel wireless microphone
system for up to 4 people. The kit
is comprised of four Blink500 Pro
TXS transmitters and one Blink500
Pro 4RX receiver. The microphone
delivers exceptional digital audio
processing-grade stable-quality
sound to DSLR, mirrorless, video
cameras, smartphones, tablets,
computers, and more.
Blink500 Pro TXS clip-on transmitter
has a great sounding built-in
omnidirectional microphone. It is
small and light enough to clip to
shirts and clothing, and features
gain & mute controls, putting you in
charge of your recording process.
Blink500 Pro 4RX clip-on receiver
features a vivid OLED display,
selectable mono and stereo
modes and a remarkable 8-hours
of run time on a single charge.
It has two LINE OUT jacks and
3.5mm headphone output for real-
time monitoring, being able to
connect four Blink500 Pro TX/ TXS
transmitters at the same time.
The Blink500 Pro B8 operates on the
2.4GHz spectrum and automatically
hops to free channels to avoid static
noise and audio dropouts. The kit
provides a great solution for content
creation, recording, vlogging,
mobile journalism, and more. Meet
the needs of professional users.
01
Features
Blink500 Pro TXS
· 2.4GHz wireless transmitter
· Professional-quality built-in
omnidirectional microphone
· Clip-on design for hands-free
operation
· Deliver exceptional, broadcast-
quality sound
· Gain control and mute functionv
· Up to 164' (50m) operating range
Blink500 Pro 4RX
· Four-channel wireless microphone
receiver
· Compatible with Blink500 Pro TX/
TXS
· Easy-to-read OLED displays
· Seletable mono and stereo mode
· Selectable mute function
· Remarkable 8-hours of run time for
receiver
· Monitoring sound by headphone
output
· Supporting 4-track audio output
(optional cable is required)
· Ideal for content creation, recording,
vlogging, mobile journalism, and
more
Packing List
02
4× Blink500 Pro
TXS Transmitter
5× USB-C
Charging Cable
4× Fur
Windshield
1× Dual 3.5mm TRS Male to Four
3.5mm TRS Male Cable (SR-C2019)
1× Dual 3.5mm TRS Male to Four XLR
Male Cable (SR-C2020)
Optional
1× Blink500 Pro
4RX Receiver
1× Dual 3.5mm TRS to 3.5mm TRS
Y-Cable for Camera
1× Dual 3.5mm TRS to 3.5mm TRRS
Y-Cable for Smartphone
Power/Mute Button
+-/Pair Button
Press +/- button to adjust mic gain.
(The setting is retained even after the
power is turned off.)
Long press the Pair button (press both “+”
and “-” buttons at the same time) to enter
pairing mode.
Belt Clip
USB-C Charging Port
Built-in Microphone
Mic
Gain
Indicators
The three indicators indicate the gain
setting in six steps.
Adjust the audio level by pressing the “+”
or “-” button.
Pairing Indicator
Power/Mute Indicator
Product Structure
Blink500 Pro TXS Function Operation
Power ON/OFF
Press and hold for 3s
Mute ON/OFF Short press
Mode Indicator
Unpaired Slow flashing blue light
Pairing
Quick flashing blue light
Paired
Successfully Solid blue light
Mode Indicator
Mute ON Slow flashing red light
Mute OFF Light off
Low Battery Quick flashing red light
Charging Solid red light
Fully Charged Light off
Blink500 Pro 4RX
03
Power/Mute button
+/SET button
-/BACK button
USB-C charging port (DC 5V)
OLED display
For more details, please refer to “OLED
Display Operation Guide”.
LINE OUT jack
There are 2 LINE OUT jacks for connecting
the Blink500 Pro 4RX to a smartphone,
tablet, camera, recorder, or mixer with the
supplied output cables..
3.5mm headphones output
Connect headphones for audio
monitoring.
Belt clip
Function Operation
Power ON/OFF Long press for 3s
Mute ON/OFF Short press
Function Operation
+
On home screen, short press
to increase headphone
volume.
On menu screen, short press
to select different functions or
values shown on the display.
SET
On home screen, long press
to enter the menu screen.
On menu screen, long press
to enter the displayed menu.
Then, long press again to
confirm your option.
Function Operation
-
On home screen, short press
to decrease headphone
volume.
On menu screen, short press
to select different functions or
values shown on the display.
BACK On menu screen, long press
to return to home screen.
OLED Display
Operation Guide
Menu screen
(Blink500 Pro 4RX)
If no operation is performed within
30 seconds on menu screens, the
display will automatically return to
home screen.
4RX’s output mode
Mono Stereo
Headphone volume & Mute indicator
On home screen, press +/- button to
adjust the headphone volume.
Mute ON Mute OFF
RF Level Indicator
Indicates the current signal level.
Signal is strong (Paired successfully)
Signal is weak (Paired successfully)
No signal (Disconnected)
4RX battery level indicator
Displays the current battery
level. Please recharge the device
immediately when the indicator starts
flashing
Audio input level meter
Displays the audio input level.
S
⑤ ⑤
① ④
04
Menu screen
Headphone Output Volume
The headphone monitoring volume
can be set from 0 to 6. Default is "5".
Output Mode Setting
The output mode can be set to either
mono or stereo. When in mono mode,
the audio from the transmitter, or
transmitters will be mixed to both the
left and right sides. When in stereo
mode, the two transmitters' audio
output will be separated to the left and
right sides. Default is “Mono”.
Backlight Setting
Set backlight to always on or on for
10s/ 30s/ 60s. Default is “ON”.
Pair Setting
Pair with the transmitter. For details of
operation, please refer to “Operation
Guide”.
Language Setting
English or 简体中文 (Chinese) are
available. Default is “English”.
Track Number Setting
The track number can be set 2 or 4.
Default is "4".
Restore Default Setting
Version of the Blink500 Pro 4RX
Mute Key Setting
Enable or disable mute key button
function. Default is “Enable”.
05
with the supplied dual 3.5mm TRS to
TRS Y-cable. Or connect the 4RX to a
smartphone, tablet, or computer with
the supplied dual 3.5mm TRS to TRRS
Y-cable.
4. You are ready to record.
Tips
Please turn on the receiver first and
then turn on the transmitter to pair.
If you need to add other
transmitters during use, turn off all the
transmitters currently connected, and
then re-pair with the receiver in turn.
Pairing Order
1. If there was a need to use four
Blink500 Pro TXS transmitters at the
same time, they would be divided
into channel groups A and B in
groups of two transmitters.
2. After the Blink500 Pro 4RX receiver
enters the pairing mode, it will pair
with the groups of transmitters A1,
A2, B1, and B2 in order.
3. As the pairing is finished, the pairing
order and the channel groups will
remain unchanged as long as the
transmitters are not turned off
during use.
Auto Reconnection Order
1. In channel group A, the transmitter
rebooted first will be connected
back to channel A1 first, and the
latter transmitter rebooted will be
connected back to channel A2.
2. In channel group B, the transmitter
rebooted first will be connected
back to channel B1 first, and the
latter transmitter rebooted will be
connected back to channel B2.
4RX
Operation Guide
1. Press and hold the power button for
3s to turn on the receiver Blink500 Pro
4RX and the transmitter Blink500 Pro
TXS.
2. Pairing.
Before leaving factory, the system is
pre-paired. Therefore, the connection
will be established once they are
powered on. If they are disconnected,
please follow below steps:
Turn off all the transmitters, and
long press the 4RX's SET button to
enter menu screen.
Use the + or - button to display the
"Pair Setting" menu.
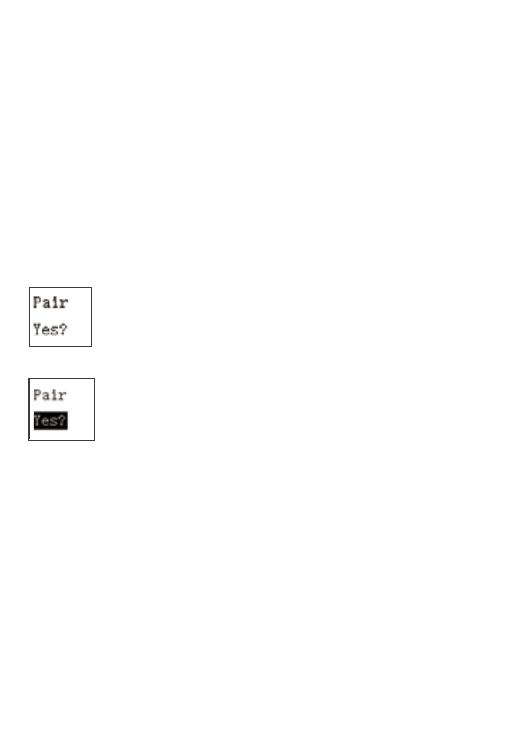
Long press the SET button to select
the menu.
4RX
Select "Yes", and long press the SET
button to confirm. The receiver enters
the pairing mode, and the RF level
indicator will flash.
Turn on the transmitter, then press
and hold the transmitter "Pair" button
(+, -) for 3s at the same time to enable
pairing mode. The indicator will
flash blue rapidly. To avoid channel
crowding, please turn on the next
transmitter to pair after the previous
transmitter is successfully paired.
Transmitter and receiver will be
successfully paired within 10s. Audio
input level meter on the receiver’s
home screen will show the volume of
the transmitter.
3. Connect the receiver to the mic
input of a camera, recorder or mixer
06
Note: After restoring the receiver’s
default settings, the user can randomly
shuffle the original pairing order of
transmitters belonging to channel
group A/ B. That is, the transmitter
originally belonging channel group
B can also be connected to the A
channel.
M/S Output Mode
1.In mono audio output mode, the
audio from group A1/A2/B1/B2 of
transmitters will be mixed to output.
2.In stereo audio output mode,
whether it is a two-track audio output
or four-track audio output, the audio
from group A1/ B1 of transmitters is
output to the left channel, and from
group A2/ B2 is output to the right
channel.
Note: The OUT1 port of the receiver
outputs the audio from group A1/A2
of transmitters, and the OUT2 port
outputs the audio from group B1/B2
of transmitters.
07
B1 L
B2 R
A1 L
A2 R
B1 B2
LR
A1 A2
LR
08
09
Specification
Transmission Type 2.4GHz Digital Frequency
Modulation GFSK
Operating Range (Without Obstacle) Up to 164' (50m)
RF Output Power < 10mW
Polar Pattern Omnidirectional
Frequency Response 50Hz-18kHz
Maximum SPL 120dB SPL
Sensitivity -39dB
Audio Output Level -60dBV ~ -20dBV
SNR TXS: 78dB; 4RX: 80dB
Audio Output Channel 4 Channels
Audio Output Connector 4RX: 3.5mm Headphone Jack
3.5mm TRS Line Output Jack
Power Requirements Built-in Li-ion Battery or USB-C DC 5V
Built-in Battery Life TXS: Approx. 4 hours
4RX: Approx. 8 hours
Antenna PIFA
Weight TXS: Approx. 0.59oz(17g)
4RX: Approx. 1.76oz (50g)
Dimensions TXS: 2.4×0.78×0.55’’(61×20×14mm)
4RX: 2.60×1.93×0.83’’(66×49×21mm)
Operating Temperature 0°C to 50°C
Storage Temperature –20°C to 55°C
声明
请在使用前仔细阅读本手册,并严格按
照说明进行操作和存储。请保存以供将
来参考。如果用户手册不能帮助您解决
某些问题,请向零售商寻求帮助或给
我们发送电子邮件:info@saramonic.
com
意事项
1. 请勿擅自拆开机壳;
2. 请勿将本机靠近热源,如加热器、烤
箱或其他产生热量的设备;
3. 电池不可自行更换;
4. 请使用柔软的干布清洁本设备 ;
5. 在使用和储存时,请注意防尘和防潮。
特点
Blink500 Pro TXS
· 2.4GHz 无线发射器
· 内置专业级全向麦克风
· 领夹式设计,有效解放双手
· 提供出色的广播级音质
· 具有增益调节和静音功能
· 操作距离可达 50 米
Blink500 Pro 4RX
· 四通道无线麦克风接收器
· 可搭配 Blink500 Pro TX/ TXS 使用
· 易于阅读的 OLED 显示屏
· 可自由切换单声道 / 立体声模式
· 长达 8 小时续航时间
· 支持耳机实时监听
· 支持 4 轨音频输出 ( 需使用选配转接线 )
· 内容创作、录制音频、vlog 拍摄、街
头 采访的理想选择
Blink500 Pro B8
型号 套装内容
Blink500 Pro B8 4 × Blink500 Pro TXS
1 × Blink500 Pro 4RX
概述
枫笛 Blink500 Pro B8 套件是一款迷你四
通道无线麦克风系统,可同时供四人使
用。本套件包含四个 Blink500 Pro TXS
发射器以及一个 Blink500 Pro 4RX 接收
器。两者搭配使用,可提供出色的数字
音频处理级稳定音质;适用于单反、无
反相机 、摄像机、智能手机、平板电脑、
计算机等设备。
Blink500 Pro TXS 是一款背夹式无线发射
器,产品内置高品质麦克风,能够收录
优质的音质效果;外形轻便小巧,可轻
松夹在衣服上使用。此外,该发射器还
具有增益调节和静音功能。
Blink500 Pro 4RX 是一款背夹式无线接
收器,拥有可视化界面操作的 OLED 显
示屏,支持单声道 / 立体声模式切换,
一次充电可支持 8 小时的连续使用。
该接收器具有两个线性输出孔,一个
3.5mm 耳机监听孔,可同时连接四台
Blink500 Pro TX/ TXS 发射器使用。
Blink500 Pro B8 所使用的是抗干扰
2.4GHz 频段,遇到干扰情况下能自动跳
转频道避免噪音产生以及音频失真 。该
套件是内容创作、音频录制、Vlog 拍摄、
街头采访等的理想选择,能够满足专业
用户的需求。
10
包装清单
4× Blink500 Pro
TXS 发射器
5× Type-C 充电线 4× 防风毛套
1× 双头 3.5mm TRS 转 4 头 3.5mm TRS
转接线 (SR-C2019)
1× 双头 3.5mm TRS 转 4 头 XLR 转接线
(SR-C2020)
选配
1× Blink500 Pro
4RX 接收器
1× 双头 3.5mm TRS 转 3.5mm TRS 相
机转接线
1× 双头 3.5mm TRS 转 3.5mm TRRS 手
机转接
产品结
Blink500 Pro TXS
内置麦克风
麦克风增益指示灯
增益调节分为六个档位,三颗指示灯指
示不同增益设置。
短按 +/- 键可调节麦克风增益。
配对指示灯
电源 / 静音指示灯
模式 指示灯状态
未联机状态 蓝灯慢闪
对码中状态 蓝灯快闪
联机成功状态 蓝灯常亮
模式 指示灯状态
静音模式 红灯慢闪
取消静音 熄灭
低电量 红灯快闪
充电中 红灯常亮
充满电 熄灭
11
电源 / 静音键
+-/ 配对键
按 + 或 - 键调节麦克风增益(即使在电
源关闭后,该参数设定仍然保留)
长按 pair 键(+- 键同时按),发射器
进入对码状态。
背夹
USB-C 充电口
功能 操作
开/关长按按键 3
开启 / 取消静音 短按按键
Blink500 Pro 4RX
电源键 / 静音键
+/SET 键
- /BACK 键
USB-C 充电口(直流电 5V)
OLED 显示屏
详情参考“OLED 屏幕操作指南”。
LINE OUT 线性输出孔
2 个 LINE OUT 插孔,用于使用随附
输出线将 Blink500 Pro 4RX 连接至手
机、平板电脑、相机、录音笔或混音
器等设备。
3.5mm 耳机插孔
接入耳机进行音频监听。
背夹
功能 操作
-
在主界面上,短按 - 键减小耳机
监听音量;
在菜单界面上,短按 - 键调整各
参数值或功能。
BACK 在菜单界面上,长按返回键回
到主界面。
功能 操作
+
在主界面上,短按 + 键增大耳
机监听音量;
在菜单界面上,短按 + 键调整
各参数值或功能。
SET
在主界面上,长按设置键进入
菜单界面;
在菜单界面,长按设置键进入
选定界面,再次长按保存设定。
功能 操作
电源开启 / 关闭 长按电源键 3 秒
静音开启 / 关闭 短按电源键
12
主菜单界面
如果超过 30 秒不操作,显示屏会自动跳
转回主菜单界面。
接收器输出模式
单声道 立体声
耳机监听音量 & 静音状态指示
在主界面上,短按 +/- 键可调节耳机输
出音量大小。
静音关闭 静音开启
RF 信号强度指示
用来指示当前信号强度
信号强 ( 配对成功 )
信号弱 ( 配对成功 )
无信号显示(未联机)
OLED 屏幕操作指南
S
接收器电量指示
显示接收器电量情况,若图标为空格且
开始闪烁,请及时进行充电。
实时输入电平指示
显示实时输入电平大小。
菜单介 (Blink500 Pro 4RX)
输出音
输出音量调节范围(0~6),默认
设置为“5”。
音频输出模式设
输出模式可以设置为单声道或立体声。
当在单声道模式,音频将混合到左右两
边。在立体声模式下,两个发射器的音
频输出将左右分开。默认设置为“单声
道”。
⑤ ⑤
① ④
背光时间设
背光灯时间可设置为常亮、10 秒、30 秒、
或 60 秒, 默认设置为“常亮”。
静音按键功能设置
开启或关闭静音按键功能,默认设置为
“开启”。
13
Blink500 Pro 4RX 版本号
对码设
与发射器配对 , 具体操作请参考“操作指
南”。
语言设
English/ 简体中文可供选择,默认设置为
“English”。
音轨数设
音轨数可设置为 2 或 4,默认设置为“4”
认恢出厂后,
Blink500Pro4RX 的相关参数将
出厂值
操作指南
1. 长按电源键 3 启动接收
器 Blink500 Pro 4RX 和发射器
Blink500 Pro TXS
2. 配对。
射器和接收器出厂前已配对
功。 因此,产品开机之后会自动
机。若无成功连接,请进行如下配
操作:
① 将发射器全部关机长按接收器
SET 按菜单界面。
② 使 + - 按钮在接收器上显
“ 对 码 设 ”菜 单 。
③ 长按 SET 键菜单。
4RX
4RX
14
4. 开录制。
Tips:
请先启动接收器后启动发射器
进行配对操作。
②若使用途中需要增加其他发
器 ,则 将 目 前 连 全
重新与接收器依次配对即可
对码顺
1. 如果有需求同时使用 4 个 Blink500
Pro TXS 发射器,那么其中 2 射器
属于通道组 A另外 2 个发射器属于
组 B。
2.Blink500 Pro 4RX 接收器进入
A 1 、A 2 、B 1 、B 2
次与
3. 对码完成后的使用期间,只要发射器
不关机,则一直为配对时的连接顺序
通道不变。
回连顺
1. 组 A 中,启的发射器则优
先回连到通道 A1后重启的发射器回连
到通道 A2。
2. 在通道组 B 中,先重启的发射器则
先回连到通道 B1后重启的发射器回连
到通道 B2。
注 :在 复 出 厂 设 后 ,用 户 可 以
乱原属于 A/B 通的发射器的配
对顺序原先属于 B 通道组的发射器
在恢复默认设置后可以连接到 A 通道。
④ 选“是”长按 SET 键确认,
接收器进入对码状态,RF 信号强
指示呈闪烁状态。
⑤ 将发射器开机同时长按发射器
对码+,-3 秒使发射器进
态 ,指 灯 呈 灯 快 闪 。为 避
抢 占 ,请 个 发
个发
作。
⑥ 发射器和接收器 10 秒内完
成配对配对成功接收主页
的实时输入电平指示会显示发射
器的音量状态。
3. 使用随的双头 3.5mm TRS
TRS 转接线将接收器接至相机、
录音笔或混音器等设备。或者使用
随附的双头 3.5mm TRS 转 TRRS
M/S 声道输出模
1. 在单声A1/A2/
B1/B2 组发射器的音频将被混合输出。
2. 在立体声音频输出模式论是二
轨音输出还是轨音频出,A1/ B1
组发射器的音频将输出到左声道,A2/
B2 组发射器的音频将输出到右声道。
意:接收器 OUT1 孔输出 A1/A2 组发
射器的音频,OUT2 孔输出 B1/B2 组发
射器的音频。
15
B1 L
B2 R
A1 L
A2 R
B1 B2
LR
A1 A2
LR
16
参数
传输方式 2.4GHz 数字频段
信号调制 高斯频移键控
操作范围(无障碍) 最远至 50 米
射频输出功率 < 10mW
极性模式 全向型
频率响应 50Hz-18kHz
最大声压级 120dB SPL
灵敏度 -39dB
音频输出电平 -60dBV ~ -20dBV
信噪比 TXS:> 78dB; 4RX:> 80dB
音频输出通道 4 通道
音频输出口 4RX:3.5mm 耳机插孔
3.5mmTRS 线性输出孔
供电方式 内置锂电池 / USB-C DC 直流电 5V
内置电池续航时间 TXS:约 4 小时 ; 4RX:约 8 小时
天线 PIFA 天线
重量 TXS:17g; 4RX:50g
尺寸 TXS:61×20×14mm; 4RX:66×49×21mm
工作温度 0° C ~ 50° C
贮存温度 –20° C ~ 55° C
17
ShenzhenJiayzPhotoIndustrial.,Ltd
深圳市长丰影像器材有限公司
A16Building,IntelligentTerminalIndustrialParkofSiliconValley
Power,Guanlan,LonghuaDistrict,Shenzhen,China
深圳市龙华区观澜街道大富工业区硅谷动力智能终端产业园A16栋
400-613-1096 www.saramonic.com [email protected]
ScantheQRcodeandfollowus!
扫描微信关注枫笛公众号!
For better recording experience, the application
SmartRecorderis recommended.
为获得更好的录制体验,推荐使用枫笛Saramonic
自主研发应用软件SmartRecorder。
  • Page 1 1
  • Page 2 2
  • Page 3 3
  • Page 4 4
  • Page 5 5
  • Page 6 6
  • Page 7 7
  • Page 8 8
  • Page 9 9
  • Page 10 10
  • Page 11 11
  • Page 12 12
  • Page 13 13
  • Page 14 14
  • Page 15 15
  • Page 16 16
  • Page 17 17
  • Page 18 18
  • Page 19 19

Saramonic Blink500 Pro B8 ユーザーマニュアル

タイプ
ユーザーマニュアル

Saramonic Blink500 Pro B8は、4人まで同時に使用できる非常に軽量でコンパクトな4チャンネルワイヤレスマイクシステムです。Blink500 Pro TXS トランスミッター4台とBlink500 Pro 4RXレシーバー1台で構成されています。このマイクは、デジタルオーディオ処理により高品質な音声をDSLR、ミラーレス、ビデオカメラ、スマートフォン、タブレット、コンピューターなどに伝送します。

Blink500 Pro TXSクリップオン送信機には、優れた音質の全指向性マイクが内蔵されています。シャツや衣服にクリップで留めることができ、ゲインとミュートを調整できるため、録音プロセスを制御することができます。

Blink500 Pro 4RXクリップオンレシーバーは、見やすいOLEDディスプレイ、選択可能なモノラルとステレオモード、1回の充電で8時間という優れたランタイムを備えています。2つのLINE OUTジャック

他の言語で