German FXS3 ユーザーマニュアル

タイプ
ユーザーマニュアル

German FXS3 は、お湯の温度を簡単にコントロールできるリモコンです。例えば、シャワーやシンクに設置されたインスタント湯沸かし器を、別の部屋からでも操作できます。また、FXS3 リモコンを使えば、省エネかつ適切な温度のお湯を選択することも可能です。リモコンと湯沸かし器間の通信は Bluetooth® を経由して行われるため、設置条件が厳しい場合でもデータ転送が保証されます。

German FXS3 は、お湯の温度を簡単にコントロールできるリモコンです。例えば、シャワーやシンクに設置されたインスタント湯沸かし器を、別の部屋からでも操作できます。また、FXS3 リモコンを使えば、省エネかつ適切な温度のお湯を選択することも可能です。リモコンと湯沸かし器間の通信は Bluetooth® を経由して行われるため、設置条件が厳しい場合でもデータ転送が保証されます。

P.1
Please read these instructions and warranty information carefully before use and keep them handy for future reference.
Online Warranty Registration
USER MANUAL
FXS3
Remote Control Kit
Printed in Germany FXS3-M-22(6)
P.2
Safety Instructions
This remote control may only be installed and started up for the first
time by an authorized specialized company. Responsibility for compli-
ance with the applicable standards and installation regulations rests
entirely on the company installing the appliance. We cannot accept
any liability for damage and losses due to noncompliance with these
instructions. Read this manual completely before starting up the
remote control.
The handling of the appliance and the remote control are equitable.
The last set temperature will be used by the instantaneous water
heater. Make sure not to set a high temperature, inadvertently. We
recommend to activate the temperature limit function (see manual of
the instantaneous water heater).
Flat batteries can leak and damage the remote control. Hence, re-
place flat batteries right away as soon as battery symbol lights up in
the display or the remote control does not response after keystroke.
P.3
Safety Instructions
When the remote control is not to be used in the long term, remove
the batteries.
Do not expose the remote control to moisture.
Keep the remote control and wall bracket away from credit cards or
other cards with magnetic strips. The built in magnets can damage
the card’s magnetic strip.
This appliance can be used by children aged 3years and above and
persons with reduced physical, sensory or mental capabilities or lack
of experience and knowledge if they have been given supervision or
ins truction concerning use of the appliance in a safe way and under-
stand the hazards involved. Children shall not play with the appliance.
Cleaning and user maintenance shall not be performed by children
without supervision.
P.4
安全守則
• 本遙控器必須由獲授權的專業公司進行安裝及首次啟動。安裝
公司負責依據相應的標準及安裝條例來安裝此熱水器。本公司
不承擔任何因未遵守安裝指示而引起的傷害或損失責任。啟動
遙控裝置前,請詳細閱讀本手冊。
• 本熱水器和遙控器操作方便合理。每次啟動熱水器,將沿用上
次的溫度設定。請確認沒有因疏忽大意而設定過高溫度的情
況。我們建議啟動溫度限制功能(參見熱水器使用手冊)。
• 電池電量不足可能導致洩漏和遙控器損壞。因此,一旦顯示屏
電池信號燈點亮,或者按鍵後無反應,請立即更換電池。
• 如遙控器長期不使用,請取出電池。
• 切勿將遙控器暴露於潮濕環境。
P.5
安全守則
• 遙控器和掛接背板不可太靠近信用卡等附磁條的物品,否則內
嵌磁鐵可能會破壞卡片磁條。
• 凡在有適當監督或指導下,3歲或以上兒童及身體、感官或心理
障礙者或經驗及知識不足者,亦可使用本款遙控器。應對兒童
進行妥善照管,避免其隨意觸碰遙控器。禁止兒童在未經適當
監督的情況下清潔或保養設備。
P.6
安全守則
本遙控器必須由獲授權的專業公司進行安裝及首次啟動。安裝
公司負責依據相應的標準及安裝條例來安裝此熱水器。本公司
不承擔任何因未遵守安裝指示而引起的傷害或損失責任。啟動
遙控裝置前,請詳細閱讀本手冊。
本熱水器和遙控器操作方便合理。每次啟動熱水器,將沿用上
次的溫度設定。請確認沒有因疏忽大意而設定過高溫度的情
況。我們建議啟動溫度限制功能(參見熱水器使用手冊)。
電池電量不足可能導致洩漏和遙控器損壞。因此,一旦顯示屏
電池信號燈點亮,或者按鍵後無反應,請立即更換電池。
如遙控器長期不使用,請取出電池。
切勿將遙控器暴露於潮濕環境。
P.7
安全守則
遙控器和掛接背板不可太靠近信用卡等附磁條的物品,否則內
嵌磁鐵可能會破壞卡片磁條。
凡在有適當監督或指導下,3歲或以上兒童及身體、感官或心
理障礙者或經驗及知識不足者,亦可使用本款遙控器。應對兒
童進行妥善照管,避免其隨意觸碰遙控器。禁止兒童在未經適
當監督的情況下清潔或保養設備。
P.8
Table of Contents
Safety Instructions .......................................................................................
1. Description Of Appliance ........................................................................
2. Dimensions ................................................................................................
3. Technical Specification ............................................................................
4. Installation ................................................................................................
5. Initial Operation .......................................................................................
6. Handling ....................................................................................................
7. Displayed Information .............................................................................
8. Communication Of The Remote Control ............................................
9. Battery Replacement ..............................................................................
10. Troubleshooting And Service ................................................................
11. Warranty Terms & Conditions ................................................................
2
9
10
11
12
16
18
20
21
22
23
56
P.9
1. Description Of Appliance
The FXS 3 remote control set consists of the FX 3 remote control and the FXE 3 radio adapter.
The FX 3 remote control allows a convenient operation of the instantaneous water heater even
if the heater is installed under a sink or in a secondary room. An energy-ecient and adequate
choice of the water temperature is furthermore possible under these conditions with the FX 3
remote control.
The communication between the remote control and the instantaneous water heater is via
Bluetooth®. Due to this technology the data transfer is secured even under dicult installation
conditions.
To connect the remote control to an instantaneous water heater other than DSN, the provided
Bluetooth adapter must be installed.
P.10
Dimensions (in mm)
2. Dimensions
P.11
3. Technical Specification
Model FXS 3
Operating voltage 3 V
Type of battery 2 × AAA Alkaline 1)
Protection Rating IP 20
Transmission range 10 metres incl. barrier
Transmission power ≤ 8 mW
Radio frequency range 2.4 – 2.4385 GHz
Signal Transmission Undirected
Approvals Europe EN 300328 / CE
NOTE: 1) Do not use rechargeable batteries.
All information in this manual is for reference only. If there are any errors or omissions, the
specifications produced by the factory shall prevail. Specification is subjected to change without
prior notice.
If there is any inconsistency or ambiguity between the English version and the Chinese version
of this manual, the English version shall prevail.
Refer to www.germanpool.com for the most up-to-date version of the Operating Instructions.
P.12
4. Installation
1. Mounting the Wall Bracket
NOTE: Before attaching the wall bracket to the wall,
ensure that the remote control has radio contact to the
instantaneous water heater from its designated position.
The wall bracket of the remote control can either be
attached securely with the included adhesive tape, after
stripping off the protection film (as shown in fig. 1) on
a plain surface (e.g. a tile) or with suitable dowels (Ø
4 mm) and screws (as shown in fig. 2).
When using the adhesive tape it is not possible to adjust
the position afterwards because of the strong adherence
of the glue. Therefore, pay attention to horizontal
alignment when attaching it.
The remote control is magnetically retained at the wall
bracket.
Figure 1:
Installation with adhesive tape
Figure 2:
Optional installation with dowels and screws
P.13
4. Installation
2. Mounting the Bluetooth Adapter
(as shown in fig.3)
Before assembling the
Bluetooth adapter, disconnect
the instantaneous water heater
from the mains supply!
The adapter antenna is very
fragile! Please be careful when
mounting it.
Attention!
Figure 3
P.14
4. Installation
Step 1
Remove the electronics cover
Step 3
Connect the Bluetooth adapter.
(Pay attention to the proper
position of the connector!)
Step 2
Release the PCB from the
catch and lift it slightly
P.15
4. Installation
Step 4
Snap the PCB back into place
Step 5
Attach the electronics cover.
Adaptor installation completed.
Scan QR code to watch
adaptor installation video
P.16
5. Initial Operation
1. Make sure that the power supply to the instantaneous water heater is switched on (fuse) and that
the display (if available) of the instantaneous water heater shows the latest set value.
2. After inserting the batteries, the remote control briefly displays all symbols. Then 8Aand the
percentage of battery charge are displayed and the display changes to the PIN entry P1 .
3. Enter the first four digits of the Bluetooth PIN and press to confirm. The PIN can be found on
the type plate of your instantaneous water heater (the set of numbers after BLE).
4. Press and to change the current digit. Press to proceed to the next digit. After entering
P4 and pressing , the PIN is applied.
5. After entering the pin, the remote control automatically connects to the instantaneous water
heater, D1appears during the registration procedure. If there are several instantaneous water
heaters within range, they may be checked first (display D2D3 ). This can take up to one
minute. To avoid this, hold the radio remote control directly in front of the instantaneous water
heater to be registered.
6. Once connected, the display of the remote control switches to the set point value display.
P.17
5. Initial Operation
Note:
If registration is unsuccessful, the display shows “E1. The remote control quits the registration
process and switches to standby mode. Repeat the registration process by pressing any button
on the remote control.
If the registration is still unsuccessful after a number of trials, check the pinning position of the
radio adapter.
With no remote control registered or without working Bluetooth connection, the instantaneous
water heater heats to the prior selected set temperature.
After replacing the batteries, a new registration is not required.
After a power failure of the instantaneous water heater, a new registration is not required.
Automatic re-registration after a battery change or power failure can take up to one minute
If the instantaneous water heater makes noises (beeping, buzzing) after switching on, the
software is in the process of updating.
Re-registration of the Remote Control
To connect the remote control to another instantaneous water heater, press and hold all four buttons
on the remote control for at least 5 seconds. This starts the initial operation mode. Repeat steps 3-6
to connect to the new water heater.
P.18
6. Handling
The remote control is equipped with the following functions:
1. Temperature Buttons
You can set the required temperature gradually to a lower or higher value using the two buttons
and .
Note: If the temperature display is set to “--” with button, the instantaneous water heater
switches off the heating function.
2. Programme Buttons
The two programme buttons and allow to quickly select the preset temperature without the
need to press the and buttons several times.
The factory setting for programme is 35 °C and for programme is 48 °C. You can assign your
own settings for the programme buttons:
Select the desired temperature with and .
To save the current temperature, press the programme button or for about two seconds.
P.19
6. Handling
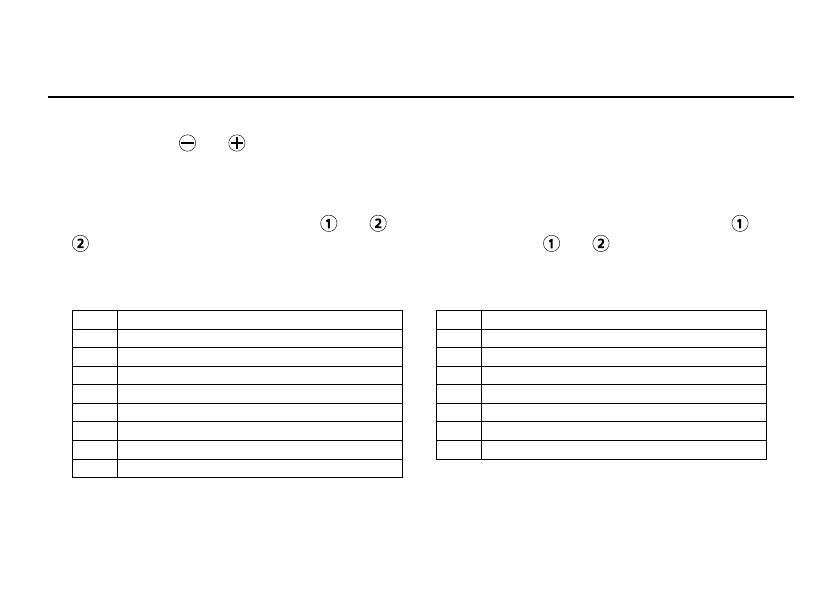
3. Restart and Battery Capacity
Press and hold and for approx. 5 seconds to restart the remote control. All symbols are
displayed briefly, followed by the battery display.
4. Info menu
Press and hold the programme keys and for about 5 seconds to open the info menu. Press or
briefly to navigate back and forth in the displays. Long presses on and exit the menu again.
In Info menu indicator
8A Current battery capacity in percentage
Er Current error status
ti Temperature of water inlet in °C
to Temperature of water outlet in °C
tL Highest selectable temperature in °C
FL Current water flow in l/min
Po Current power consumption in kW
PP Current power consumption in percentage
PL Maximum appliance power in kW
CA Calibration value
rS Signal strength in percentage
n1 Software version digit 1
n2 Software version digit 2
n3 Software version digit 3
P1 Digits 1 and 2 of the stored pin
P3 Digits 3 and 4 of the stored pin
Menu displays:
P.20
7. Displayed Information
The representation corresponds to the temperature display of the instantaneous water heater display
after a keystroke on the remote control. The description of the function can be found in the manual
of the instantaneous water heater.
Radio Communication
This radio symbol is displayed on the remote control, if a button is pressed or the initial operation is
in process.
Battery
If the batteries of the remote control are flat, the battery symbol is displayed. In this case,
exchange the batteries (see chapter “Battery Replacement”).
Energy Saving Mode
The symbol shows that the appliance works in an energy saving mode, i.e. the current energy
consumption is subject to the selected temperature and to the flow rate in the Energy Saving Mode.
Power Limit
If the full output of the instantaneous water heater does not suffice to heat the tapped quantity of
water, this will be indicated by on the LCD.
Operation with Preheated Water
If the cold water inlet temperature is higher than the set value of the hot water outlet, the
instantaneous water heater will not heat. In this case no power is emitted by the appliance and the
sun symbol is displayed on the remote control screen.
  • Page 1 1
  • Page 2 2
  • Page 3 3
  • Page 4 4
  • Page 5 5
  • Page 6 6
  • Page 7 7
  • Page 8 8
  • Page 9 9
  • Page 10 10
  • Page 11 11
  • Page 12 12
  • Page 13 13
  • Page 14 14
  • Page 15 15
  • Page 16 16
  • Page 17 17
  • Page 18 18
  • Page 19 19
  • Page 20 20
  • Page 21 21
  • Page 22 22
  • Page 23 23
  • Page 24 24
  • Page 25 25
  • Page 26 26
  • Page 27 27
  • Page 28 28
  • Page 29 29
  • Page 30 30
  • Page 31 31
  • Page 32 32
  • Page 33 33
  • Page 34 34
  • Page 35 35
  • Page 36 36
  • Page 37 37
  • Page 38 38
  • Page 39 39
  • Page 40 40
  • Page 41 41
  • Page 42 42
  • Page 43 43
  • Page 44 44
  • Page 45 45
  • Page 46 46
  • Page 47 47
  • Page 48 48
  • Page 49 49
  • Page 50 50
  • Page 51 51
  • Page 52 52
  • Page 53 53
  • Page 54 54
  • Page 55 55
  • Page 56 56
  • Page 57 57
  • Page 58 58
  • Page 59 59
  • Page 60 60

German FXS3 ユーザーマニュアル

タイプ
ユーザーマニュアル

German FXS3 は、お湯の温度を簡単にコントロールできるリモコンです。例えば、シャワーやシンクに設置されたインスタント湯沸かし器を、別の部屋からでも操作できます。また、FXS3 リモコンを使えば、省エネかつ適切な温度のお湯を選択することも可能です。リモコンと湯沸かし器間の通信は Bluetooth® を経由して行われるため、設置条件が厳しい場合でもデータ転送が保証されます。

他の言語で