
www.gigabytecm.com
Quick Guide

2
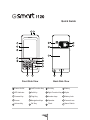
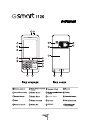
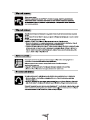
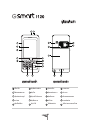
Power On/Off
LED Indicator
Camera Key
Screen
Volume Key
Left Function Key
Call Key
Flag Key
Navigation Keys
OK Key
End Key
Right Function Key
Number keys
Speaker
Flash
Battery
Stylus
Battery Lock
Camera Lens
Macro Switch
Front Side View Back Side View
Quick Guide

3
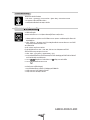
Making a Call/Smart Dial
Scheduler
Before making a call, please make sure that the device has a SIM card inside. Press
Call Key to switch to phone mode.
Dialing Out (Using screen)
1. After switching to phone mode, dial the number you wish to call via screen or
keypad.
2. Press Call Key to call. Press End Key to hang up.
3. Alternatively, you may select a contact in your Contacts, and then press Call Key
to make a call to that person.
Smart Dial (Using keypad)
You can use this function to quickly nd the contact or number you wish to dial.
1. Press Call Key. Press the right navigation key, or tap “Menu” > Smart Dial.
2. The smart dial screen will show all contacts in this device and calls in Call History.
3. After inputting the rst number / letter, the smart dial screen will display the
matching phone numbers and contacts on the screen.
4. Select a number or contact you want to call. Press Call Key to call; press End Key
to end connection.
Turn the device into your best secretary by taking a few simple steps. You can
set up auto-launch of various programs. To set up auto-launch, select “START” >
Programs > Tools > Scheduler.
Media Faves
Media Faves is like a jukebox that collects your favorite TV and FM channels. No
more ipping through the channels!
1. Select START > Programs > Multimedia > Media Faves
2. Select TV or FM tab to view your favorite TV or FM channels.
3. Tap on a channel to view or listen to. (Antenna or antenna headset is required)
Smart Input
Smart input allows you to edit text by pressing 12-key phone keypad. The number of
key pressed required will be dramatically reduced.
1. On your screen, tap the arrow icon next to the Keyboard icon for more input
methods. On the pop-up list, tap Smart Input.
2. Input desired text using the number keys. With each letter input, Smart input will
offer possible word or letter candidates.
3. You may press and hold “*” to switch input methods.

4
1
1
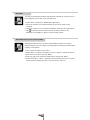
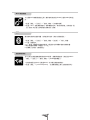
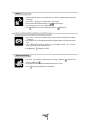
Block List
Answer Machine
The device lets you block specic numbers or all unknown calls. When a
blocked number calls, the screen will display incoming call alert and ring and will
automatically hang up within 5 seconds.
Select “Start” > [Programs] > [Phone Manager] > [Block List]
1. Check “Block all unknown calls” in {Menu} or tap {Add Block List} to add a number
you would like to block.
2. Select “OK” to save the settings. Alternatively, tap {Contacts} on Today screen,
highlight the contact you would like to block and tap {Menu}. Select “Set to Block
List”. You may also block numbers in Call History, or create new blocked numbers
in Block List.
Use answer machine to save callers’ messages to this device and listen to cost-free
messages with ease.
Select “Start” > [Settings] > Personal Tab > [Wise Talk] > Answer Machine tab.
1. Check “Enable answer machine” to activate answer machine function.
2. Select {Greeting Setup} to set your greeting.
Background Effects
Use background effect function to create the call environment you desire.
1. Select “Start” > [Settings] > Personal tab > [Wise Talk] > Background Effects tab.
2. Check “Enable Overdub” to activate background effects. Tap {Background Sound}
to select a special sound effect. Tap “OK” to save and exit.
When a call comes with Background Effects activated, select {Answer} to answer the
call with a background sound; or tap the icon on the pop up screen and select
{Disable Overdub} to answer the call without the background sound.
Press and hold the Flag Key for about 3 seconds and then release to activate Easy-
Touch Menu. On this menu, you can easily close programs, control BT headset
volume, adjust backlight brightness, or apply proles.
Easy-Touch Menu

5
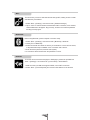
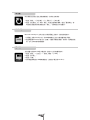
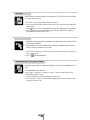
Phone Recording
Television/TV Recording
Use phone recording function to record your call contents.
1. Select “Start” > [Settings] > Personal tab > [Wise Talk] > Phone Record tab.
2. Check “Activate Phone Recording” to activate phone recording function, and tap
“OK”.
3. Press Camera key to start or stop in-call recording.
Use the device to watch analog television and be the rst to catch the news. You can
even record the TV programs you are watching by pressing the Camera key.
1. Plug in the headset. Your headset is also an antenna; you may adjust the headset
lines for better reception.
2. Select “Start” > “Settings” > [System] tab > [TV/FM], Select a country name or a
PAL subsystem.
If you can’t nd the country name for selection, you may follow the steps below:
a) select”NTSC” for NTSC system.
b) select either of PAL-I, PAL-BG or PAL-DK based on your sub-system.
A good reference link to the world TV standard is http://kropla.com/tv.htm
3. Select “Start” > [Programs] > [Multimedia] > [TV]
4. Tap the screen to open menu. When turning on the television for the rst time,
your device will automatically start searching for available channels and will play
the rst available channel detected.
5. Tap to switch between channels or tap to view the list of available
channels. A searching progress indication will appear on the screen. If you have
selected one of the PAL-I, PAL-BG or PAL-DK subsystems, it will take a few
minutes to search through all 453 channels for that general sub-system.
6. Tap to turn off television and exit.
To record a TV program you are watching:
1. Turn to the channel you would like to record. Be sure to get a clear signal.
2. Press and hold Camera key to start recording.
3. Press Camera key to stop recording.

6
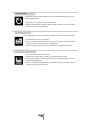
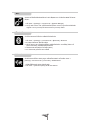
Radio*
Camera / Video Filming / Pictures & Videos
1. Plug in the headset before listening to the radio. The headset is also an antenna;
adjust the lines for better reception.
2. Select “Start” [Programs] > [Multimedia] > [FM Radio]
3. Tune to a channel by inputting the channel frequency using keypad or tapping on
of the function bar.
4. Tap {Options} and then tap “Exit” to turn off the radio.
5. Tap to play radio on the background; tap to turn off the radio.
*Available when purchased in countries using PAL/NTSC TV systems.
1. Select “Start” > [Programs] > [Multimedia] > [Camera] or press and hold Camera
Key to switch to camera mode.
2. Focus on the object you wish to shoot, gently push the volume control key
upwards or downwards to zoom in or out. Press Camera Key to shoot.
3. Tap on to select shooting mode, effects, size, picture quality, timer, sequential
shoot, storage location, ash, and shutter sound.
4. Select icon to view [Pictures & Videos].
Video Recording
1. Select “Start” > [Programs] > [Multimedia] > [Camera] >
icon, or press and
hold Camera Key >
icon.
2. Focus on the object you wish to shoot, press Camera Key to start and stop
recording.
3. Tap to view [Pictures & Videos] and edit your video clips.

7
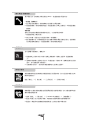
Recorder
You may record important meetings with Recorder. Each le can record for up to 2
hours (depending on the size of your mini SD card).
1. Select “Start” > [Programs] > [Multimedia] > [Recorder]
2. Tap on the “Record” icon to start recording; tap on the icon again to stop
recording.
3. Tap on the “History” icon to view all recorded les. Select any le to play this le.
4. Tap to leave the recorder screen with the recording running on the
background; or tap {Menu} > {Exit}, to stop recording and exit.
Windows Direct Push (Push E-Mail)
With Windows Direct Push, your device automatically receives new incoming
E-Mail messages from your company Exchange Server, keeping you with the latest
company news updates.
1. Turn on Wi-Fi or GPRS on your device.
2. Select “Start” > Programs > ActiveSync > Menu > Options > Add Server Source.
3. Enter the IP of the server, then tap “NEXT”.
4. Enter your login in ID, password, domain name, and then tap “NEXT”.
5. Select “ActiveSync” > Menu > Schedule, set the peak time sync time to “As item
arrives” and the off-peak sync time to “As item arrives”. Tap “OK”.

8
WIFI
Bluetooth
This device may connect to detected network through WIFI, making access to email
and MSN easy and efcient.
1. Select “Start” > [Settings] > Connections tab > [Wireless Manager]
2. Tap on “Wi-Fi” to activate wireless network.When WIFI is activated, a new window,
“Network Detected” will appear. Tap {Connect}, enter the local network password
and tap {Connect} again.
Before using Bluetooth, please complete connection setup.
1. Select “Start” > [Settings] > Connections tab > [Bluetooth] > Mode tab.
2. Check {Turn on Bluetooth}.
3. Select Devices tab and select the device you would like to connect to from the list,
or tap New Partnership to establish a new connection with a device.
4. Enter the device password, and then select {Next}.
5. A connection will be formed when the password is correct.
Internet
To use this device to browse web pages or WAP pages, please set up GPRS rst:
“Start” > [Settings] > Connections tab > [Connections] > GPRS Wizard
1. Make sure that your SIM card supports GPRS, or that WIFI is turned on.
2. Select “Start” > [Internet Explorer] and enter the URL address on the browser.

9
Pocket Ghost
ActiveSync
Pocket Ghost makes backup images of your personal data and settings. You may
restore a backup image.
1. Select “Start” > Programs > Tools > Pocket Ghost.
2. Select “Create backup” to create a backup image or “Restore a image” to restore
the device using a particular image.
Microsoft ActiveSync synchronizes data in this device with your personal computer.
1. Install ActiveSync onto your computer.
2. Turn on your device and connect the device to your computer with the USB cable.
Follow the prompts on screen to start synchronization.
3. On your computer, click on “Explore” in ActiveSync to view les in the device.
Mini SD Card Reader
1. Insert the mini SD card into the device.
2. On the device, select “Start” > [Settings] > Connections tab > [USB]
3. Tap “SD Card Reader”, and then press “Change”, and connect the device to the
computer with USB cable.
4. Your PC will automatically detect the new hardware. Now you can view or transfer
les to and from your mini SD card.

10
電源開關
狀態指示燈
相機鍵
螢幕
音量控制鍵
左功能鍵
通話鍵
選單鍵
五向鍵
OK鍵
結束鍵
右功能鍵
數字鍵
喇叭
閃光燈
電池
觸控筆
電池扣
相機鏡頭
近拍開關
手機正面圖 手機背面圖
外觀介紹

11
撥打電話/智慧撥號
排程小管家
撥打電話之前,請先確定手機已經插入SIM卡。按通話鍵進入電話功能。
一般撥號(螢幕輸入)
1. 進入電話功能畫面後,使用螢幕輸入您想撥打的電話號碼。
2. 按通話鍵撥號,按結束鍵結束通話;或點選連絡人清單上的連絡人,再按通話鍵直
接撥號。
智慧撥號
使用此功能直接找尋欲撥的號碼或特定的人,以節省尋找的時間。
1. 按通話鍵來進入電話功能。
2. 按右方向鍵,或是您也可以點選功能表 > 智慧撥號。
3. 鍵入幾個數字後,手機將篩選出符合此組數字開頭的電話及連絡人姓名。選擇想撥
打的電話號碼或連絡人,按通話鍵撥號;按結束鍵結束通話。
透過幾個簡單的設定步驟將您的裝置成為個人的最佳助理。您可以設定多種程式在時
間到時自動執行。
點選「開始」 →【 程式集】 → 【工具程式】 → 【排程小管家】。
視聽最愛
視聽最愛可以讓您快速地開啟您的最愛電視或是收音機的頻道,也可以讓您簡單地瀏
覽所有最愛頻道列表。
1. 選擇「開始」 →【程式集】 → 【GIGABYTE多媒體】 → 【視聽最愛】。
2. 點選【電視】或【收音機】標籤,來瀏覽您的最愛電視或收音機頻道列表。
3. 點選任一頻道即可直接觀看或收聽該頻道(必須先安裝好耳機天線)
智慧輸入
您可使用數字按鍵輸入、編輯文字。
1. 點選螢幕上功能列中的小箭頭,螢幕上將會顯示一個輸入法選單。點選智慧輸
入。
2. 使用數字按鍵輸入您欲輸入的文字。每當您鍵入一個新字母,螢幕將出現符合的候
選字,您可直接選擇一個候選字。
3. 在智慧輸入模式下,長按*鍵可開啟智慧輸入法的輸入法選單。

12
長按開始鍵約三秒後放開即開啟快速選單。您可在此選單上做多項設定,包含快速關
閉程式、套用情境模式、調整藍芽耳機音量、調整螢幕亮度等。
1
1
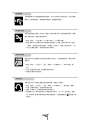
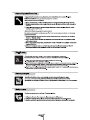
來電黑名單
來電小秘書
來電黑名單讓您保有私人的空間,遠離不必要的來電干擾。黑名單號碼來電時,螢幕
顯示來電訊息後,將會自動切斷來電。
1. 點選「開始」→【程式集】→【手機小管家】→【來電黑名單】。
2. 點選{選單}中的{新增黑名單}新增想拒接的號碼;或勾選{掛斷不明來電}或進入
{連絡人}選擇您欲拒接的連絡人,再開啟{功能表},點選<設為黑名單>。您
也可以從電話記錄中,將來電設為黑名單來電。
電話答錄功能可直接將對方的訊息留言儲存至手機上,方便您聽取留言,還可節省電
話費用。
1. 點選「開始」→【設定】→「個人」標籤 →【手機應用】→「來電小秘書」標
籤。
2. 勾選「啟動來電小秘書」來啟動電話答錄功能。
3. 選擇您欲使用的答錄設定。
背景混音
背景混音功能可以製造您想要身處的通話環境,如捷運、機場等。
1. 點選「開始」→【設定】→「個人」標籤 →【手機應用】→「背景混音」標籤。
2. 勾選「啟動背景混音」來啟動背景混音功能。
3. 點觸「背景音效」來選擇所欲使用的背景特效。
4. 使用畫面上的「背景音效音量」來調整特效音量大小。按「OK」儲存設定。啟動
後,來電時按{接聽}即套用預設的背景混音接聽。一般接聽請點選
再選擇「關
閉音效」。
來電黑名單
快速選單

13
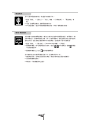
電話側錄
電視/電視錄影
您可以使用電話側錄功能,將通話內容錄製下來。
1. 點選「開始」 →【設定】→ 「個人」標籤 →【手機應用】→ 「電話側錄」標
籤。
2. 勾選「啟動電話側錄」啟動電話側錄功能。
3. 本功能啟動後,通話中按相機鍵即開始錄音,再按下相機鍵取消錄音。
您的裝置可接收無線電視頻道,讓您在行動中也能即時掌握最新資訊。看電視前,請
先將耳機插入,原廠耳機即為天線。第一次使用電視時,請先選擇您所在的區域或所
使用的系統,選定後將自動搜尋所有可收視頻道,並播放第一個可收視頻道。
1. 點選「開始」 →【程式集】→【GIGABYTE多媒體】→【電視】。
2. 點觸螢幕畫面,即可開啟電視的功能列。點選
可切換頻道。點觸 即開啟
可收視頻道選單。
3. 點觸螢幕畫面右上方的 圖示即關閉電視。
您可隨時將正在收看的電視節目錄下來,記錄精采的每一刻。
1. 開啟電視功能,並轉至您欲錄影的頻道,調整天線角度至最佳收視畫質。
2. 長按相機鍵開始錄影。
3. 再輕按一下相機鍵即停止錄影。

14
收音機*
照相機 / 相片與影片瀏覽
1. 收聽FM收音機前,請先將耳機插入。原廠耳機即為天線,調整天線以獲得最佳的
收聽效果。
2. 點選「開始」→【程式集】→【GIGABYTE多媒體】→【收音機】。
3. 使用收音機畫面上的數字鍵或按 來選取您喜愛的頻道。
4. 在收音機畫面下,點選{功能表},再點選{離開}即關閉收音機。
5. 點選 讓收音機在背景播放,您可以同時執行其他某些程式。點選螢幕右上方的
即關閉收音機。
*這個功能可以在提供PAL/ NTSC電視系統的國家中使用。
1. 點選「開始」→【程式集】→【GIGABYTE多媒體】→【照相機】,或直接長按相
機鍵進入相機模式。
2. 對焦在您欲拍攝的物體上,使用音量調整側鍵調整變焦 -
向上為拉近、向下為拉
遠 - 再按相機鍵拍攝。
3. 點選 可以設定拍照模式、特效、尺寸大小、畫質、計時器、連拍、儲存位
置、閃光燈、快門音效、曝光補償等項目。
4. 點選 進入【圖片與視訊】檢視及編輯您拍下的照片。
攝影功能
1. 點選「開始」→【程式集】→【GIGABYTE多媒體】→【照相機】再點選 或
是長按相機鍵後再按 進入攝影模式。
2. 對焦於您欲拍攝的畫面上,按下相機鍵開始與停止拍攝影片。
3. 點選 可以設定攝影模式、特效、影片格式、MMS影片、儲存位置等項目。
4. 點選 進入【圖片與視訊】檢視及編輯您錄下的影片。

15
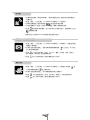
錄音筆
語音命令
錄音功能可供您錄製最長2小時(視記憶體大小)的語音記事,方便您快速記錄重要
的會議或事項。
1. 點選「開始」→【程式集】→【GIGABYTE多媒體】→【錄音筆】。
2. 點觸「錄音」圖示按鈕開始錄音,再按一次即停止錄音。
3. 點觸「History」歷史記錄按鈕可展開您所有的錄音檔案。
4. 點觸 即離開錄音功能畫面,但錄音功能繼續錄音。點觸{功能表}→{離
開}即關閉錄音功能。
語音命令功能可讓您直接呼叫撥打給連絡人、撥放音樂,或開啟應用程式,享受便捷
快速的操作。
1. 輕按音量調整側鍵中鍵 進入語音命令模式,再參照螢幕顯示,對著手機清晰地
說出指令。
2. 使用藍芽耳機時,長按耳機通話鍵即可進入語音命令模式。
3. 裝置已內建語音標籤。
您也可選擇自行錄製:
1. 點選「開始」→【設定】→ 「系統」標籤 →【語音命令設定】→ 連絡人或「應
用程式」標籤。
2. 按「語音」標籤 可錄製您個人的發音方式。
Windows Direct Push (Push E-Mail)
透過Exchange Server 2003 SP2的伺服器,在外也能以Wi-Fi 或GPRS 接收最新的電
子郵件、查詢通訊錄,行動辦公不受限制。使用Push E-Mail前,請依下列設定:
1. 開啟Wi-Fi或GPRS連線。
2. 點選「開始」→ 程式集 →【ActiveSync】→ 功能表 → 選項 → 設定伺服器。
3. 輸入伺服器的IP位址,再點選「下一步」。
4. 輸入您的帳號、密碼、網域,勾選「儲存密碼」,再點選「完成」。
5. 點選【ActiveSync】→ 功能表 → 排程。依您的需要,在「尖峰時間」、「離峰
時間」選擇與伺服器同步的時間。

16
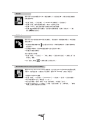
Wi-Fi無線網路
藍芽
可以透過Wi-Fi無線網路連接上網,讓你隨時隨地收發 E-Mail 及使用 MSN 即時通
訊。
1. 點選「開始」→【設定】→「連線」標籤 →【無線管理員】
2. 點選{Wi-Fi}啟動無線網路後,螢幕畫面將出現「偵測到新網路」的新視窗,點
選{連線}輸入進入區域網路的密碼後按{連線}。
讓您隨時連接其他藍芽裝置。使用藍芽功能前,請先完成連線設定。
1. 點選「開始」→【設定】→「連線」標籤 →【藍芽】→「模式」標籤。
2. 勾選「啟動藍芽」。
3. 至「裝置」標籤點選欲連線的裝置,或點選新合作夥關係增加新連線裝置。
4. 輸入裝置的密碼後,再點選「下一步」。
5. 密碼輸入正確後,連線即建立。
瀏覽網際網路
您可以用您的裝置瀏覽網際網路或WAP網頁。瀏覽網際網路前,請先設定GPRS:
「開始」→【設定】→「連線」標籤 →【GPRS連線精靈】。
1. 請先將確認您的SIM卡已開通GPRS,或手機已開啟無線網路。
2. 點選「開始」→【Internet Explorer】。在瀏覽器畫面上輸入您欲瀏覽的網址。

17
時光機
ActiveSync
時光機能為您的個人設定及檔案做備份,資料安全有保障。
1. 點選「開始」→【程式集】→【工具程式】→【時光機】。
2. 點選「建立備份」後,再按「確定」來建立還原備份檔案。點選「還原備份」後,
再選取您欲還原的備份檔案並按「確定」,即開始進行系統還原。
Microsoft ActiveSync可以同步您在手機及電腦上的資料,協助您備份資料。
1. 在電腦上安裝ActiveSync後,用USB傳輸線接上您的行動裝置與個人電腦。
2. 點選電腦端ActiveSync程式的{瀏覽}可讀取手機裏的檔案。相同於一般電腦的使
用,您可以同時管理兩個檔案。
讀卡機
您的裝置可做為Mini SD讀卡機使用,讓您可以方便地攜帶資料。
1. 點選「開始」→【設定】→「連線」標籤 →【USB】。
2. 點選「讀卡機」。
3. 點選{切換}。
4. 將本裝置與電腦以USB傳輸線連結,並確定手機已裝mini SD卡。

18
Кнопки цифры

19

20
1
1
ページが読み込まれています...
ページが読み込まれています...
ページが読み込まれています...
ページが読み込まれています...
ページが読み込まれています...
ページが読み込まれています...
ページが読み込まれています...
ページが読み込まれています...
ページが読み込まれています...
ページが読み込まれています...
ページが読み込まれています...
ページが読み込まれています...
ページが読み込まれています...
ページが読み込まれています...
-
 1
1
-
 2
2
-
 3
3
-
 4
4
-
 5
5
-
 6
6
-
 7
7
-
 8
8
-
 9
9
-
 10
10
-
 11
11
-
 12
12
-
 13
13
-
 14
14
-
 15
15
-
 16
16
-
 17
17
-
 18
18
-
 19
19
-
 20
20
-
 21
21
-
 22
22
-
 23
23
-
 24
24
-
 25
25
-
 26
26
-
 27
27
-
 28
28
-
 29
29
-
 30
30
-
 31
31
-
 32
32
-
 33
33
-
 34
34


