dji Osmo Action 4 ユーザーガイド

タイプ
ユーザーガイド
Osmo Action GPS
Bluetooth Remote Controller
User Guide
使用说明
使用說明
ユーザーガイ
사용자 가이드
Handbuch
Guía de usuario
Guide d’utilisateur
Manuale utente
Gebruikershandleiding
Manual do utilizador
Guia do Usuário
Руководство пользователя
2023.08v1.0
User Guide 3
使用说明 11
使用說明 19
ユーザーガイド 27
사용자 가이드 35
Handbuch 43
Guía de usuario 51
Guide d’utilisateur 59
Manuale utente 67
Gebruikershandleiding 75
Manual do utilizador 83
Guia do Usuário 91
Руководство пользователя 99
Contents
CHS
CHT
JP
KR
DE
EN
ES
FR
IT
NL
PT
PTBR
RU
© 2023 DJI All Rights Reserved.3
EN
Disclaimer
By using this product, you signify that you have read, understand, and accept the terms and
conditions of this guideline and all instructions at https://www.dji.com/osmo-action-4. EXCEPT
AS EXPRESSLY PROVIDED IN AFTER-SALES SERVICE POLICIES AVAILABLE AT HTTPS://WWW.
DJI.COM/SERVICE/POLICY, THE PRODUCT AND ALL MATERIALS AND CONTENT AVAILABLE
THROUGH THE PRODUCT ARE PROVIDED "AS IS" AND ON "AS AVAILABLE BASIS" WITHOUT
WARRANTY OR CONDITION OF ANY KIND.
Safety Guidelines
1. Put out any product re using water, sand, a re blanket, or a dry powder re extinguisher.
2. The product should only be used in temperatures from -10° to 45° C (14° to 113° F).
3. DO NOT disassemble or pierce the product in any way or the battery may leak, catch re, or
explode.
4. DO NOT drop or strike the product. DO NOT place heavy objects on the product.
5. DO NOT heat the product. DO NOT put the product in a microwave oven or a pressurized
container.
6. DO NOT leave the product near heat sources such as a furnace or heater. DO NOT leave the
product inside of a vehicle on hot days. DO NOT store the product in environments above
45° C (113° F). The ideal storage temperature is 22° to 28° C (72° to 82° F).
7. DO NOT store the product for an extended period after fully discharging the battery.
Otherwise, the battery may over-discharge and cause irreparable damage.
8. Discharge and charge the battery completely once every three months to keep it in good
working condition.
4© 2023 DJI All Rights Reserved.
EN
Introduction
OSMOTM Action GPS Bluetooth Remote Controller (hereinafter referred to as “remote controller”)
connects to Osmo Action 4* via Bluetooth. Users can control the camera remotely to capture
footage using the remote controller. The remote controller supports single-camera and multi-
camera control modes so that users can shoot with up to 16 cameras simultaneously. The built-
in satellite positioning modules enable users to record accurate data in motion. When used with
the DJITM Mimo app, users can add a host of collected data to enrich the video, such as speed,
route, direction, and elevation.
With the wrist strap, the remote controller can be installed in different places such as the
handlebar of the bicycle, which can be exibly adjusted to shoot in various sports scenes.
* Support for DJI devices will be updated continuously. Visit the corresponding DJI Osmo Action camera
product page for a complete list.
Overview
1. Quick Switch Button
2. Shutter/Record Button
3. USB-C Port
4. Status LED
5. Screen
6. Link Button
7. Lanyard Hole
8. Wrist Strap Hole
9. Bluetooth RC Wrist Strap (Long)
10. Bluetooth RC Wrist Strap (Short)
1
2
3
4
5
6
7
8
9
10
© 2023 DJI All Rights Reserved.5
EN
Button Features
Quick Switch Button
Press and hold: power on or off the remote controller.
Press once: switch between shooting modes when connected to the camera.
Link Button
Press and hold: link the remote controller and the camera.
Press once: power on the camera when the camera is in sleep mode and connected to
the remote controller. During the linking process, press once to cancel linking.
Shutter/Record Button
Press and hold: power off the camera. When the camera is in sleep mode, press and hold
to power on the camera.
Press once: take a photo or start/stop recording. When the camera is in sleep mode, press
once to start SnapShot.
Note: both both scenarios refer to situations when the remote controller is connected to the
camera.
Button Combinations
Press and hold the shutter/record button and link button for four seconds: switch
between single-camera control mode and multi-camera control mode and start linking.
Press and hold the quick switch button and shutter/record button for four seconds:
view the firmware version of the remote controller.
Press and hold the quick switch button and link button for four seconds: forget the
Bluetooth connection and start linking.
Quick Switch Button
Link Button
Shutter/Record Button
6© 2023 DJI All Rights Reserved.
EN
Screen Description
The screen displays the status of the connected camera, the battery level of the remote
controller, and other information. When controlling multiple cameras, the screen displays the
number of cameras connected. The display on the screen varies depending on the camera
mode.
1. Verication Code: displays the verication code. When the camera is found, both the remote
controller screen and the camera screen show the same verication code. Tap Accept on the
camera screen.
2. GPS Signal: displays GPS signal strength. When the remote controller is searching for the
GPS signal, the icon will be displayed.
3. Battery Level: displays the battery level of the remote controller.
4. Connection Status: displays the connection to the camera via Bluetooth.
5. microSD Card Information: displays either the remaining number of photos or the video
duration that can be taken or recorded according to the current shooting mode. The icon is
displayed only when a camera is connected.
6. Screen Information: the camera information will be synchronized when the camera is
connected.
The screen will enter sleep mode if there is no operation within 3 minutes. The remote
controller will power off if there is no operation after 10 minutes when there is no camera
connected and the remote controller is not charging. When the screen is o, press any button
to exit sleep mode and continue using the remote controller.
1 2 3
4
5
6
© 2023 DJI All Rights Reserved.7
EN
Operation
Installation Methods
The package includes two wrist straps of dierent lengths. The remote controller can be xed
to the wrist using the long wrist strap and can also be xed to the bicycle handlebar, motorcycle
handlebar, backpack strap, and other locations using the short wrist strap.
Installing the Long Wrist Strap
Fix the remote controller in a suitable position on the wrist and fasten the hook-and-loop
fastener properly, as shown below.
Installing the Short Wrist Strap
1. Remove the buckle from the hole of the long wrist strap, as shown below.
2. Thread the short wrist strap through the strap slot on the back of the remote controller.
Make sure that the side with the raised surface is facing upward.
3. Adjust the position of the remote controller on the wrist strap until one end of the strap slot
reaches the raised surface. Thread the buckle through the hole on the short wrist strap.
1
2
8© 2023 DJI All Rights Reserved.
EN
Linking
Linking in Single-Camera Control Mode
When powered on, the remote controller automatically searches for and connects to any Osmo
Action 4 cameras. Follow the prompts on the camera screen to link the devices.
Linking in Multi-Camera Control Mode
When powered on, the remote controller will be in single-camera control mode by default.
Press and hold the shutter/record and link buttons for four seconds to switch into multi-camera
control mode. Then the remote controller searches for the cameras and starts the linking
process. Follow the prompts on the camera screen to link the devices. When controlling multiple
cameras, the screen displays the number of cameras connected.
During linking, the status LED of the remote controller will blink blue. After linking the remote
controller to the camera, users can control the camera remotely to capture footage using the
remote controller.
Controlling the Cameras
Single-Camera Control Mode
In single-camera control mode, press the quick switch button once to switch between shooting
modes. The shooting modes that can be switched are the same as the settings in the camera.
Press the shutter/record button once to take a photo or to start or stop recording.
Multi-Camera Control Mode
In multi-camera control mode, the remote controller can control each camera to use its set
shooting mode to capture videos or images. Press the quick switch button to set all cameras
to a unified shooting mode. Press the shutter/record button once to take a photo or start
recording and press twice to stop recording. The shooting parameters will be based on the
presets of each camera in this mode.
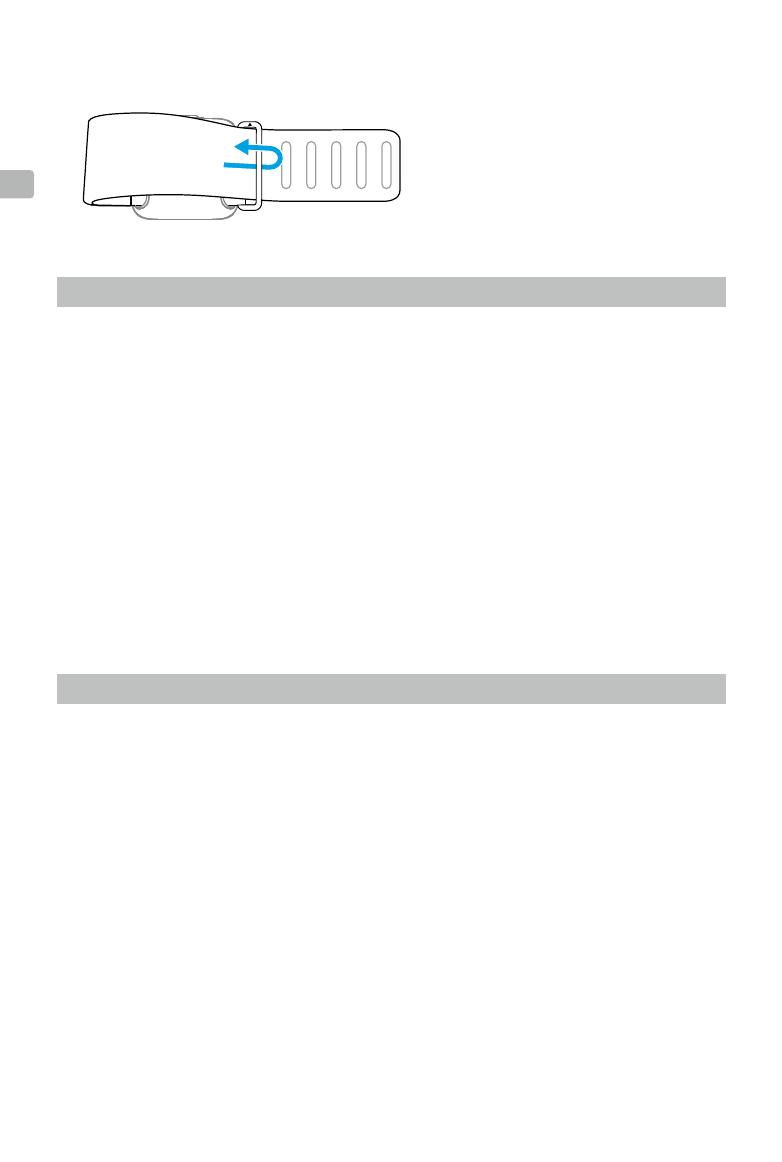
4. Thread the strap through the buckle and fasten the hook-and-loop fastener properly.
© 2023 DJI All Rights Reserved.9
EN
Dashboard
The built-in satellite positioning modules enable users to record tness data accurately when
shooting. When used with DJI Mimo, users can add a host of collected data to enrich the video,
such as speed, route, direction, and elevation.
Make sure to use the remote controller in an open outdoor environment to avoid signal
interference and wait 1-2 minutes until the GPS signal is strong. Make sure the remote
controller faces upward for the optimal GPS signal. DO NOT block the top of the remote
controller with your hands or other objects.
The remote controller does not have a GPS signal underwater. DO NOT use the remote
controller underwater.
Charging the Battery
Connect the remote controller to a charger via the USB-C port.
Status LED
Status Indicator Descriptions
Charging Status When Powered O
Solid green for 6 seconds and turns o Charging completed
Blinks green four times Charging, 76%-100%
Blinks green three times Charging, 51%-75%
Status LED
10© 2023 DJI All Rights Reserved.
EN
Specications
Model OSMO-AF-336
Dimensions 40.5×38.6×20.5 mm
Weight 26 g
Waterproof Level IPX7
Eective Remote Control Distance* 25 m
GNSS GPS+BeiDou+Galileo+GLONASS
Bluetooth
Protocol BLE 5.0
Operating Frequency 2.4000-2.4835 GHz
Transmitter Power (EIRP) <10 dBm
Battery
Capacity 270 mAh
Battery Type Chargeable Lithium Battery
Charging Temperature 0° to 45° C (32° to 113° F)
Operating Temperature 10° to 45° C (14° to 113° F)
* The eective remote control distance is measured in an interference-free outdoor environment without any
obstacles.
Blinks green twice Charging, 26%-50%
Blinks green Charging, 0%-25%
System Status
Blinks red three times Power on or o
Blinks blue Linking
Operation Status
Solid green Ready to use
Temporarily o Take a photo
Blinks red Recording a video
© 2023 大疆创新版权所有 11
CHS
免责声明和警告
使用本产品前,请您仔细阅读并遵守本安全概要、访问 https://www.dji.com/osmo-action-4
阅读《用户手册》和其他指引。使用本产品视为您已经阅读并接受与本产品相关的全部条款。
安全操作指引
1. 若产品起火,请根据实际情况按以下推荐顺序使用灭火器材水、水雾、沙、灭火毯、干粉、
二氧化碳灭火器。
2. 请在温度为 -10℃至 45℃之间的环境中使用产品。
3. 禁止以任何方式拆解产品。若拆解过程中刺破电池,将会导致电池内部电解液泄漏、甚至引
发起火、爆炸。
4. 禁止机械撞击、碾压或抛掷产品。请勿在产品上放置重物。
5. 切勿对产品进行加热。请勿将产品放置于微波炉或压力锅中。
6. 禁止将产品放在靠近热源(火炉或加热器等)的地方以及将产品置于热天的汽车内。切勿将
产品存储在超过 45℃的环境下。理想的存储环境温度为 22-28℃。
7. 切勿将电池彻底放完电后长时间存储,以避免电池进入过放状态而造成电芯损坏,将无法恢
复使用。
8. 每隔 3个月左右重新充放电一次以保持电池活性。
12 © 2023 大疆创新版权所有
CHS
简介
OSMOTM Action GPS 蓝牙遥控器(以下简称“遥控器”)使用无线蓝牙的方式与 Osmo Action 4*
连接,实现操控相机进行远程拍摄。遥控器支持单机控制和一控多机,最多可同时控制 16 台相
机进行拍摄。遥控器内置多模卫星定位模块,可精准记录运动数据,连接 DJITM Mimo App 后,
可添加实时运动数据(如速度、路线、方向及海拔等)至拍摄素材中并导出。
遥控器安装方式简单,支持通过腕带固定于手腕、自行车车把等位置,以便帮助更好完成各种
运动场景下的拍摄。
*适用的 DJI 设备会持续更新,请访问 Osmo Action 系列运动相机产品页面查看详细列表。
部件介绍
1. 快速切换按键
2. 拍摄按键
3. USB-C 接口
4. 状态指示灯
5. 显示屏
6. 对频按键
7. 挂绳孔
8. 腕带槽位
9. Osmo Action 蓝牙遥控器腕带(长)
10. Osmo Action 蓝牙遥控器腕带(短)
1
2
3
4
5
6
7
8
9
10
© 2023 大疆创新版权所有 13
CHS
按键功能
快速切换按键
长按:开启或关闭遥控器。
短按:当遥控器与相机连接时,可切换相机拍摄模式。
对频按键
长按:遥控器与相机开始配对。
短按:当遥控器与相机连接时,唤醒相机。当处于配对过程时,取消对频。
拍摄按键
长按:使相机休眠或唤醒相机。
短按:拍照或开始 /停止录像。当相机处于休眠状态时,唤醒相机并进行 SnapShot 录制。
注意:在遥控器与相机保持连接的情况下,使用拍摄按键控制相机相关功能。
组合按键
同时长按拍摄按键对频按键 4秒:切换一控多机或单机控制,并进入配对状态。
同时长按快速切换按键拍摄按键 4秒:查看遥控器当前的固件版本信息。
同时长按快速切换按键对频按键 4秒:清除当前所有相机的连接信息,并进入配对状态。
快速切换按键
对频按键
拍摄按键
14 © 2023 大疆创新版权所有
CHS
显示屏说明
Osmo Action GPS 蓝牙遥控器的显示屏可显示已连接相机状态和遥控器电量等信息。一控多机
时,可显示当前连接相机数量。不同状态显示的内容不同,请以实际显示为准。
1. 相机验证码:显示遥控器与相机连接的验证码。当找到相机后,遥控器屏幕和相机屏幕会显
示验证码,在相机屏幕点击“接受”。
2. GPS 定位状态:显示当前的 GPS 信号强度。当遥控器正在搜索 GPS 信号时,将显示
3. 遥控器电量:显示遥控器的剩余电量。
4. 连接状态:显示与相机的蓝牙连接状态。
5. 相机 microSD 卡信息:与相机连接成功后,显示相机内 microSD 卡可存储的照片数量或可
拍摄时长。
6. 界面信息:与相机连接成功后,同步相机拍摄信息。
如果 3分钟内无按键动作,显示屏将熄屏省电;未连接相机且非充电状态时,显示屏熄屏后 10
分钟内如果依旧无按键动作,蓝牙遥控器将自动关机。显示屏熄屏期间按任意按键可重新点亮
屏幕,蓝牙遥控器正常工作。
1 2 3
4
5
6
© 2023 大疆创新版权所有 15
CHS
使用方法
固定方式
包装内含有长度不同的两根腕带。通过长腕带可以把遥控器固定至手腕处,通过短腕带可以把
遥控器固定至自行车车把、摩托车车把、背包带等位置。
安装长腕带至手腕
如下图所示,将遥控器固定至手腕合适位置后扣紧魔术贴。
安装短腕带至自行车车把
1. 如下图所示,先将口字扣从长腕带的孔位取下。
2. 将短腕带穿过遥控器背面的腕带槽位,注意将有凸起限位的一面朝上。
3. 调整遥控器在腕带上的位置,直至槽位的一端抵住凸起限位。将口字扣穿过短腕带的孔位。
1
2
4. 将腕带的另一端穿过口字扣后扣紧魔术贴。
16 © 2023 大疆创新版权所有
CHS
配对
单机配对
遥控器开机后默认进入单机配对模式,将自动搜索相机并进行配对。根据相机界面提示进行配
对授权操作。
多机配对
遥控器开机后默认进入单机配对模式,同时长按拍摄按键与对频按键 4秒可进入一控多机模式。
遥控器将自动搜索相机并逐个进行配对。根据相机界面提示进行配对授权操作。一控多机时,
遥控器的显示屏将显示当前连接相机数量。
配对过程中遥控器机身持续闪烁蓝灯,直至配对成功。配对完成后,可以通过遥控器控制相机
拍照、录像等操作。
控制拍录
单机控制
单机控制模式下,短按快速切换按键可控制相机切换拍摄模式。可供切换的拍摄模式与相机内
的设置一致。短按拍摄按键可控制相机拍照或开始 /停止拍摄。
多机控制
一控多机模式下,默认情况下遥控器可以控制各相机使用各自的拍摄模式进行拍摄。短按快速
切换按键,可以将全部相机切换至统一的拍摄模式。短按拍摄按键控制相机开始拍摄,双击拍
摄按键控制相机停止拍摄。拍摄规格参数将以各相机在该模式的预设下为准。
仪表盘功能
遥控器内置多模卫星定位模块,可精准记录运动数据。连接 DJI Mimo App 后,可添加实时运动
数据(如速度、路线、方向及海拔等)至拍摄素材中并导出。
为避免 GPS 信号受到干扰,在室外空旷环境下使用遥控器。等待 1-2 分钟直至确认
GPS 信号满格后再使用。使用时保持遥控器正面朝上,请勿用手或其他物体挡住遥控器
的顶部。
由于遥控器信号在水下会受到影响,请勿在水下环境使用。
© 2023 大疆创新版权所有 17
CHS
充电
打开遥控器机身的 USB-C 保护盖后,连接遥控器的 USB-C 接口与充电器充电。
状态指示灯
指示灯 描述
关机状态下充电
绿灯常亮 6秒后熄灭 充电完成
绿灯四闪 充电中,76%-100%
绿灯三闪 充电中,51%-75%
绿灯双闪 充电中,26%-50%
绿灯闪烁 充电中,0%-25%
系统状态
红灯三闪 关机
蓝灯闪烁 进入配对状态
工作状态
绿灯常亮 进入拍摄就绪状态
绿灯灭一次 拍照
红灯闪烁 录像中
状态指示灯
18 © 2023 大疆创新版权所有
CHS
规格参数
产品型号 OSMO-AF-336
蓝牙遥控器尺寸 40.5 x 38.6 x 20.5 mm
重量 26 g
防水等级 IPX7
遥控距离 25 *
GNSS GPS+BeiDou+Galileo+GLONASS
蓝牙
协议 BLE 5.0
工作频率 2.402-2.480 GHz
发射功率 < 4 dBm
电池
容量 270mAh
电池类型 可充电锂离子电池组
充电方式 连接 USB-C 接口(电压为 4.4V
充电环境温度 0 ℃至 45
工作环境温度 -10℃至 45
* 在无干扰无遮挡实验室条件下测得。
CHT
© 2023 大疆創新 版權所有 19
免責聲明和警告
使用本產品前,請您仔細閱讀並遵守本安全概要,前往 https://www.dji.com/osmo-action-4
閱讀《使用者手冊》及其他指南。使用本產品即視同您已閱讀並接受與本產品相關的所有條款。
安全操作指南
1. 若產品起火,請依據實際情況按照以下建議的順序使用滅火器材:水、水霧、沙、滅火毯、
乾粉、二氧化碳滅火器。
2. 請在溫度為 -10 45 之間的環境中使用產品。
3. 禁止以任何方式拆解產品。若在拆解過程中刺破電池,將會導致電池內部電解液外漏,甚至
引發起火、爆炸。
4. 禁止機械撞擊、碾壓或拋擲產品。請勿在產品上放置重物。
5. 切勿對產品進行加熱。請勿將產品置於微波爐或壓力鍋中。
6. 禁止將產品置於熱源(例如火爐或電暖器)附近,也禁止在天氣炎熱時將產品留置於車內。
切勿將產品存放在超過 45 的環境下。理想的存放環境溫度為 22 28℃。
7. 切勿將電池完全放電後長時間存放,以免電池進入過度放電狀態而造成電芯損壞,導致其無
法恢復使用。
8. 請每 3 個月左右重新充放電一次,以保持電池活性。
CHT
20 © 2023 大疆創新 版權所有
簡介
OSMOTM Action GPS 藍牙遙控器(以下簡稱「遙控器)使用無線藍牙的方式與
Osmo Action 4* 連接,可操控相機進行遠端拍攝。遙控器支援單機控制和一控多機,最多可同
時控制 16 台相機進行拍攝。遙控器內建多模衛星定位模組,可精準記錄運動數據,連接 DJITM
Mimo 應用程式後,可新增即時運動數據(如速度、路線、方向及海拔等)至拍攝素材中並匯出。
遙控器安裝方式簡單,支援透過腕帶固定於手腕、自行車握把等位置,以便協助使用者在各種
運動場景下完成更佳拍攝。
*適用的 DJI 裝置會持續更新,請前往 Osmo Action 系列運動相機產品頁面以瀏覽詳細清單。
零組件介紹
1. 快速切換按鍵
2. 拍攝按鈕
3. USB-C
連接埠
4. 狀態指示燈
5. 顯示螢幕
6. 配對按鍵
7. 掛繩孔
8. 腕帶槽位
9. Osmo Action 藍牙遙控器腕帶(長)
10. Osmo Action 藍牙遙控器腕帶(短)
1
2
3
4
5
6
7
8
9
10
  • Page 1 1
  • Page 2 2
  • Page 3 3
  • Page 4 4
  • Page 5 5
  • Page 6 6
  • Page 7 7
  • Page 8 8
  • Page 9 9
  • Page 10 10
  • Page 11 11
  • Page 12 12
  • Page 13 13
  • Page 14 14
  • Page 15 15
  • Page 16 16
  • Page 17 17
  • Page 18 18
  • Page 19 19
  • Page 20 20
  • Page 21 21
  • Page 22 22
  • Page 23 23
  • Page 24 24
  • Page 25 25
  • Page 26 26
  • Page 27 27
  • Page 28 28
  • Page 29 29
  • Page 30 30
  • Page 31 31
  • Page 32 32
  • Page 33 33
  • Page 34 34
  • Page 35 35
  • Page 36 36
  • Page 37 37
  • Page 38 38
  • Page 39 39
  • Page 40 40
  • Page 41 41
  • Page 42 42
  • Page 43 43
  • Page 44 44
  • Page 45 45
  • Page 46 46
  • Page 47 47
  • Page 48 48
  • Page 49 49
  • Page 50 50
  • Page 51 51
  • Page 52 52
  • Page 53 53
  • Page 54 54
  • Page 55 55
  • Page 56 56
  • Page 57 57
  • Page 58 58
  • Page 59 59
  • Page 60 60
  • Page 61 61
  • Page 62 62
  • Page 63 63
  • Page 64 64
  • Page 65 65
  • Page 66 66
  • Page 67 67
  • Page 68 68
  • Page 69 69
  • Page 70 70
  • Page 71 71
  • Page 72 72
  • Page 73 73
  • Page 74 74
  • Page 75 75
  • Page 76 76
  • Page 77 77
  • Page 78 78
  • Page 79 79
  • Page 80 80
  • Page 81 81
  • Page 82 82
  • Page 83 83
  • Page 84 84
  • Page 85 85
  • Page 86 86
  • Page 87 87
  • Page 88 88
  • Page 89 89
  • Page 90 90
  • Page 91 91
  • Page 92 92
  • Page 93 93
  • Page 94 94
  • Page 95 95
  • Page 96 96
  • Page 97 97
  • Page 98 98
  • Page 99 99
  • Page 100 100
  • Page 101 101
  • Page 102 102
  • Page 103 103
  • Page 104 104
  • Page 105 105
  • Page 106 106
  • Page 107 107

dji Osmo Action 4 ユーザーガイド

タイプ
ユーザーガイド