
Copyright - Games Bad Rodach 2016
My Very First Games
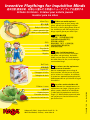
个游戏 - 汉尼蜜蜂 · Hanni Honigbiene
Abella l’abeille · La abeja Adela
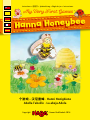
Hanna Honeybee
Instructions •
说明书
• Spielanleitung • Règle du jeu • Instrucciones


My Very First Games
My Very First Games
Hanna Honeybee
Two cooperative color die games for 1 to 4 busy bees ages 2 years and older.
Author: Tim Rogasch
Illustrations: frau annika
Game duration: 5 to 10 minutes
Game contents:
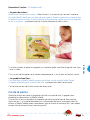
1 beehive (= insertion and box bottom), 1 Hanna Honeybee, 10 flower tiles, 1 honey pot
(= deposit board), 1 die, 1 game instructions
Dear Parents,
Thank you for choosing this game from the My Very First Games series. You’ve made
an excellent choice, providing your child an opportunity to develop important skills in
a playful manner.
These instructions provide you with many ideas on how you and your child can
explore the game contents together, enjoying a variety of playing ideas. This game
encourages your child’s development in several areas, including color recognition,
identification and allocation, fine motor skills, concentration and language skills. But
most importantly, your child will simply have a lot of fun! The rest comes practically
on its own.
We wish you and your child wonderful moments of playful discovery!
Your children’s inventors.
Important:
Carefully remove the perforated tiles from the plate. Immediately discard the plate,
as small parts may result from removing the tiles.
ENGLISH
3

My Very First Games
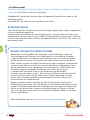
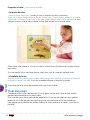
Discovering details with creative play
Before actually playing the game, take the time to discover the game contents with your
child. Play along! Explore and talk about the beehive illustrations (=box), the honey pot and
the flower tiles. Before playing for the first time, talk about Hanna Honeybee, how she flies
from flower to flower collecting sweet nectar to bring back to the hive. Lay the flower side
of the tiles next to the beehive and show your child how the colors correspond to the colors
on the die. Practice rolling the die and tossing the corresponding tile into the beehive. Thus,
your child becomes familiar with allocating colors and discovers the beehive mechanism.
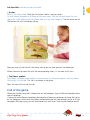
When a flower is thrown into the beehive, a drop of honey comes out at the bottom.
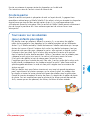
Older children, who are already familiar with the game
materials, can also be asked specific questions about beehives.
For example, how many bees are flying around the beehive?
Did you discover the ladybugs? How many ladybugs are there?
Where is the butterfly? Can you find the yellow, pink,
etc. flowers?
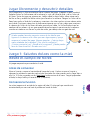
Game 1: Sweet honey greetings from the
wildflower meadow
A cooperative honey-collecting game.
Before you begin
Fold out the inserter and remove the other game materials from the box. Fold the inserter
back together and place the beehive upright for all children to see, and at a distance they all
can reach. Distribute the 10 tiles over the playing area with the flower side up. Place Hanna
Honeybee, the honey pot (=deposit board) and the die close at hand.
Let’s play!
The game proceeds clockwise. The child who most recently ate bread and honey gets to roll
the die first.
ENGLISH
4

My Very First Games
Ask the child, what do you see on the die?
• A color:
What is this color called? Help the child when she/he is not yet certain.
Fly with Hanna Honeybee to a flower of the same color. Take the tile and throw it in the
upper slot in the beehive with the flower side up. Look what happens! The tile comes out of
the bottom slot with the honey side up.
Now you may lay the tile with the honey side up on any free space on the honey pot.
When there are no more tiles with the corresponding color, it is the next child’s turn.
• The flower symbol:
One flower is already wilted and has no more nectar for Hanna Honeybee. Take any flower
tile and lay it to the side. This tile is no longer in the game.
Now, the next child can roll the die.
End of the game
When the children have laid six honey tiles on the honeypot, they and Hanna Honeybee have
won all together!
If too many wilted flowers have been eliminated and there are no longer six honey tiles to lay
on the honeypot, Hanna and the children unfortunately do not have enough nectar to fill the
honeypot. But keep trying; you will have better luck next time! Shall we play another round?
ENGLISH
5

My Very First Games
Sharing fun makes your child emotionally strong and cheerful! It
lends your child positive reinforcement and fosters solidarity within
the family or community where the game is played.
Game 2: Busy bees find colorful flowers
An amusing color memory game.
Before you begin
Fold out the inserter and remove the other game materials from the box. Fold the inserter
back together and place the beehive upright for all children to see, and at a distance they all
can reach. Distribute the 10 tiles over the playing area with the honey side up. Place Hanna
Honeybee, the honey pot (=deposit board) and the die close at hand.
Let’s play!
The game proceeds clockwise. The child who most recently has seen a bee gets to roll the die
first.
Ask the child, what do you see on the die?
• A color:
What is this color called? Help the child when she/he is not yet certain.
Fly with Hanna Honeybee to a tile and turn the tile over. Is it the flower the same color as on
the die?
• Yes!
Take the tile and throw it in the upper slot in the beehive with the flower side up. Look
what happens!
The tile comes out of the bottom slot with the honey side up.
Now you may lay the tile with the honey side up on any free space on the honey pot.
• No!
If you can name the color of the flower correctly, you can turn over another honey
tile. Once the child has turned over all the tiles and there are no more tiles of the
corresponding color, it is the next child’s turn.
• The flower symbol:
Hanna Honeybee is running out of nectar. Take any honey tile and lay it aside. This tile is no
longer in the game.
When appropriate, turn all flower tiles back over to show the honey side up.
Now, the next child can roll the die.
ENGLISH
6

My Very First Games
End of the game
When the children have laid six honey tiles on the honeypot, they and Hanna Honeybee have
won! If too many wilted flowers have been eliminated and there are no longer six honey tiles
to lay on the honeypot, Hanna and the children unfortunately do not have enough nectar to
fill the honeypot. But keep trying; you will have better luck next time! Shall we play another
round?
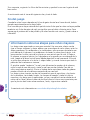
About bees, for older children
Bees live in large families called swarms. There is a queen, male bees (called drones)
and worker bees with various jobs, such as guards, collectors and honeycomb
workers keeping house inside the hive. The collectors do not carry a bucket; they
collect the nectar in a honey sac, also called a honey stomach. Back at the hive, they
spit out the nectar and the hive bees absorb it in their honey stomachs and bring the
ripe honey to the honeycomb. The honey is food for the larvae (=bee babies) as well
as the winter provisions for the whole swarm.
A beekeeper can “harvest” the honey. He takes the honeycomb out of the hive,
removes the layer of wax and carefully spins out the honey, using a special machine.
And then anyone with a sweet tooth can have delightful bread and honey.
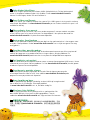
Bees and other insects are very important for farmers and wildflowers. Fruits trees,
grains and all other plants need bees to pollinate. When the bees take the nectar
from a blossom, they carry pollen (flower dust) from blossom to blossom. Fruits like
apples and strawberries, and grains like wheat all need bee pollen to produce their
fruits.
More information can be found at www.haba.de/spielzeug/haba-erleben
ENGLISH
7

我的第一个游戏
我的第一
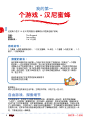
个游戏 - 汉尼蜜蜂
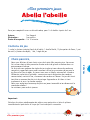
这是两个适于 1-4 名 2 周岁勤劳小蜜蜂的合作性颜色骰子游戏。
作者: Tim Rogasch
插图: frau annika
游戏时长: 5 à 10 分钟
游戏材料:
1 个蜂巢(=插件和纸箱底部)、1 只汉尼蜜蜂、10 朵花、1 个蜜罐(=存放方案)、1 个
骰子、1 份游戏指南
亲爱的家长:
我们很高兴看到您从“我的第一个游戏”系列中选择了本套游戏。您做出了一个明智
的选择——这会拓宽孩子的视野,并让孩子在游戏中得到锻炼和成长。
本指南介绍了各种技巧提示,以便您与孩子能够发现游戏材料,并使用不同的游戏
方案。在游戏过程中,孩子的各种能力和技能都会得到提升:颜色的识别、命名和
分配,动作技能、注意力和语言能力。这个游戏的最显著特点:乐趣无穷!寓教于
乐,独立学习。
游戏作者祝孩子们在共同的游戏和探索中
享受游戏的无穷乐趣
重要提示:
请小心把预冲压的部分压出平板。立即丢弃平板,以免产生一些小片。
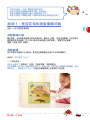
自由游戏,探索细节
在自由游戏中,您的孩子会摆弄各种游戏材料。请您跟着一起玩吧!请共同探索蜂巢
(=盒子)上的图像、蜜罐和花板。在开始第一场游戏前,先谈谈汉妮蜜蜂,蜜蜂如何在
花间飞来飞去并采集花蜜,将花蜜带到蜂巢。请将花朝上把小板放到蜂巢旁,并展示与骰
子上相同的颜色。与您的孩子一起练习如何正确掷骰子,并向蜂巢里投掷与掷骰子结果相
匹配的小板。这样孩子就会熟悉颜色的配合并了解蜂巢的机理:如果人在上面投进去一朵
花,下面就会流出一滴蜂蜜。
8
中文

我的第一个游戏
对于年纪稍大,已经了解游戏材料的孩子,
您也可以提出有关蜂巢的细节问题。举例来说:
有多少蜜蜂在围绕蜂巢飞舞?你找到瓢虫了吗?
有多少只瓢虫?蝴蝶在哪里?哪里有黄色/粉色等颜色的花朵?
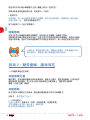
游戏 1:来自花甸的甜蜜蜜蜂问候
这是一个合作性的采蜜游戏
开始游戏之前
翻开插件,并从纸箱底部取出其余游戏材料,重新合上插件,垂直竖起蜂巢,让所有孩子
都能看清并用手碰到。把 10 块小板以花朵面朝上分散到桌上。摆放好汉尼蜜蜂、
蜜罐(=存放方案)和骰子。
开始游戏
孩子们依次以顺时针方向游戏。最近吃过蜂蜜面包的孩子可以开始掷骰子。
问孩子: 骰子显示了什么?
• 一个彩色的点:
这是什么颜色? 如果孩子(仍然)不知道答案,则提供帮助。
与汉妮蜜蜂一起飞到一朵相同颜色的花上。拿起小板,并把它扔入蜂巢的顶部缝隙(花朵
面须向上)。看看发生了什么! 小板会以蜂蜜面朝上从底部开口处出来。
9
中文

我的第一个游戏
现在你可以将小板以蜂蜜面向上放入蜜罐上的任一空白栏位。
如果没有更多相应颜色的小板,则轮到下一个孩子。
• 花朵符号:
不幸的是,有一朵花没有花蜜供给汉尼蜜蜂,因为花已经枯萎了。随意拿起一块花朵板,
并把它放在一边。 这样这块板就出局了。
接下来轮到下一个孩子并掷骰子。
结束游戏
当孩子们把六块蜂蜜板都放到蜜罐里,他们就与汉尼蜜蜂一起赢得了胜利。
如果事先从游戏中取走花朵的太多,以至于孩子们没法再收集六块蜂蜜板,则没有足够的
花蜜可供采集。但孩子们和汉妮蜜蜂们下次肯定会有好运气。新一回合里的运气怎么样?
一起欢庆,营造热烈的气氛,并确保心情愉快!这将增强孩子们
的行动能力,促进孩子融入家庭或游戏的小团体。
游戏 2:勤劳蜜蜂,趣味寻花
一个有趣的颜色记忆游戏
开始游戏之前
翻开插件,并从纸箱底部取出其余游戏材料,重新合上插件,垂直竖起蜂巢,让所有孩子
都能看清并用手碰到。把 10 块小板以花朵面朝上分散到桌上。摆放好汉尼蜜蜂、
蜜罐(=存放方案)和骰子。
开始游戏
孩子们依次以顺时针方向游戏。最近看过蜂蜜的孩子可以开始掷骰子。
问孩子: 骰子显示了什么?
• 一个彩色的点:
这是什么颜色? 如果孩子(仍然)不知道答案,则提供帮助。
与汉尼蜜蜂一起飞到一块小板上。翻转小板。
骰子和花朵的颜色是一样的吗?
10
中文

我的第一个游戏
• 是的!
拿起小板,并把它扔入蜂巢的顶部缝隙(花朵面须向上)。看看发生了什么!
小板会以蜂蜜面朝上从底部开口处出来。。
现在你可以将小板以蜂蜜面向上放入蜜罐上的任一空白栏位。
• 没有?
如果你现在正确说出这朵花的颜色,就可以翻转另一块蜂蜜板。
如果孩子们打开了所有小板,而没有更多相应颜色的小板,则轮到下一位孩子。
• 花朵符号:
汉尼蜜蜂缺少花蜜。随意拿起一块蜂蜜板,并把它放在一边。
这样这块板就出局了。
如有必要,将现在还面朝上摆放的花朵小板重新翻转到蜂蜜面。
接下来轮到下一个孩子并掷骰子。
结束游戏
当孩子们把六块蜂蜜板都放到蜜罐里,他们就与汉尼蜜蜂一起赢得了胜利。
如果事先从游戏中取走花朵的太多,以至于孩子们没法再收集六块蜂蜜板,则没有足够的
花蜜可供采集。但孩子们和汉妮蜜蜂们下次肯定会有好运气。新一回合里的运气怎么样?
适于年龄较大儿童的蜜蜂知识
蜜蜂都是大量群居。蜂群中有蜂后、雄性蜜蜂(即所谓的雄蜂)和承担不同任务的
工蜂:有警卫、采集工和内勤蜂,内勤蜂负责打理蜂巢内部的全部事情。采集工并
没有装花蜜的提桶,而是用蜂蜜胃收集甜蜜的汁液。它们在蜂巢内吐出花蜜,并由
内勤蜂收集花蜜。内勤蜂会把花蜜吸入蜂蜜胃,将其带入巢洞,并在此排出熟化的
蜂蜜。蜂蜜会被用作幼虫(=幼蜂)的食物,并作为蜂群的冬季存粮。
养蜂人可以“收获”蜂蜜:为此,他从蜂房里取出从蜂巢,除去蜂巢上的蜡层并小心
地旋转甩出蜂蜜。这需要用到一台特殊的机器。这样所有小馋鬼就可以吃上蜂蜜面
包了。
蜜蜂和其他昆虫对农业和野生开花植物都特别重要:因为果树、田间的谷物和所有
其他植物都需要蜜蜂授粉。原因是,昆虫在从花朵采集花蜜的同时,会将花粉从一
株个植物传播到另一株植物。这点非常重要,因为这样植物才能结出果实,如苹
果、草莓、小麦和其它谷物。
更多详细信息,请访问www.haba.de/spielzeug/haba-erleben
11
中文

Meine ersten Spiele
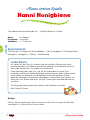
Meine ersten Spiele
Hanni Honigbiene
Zwei kooperative Farbwürfelspiele für 1 - 4 fleißige Bienen ab 2 Jahren.
Autor: Tim Rogasch
Illustration: frau annika
Spieldauer: 5 - 10 Minuten
Spielmaterial:
1 Bienenstock (= Einleger und Schachtelboden), 1 Hanni Honigbiene, 10 Blütenplättchen, 1
Honigtopf (= Ablageplan), 1 Würfel, 1 Spielanleitung
Liebe Eltern,
wir freuen uns, dass Sie sich für dieses Spiel aus der Reihe Meine ersten Spiele
entschieden haben. Sie haben eine gute Wahl getroffen und eröffnen Ihrem Kind
damit viele Perspektiven, sich spielerisch zu entwickeln.
Diese Anleitung bietet viele Tipps, wie Sie das Spielmaterial mit Ihrem Kind
entdecken und für verschiedene Spielideen einsetzen können. Beim Spielen werden
unterschiedliche Fähigkeiten und Fertigkeiten Ihres Kindes gefördert: Farben
erkennen, benennen und zuordnen, Feinmotorik, Konzentration und Sprache. Vor
allem macht das Spielen aber eines: viel Spaß! Lernen geht also nebenbei und fast
von allein.
Viel Vergnügen beim gemeinsamen Spielen und Entdecken wünschen
die Erfinder für Kinder
Wichtig:
Drücken Sie die vorgestanzten Teile vorsichtig aus der Platte. Entsorgen Sie die Platte
unverzüglich. Es können kleine Teile entstehen.
12
DEUTSCH

Meine ersten Spiele
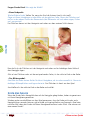
Freies Spiel und Details entdecken
Im freien Spiel beschäftigt sich Ihr Kind mit dem Spielmaterial. Spielen Sie mit! Erkunden
Sie gemeinsam die Abbildungen auf dem Bienenstock (= Schachtel), dem Honigglas und
den Blütenplättchen. Sprechen Sie vor dem ersten Spiel über Hanni Honigbiene, wie sie
von Blume zu Blume fliegt und so den süßen Nektar sammelt, um ihn zum Bienenstock zu
bringen. Legen Sie die Plättchen mit den Blüten nach oben neben den Bienenstock und
zeigen Sie, dass sich die gleichen Farben auf dem Würfel befinden. Üben Sie mit Ihrem Kind,
wie man richtig würfelt, und lassen Sie es das zum Würfelergebnis passende Plättchen in den
Bienenstock werfen. So macht es sich mit der Zuordnung der Farben vertraut und lernt den
Mechanismus des Bienenstocks kennen: Wenn man oben eine Blüte reinwirft, kommt unten
ein Honigtropfen heraus.
Bei Kindern, die etwas älter sind und das Spielmaterial schon
besser kennen, können Sie auch Fragen nach Details rund um
den Bienenstock stellen. Beispiele sind: Wie viele Bienen fliegen
um den Bienenstock? Hast du die Marienkäfer gesehen? Wie
viele Marienkäfer sind es? Wo ist der Schmetterling? Wo sind
gelbe/rosafarbene usw. Blumen zu sehen?
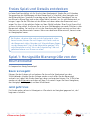
Spiel 1: Honigsüße Bienengrüße von der
Blumenwiese
Ein kooperatives Honig-Sammelspiel
Bevor es losgeht
Klappen Sie den Einleger auf und nehmen Sie das restliche Spielmaterial aus dem
Schachtelboden, klappen Sie den Einleger wieder zu und stellen Sie den Bienenstock
senkrecht auf, sodass alle Kinder diesen gut sehen und erreichen können. Die 10 Plättchen
werden mit der Blütenseite nach oben auf dem Tisch verteilt. Legen Sie Hanni Honigbiene,
den Honigtopf (= Ablageplan) und den Würfel bereit.
Jetzt geht‘s los
Die Kinder spielen reihum im Uhrzeigersinn. Wer zuletzt ein Honigbrot gegessen hat, darf
beginnen zu würfeln.
13
DEUTSCH

Meine ersten Spiele
Fragen Sie das Kind: Was zeigt der Würfel?
• Einen Farbpunkt:
Wie heißt diese Farbe? Helfen Sie, wenn das Kind die Antwort (noch) nicht weiß.
Fliege mit Hanni Honigbiene zu einer Blüte mit der gleichen Farbe. Nimm das Plättchen und
wirf es in den oberen Schlitz des Bienenstocks (die Blütenseite soll nach oben zeigen). Schau
mal, was passiert!
Das Plättchen kommt mit der Honigseite nach oben aus dem unteren Schlitz heraus.
Nun darfst du das Plättchen mit der Honigseite nach oben auf ein beliebiges freies Feld auf
dem Honigglas legen.
Gibt es kein Plättchen mehr mit der entsprechenden Farbe, ist das nächste Kind an der Reihe.
• Das Blütensymbol:
Eine Blüte hat leider keinen Nektar für Hanni Honigbiene, da sie schon verwelkt ist. Nimm ein
beliebiges Blütenplättchen und lege es beiseite. Das Plättchen ist damit aus dem Spiel.
Anschließend ist das nächste Kind an der Reihe und würfelt.
Ende das Spiels
Wenn die Kinder sechs Honigplättchen auf das Honigglas gelegt haben, haben sie gemeinsam
mit Hanni Honigbiene gewonnen.
Wurden vorher so viele Blüten aus dem Spiel genommen, dass die Kinder nicht mehr sechs
Honigplättchen sammeln können, gibt es leider nicht genug Nektar zum Sammeln. Aber beim
nächsten Mal haben die Kinder und Hanni Honigbiene bestimmt mehr Glück. Wie wäre es mit
einer neuen Runde?
14
DEUTSCH

Meine ersten Spiele
Sich gemeinsam freuen, macht emotional stark und sorgt für gute
Laune! Es bestärkt Kinder in ihrem Tun und fördert den
Zusammenhalt in der Familie oder in der Gruppe, in der gespielt wird.
Spiel 2: Farbenfrohe Blütensuche für
fleißige Bienen
Ein lustiges Farben-Memo-Spiel
Bevor es losgeht
Klappen Sie den Einleger auf und nehmen Sie das restliche Spielmaterial aus dem
Schachtelboden, klappen Sie den Einleger wieder zu und stellen Sie den Bienenstock
senkrecht auf, sodass alle Kinder diesen gut sehen und erreichen können. Die 10 Plättchen
werden mit der Honigseite nach oben auf dem Tisch verteilt. Legen Sie Hanni Honigbiene,
den Honigtopf (= Ablageplan) und den Würfel bereit
Jetzt geht‘s los
Die Kinder spielen reihum im Uhrzeigersinn. Wer zuletzt eine Biene gesehen hat, darf
beginnen zu würfeln.
Fragen Sie das Kind: Was zeigt der Würfel?
• Einen Farbpunkt:
Wie heißt diese Farbe? Helfen Sie, wenn das Kind die Antwort (noch) nicht weiß.
Fliege mit Hanni Honigbiene zu einem Plättchen. Drehe das Plättchen um.
Ist die Farbe vom Würfel und der Blüte gleich?
• Ja!
Nimm das Plättchen und wirf es in den oberen Schlitz des Bienenstocks (die Blütenseite
soll nach oben zeigen). Schau mal, was passiert!
Das Plättchen kommt mit der Honigseite nach oben aus dem unteren Schlitz heraus.
Nun darfst du das Plättchen mit der Honigseite nach oben auf ein beliebiges freies Feld
auf dem Honigglas legen.
Gibt es kein Plättchen mehr mit der entsprechenden Farbe, ist das nächste Kind an der
Reihe.
• Nein!
Benennst du jetzt die Farbe dieser Blüte richtig, darfst du ein weiteres Honigplättchen
umdrehen. Hat das Kind alle Plättchen aufgedeckt und es gibt kein Plättchen in der
entsprechenden Farbe mehr, ist das nächste Kind an der Reihe
15
DEUTSCH

Meine ersten Spiele
• Das Blütensymbol:
Der Nektar wird knapp für Hanni Honigbiene. Nimm ein beliebiges Honigplättchen und lege
es beiseite. Das Plättchen ist damit aus dem Spiel.
Gegebenenfalls werden jetzt alle noch offen ausliegenden Blütenplättchen wieder auf die
Honigseite gedreht.
Anschließend ist das nächste Kind an der Reihe und würfelt.
Ende das Spiels
Wenn die Kinder sechs Honigplättchen auf das Honigglas gelegt haben, haben sie gemeinsam
mit Hanni Honigbiene gewonnen.
Wurden vorher so viele Blüten aus dem Spiel genommen, dass die Kinder nicht mehr sechs
Honigplättchen sammeln können, gibt es leider nicht genug Nektar zum Sammeln. Aber beim
nächsten Mal haben die Kinder und Hanni Honigbiene bestimmt mehr Glück. Wie wäre es mit
einer neuen Runde?
Bienen-Wissen für ältere Kinder
Bienen leben in einem großen Volk zusammen. Es gibt eine Königin, männliche
Tiere (die sogenannten Drohnen) und Arbeitsbienen mit verschiedenen Aufgaben:
Es gibt Wächterinnen, Sammlerinnen und Stockbienen, die sich um alles im Inneren
des Bienenstocks kümmern. Die Sammlerinnen haben keinen Eimer für den Nektar
dabei, sondern sammeln die süßen Pflanzensäfte ihn einer Honigblase. Im Bienenstock
spucken sie den Nektar aus und er wird von den Stockbienen aufgenommen. Diese
nehmen den Nektar in ihren Honigmagen auf und bringen ihn zu den Waben, um
den reifen Honig dort abzulegen. Der Honig wird als Futter für die Larven
(= Bienenkinder) verwendet und er ist der Wintervorrat des Bienenvolks.
Der Imker kann den Honig „ernten“: Dafür holt er die Waben aus dem Bienenstock,
entfernt die Wachsschicht auf den Waben und schleudert den Honig vorsichtig
heraus. Dafür wird eine spezielle Maschine verwendet. Und dann können alle
Leckermäulchen ein Honigbrot essen.
Bienen und andere Insekten sind aber vor allem für die Landwirtschaft und die
Wildblütenpflanzen wichtig: Denn Obstbäume, das Getreide auf den Feldern und alle
anderen Pflanzen brauchen die Bienen zur Bestäubung. Denn wenn die Insekten den
Nektar aus den Blüten holen, verteilen sie den Blütenstaub von Pflanze zu Pflanze.
Das ist wichtig, damit diese dann Früchte wie Äpfel, Erdbeeren, Weizen und andere
Körner tragen können.
Mehr Informationen gibt es auf www.haba.de/spielzeug/haba-erleben
16
DEUTSCH

Mes premiers jeux
Mes premiers jeux
Abella l’abeille
Deux jeux coopératifs avec un dé multicolore, pour 1 à 4 abeilles à partir de 2 ans.
Auteur : Tim Rogasch
Illustration : frau annika
Durée d’une partie : 5 à 10 minutes
Contenu de jeu
1 ruche (= plateau inséré et fond de la boîte), 1 abeille Abella, 10 plaquettes de fleurs, 1 pot
de miel (= plateau de dépôt), 1 dé, 1 règle du jeu
Chers parents,
Nous vous félicitons d’avoir choisi ce jeu de la série Mes premiers jeux. Vous avez
fait un bon choix et allez permettre à votre enfant de grandir et évoluer dans un
environnement ludique.
Ce fascicule vous propose des règles de jeu simples et vous donne de nombreux
conseils et suggestions pour savoir comment utiliser les accessoires de jeu pour le
jeu libre et les jeux à règles. En jouant avec vous et Abella, votre enfant stimulera
différentes capacités et aptitudes : reconnaissance et désignation des couleurs,
concentration, motricité fine, classement des couleurs et formes. Un jeu doit avant
tout être un moment de plaisir et de partage. Apprendre se fait donc ici tout
simplement et sans s’en rendre compte.
Nous vous souhaitons beaucoup de plaisir en jouant ensemble et en découvrant le
monde des abeilles !
Les créateurs pour enfants joueurs
Important :
Détachez les pièces prédécoupées du plateau avec précaution et jetez le plateau
immédiatement pour éviter le risque qu’il reste des petits morceaux.
17
FRANÇAIS

Mes premiers jeux
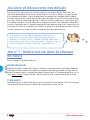
Jeu libre et découverte des détails
Dans le jeu libre, votre enfant se familiarise avec les accessoires du jeu. Jouez avec lui !
Découvrez ensemble les illustrations représentées sur la ruche (= boîte), sur le pot de miel
et les plaquettes de fleurs. Avant de jouer pour la première fois, évoquez Abella l’abeille,
racontez comment elle vole de fleur en fleur pour récupérer le nectar et l’emmener ensuite
à la ruche. Posez les plaquettes de fleurs à côté de la ruche et montrez à votre enfant qu’il y
a les mêmes couleurs sur le dé. Montrez lui comment lancer le dé et comment insérer dans
la ruche la plaquette dont la couleur correspond à celle obtenue avec le dé. Votre enfant se
familiarise ainsi avec le classement des couleurs et apprend à comprendre le mécanisme de
la ruche : quand on y insère une fleur, une goutte de miel apparait en bas.
Si les enfants sont plus âgés et connaissent déjà bien les
accessoires du jeu, vous pourrez également leur poser des
questions sur la ruche, par ex.: combien d’abeilles volent-elles
autour de la ruche ? As-tu vu les coccinelles ? Combien y-en-a-t-il ?
Où est le papillon ? Où vois-tu des fleurs jaunes/roses, etc. ?
Jeu n° 1 : Abella butine dans le champs
de fleurs
Un jeu coopératif de collecte de miel.
Avant de jouer
Rabattez le plateau inséré pour l’ouvrir et sortez les accessoires de jeu de la boîte. Refermez
le plateau inséré et posez la ruche dessus en position verticale de manière à ce que tous les
enfants la voient bien et y accèdent facilement. Répartissez les 10 plaquettes de fleurs sur la
table, fleurs visibles. Préparez Abella l’abeille, le pot de miel (= plateau de dépôt) et le dé.
C’est parti
Les enfants jouent à tour de rôle dans le sens des aiguilles d’une montre. Celui qui a mangé
une tartine de miel en dernier a le droit de commencer en lançant le dé.
18
FRANÇAIS

Mes premiers jeux
Demandez à l’enfant : Qu’indique le dé ?
• Un point de couleur :
Quelle est le nom de cette couleur ? Aidez l’enfant s’il ne connaît pas (encore) la réponse.
Fais voler Abella l’abeille vers une fleur de cette couleur. Prends la plaquette et insère-la dans
la fente en haut de la ruche (le côté montrant la fleur doit être tourné vers le haut). Regarde
ce qui va se passer ! La plaquette sort de la fente inférieure du côté « miel ».
Tu as alors le droit de poser la plaquette sur n’importe quelle case libre du pot de miel, face
« miel » visible.
S’il n’y a plus de plaquettes de la couleur correspondante, c’est au tour de l’enfant suivant.
• Le symbole d’une fleur :
C’est une fleur qu’Abella l’abeille ne peut pas butiner car elle est déjà fanée. Prends
n’importe quelle plaquette et mets-la de côté. La plaquette est donc sortie du jeu.
C’est ensuite au tour de l’enfant suivant de lancer le dé.
Fin de la partie
Quand les enfants ont posé six plaquettes de miel sur le pot de miel, ils gagnent tous
ensemble en même temps qu’Abella l’abeille.
Si les enfants n’ont pas récupéré six plaquettes de miel parce que trop de fleurs ont été
sorties du jeu, il n’y a malheureusement pas suffisamment de nectar à récupérer. Mais les
enfants et Abella l’abeille auront certainement plus de chance la prochaine fois. Vous voulez
essayez tout de suite en faisant une autre partie ?
19
FRANÇAIS

Mes premiers jeux
Se réjouir ensemble rend fort sur le plan émotionnel et apporte de
la bonne humeur ! Les enfants se sentent plus forts dans ce qu’ils
font et cela stimule la solidarité au sein de la famille ou dans le
groupe où le jeu est joué.
Jeu n° 2 : A la recherche de fleurs de
toutes les couleurs
Un amusant jeu de mémoire coopératif sur les couleurs
Avant de jouer
Rabattez le plateau inséré pour l’ouvrir et sortez les accessoires de jeu de la boîte. Refermez
le plateau inséré et posez la ruche dessus en position verticale de manière à ce que tous les
enfants la voient bien et y accèdent facilement. Répartissez les 10 plaquettes de fleurs sur la
table, côté « miel » visible. Préparez Abella l’abeille, le pot de miel (= plateau de dépôt) et le
dé.
C’est parti
Les enfants jouent à tour de rôle dans le sens des aiguilles d’une montre. Celui qui a vu une
abeille en dernier a le droit de commencer en lançant le dé.
Demandez à l’enfant : Qu’indique le dé ?
• Un point de couleur :
Quel est le nom de cette couleur ? Aidez l’enfant s’il ne connaît pas (encore) la réponse.
Fais voler Abella vers une plaquette. Retourne la plaquette.
La couleur du dé et celle de la fleur sont-elles identiques ?
• Oui !
Prends la plaquette et mets-la dans la fente du haut de la ruche (le côté fleur doit être
tourné vers le haut). Regarde ce qui va se passer !
La plaquette sort de la fente inférieure côté « miel ».
Tu as alors le droit de poser la plaquette sur n’importe quelle case libre du pot de miel,
face « miel » visible.
• Non !
Si tu nommes la bonne couleur de cette fleur, tu as le droit de retourner une autre
plaquette de miel. Si l’enfant a retourné toutes les plaquettes et s’il n’y en a plus de la
couleur du dé, c’est au tour de l’enfant suivant.
• Le symbole d’une fleur :
Il y a de moins en moins de nectar pour Abella l’abeille. Prends n’importe quelle plaquette
de miel et mets-la de côté. La plaquette est donc sortie du jeu.
20
FRANÇAIS
ページが読み込まれています...
ページが読み込まれています...
ページが読み込まれています...
ページが読み込まれています...
ページが読み込まれています...
ページが読み込まれています...
ページが読み込まれています...
ページが読み込まれています...
-
 1
1
-
 2
2
-
 3
3
-
 4
4
-
 5
5
-
 6
6
-
 7
7
-
 8
8
-
 9
9
-
 10
10
-
 11
11
-
 12
12
-
 13
13
-
 14
14
-
 15
15
-
 16
16
-
 17
17
-
 18
18
-
 19
19
-
 20
20
-
 21
21
-
 22
22
-
 23
23
-
 24
24
-
 25
25
-
 26
26
-
 27
27
-
 28
28


他の言語で
- italiano: Haba 302199 Manuale del proprietario
- español: Haba 302199 El manual del propietario
- Deutsch: Haba 302199 Bedienungsanleitung
- français: Haba 302199 Le manuel du propriétaire
- English: Haba 302199 Owner's manual