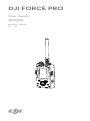
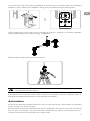
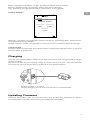
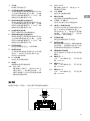
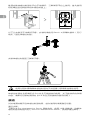
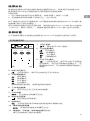
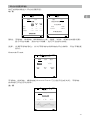
DJI Force Pro は、カメラの動きを制御するシステムです。ワイヤレスまたは有線でジンバルに接続することで、オペレーターはカメラの動きをリモートで制御し、複雑なショットを直感的に撮影できます。
最大3kmの制御距離を持つワイヤレス送信システムと、最大5時間の連続駆動が可能なバッテリーを搭載しています。
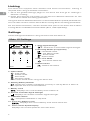
パン、チルト、ロールの各軸の速度を個別に調整でき、オペレーターはジンバルの動きを自分の好みに合わせてカスタマイズすることができます。また、フォローモード、フリーモード、FPVモードなど、さまざまなモードを搭載しており、撮影シーンに合わせて最適なモードを選択することができます。
DJI Force Proは、ビデオグラファーや映画制作者にとって、カメラの動きを正確に制御し、複雑なショットを撮影するのに最適なツールです。
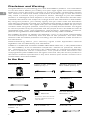
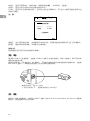
DJI Force Pro は、カメラの動きを制御するシステムです。ワイヤレスまたは有線でジンバルに接続することで、オペレーターはカメラの動きをリモートで制御し、複雑なショットを直感的に撮影できます。
最大3kmの制御距離を持つワイヤレス送信システムと、最大5時間の連続駆動が可能なバッテリーを搭載しています。
パン、チルト、ロールの各軸の速度を個別に調整でき、オペレーターはジンバルの動きを自分の好みに合わせてカスタマイズすることができます。また、フォローモード、フリーモード、FPVモードなど、さまざまなモードを搭載しており、撮影シーンに合わせて最適なモードを選択することができます。
DJI Force Proは、ビデオグラファーや映画制作者にとって、カメラの動きを正確に制御し、複雑なショットを撮影するのに最適なツールです。


-
 1
1
-
 2
2
-
 3
3
-
 4
4
-
 5
5
-
 6
6
-
 7
7
-
 8
8
-
 9
9
-
 10
10
-
 11
11
-
 12
12
-
 13
13
-
 14
14
-
 15
15
-
 16
16
-
 17
17
-
 18
18
-
 19
19
-
 20
20
-
 21
21
-
 22
22
-
 23
23
-
 24
24


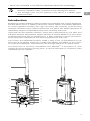
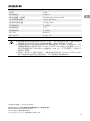
DJI Force Pro は、カメラの動きを制御するシステムです。ワイヤレスまたは有線でジンバルに接続することで、オペレーターはカメラの動きをリモートで制御し、複雑なショットを直感的に撮影できます。
最大3kmの制御距離を持つワイヤレス送信システムと、最大5時間の連続駆動が可能なバッテリーを搭載しています。
パン、チルト、ロールの各軸の速度を個別に調整でき、オペレーターはジンバルの動きを自分の好みに合わせてカスタマイズすることができます。また、フォローモード、フリーモード、FPVモードなど、さまざまなモードを搭載しており、撮影シーンに合わせて最適なモードを選択することができます。
DJI Force Proは、ビデオグラファーや映画制作者にとって、カメラの動きを正確に制御し、複雑なショットを撮影するのに最適なツールです。
他の言語で
- italiano: dji Force Pro Guida utente
- English: dji Force Pro User guide
関連論文
その他のドキュメント
-
Autel MaxiCOM MK808BT ユーザーガイド
-
Acer DA221HQL クイックスタートガイド
-
Insta360 GPS Smart Remote Controller ユーザーマニュアル
-
 Baseus BC02 取扱説明書
-
 Aidialink AL-100 UHF Handheld Reader ユーザーマニュアル
-
MOZA AirCross S Professional Camera Gimbal Stabilizer ユーザーマニュアル
-
FS GMR00 Mini 4-channel receiver ユーザーマニュアル
-
Radiomaster T8 PRO ユーザーマニュアル

