VOX Amplification AC15C2 取扱説明書

カテゴリー
楽器用アンプ
タイプ
取扱説明書
S JGFE
10
3
English ......................................................................................4
Français...................................................................................14
Deutsch ...................................................................................26
Español ...................................................................................36
.......................................................................................46
4
IMPORTANT SAFETY INSTRUCTIONS
Read these instructions.
Keep these instructions.
Heed all warnings.
Follow all instructions.
Do not use this apparatus near water.
Mains powered apparatus shall not be exposed to dripping
or splashing and that no objects filled with liquids, such as
vases, shall be placed on the apparatus.
Clean only with dry cloth.
Do not block any ventilation openings. Install in
accordance with the manufacturer’s instructions.
Do not install near any heat sources such as radiators,
heat registers, stoves, or other apparatus (including
amplifiers) that produce heat.
Do not defeat the safety purpose of the polarized or
grounding-type plug. A polarized plug has two blades with
one wider than the other. A grounding type plug has two
blades and a third grounding prong. The wide blade or the
third prong are provided for your safety. If the provided
plug does not fit into your outlet, consult an electrician for
replacement of the obsolete outlet. (for USA and Canada)
Protect the power cord from being walked on or pinched
particularly at plugs, convenience receptacles, and the
point where they exit from the apparatus.
Only use attachments/accessories specified by the
manufacturer.
Unplug this apparatus during lightning storms or when
unused for long periods of time.
Turning off the power switch does not completely isolate
this product from the power line so remove the plug from
the socket if not using it for extended periods of time.
Install this product near the wall socket and keep the
power plug easily accessible.
WARNING—This apparatus shall be connected to a mains
socket outlet with a protective earthing connection.
Refer all servicing to qualified service personnel. Servicing
is required when the apparatus has been damaged in any
way, such as power-supply cord or plug is damaged, liquid
has been spilled or objects have fallen into the apparatus,
the apparatus has been exposed to rain or moisture, does
not operate normally, or has been dropped.
Do not install this equipment on the far position from wall
outlet and/or convenience receptacle.
Do not install this equipment in a confined space such as a
box for the conveyance or similar unit.
Excessive sound pressure from earphones and
headphones can cause hearing loss.
Use only with the cart, stand, tripod, bracket, or table
specified by the manufacturer, or sold with the apparatus.
When a cart is used, use caution when moving the cart/
apparatus combination to avoid injury from tip-over.
This apparatus is for moderate climates areas use, not
suitable for use in tropical climates countries.
The ventilation should not be impeded by covering the
ventilation openings with items, such as newspapers,
table-cloths, curtains, etc.
No naked flame sources, such as lighted candles, should
be placed on the apparatus.
The lightning flash with arrowhead symbol
within an equilateral triangle, is intended to
alert the user to the presence of uninsulated
“dangerous voltage” within the product’s
enclosure that may be of sufficient magnitude
to constitute a risk of electric shock to persons.
The exclamation point within an equilateral tri-
angle is intended to alert the user to the pres-
ence of important operating and maintenance
(servicing) instructions in the literature accom-
panying the product.
* All product names and company names are the trademarks
or registered trademarks of their respective owners.
Notice regarding disposal (EU only)
When this “crossed-out wheeled bin” symbol is dis-
played on the product, owner’s manual, battery, or
battery package, it signifies that when you wish to dis-
pose of this product, manual, package or battery you
must do so in an approved manner. Do not discard
this product, manual, package or battery along with
ordinary household waste. Disposing in the correct
manner will prevent harm to human health and potential dam-
age to the environment. Since the correct method of disposal
will depend on the applicable laws and regulations in your
locality, please contact your local administrative body for
details. If the battery contains heavy metals in excess of the
regulated amount, a chemical symbol is displayed below the
“crossed-out wheeled bin” symbol on the battery or battery
package.
5
INTRODUCTION
Congratulations on your purchase of the VOX Custom Series Guitar Amplifier AC30C2X/AC30C2/
AC30C2-TV/AC15C1X/AC15C2/AC15C1/AC15C1-TV / VOX Custom Series Guitar Amplifier Head
AC30CH/AC15CH / Speaker cabinet V212C.
This amp is the culmination of over 50 years of manufacturing expertise and high quality, guitar ampli-
fier design. We have taken the best AC designs and added a number of useful features to give you
the most tonally flexible AC to date!
We’re confident you will find these improvements extremely useful and that your new amplifier will
give you many hours of tonal pleasure. Your AC30 is equipped with a number of modern features and
conveniences, a true bypass FX loop, master volume and Celestion AlNiCo Blue speakers
(AC30C2X/AC15C1X only), to name a few. Please read this manual carefully so that you can famil-
iarize yourself with them.
The AC15C1X/AC15C2/AC15C1/AC15C1-TV/AC15CH now features both NORMAL and TOP
BOOST channels, and has many common features with the AC30C2X/AC30C2/AC30C2-TV/
AC30CH.
All models are fitted with the Celestion G12M Greenback as standard.
The AC30CH/AC15CH gives you all the great AC tones in the convenience of a portable head format.
In addition to the standard AC30C2/AC15C1 specification, the heads also have a built in Reactive
Attenuator, giving you great tones at more ear friendly levels.
Please refer to the instructions of the AC30C2/AC15C1 in the Owner’s Manual about how to use
AC30C2-TV/AC15C1-TV.
6
AC30C2(X)/AC30CH FRONT PANEL LAYOUT
INPUTS
1. NORMAL jack
Plugging your guitar into this input will route your signal through the NORMAL
channel. Top jack for high Input, and bottom jack for low input.
2. TOP BOOST
jack Plugging your guitar into this input will route your signal through the TOP BOOST
channel. Top jack for high Input, and bottom jack for low input.
NORMAL
3. VOLUME
control
This determines the sensitivity of the preamp section in the NORMAL channel.
Depending on where this is set, you can either blend in more gain by turning it
clockwise or you can turn it anticlockwise for a cleaner sound. The NORMAL
volume can be used in conjunction with the MASTER volume which will allow you
to get the perfect balance between distortion and overall volume. I.e. if you keep
the NORMAL volume low and the MASTER volume high, you will get a clean
sound at a high volume. Conversely, if you keep the NORMAL volume high and
the MASTER volume low you will get more distortion at a lower overall volume.
NOTE!
Because of the nature of the design of this amplifier, it may take a few minutes
until the circuit becomes stable after the power is turned on. Some noise might
occur during this time but it soon disappears.
TOP BOOST
NOTE!
The tone controls on the TOP BOOST channel are very interactive, eg increasing
the level of the TREBLE control will cut the BASS level. It is best to begin with the
Tone controls at 12 o’clock and experiment to find your perfect tone.
4. VOLUME
control
This determines the sensitivity of the preamp section in the TOP BOOST channel. Depend-
ing on where this is set, you can either blend in more gain by turning it clockwise or you
can set it lower for a cleaner, “chimey” sound. The TOP BOOST Volume can be used in
conjunction with the MASTER volume which will allow you to get the perfect balance
between distortion and overall volume. I.e. If you keep the TOP BOOST volume low and
the MASTER volume high, you will get a clean sound at a high volume. Conversely, if you
keep the TOP BOOST volume high and the MASTER volume low you will get more distor-
tion at a lower overall volume.
NOTE!
Because of the nature of the design of this amplifier, it may take a few minutes
until the circuit becomes stable after the power is turned on. Some noise might
occur during this time but it soon disappears.
5. TREBLE
control
This controls the high frequencies in your sound—from soft and round when
turned down (counterclockwise) to bright and cutting when cranked (clockwise)
and all points in-between.
6. BASS
control
This controls the low frequencies in your sound—from thin and light when turned
12 4356
98
10
7
11 1312
14
7
down (counterclockwise) to warm and heavy when turned up full (clockwise) and
all points in-between.
REVERB
This section allows you to control the Reverb for both channels by adjusting the Tone and Level. You
can remotely switch the reverb On or Off with the Optional VFS2A Foot Switch.
7. TONE
control
This controls the high and low frequencies of the REVERB. You can make the
REVERB sound brighter by turning this control clockwise or you can make the
sound darker by turning it counterclockwise.
Experiment with this control to see which settings work best for you.
8. LEVEL
control
This controls the mix (amount) of REVERB in your sound. Turning this knob fully
clockwise will give you a wet, saturated sound while counterclockwise will give
you a drier sound.
TREMOLO
This section allows you to control the TREMOLO for both channels on this amplifier by adjusting the Speed
and Depth. You can remotely switch the TREMOLO on or off with the Optional VFS2A Foot Switch.
9. SPEED
control
As you might have guessed, this controls the SPEED of the built-in TREMOLO.
10. DEPTH
control
This controls the DEPTH (intensity) of the built-in TREMOLO.
What is TREMOLO?
Tremolo is a Vintage Guitar Amplifier effect that hails from the Brit invasion during the 60’s. Essentially it’s like having someone
sat next to your amplifier turning the master volume up and down! Having the Depth Control set to maximum will give a very
dramatic effect, making your guitar sounding very choppy, you can adjust how quickly the volume is turned up and down with
the speed control. Best thing to do is experiment to find your perfect sound.
MASTER
11. TONE CUT control
This circuit is placed in the power amp as opposed to the preamp section like the
TREBLE and BASS controls. What this does is the opposite of what you may
think. Turning it clockwise will decrease the higher frequencies and turning it
counterclockwise will add higher frequencies.
12. VOLUME
control
This controls the overall (MASTER) VOLUME of your amplifier. Cleaner sounds
can be achieved by lowering the NORMAL or TOP BOOST volumes and raising
the MASTER. Setting the MASTER lower and the NORMAL and TOP BOOST
volumes higher will give you a fatter, more distorted tone at a lower volume.
As with all the controls of this amplifier, please experiment with different configu-
rations to find the tones that fit your playing style.
POWER
13. STANDBY Switch
This switch allows the amplifier to attain the correct working temperature before
applying the H.T. supply. Before connecting the amplifier to the Mains supply,
ensure the Power and STANDBY switches are in the off position. Turn on the
POWER switch first and then wait 2–3 minutes before turning on the STANDBY
switch. Doing this each time you play helps prolong tube life.
The STANDBY switch is also very useful for playing live as it allows you to keep
the valves at a functional temperature between sets.
14. POWER Switch
This is the ON/OFF switch for the power to the amplifier. Please ensure the ampli-
fier is switched off and unplugged before being moved.
8
AC15C1(X)/AC15C2/AC15CH FRONT PANEL LAYOUT
POWER
1. POWER Switch
This is the ON/OFF switch for the power to the amplifier. Please ensure the ampli-
fier is switched off and unplugged before being moved.
2. STANDBY Switch
This switch allows the amplifier to attain the correct working temperature before
applying the H.T. supply. Before connecting the amplifier to the Mains supply,
ensure the Power and STANDBY switches are in the off position. Turn on the
POWER switch first and then wait 2–3 minutes before turning on the STANDBY
switch. Doing this each time you play helps prolong tube life. The STANDBY
switch is also very useful for playing live as it allows you to keep the valves at a
functional temperature between sets.
MASTER
3. VOLUME
control
This controls the overall (MASTER) VOLUME of your amplifier. Cleaner sounds
can be achieved by lowering the NORMAL or TOP BOOST volumes and raising
the MASTER. Setting the MASTER lower and the NORMAL and TOP BOOST
volumes higher will give you a fatter, more distorted tone at a lower volume.
As with all the controls of this amplifier, please experiment with different configu-
rations to find the tones that fit your playing style.
4. TONE CUT
control
This circuit is placed in the power amp as opposed to the preamp section like the
TREBLE and BASS controls. What this does is the opposite of what you may
think. Turning it clockwise will decrease the higher frequencies and turning it
counterclockwise will add higher frequencies.
TREMOLO
This section allows you to control the TREMOLO for both channels on this amplifier by adjusting the
Speed and Depth. You can remotely switch the TREMOLO on or off with the Optional VFS2A Foot
Switch.
5. DEPTH
control
This controls the DEPTH (intensity) of the built-in TREMOLO.
6. SPEED
control
As you might have guessed, this controls the SPEED of the built-in TREMOLO.
What is TREMOLO?
Tremolo is a Vintage Guitar Amplifier effect that hails from the Brit invasion during the 60’s. Essentially
it’s like having someone sat next to your amplifier turning the master volume up and down! Having
the Depth Control set to maximum will give a very dramatic effect, making your guitar sounding very
choppy, you can adjust how quickly the volume is turned up and down with the speed control. Best
thing to do is experiment to find your perfect sound.
12 3 4 5
87
9
6
10 11
12 13
9
REVERB
This section allows you to control the Reverb for both channels by adjusting the Level. You can
remotely switch the reverb On or Off with the Optional VFS2A Foot Switch.
7. LEVEL
control
This controls the mix (amount) of REVERB in your sound. Turning this knob fully
clockwise will give you a wet, saturated sound while counterclockwise will give
you a drier sound.
TOP BOOST
NOTE!
The tone controls on the TOP BOOST channel are very interactive, eg increasing
the level of the TREBLE control will cut the BASS level. It is best to begin with the
Tone controls at 12 o’clock and experiment to find your perfect tone.
8. BASS
control
This controls the low frequencies in your sound—from thin and light when turned
down (counterclockwise) to warm and heavy when turned up full (clockwise) and
all points in-between.
9. TREBLE
control
This controls the high frequencies in your sound—from soft and round when
turned down (counterclockwise) to bright and cutting when cranked (clockwise)
and all points in-between.
10. VOLUME
control
This determines the sensitivity of the preamp section in the TOP BOOST channel.
Depending on where this is set, you can either blend in more gain by turning it clock-
wise or you can set it lower for a cleaner, “chimey” sound. The TOP BOOST Volume
can be used in conjunction with the MASTER volume which will allow you to get the
perfect balance between distortion and overall volume. I.e. If you keep the TOP
BOOST volume low and the MASTER volume high, you will get a clean sound at a
high volume. Conversely, if you keep the TOP BOOST volume high and the MASTER
volume low you will get more distortion at a lower overall volume.
NOTE!
Because of the nature of the design of this amplifier, it may take a few minutes
until the circuit becomes stable after the power is turned on. Some noise might
occur during this time but it soon disappears.
NORMAL
11. VOLUME control
This determines the sensitivity of the preamp section in the NORMAL channel.
Depending on where this is set, you can either blend in more gain by turning it
clockwise or you can turn it anticlockwise for a cleaner sound. The NORMAL
volume can be used in conjunction with the MASTER volume which will allow you
to get the perfect balance between distortion and overall volume. I.e. if you keep
the NORMAL volume low and the MASTER volume high, you will get a clean
sound at a high volume. Conversely, if you keep the NORMAL volume high and
the MASTER volume low you will get more distortion at a lower overall volume.
NOTE!
Because of the nature of the design of this amplifier, it may take a few minutes
until the circuit becomes stable after the power is turned on. Some noise might
occur during this time but it soon disappears.
INPUTS
12. TOP BOOST
jack
Plugging your guitar into this input will route your signal through the TOP BOOST
channel.
13. NORMAL
jack
Plugging your guitar into this input will route your signal through the NORMAL
channel.
10
REAR PANEL LAYOUT
1. POWER OUTPUT Jacks
COMBOS
This is where you can hook up an extension or external speaker cabinet(s) if
desired.
EXTENSION SP:
This speaker jack runs parallel with the internal speakers which
are wired for 16 Ohms. The extension cabinet must be 16 Ohms.
EXTERNAL SP:
This speaker jack will mute (disconnect) the internal speakers and
you can hook up either a 16 Ohm or 8 Ohm cabinet. Be sure to set the Output
Select switch accordingly.
NOTE!
Hooking up a cabinet through the External jack will mute (disconnect) the internal
speakers!
HEAD
LOUDSPEAKER:
The two LOUDSPEAKER Jacks are connected in parallel.
You can connect one or two 16 Ohm cabinets. You can only connect one 8 ohm
cabinet.
Be sure to set the IMPEDANCE SELECT switch accordingly.
WARNING!
To ensure that your system works correctly, you must observe the following
points.
a) Don’t use an extension cabinet whose impedance is other than 16 Ohms.
b) Don’t connect a speaker whose rated input capacity is less than 30 watts (for
AC30C2(X)/AC30CH) or 15 watts (AC15C2/AC15C1(X)/AC15CH). The speaker
may be destroyed if you ignore this caution—not recommended!
c) You must use a speaker cable to connect an external speaker. Don’t use a
shielded cable like the one you use to connect a guitar to an amp.
d) You must turn off the power before connecting the cable. Connecting the cable
while the power is turned on may damage your amp.
NOTE!
It is recommended that all audio cables, with the exception of the speaker lead,
used to connect to the AC30C2(X)/AC15C2/AC15C1(X)/AC30CH of a high qual-
ity, screened type.
These should not exceed 10 metres in length. Always use a non-screened
speaker lead with the AC30C2(X)/AC15C2/AC15C1(X)/AC15CH Amplifier and
extension cabinets.
2. IMPEDANCE Select switch
16 OHMS:
COMBOS
Combos allow for the following configurations:
1) Set it to this if you use the internal speakers only.
2) Set it to this if you connect an external 16 Ohm speaker cabinet through the
External jack.
HEAD
1) Set it to this if you connect an external 16 Ohm speaker cabinet through the
LOUDSPEAKER jack.
8 OHMS:
COMBOS
Combos allow for the following configurations:
(AC30C2(X)/AC30CH)
412 3 5
11
1) Set it to this if you connect an extension cabinet through the Extension jack.
You’ll be running the internal and external speakers in parallel. The impedance of
the extension cabinet must be 16 Ohms.
2) Set it to this if you connect an external 8 Ohm speaker cabinet through the
External jack.
HEAD
1) Set it to this if you connect two external 16 Ohm speaker cabinets.
2) Set it to this if you connect an external 8 Ohm speaker cabinet through the
LOUDSPEAKER jack.
3. EFFECTS LOOP jack
(AC30C2(X)/AC30CH)
The EFFECTS LOOP allows effects to be added further down the signal chain,
rather than just plugging them in line with your guitar and amplifier. By using the
Effects loop with Delay stomp boxes, for example, will prevent any strange distor-
tions to the time delayed repetitions.
Please note that the EFFECTS LOOP sends at -10dB meaning it is suitable for
stomp boxes.
BYPASS ON/OFF:
This is a true bypass effects loop which means if this is set in the
“BYPASS” position, absolutely none of your original signal will be running through
until it’s switched “ON”.
RETURN:
Think of this as the “input” of the effects loop and will be connected to
the output of your effect(s).
NOTE!
Be sure to use shielded guitar cables only! NEVER use unshielded speaker cables.
SEND:
Think of this as the “output” of the FX loop and will be connected to the
input of your effect(s).
4. FOOT SWITCH jack
This is where you connect the Optional VFS2A Foot Switch so you can turn the
REVERB and TREMOLO on and off.
5. MAINS INPUT connector
This is where the supplied, detachable Mains (power) cord is connected. The specific
mains input voltage rating that your amplifier needs to run at is located on the rear panel
of your amplifier. Before making any connections or powering up the amplifier, make sure
the correct voltage is set. If you have any doubt, refer to your local VOX dealer.
6. Attenuator
(AC30CH/AC15CH)
The AC30CH/AC15CH has a built in Reactive Attenuator. This enables you to keep the
great sounds of a driven AC30CH/AC15CH at more ear friendly volumes.
AC30CH
There are 3 settings, 30W (BYPASS), 3W (-10dB Attenuation) and 1/3W (-20dB Attenuation).
AC15CH
There are 3 settings, 15W (Bypass), 1.5W (-10dB Attenuation) and 1/6W (-20dB Attenuation).
NOTE!
When the IMPEDANCE Switch is set to 8Ohms the attenuator does not work.
What is a Reactive Attenuator?
Our Reactive Attenuator design allows for a truer tone even at attenuated output volumes. This is
achieved by using our proprietary Reactor technology to allow the speaker and the amplifier interact
with one another, even with a resistive load (the attenuator) in line. This means the amplifier and
speaker behave the same way as a non-attenuated amplifier, with resonant peaks and troughs. What
this simply means to you is great tone, without the volume.
12
SPECIFICATION
*Specifications and appearance are subject to change without notice for improvement.
AC30C2X AC30C2/AC30C2-TV
Dimensions
(W x D x H)
702 x 265 x 556 mm / 27.64 x 10.43 x
21.89 inches
AC30C2: 702 x 265 x 556 mm / 27.64 x 10.43 x 21.89 inches
AC30C2-TV: 703 x 263 x 562 mm / 27.68 x 10.35 x 22.13 inches
Weight 33.4 kg / 73.59 lbs. AC30C2: 32.2 kg / 70.99 lbs. AC30C2-TV: 31.0 kg / 68.34 lbs.
Output Power 30 Watts RMS into 16 Ohms 30 Watts RMS into 16 Ohms
Speaker 2 x 12" 8 ohm Celestion Alnico Blue 2 x 12" 8 ohm Celestion G12M Greenback
Inputs Normal input jack (high and low), Top
Boost input jack (high and low), FX
RETURN jack, Footswitch jack
Normal input jack (high and low), Top Boost input jack (high and
low), FX RETURN jack, Footswitch jack
Outputs External loudspeaker jack, Extension
loudspeaker jack, FX SEND jack
External loudspeaker jack, Extension loudspeaker jack, FX SEND
jack
Options VFS2A Footswitch VFS2A Footswitch
AC15C1X AC15C2 AC15C1/AC15C1-TV
Dimensions
(W x D x H)
602 x 265 x 456 mm / 23.70 x
10.43 x 17.95 inches
702 x 265 x 556 mm / 27.64 x
10.43 x 21.89 inches
AC15C1: 602 x 265 x 456 mm / 23.70 x
10.43 x 17.95 inches
AC15C1-TV: 605 x 263 x 468 mm / 23.82 x
10.35 x 18.43 inches
Weight 22.6 kg / 49.82 lbs. 30.2 kg / 66.58 lbs. AC15C1:22 kg / 48.50 lbs.
AC15C1-TV:21.3 kg / 46.96 lbs.
Output Power: 15 Watts RMS into 16 Ohms 15 Watts RMS into 16 Ohms 15 Watts RMS into 16 Ohms
Speaker 1 x 12" 15 ohm Celestion
Alnico Blue
2 x 12" 8 ohm Celestion G12M
Greenback
1 x 12" 16 ohm Celestion G12M Green-
back
Inputs Normal input jack, Top Boost
input jack, Footswitch jack
Normal input jack, Top Boost
input jack, Footswitch jack
Normal input jack, Top Boost input jack,
Footswitch jack
Outputs External loudspeaker jack,
Extension loudspeaker jack
External loudspeaker jack,
Extension loudspeaker jack
External loudspeaker jack, Extension loud-
speaker jack
Options VFS2A Footswitch VFS2A Footswitch VFS2A Footswitch
AC30CH AC15CH V212C
Dimensions
(W x D x H)
705 x 266 x 284 mm / 27.76 x
10.47x 11.18 inches
610 x 266 x 284 mm / 24.02 x
10.47 x 11.18 inches
705 x 268 x 571 mm / 27.76 x 10.55 x
22.48 inches
Weight 18.8 kg / 41.45 lbs. 15.3 kg / 33.73 lbs. 22.5 kg / 49.60 lbs.
Output Power 30 Watts RMS into 16 Ohms 15 Watts RMS into 16 Ohms ------------
Speaker ------------- ------------
2 x 12" 8 ohm Celestion G12M Greenback
Inputs Normal input jack (high and
low), Top Boost input jack
(high and low), FX RETURN
jack, Footswitch jack
Normal input jack, Top Boost
input jack, Footswitch jack
LOUDSPEAKER Input jack
Outputs 2x LOUDSPEAKER jack, FX
SEND jack
2x LOUDSPEAKER jack --------------
Options VFS2A Footswitch VFS2A Footswitch
13
14
INFORMATIONS IMPORTANTES DE SECURITE
Lisez attentivement ces instructions.
Veuillez conserver ces instructions.
Observez tous les avertissements.
Suivez toutes les consignes à la lettre.
N’utilisez jamais cet appareil dans un endroit humide ni à
proximité d’eau.
L’appareil alimenté par courant électrique ne peut pas être
exposé à des éclaboussures; évite en outre de placer des
récipients contenant des liquides, comme un vase (ou un
verre de bière), sur l’appareil.
Nettoyez uniquement l’appareil avec un chiffon doux et sec.
Ne bloquez jamais les orifices de ventilation de l’appareil et
installez-le toujours conformément aux instructions du
fabricant.
N’installez jamais l’appareil à proximité d’une source de
chaleur, telle que des radiateurs, poêles ou tout autre
dispositif (y compris des amplificateurs) générant de la
chaleur.
N’essayez jamais de contourner le dispositif de sécurité d’une
prise de type polarisée ou d’une prise de terre. Une prise dite
polarisée dispose de deux broches, dont l’une est plus large
que l’autre. Une prise de terre comporte trois broches, dont
une de mise à la terre. Cette broche plus large ou broche de
mise à la terre vise à assurer votre sécurité. Si la fiche du
cordon d’alimentation ne correspond pas au type de prise de
courant de votre région, faites remplacer la prise obsolète par
un électricien qualifié (pour les Etats-Unis et le Canada).
Placez toujours le cordon d’alimentation de sorte qu’on ne
risque pas de marcher dessus ni de le pincer. Cette
précaution vise tout spécialement la fiche du cordon et sa
sortie de l’appareil.
Utilisez exclusivement les fixations/accessoires préconisés
par le fabricant.
S’il y a risque d’orage ou que vous ne comptez pas utiliser
l’appareil pendant une période prolongée, débranchez-le du
secteur.
La mise sur OFF de l’interrupteur d’alimentation n’isole pas
totalement ce produit de la ligne secteur; aussi, retirez la fiche
de la prise s’il doit rester inutilisé pendant une période
prolongée.
Installez ce produit près de la prise électrique murale et
gardez un accès facile à la prise électrique et au cordon
d’alimentation.
ATTENTION: Cet appareil doit absolument être connecté à
une prise électrique reliée à la terre.
Confiez tout travail de réparation uniquement à un S.A.V.
qualifié. Faites appel au S.A.V. si l’appareil a subi tout
endommagement, comme par exemple si sa fiche secteur ou
son cordon d’alimentation sont endommagés, si de l’eau ou
des objets ont pénétré à l’intérieur de l’appareil, si celui-ci a
été exposé à la pluie ou à la moisissure, s’il est tombé ou
présente tout signe de dysfonctionnement.
N’utilisez jamais d’allonge trop longue avec cet appareil et ne
l’alimentez jamais via les prises secteur équipant d’autres
dispositifs.
N’installez jamais cet appareil dans un endroit confiné comme
une caisse de transport ou tout autre récipient similaire.
Des niveaux d’écoute trop importants lors de l’utilisation d’un
casque ou d’écouteurs peuvent entraîner des pertes
d’audition.
Utilisez l’appareil uniquement avec le chariot, stand, trépied,
fixation ou table spécifiés par le fabricant ou fourni avec
l’appareil. Si vous avez placé l’appareil sur un chariot, soyez
très prudent quand vous déplacez le chariot, afin d’éviter une
chute et des blessures.
Cet instrument est conçu pour être utilisé dans des régions au
climat tempéré et ne convient pas pour les pays au climat
tropical.
Veillez à ne jamais bloquer les orifices de ventilation en les
couvrant d’objets tels que des journaux, nappes, rideaux, etc.
Ne placez aucune source de flamme nue, telle qu’une bougie
allumée, sur l’instrument.
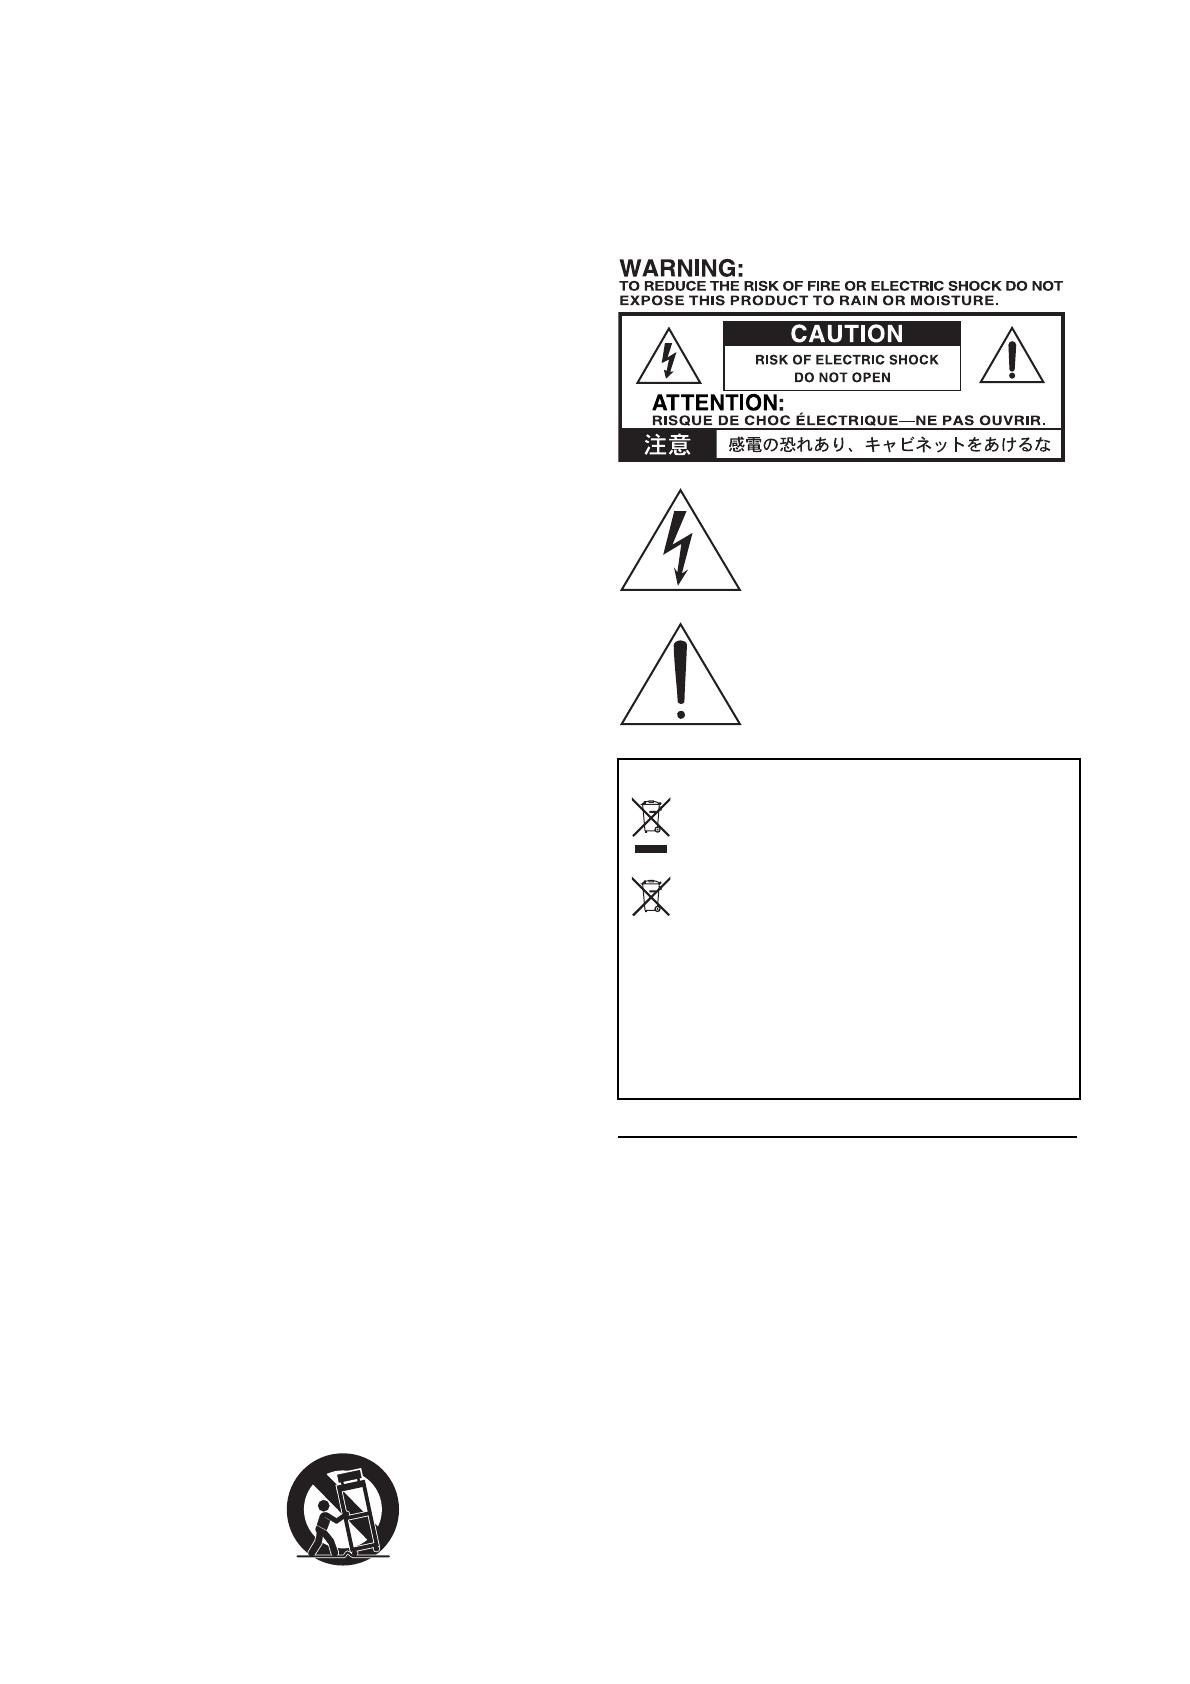
L’éclair dans le triangle est un symbole destiné à
attirer l’attention de l’utilisateur sur la présence de
parties non isolées et de “tension dangereuse” à
l’intérieur de l’appareil, qui posent des risques
d’électrocution pour l’utilisateur.
Le point d’exclamation dans un triangle est un
symbole destiné à attirer l’attention de
l’utilisateur sur des sections de ce manuel
contenant des informations importantes, liées
à l’utilisation et à l’entretien de ce produit.
* Tous les noms de produits et de sociétés sont des marques
commerciales ou déposées de leur détenteur respectif.
Note concernant les dispositions (Seulement EU)
Quand un symbole avec une poubelle barrée d’une
croix apparait sur le produit, le mode d’emploi, les
piles ou le pack de piles, cela signifie que ce produit,
manuel ou piles doit être déposé chez un
représentant compétent, et non pas dans une
poubelle ou toute autre déchetterie conventionnelle.
Disposer de cette manière, de prévenir les dommages
pour la santé humaine et les dommages potentiels pour
l'environnement. La bonne méthode d'élimination dépendra
des lois et règlements applicables dans votre localité, s’il vous
plaît, contactez votre organisme administratif pour plus de
détails. Si la pile contient des métaux lourds au-delà du seuil
réglementé, un symbole chimique est affiché en dessous du
symbole de la poubelle barrée d’une croix sur la pile ou le
pack de piles.
15
INTRODUCTION
Félicitations pour votre achat de l'amplificateur de guitare VOX Custom Series AC30C2X/AC30C2/
AC30C2-TV/AC15C1X/AC15C2/AC15C1/AC15C1-TV / de la tête d'ampli de guitare VOX Custom
Series AC30CH/AC15CH / du baffle V212C.
Cet ampli est l'aboutissement de plus de 50 ans d'expertise dans la conception et la fabrication
d'amplis guitare de haute qualité. Nous avons pris les meilleurs modèles AC et leur avons ajouté un
certain nombre de caractéristiques utiles pour vous offrir l'AC ayant la plus grande polyvalence
sonore à ce jour !
Nous sommes sûrs que vous trouverez ces améliorations extrêmement utiles et que votre nouvel
amplificateur vous apportera de nombreuses heures de plaisir sonore. Votre AC30 est équipé d'un
grand nombre de caractéristiques modernes et pratiques comme une véritable boucle d'effets
bypass, un volume général et des hauts-parleurs Celestion Blue Alnico (sur l'AC30C2X/AC15C1X
uniquement), pour n'en citer que quelques unes. Veuillez lire attentivement ce mode d'emploi pour
vous familiariser avec elles.
L'AC15C1X/AC15C2/AC15C1/AC15C1-TV/AC15CH possède maintenant un canal NORMAL et un
canal TOP BOOST, et partage de nombreuses caractéristiques avec l'AC30C2X/AC30C2/AC30C2-
TV/AC30CH.
Tous les modèles sont équipés du Celestion G12M Greenback.
L'AC30CH/AC15CH vous propose le formidable éventail de sons AC dans une tête de format por-
table et pratique. Outre leur conformité aux spécifications standard AC30C2/AC15C1, les têtes intè-
grent un atténuateur réactif, pour des sons croustillants même à bas volume - un must pour vos
tympans.
Veuillez vous reporter aux instructions de l’AC30C2/AC15C1 dans le manuel de l’utilisateur concer-
nant l’utilisation de l’AC30C2-TV/AC15C1-TV.
16
AGENCEMENT DE LA FACE AVANT DE L'AC30C2(X)/AC30CH
INPUTS (ENTRÉES)
1. Prise NORMAL
Brancher votre guitare à cette entrée fera passer votre signal au travers du canal
NORMAL. Prise jack du haut pour une entrée de haut niveau, et prise jack du bas
pour une entrée de bas niveau.
2. Prise TOP BOOST
Brancher votre guitare à cette entrée fera passer votre signal au travers du canal
TOP BOOST. Prise jack du haut pour une entrée de haut niveau, et prise jack du
bas pour une entrée de bas niveau.
NORMAL
3. Commande VOLUME
Détermine la sensibilité de la section préampli du canal NORMAL. Avec ce réglage, vous
pouvez soit ajouter plus de gain en tournant le bouton dans le sens horaire soit obtenir un
son plus clair en le tournant en sens inverse. Le volume NORMAL peut être employé en
conjonction avec le volume MASTER, ce qui vous permet d'obtenir la balance parfaite
entre distorsion et volume général. C'est-à-dire que si vous réglez le volume NORMAL bas
et le volume MASTER haut, vous obtiendrez un son clair à fort volume. À l'opposé, si vous
réglez le volume NORMAL haut et le volume MASTER bas, vous obtiendrez plus de dis-
torsion à un volume général plus bas.
NOTE !
De par la nature de son design, le circuit a besoin de quelques minutes pour se
stabiliser une fois l’ ampli mis en sous tension. Il se peut que vous entendiez des
bruits au cours de ce laps de temps, mais ils disparaitront tres rapidement.
TOP BOOST
NOTE !
Les commandes de tonalité du canal TOP BOOST sont très interactives, ainsi par
exemple augmenter le niveau des aigus avec la commande TREBLE réduira le
niveau des graves (BASS). Il vaut mieux commencer avec les commandes de
tonalité en position 12 heures et expérimenter pour trouver votre son parfait.
4. Commande VOLUME
Détermine la sensibilité de la section préampli du canal TOP BOOST. Avec ce
réglage, vous pouvez soit ajouter plus de gain en tournant le bouton dans le sens
horaire soit le tourner en sens inverse pour un son "carillonnant" plus clair. Le
volume TOP BOOST peut être employé en conjonction avec le volume MASTER,
ce qui vous permet d'obtenir la balance parfaite entre distorsion et volume géné-
ral. C'est-à-dire que si vous réglez le volume TOP BOOST bas et le volume MAS-
TER haut, vous obtiendrez un son clair à fort volume. À l'opposé, si vous réglez
le volume TOP BOOST haut et le volume MASTER bas, vous obtiendrez plus de
distorsion à un volume général plus bas.
NOTE !
De par la nature de son design, le circuit a besoin de quelques minutes pour se
stabiliser une fois l’ ampli mis en sous tension. Il se peut que vous entendiez des
bruits au cours de ce laps de temps, mais ils disparaitront tres rapidement.
12 4356
98
10
7
11 1312
14
17
5. Commande TREBLE
Contrôle les hautes fréquences de votre son—d'un son doux et rond en position
basse (sens anti-horaire) à un son brillant et tranchant avec un réglage poussé à
fond (sens horaire) en passant par tous les intermédiaires.
6. Commande BASS
Contrôle les basses fréquences de votre son—d'un son ténu et léger en position
basse (sens anti-horaire) à un son chaud et lourd avec un réglage à fond (sens
horaire) en passant par tous les intermédiaires.
REVERB
Cette section vous permet de contrôler la Reverb pour les deux canaux en réglant les commandes
Tone (tonalité) et Level (niveau). Vous pouvez activer/désactiver la reverb au pied avec le pédalier
optionnel VFS2A.
7. Commande TONE
Contrôle les hautes et basses fréquences de la REVERB. Vous pouvez rendre
plus brillant le son de la REVERB en tournant cette commande dans le sens
horaire ou plus feutré par une rotation anti-horaire.
Faites des essais avec cette commande pour trouver les réglages qui vous con-
viennent le mieux.
8. Commande LEVEL
Contrôle le mixage (la quantité) de REVERB dans votre son. Tourner cette com-
mande à fond dans le sens horaire vous donne un son saturé d'effet tandis qu'en
sens anti-horaire, vous obtenez un son plus sec (moins d'effet).
TREMOLO
Cette section vous permet de contrôler le TREMOLO pour les deux canaux de l'amplificateur en
réglant les commandes Speed (vitesse) et Depth (profondeur). Vous pouvez activer/désactiver le
TREMOLO au pied avec le pédalier optionnel VFS2A.
9. Commande SPEED
Comme vous pouvez vous en douter, c'est la commande de vitesse du TRE-
MOLO intégré.
10. Commande DEPTH
Contrôle la profondeur (intensité) du TREMOLO intégré.
Qu'est-ce que le TREMOLO ?
Le Tremolo est un effet d'ampli guitare vintage qui vient de la déferlante britannique des années 60.
Essentiellement, cela revient à avoir quelqu'un assis près de votre ampli et chargé de constamment
monter et baisser le volume master volume ! Avec la commande Depth au maximum, cela donne un
effet très spectaculaire, qui fait sonner votre guitare de façon très hachée, la vitesse à laquelle le
volume monte et descend se réglant avec la commande Speed. La meilleure chose à faire est de
l'essayer pour trouver votre son idéal.
MASTER
11. Commande TONE CUT
Ce circuit est placé dans l'ampli de puissance contrairement aux commandes
TREBLE et BASS de la section préampli. Il fonctionne à l'inverse de ce que vous
pourriez imaginer. Tourner la commande dans le sens horaire réduit les plus
hautes fréquences et la tourner dans le sens anti-horaire rajoute les plus hautes
fréquences.
12. Commande VOLUME
Contrôle le VOLUME général (MASTER) de votre amplificateur. Les sons clairs
peuvent être obtenus en baissant les volumes NORMAL ou TOP BOOST et en
18
montant le volume MASTER. Un réglage bas du volume MASTER et un réglage
haut des volumes NORMAL et TOP BOOST vous donneront un son plus gros,
avec plus de distorsion, même à bas volume.
Comme avec toutes les commandes de cet amplificateur, veuillez essayer différ-
entes configurations pour trouver les sons qui conviennent à votre style de jeu.
POWER
13. Commutateur
STANDBY
Ce commutateur permet à l'amplificateur d'atteindre la température de fonction-
nement correcte avant de lui appliquer l'alimentation H.T. Avant de brancher
l'amplificateur à la prise secteur, assurez-vous que les commutateurs POWER et
STANDBY sont relevés (position off). Activez d'abord le commutateur POWER et
attendez 2–3 minutes avant d'activer le commutateur STANDBY. Faire cela
chaque fois que vous jouez prolonge l'espérance de vie des lampes.
Le commutateur STANDBY est aussi très utile sur scène car il vous permet de
conserver les lampes à température fonctionnelle entre vos différents passages.
14. Commutateur
POWER
C'est l'interrupteur On/Off de l'alimentation électrique de l'amplificateur. Vérifiez
que l'amplificateur est bien éteint et débranché avant de le déplacer.
19
AGENCEMENT DE LA FACE AVANT DE L'AC15C2/AC15C1(X)/AC15CH
POWER
1. Commutateur
POWER
C'est l'interrupteur On/Off de l'alimentation électrique de l'amplificateur. Vérifiez
que l'amplificateur est bien éteint et débranché avant de le déplacer
2. Commutateur
STANDBY
Ce commutateur permet à l'amplificateur d'atteindre la température de fonction-
nement correcte avant de lui appliquer l'alimentation H.T. Avant de brancher
l'amplificateur à la prise secteur, assurez-vous que les commutateurs POWER et
STANDBY sont relevés (position off). Activez d'abord le commutateur POWER et
attendez 2–3 minutes avant d'activer le commutateur STANDBY. Faire cela
chaque fois que vous jouez prolonge l'espérance de vie des lampes. Le commu-
tateur STANDBY est aussi très utile sur scène car il vous permet de conserver les
lampes à température fonctionnelle entre vos différents passages.
MASTER
3. Commande VOLUME
Contrôle le VOLUME général (MASTER) de votre amplificateur. Les sons clairs
peuvent être obtenus en baissant les volumes NORMAL ou TOP BOOST et en
montant le volume MASTER. Un réglage bas du volume MASTER et un réglage
haut des volumes NORMAL et TOP BOOST vous donneront un son plus gros,
avec plus de distorsion, même à bas volume.
Comme avec toutes les commandes de cet amplificateur, veuillez essayer diffé-
rentes configurations pour trouver les sons qui conviennent à votre style de jeu.
4. Commande TONE CUT
Ce circuit est placé dans l'ampli de puissance contrairement aux commandes
TREBLE et BASS de la section préampli. Il fonctionne à l'inverse de ce que vous
pourriez imaginer. Tourner la commande dans le sens horaire réduit les plus hautes
fréquences et la tourner dans le sens anti-horaire rajoute les plus hautes fréquences.
TREMOLO
Cette section vous permet de contrôler le TREMOLO pour les deux canaux de l'amplificateur en
réglant les commandes Speed (vitesse) et Depth (profondeur). Vous pouvez activer/désactiver le
TREMOLO au pied avec le pédalier optionnel VFS2A.
5. Commande DEPTH
Contrôle la profondeur (intensité) du TREMOLO intégré.
12 3 4 5
87
9
6
10 11
12 13
20
6. Commande SPEED
Comme vous pouvez vous en douter, c'est la commande de vitesse du TRE-
MOLO intégré.
Qu'est-ce que le TREMOLO ?
Le Tremolo est un effet d'ampli guitare vintage qui vient de la déferlante britannique des années 60.
Essentiellement, cela revient à avoir quelqu'un assis près de votre ampli et chargé de constamment
monter et baisser le volume master volume ! Avec la commande Depth au maximum, cela donne un
effet très spectaculaire, qui fait sonner votre guitare de façon très hachée, la vitesse à laquelle le
volume monte et descend se réglant avec la commande Speed. La meilleure chose à faire est de
l'essayer pour trouver votre son idéal.
REVERB
Cette section vous permet de contrôler la Reverb pour les deux canaux en réglant la commande
Level (niveau). Vous pouvez activer/désactiver la reverb au pied avec le pédalier optionnel VFS2A.
7. Commande LEVEL
Contrôle le mixage (la quantité) de REVERB dans votre son. Tourner cette com-
mande à fond dans le sens horaire vous donne un son saturé d'effet tandis qu'en
sens anti-horaire, vous obtenez un son plus sec (moins d'effet).
TOP BOOST
NOTE !
Les commandes de tonalité du canal TOP BOOST sont très interactives, ainsi par
exemple augmenter le niveau des aigus avec la commande TREBLE réduira le
niveau des graves (BASS). Il vaut mieux commencer avec les commandes de
tonalité en position 12 heures et expérimenter pour trouver votre son parfait.
8. Commande BASS
Contrôle les basses fréquences de votre son—d'un son ténu et léger en position
basse (sens anti-horaire) à un son chaud et lourd avec un réglage à fond (sens
horaire) en passant par tous les intermédiaires.
9. Commande TREBLE
Contrôle les hautes fréquences de votre son—d'un son doux et rond en position
basse (sens anti-horaire) à un son brillant et tranchant avec un réglage poussé à
fond (sens horaire) en passant par tous les intermédiaires.
10. Commande VOLUME
Détermine la sensibilité de la section préampli du canal TOP BOOST. Avec ce
réglage, vous pouvez soit ajouter plus de gain en tournant le bouton dans le sens
horaire soit le tourner en sens inverse pour un son "carillonnant" plus clair. Le
volume TOP BOOST peut être employé en conjonction avec le volume MASTER,
ce qui vous permet d'obtenir la balance parfaite entre distorsion et volume géné-
ral. C'est-à-dire qu’avec un réglage bas du volume TOP BOOST et un réglage
haut du volume MASTER, vous obtiendrez un son clair à fort volume. À l'opposé,
avec un réglage haut du volume TOP BOOST et un réglage bas du volume MAS-
TER, vous obtiendrez plus de distorsion à un volume général plus bas.
NOTE !
De par la nature de son design, le circuit a besoin de quelques minutes pour se
stabiliser une fois l’ ampli mis en sous tension. Il se peut que vous entendiez des
bruits au cours de ce laps de temps, mais ils disparaitront tres rapidement.
NORMAL
11. Commande VOLUME
Détermine la sensibilité de la section préampli du canal NORMAL. Avec ce réglage,
vous pouvez soit ajouter plus de gain en tournant le bouton dans le sens horaire soit
obtenir un son plus clair en le tournant en sens inverse. Le volume NORMAL peut
être employé en conjonction avec le volume MASTER, ce qui vous permet d'obtenir
la balance parfaite entre distorsion et volume général. C'est-à-dire que si vous
  • Page 1 1
  • Page 2 2
  • Page 3 3
  • Page 4 4
  • Page 5 5
  • Page 6 6
  • Page 7 7
  • Page 8 8
  • Page 9 9
  • Page 10 10
  • Page 11 11
  • Page 12 12
  • Page 13 13
  • Page 14 14
  • Page 15 15
  • Page 16 16
  • Page 17 17
  • Page 18 18
  • Page 19 19
  • Page 20 20
  • Page 21 21
  • Page 22 22
  • Page 23 23
  • Page 24 24
  • Page 25 25
  • Page 26 26
  • Page 27 27
  • Page 28 28
  • Page 29 29
  • Page 30 30
  • Page 31 31
  • Page 32 32
  • Page 33 33
  • Page 34 34
  • Page 35 35
  • Page 36 36
  • Page 37 37
  • Page 38 38
  • Page 39 39
  • Page 40 40
  • Page 41 41
  • Page 42 42
  • Page 43 43
  • Page 44 44
  • Page 45 45
  • Page 46 46
  • Page 47 47
  • Page 48 48
  • Page 49 49
  • Page 50 50
  • Page 51 51
  • Page 52 52
  • Page 53 53
  • Page 54 54
  • Page 55 55
  • Page 56 56

VOX Amplification AC15C2 取扱説明書

カテゴリー
楽器用アンプ
タイプ
取扱説明書