English
English
1312
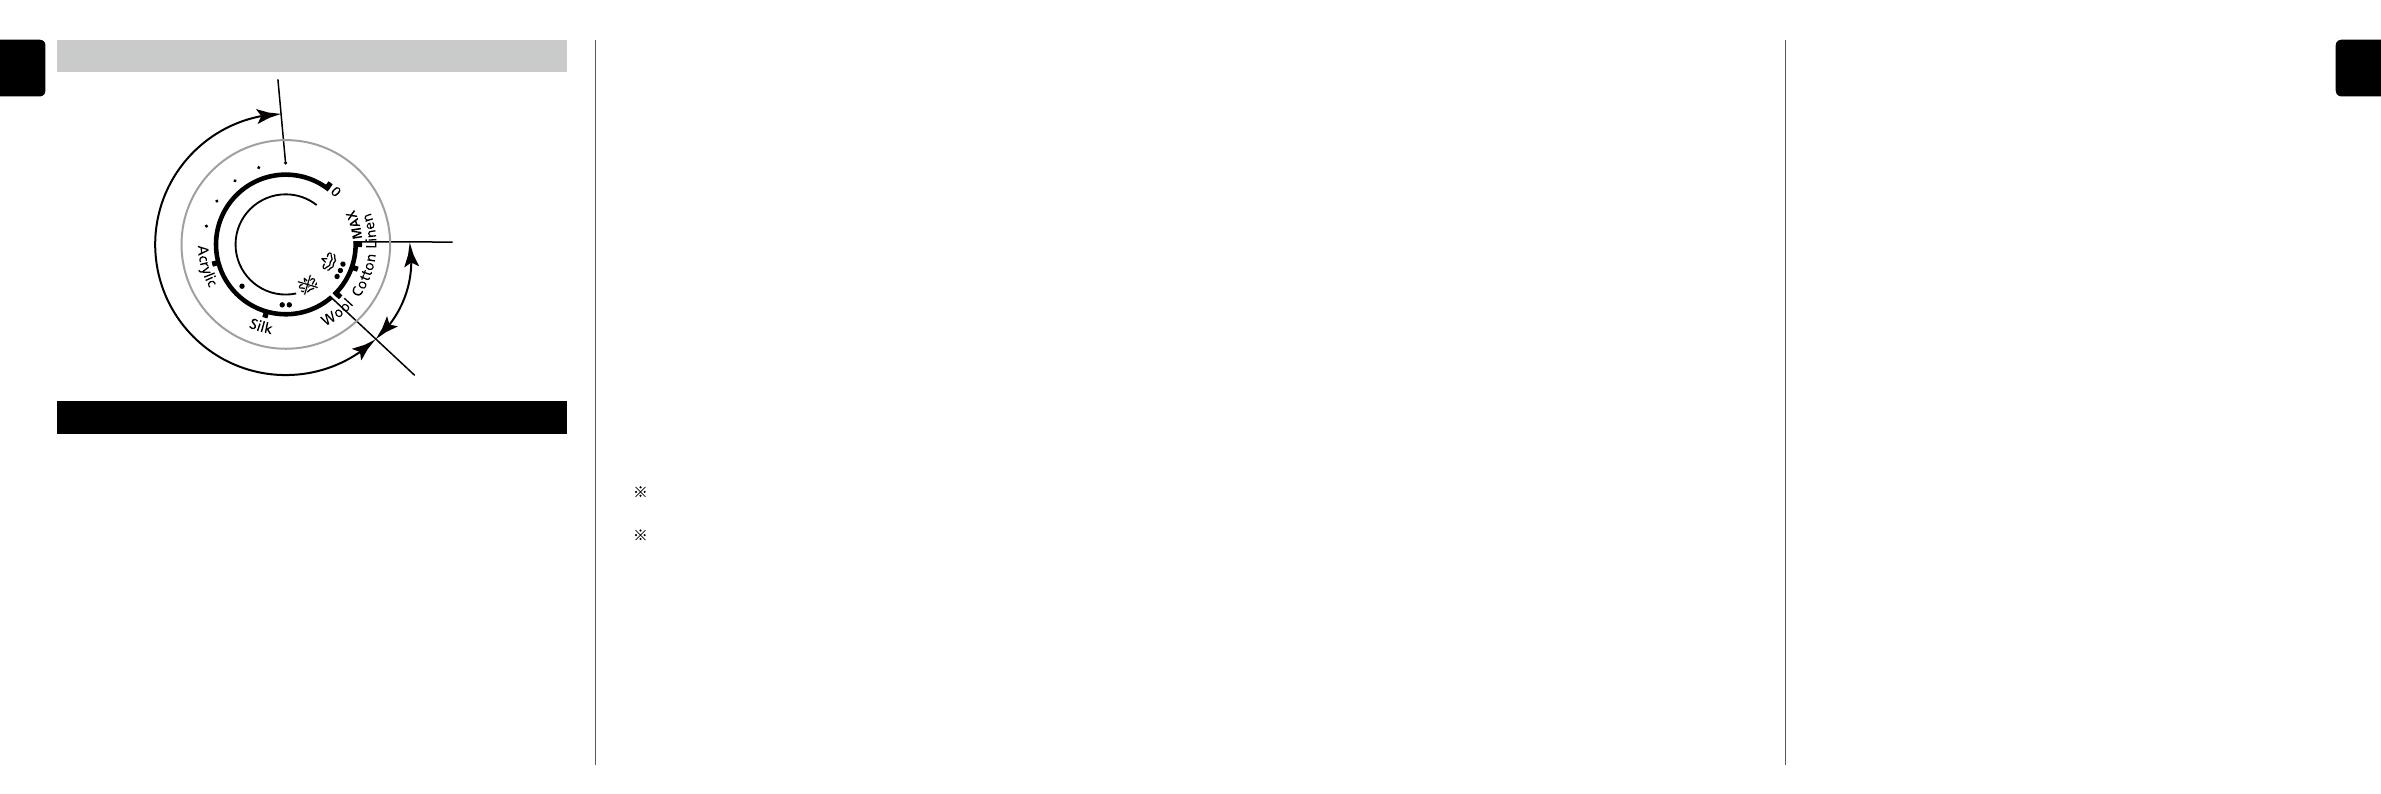
Temperature selector (for NI-GT200 only)
Dry ironing
area
Max steam
level position
Steam area
Operating instructions for each part
Be sure to disconnect the power plug from the power outlet
before filling the water tank with water. Do not take out the
water tank while you are using the product.
• Water inlet
Hold the water tank handle, press the water tank latch upward,
take out the water tank, and add water through the water inlet.
Make sure that the “MAX” water level mark on the water tank
is not exceeded.
• Level adjustment button (for NI-GT500 only)
Press the button to set the level according to materials
of clothes (See the section “Fabric and ironing
recommendations”).
• Temperature selector (for NI-GT200 only)
Select an appropriate temperature level according to
materials of clothes (See the section “Fabric and ironing
recommendations”).
• Power button
Press the power button. The product will start working. At this
time, the power indicator turns on in red.
To power off the product, press and hold the power
button for about three seconds to disconnect the power
supply.
• Steam switching button
This product can switch between the enhanced steam level
and the eco steam level through the steam switching button.
Please select an appropriate steam level according to the
thickness of clothes.
Eco steam level: suitable for light clothes that need a little
steam.
Enhanced steam level: suitable for heavy clothes that need
much steam.
The product starts with the eco steam level by default. Press
the steam switching button to switch to your desired level.
It takes about 3 minutes for the eco steam level indicator or
enhanced steam level indicator to become steady on from
flashing in the process from the start to the completion of
preheating of the power base.
• Level indicator (for NI-GT500 only)
When the iron starts heating, the level indicator starts flashing.
After the iron finishes heating, the level indicator becomes
steady on. During ironing, the level indicator is always on.
The quick care indicator turns on in red and the optimal care
indicator turns on in blue.
• Thermostat indicator (for NI-GT200 only)
When the temperature selector is set to the steam-out range,
the thermostat indicator will turn on when the iron starts
heating and will turn off when the iron finishes heating. During
ironing, the thermostat indicator will turn on and off to indicate
that the iron is heating.
• Water shortage indicator
When the water level of the water tank drops below the “MIN”
water level mark, the water shortage indicator will turn on and
two beeps will be sounded to remind you of insufficient water
of the water tank. In this case, disconnect the power supply,
remove the water tank, inject water into the water tank through
the water inlet and install the water tank back into the main
body. Then the water shortage indicator will turn off and the
product can start to work properly again.
• Scale inhibition box (for NI-GT500 only)
Advanced anti-calc technology.
∙ When water is added into the water tank, the scale inhibitor
in the scale inhibition box will be slowly dissolved into the
water to prevent scale accumulation and stabilize the steam.
The service life of the scale inhibitor is about five years.
∙ Cleaning frequency: about once a year.
∙ Conditions of use: Assumed that 250 ppm hard water is used
and the product is used two or three times a week in average
(about 20 minutes each time).
∙ After each use, please drain residual water in the water tank
to make the scale inhibitor more stable.
∙ Water may leak when the iron sprays steam at the beginning.
Please press the steam level adjustment button to set the
steam level to “QUICK CARE” or rest the iron on the power
base for about 15 seconds.
∙ Do not remove the scale inhibition box.
∙ To replace the inhibition box, please send your product to an
authorized service center.
• Descaling indicator
∙ When the product has output steam for up to 100 minutes
accumulatively (for NI-GT200 only)
∙ When the product has been used for up to 3,100 minutes
accumulatively (for NI-GT500 only)
The descaling indicator will turn on, indicating that
accumulated scale and other impurities in the product need
to be cleared. Please operate according to “Descaling”
instructions in “Cleaning”.
After descaling, restart the product and press the reset button.
Then the descaling indicator will turn off and the product can
work properly again.
• Cable trough
When the product is not in use, the hose and power cord can
be stored in the cable trough.


