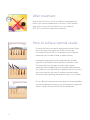
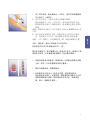
Philips SC2004/11 は、毎日の生活をより快適にする多機能なスチームクリーナーです。頑固な汚れを落とすための強力なスチームに加えて、さまざまなニーズに合わせて調整できる可変スチーム設定を備えています。フローリング、カーペット、窓、台所、浴室など、家中のあらゆる場所を掃除するのに最適です。また、付属のアクセサリーを使えば、家具や衣類、車内まで、隅々までお掃除することができます。Philips SC2004/11 は、お手頃価格でパワフルなスチームクリーナーをお探しの方に最適な製品です。
Philips SC2004/11 は、毎日の生活をより快適にする多機能なスチームクリーナーです。頑固な汚れを落とすための強力なスチームに加えて、さまざまなニーズに合わせて調整できる可変スチーム設定を備えています。フローリング、カーペット、窓、台所、浴室など、家中のあらゆる場所を掃除するのに最適です。また、付属のアクセサリーを使えば、家具や衣類、車内まで、隅々までお掃除することができます。Philips SC2004/11 は、お手頃価格でパワフルなスチームクリーナーをお探しの方に最適な製品です。


-
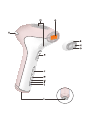
 1
1
-
 2
2
-
 3
3
-
 4
4
-
 5
5
-
 6
6
-
 7
7
-
 8
8
-
 9
9
-
 10
10
-
 11
11
-
 12
12
-
 13
13
-
 14
14
-
 15
15
-
 16
16
-
 17
17
-
 18
18
-
 19
19
-
 20
20
-
 21
21
-
 22
22
-
 23
23
-
 24
24
-
 25
25
-
 26
26


Philips SC2004/11 は、毎日の生活をより快適にする多機能なスチームクリーナーです。頑固な汚れを落とすための強力なスチームに加えて、さまざまなニーズに合わせて調整できる可変スチーム設定を備えています。フローリング、カーペット、窓、台所、浴室など、家中のあらゆる場所を掃除するのに最適です。また、付属のアクセサリーを使えば、家具や衣類、車内まで、隅々までお掃除することができます。Philips SC2004/11 は、お手頃価格でパワフルなスチームクリーナーをお探しの方に最適な製品です。
他の言語で
- English: Philips SC2004/11 User manual