Use the Optional Ionizer
2
Before using
For note and safety, refer to the instruction manual of
UJF-3042/6042MkII main body.
Before using, be sure to read “Warning and Note” of this
manual and fully understand its contents.
It is recommended to check the effect of removing
electricity in advance.
Setting the Ionizer
When set the ionizer "ON" in the MACHINE SETUP, it will
perform the static elimination operation before print.
1
Press
(MENU) (>>
) in local.
2
Press to select “MACHINE
SETUP” and press the key.
• MACHINE SETUP MENU will be displayed.
3
Press to select “IONISER” and
press the key.
• “IONISER” setting will be selected.
4
Press to select “ON” and press
the key.
• When set to “ON” , the table moves the entire
surface according to the print data in order to
eliminate static prior to print.
5
Press the key several times
to end the setting.
About daily care
Tools required for maintenance
• Electrode Probe Cleaning Kit (SPA-0237/SPA-0239)
• Goggles
• Alcohol
•Gloves
Cleaning the Electrode Probe
Check the electrode probe before the work and clean it if it
is dirty.
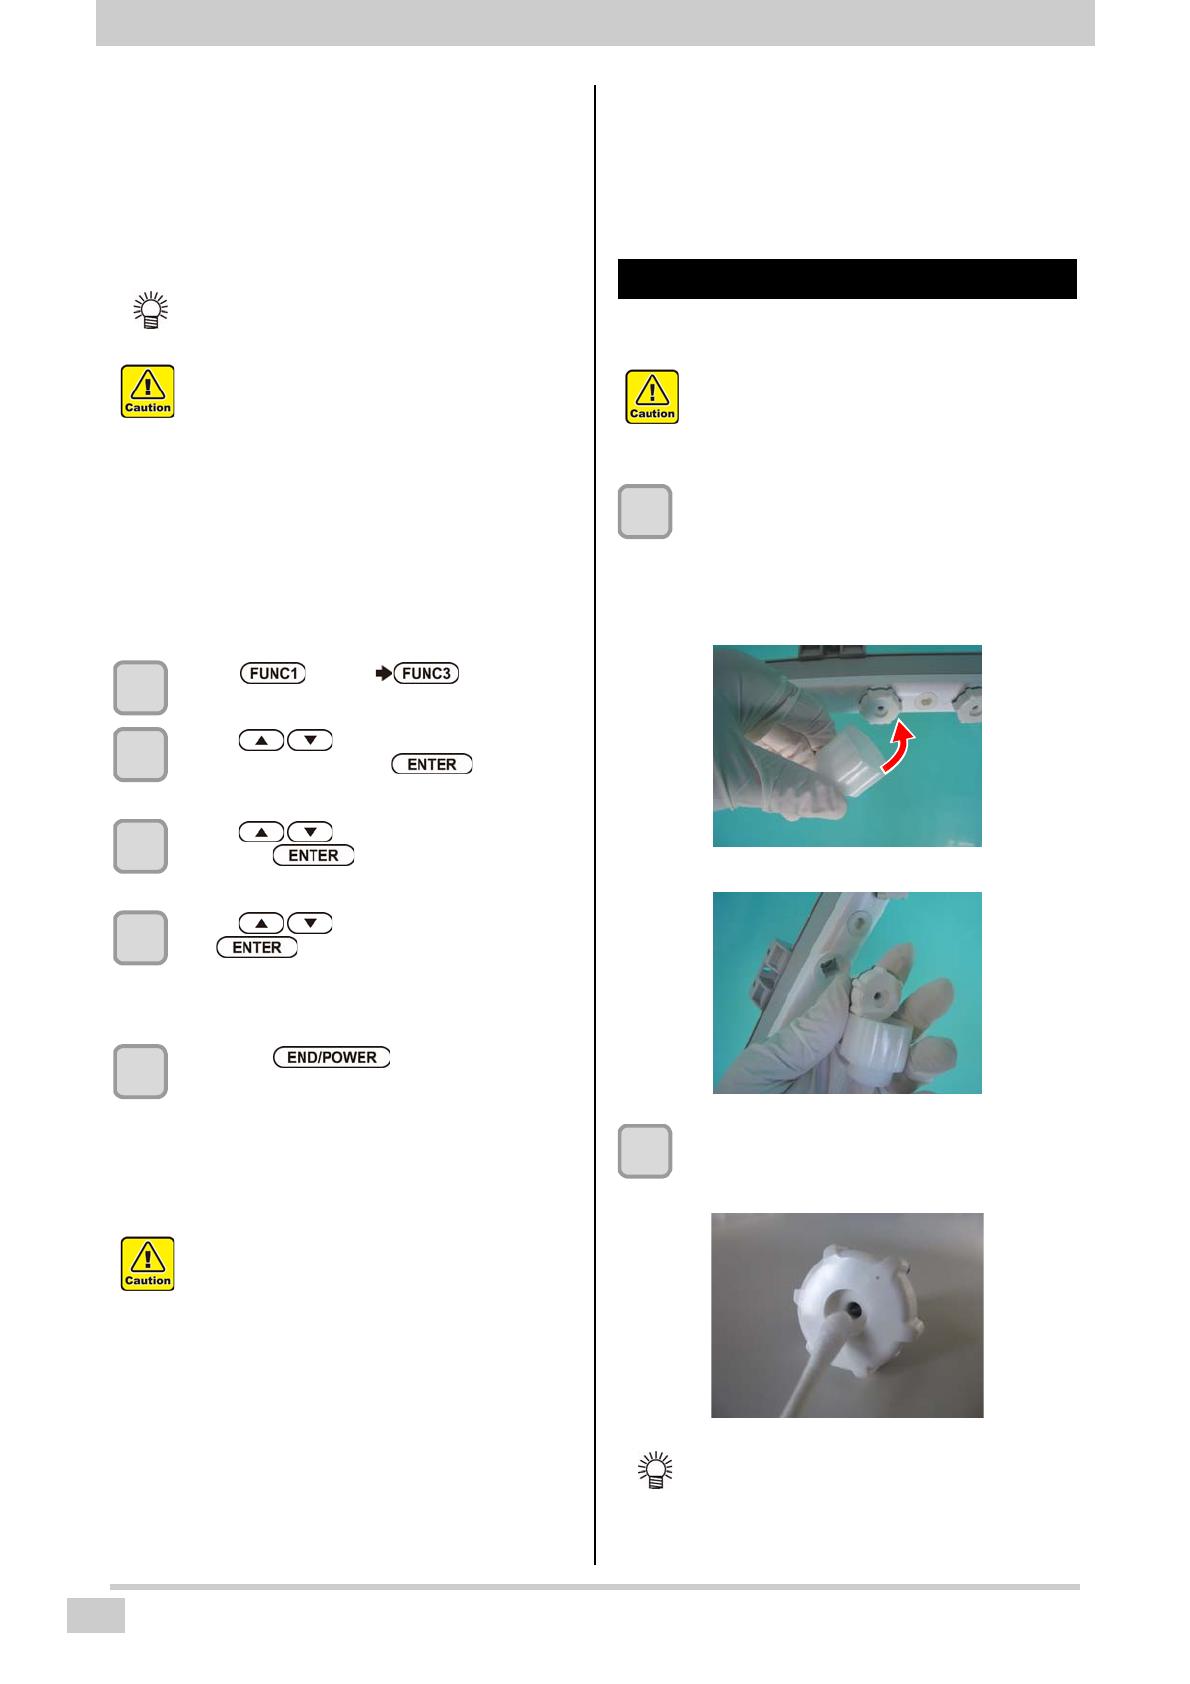
1
Remove the electrode probe from the
ionizer.
• By using the attached electrode probe
replacement kit, you can remove it easily.
(1) Put the replacement kit to the electrode
probe.
(2) Remove the electrode probe.
2
Wipe off the electrode probe and around it
with a cotton swab immersed in alcohol.
• Recommended: ethyl alcohol, isopropyl alcohol
• It is possible that enough effect cannot be
achieved depending on your using environment
or the media.
• Do not touch directly on the electrode probe
during use or in the middle of static elimination.
There is a risk of injury. Please working with care.
• Do not touch the electrode probe in hard material,
such as a tool during use or in the middle of static
elimination. This may cause a malfunction or
accident.
• Before taking care of it, be sure to turn off the
main power switch of the main body.
You may get an electric shock. Also, you may get
injured collaterally.
• Do not touch the electrode probe directly. You
may get injured. Be careful to work.
• After cleaning, fully dry it and then attach it to the
ionizer to use.
• When washing liquid remains on the electrode
probe, it may cause an accident or failure of the
machine.The cleaning alcohol may touch your
skin or get in your eyes.
• Do not touch the electrode probe with a hard
thing such as a tool. It may cause an accident or
failure of the machine.
• Do not touch the electrode probe directly. You
may get injured. Be careful to work.
• Do not touch the electrode probe with a hard
thing such as a tool. It may cause an accident or
failure of the machine.
When it is very dirty
• Use an ultrasonic bath.
Also, you can use alcohol as washing liquid.


