ページを読み込んでいます...

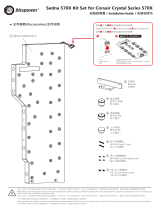
Suggestion Installation Guide For
Soft Tube as below picture:
軟管配置建議安裝如圖:
软管配置建议安装如图:
步驟三/Step 3/步骤三
1
2
3
4
5
6
7
8
99
9
10
11
11
11
12
13
14
步驟一/Step 1/步骤一 步驟二/Step 2/步骤二
A
A
B
B
C
C
16
15
D
BP-WCKMG240
1
选择喜好的水冷浓缩液颜色,以纯水调合,
由【D】注入至水箱九分满,接着利用”24PIN跳线开关”
启动电源,让水路中的空气集中至水箱排出,
再依水量继续添加至水箱七分满左右即可。
(24PIN跳线开关用途:需无经主板开启ATX电源时,
使电源直接开启供电。)
注意:一定要使用纯水,不可用其他液体替代,未注水
前,请勿启动水泵电源。
選擇喜好的水冷濃縮液顏色,以純水調合,
由【D】注入至水箱九分滿,接著利用“24PIN跳線開關”
啟動電源,讓水路中的空氣集中至水箱排出,
再依水量繼續添加至水箱七分滿左右即可。
(24PIN跳線開關用途:需無經主板開啟ATX電源時,
使電源直接開啟供電。)
注意:一定要使用純水,不可用其他液體替代,未注水
前,請勿啟動水泵電源。
Choose the coolant dye color that you prefer and blending with pure water.
Fill the water from [D] into reservoir until 90% full and then use PSU 24PIN
Active to start.
Exhaust the air in the water loop from reservoir. And then fill the water until
seven full.
(PSU 24PIN Active: Do not need to open ATX power by motherboard and it
can be start directly by PSU. )
Note: Must use pure water and cannot be replaced by other liquids.
Do not start the pump before you fill up water.

步驟四/Step 4/步骤四
適用Intel各腳位CPU
請參照下圖將螺母鎖緊定位
请参照下图将螺母锁紧定位
17
18
10
17
18
10
20
21
22
23
24
25
19
适量使用导热膏
適量使用導熱膏
Using Appropriate Amount Of Thermal Paste.
适量使用导热膏
適量使用導熱膏
Using Appropriate Amount Of Thermal Paste.
1
2
3
4
5
6
7
8
9
10
11
12
13
14
15
16
17
18
19
20
21
22
23
24
25
M4x10螺絲/M4x10 Screw/M4x10螺丝
M4x30螺絲/M4x30 Screw/M4x30螺丝
BP-RCPF-CC3U
水管夾/Tank Clamp/水管夹
M4螺帽/M4Nut/M4螺帽
240冷排/240Radiator/240冷排
風扇/Fan/风扇
x 4
M4x6螺絲/M4x6 Screw/M4x6螺丝
水箱支架/ Water Tank Mount Panel
x 4
x 1
x 2
x 4
x 1
x 2
x 8
x 3
BP-CPF-CC3U x 3
BP-90R x 1
x 1
x 1
x 1
馬達水箱組/Pump And Water Tank Kit/马达水箱组
PVC軟管 2M/PVC Tube 2M/PVC软管 2M
注射器/Fill Syringe/注射器
24PIN跳線開關/24PIN-PSU Active/
24PIN跳线开关
x 1
x 1
x 1
手轉螺帽/Hand-Turn Nut/手转螺帽 x 4
螺帽/Nut/螺帽
1 mm墊片/1 mm Spacer/1 毫米 垫片
x 4
x 4
M3x32螺絲/M3x32 Screw/M3x32螺丝 x 4
彈簧/Spring/弹簧
孔位固定螺絲/Screw/孔位固定螺丝
x 4
x 4
CPU水冷頭/CPU Water Block/CPU水冷头 x 1
背膠絕緣片/PASTE PAD/背胶绝缘片
x 1
金屬背板/Metal Backplate/金属背板
背板墊片/BACK PAD/背板垫片
BP-WCKMG240
2

1:1 螺絲表/1:1 Screw List/1:1螺丝表
10
M4x10L
1
32
6
M4x6L
3M3x32L
25
6
備品/Spare Parts/备品
M4x6L
3
30
M4x30L
8
30
備品/Spare Parts/备品
M4x30L
8
BP-WCKMG240
注意,跑水前,請先確認所有零件已安裝在正確的位置上,在不開主機,單開水泵的情况下,
進行24小時的跑水測試, 確保無漏水情况後再開主機,避免發生漏水而導致電腦零件的損壞。
注意,跑水前,请先确认所有零件已安装在正确的位置上,在不开主机,单开水泵的情况下,
进行24小时的跑水测试, 确保无漏水情况后再开主机,避免发生漏水而导致电脑零件的损坏。
Before fill in water,please make sure all the component be installed correctly,
avoidingleaking happen and destroy the PC component.
*产品如有变更,则依网站公告为主,不再另外通知*
*產品如有變更,則依網站公告為主,不再另外通知*
*All Specification Will Be Changed By Official Website And Without Further Notice*
V2
3
/


