
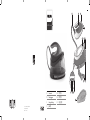
GC7800 series
© 2018 Koninklijke Philips N.V.
All rights reserved
4239.001.0420.5
21 3
6 75
9 8
11 1012
4
13
1
EN User manual
MS Manual pengguna
VI Hướng dẫn sử dụng
TH
ZH-S 用户手册
ZH-T 使用手冊
KO 사용 설명서

2
3
4
5
6
7
8
9
10
2x
11
12
13
14
15
16
17
18
19
2 sec.
20
2 min.
21
22
23
24
25
26
27
28
29
30
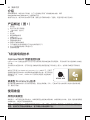
产品:飞利浦智能型压力式蒸汽电熨斗
型号:
GC7808
额定电压:
220V
~
额定频率:
50Hz
额定输入功率:
2000 W
生产日期:请见产品本体
产地:印度尼西亚
飞利浦(中国)投资有限公司
上海市静安区灵石路
718
号
A1
幢
全国顾客服务热线
: 4008 800 008
本产品根据国标
GB4706.1-2005, GB4706.2-2007,
GB4343.1-2009
及
GB17625.1-2012
制造

English 6
Bahasa Melayu 13
Tiếng Việt 20
26
简体中文 32
繁體中文 37
한국의 43

6
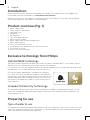
Introduction
Congratulations on your purchase and welcome to Philips! To fully benet from the support that
Philips oers, register your product at www.philips.com/welcome.
Read this user manual, the important information leaet, and the quick start guide carefully before
you use the appliance. Save them for future reference.
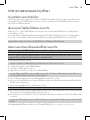
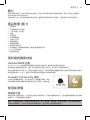
Product overview (Fig. 1)
1 Water supply hose
2 Steam trigger/Steam boost
3 'Iron ready' light
4 Soleplate
5 Iron platform
6 Carry lock release button
7 Water tank lling door
8 Water supply hose storage compartment
9 Mains cord with plug
10 CALC-CLEAN button with light
11 On/o button with power-on light and auto-o light
12 ECO button with light
13 Smart Calc-Clean container
Exclusive technology from Philips
OptimalTEMP technology
The OptimalTEMP technology enables you to iron all types of ironable fabrics, in any order, without
adjusting the iron TEMPerature and without sorting your garments.
It is safe to just rest the hot soleplate directly on the ironing board (Fig. 2) without putting back to the
iron platform. This will help reduce the stress on your wrist.
This iron has been approved by The Woolmark Company
Pty Ltd for the ironing of wool-only products, provided that
the garments are ironed according to the instructions on the
garment label and those issued by the manufacturer of this
iron. R1603. The Woolmark symbol is a certication mark in
many countries.
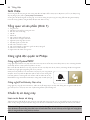
Compact ProVelocity Technology
This technology delivers continuous steam that penetrates deeply to remove creases easily. At the
same time, it keeps the appliance more compact and lighter than traditional steam generators, for
easier storage (Fig. 3).
Preparing for use
Type of water to use
This appliance has been designed to be used with tap water. However, if you live in an area with hard
water, fast scale build-up may occur. Therefore, it is recommended to use distilled or demineralized
water to prolong the lifetime of the appliance.
English

7
Warning: Do not use perfumed water, water from the tumble dryer, vinegar, starch,
descaling agents, ironing aids, chemically descaled water or other chemicals, as they
may cause water spitting, brown staining or damage to your appliance.
Filling the water tank
Fill the water tank before every use or when the water level in the water tank drops below the
minimum level. You can rell the water tank at any time during use.
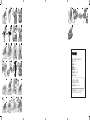
1 Open the water tank lling door (Fig. 4).
2 Fill the water tank up to the MAX indication (Fig. 5).
3 Close the water tank lling door ('click').
Using the appliance
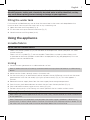
Ironable fabrics
Do not iron non-ironable fabrics.
- Fabrics with these symbols (Fig. 6) are ironable, for example linen, cotton, polyester, silk, wool,
viscose and rayon.
- Fabrics with this symbol (Fig. 7) are not ironable. These fabrics include synthetic fabrics such
as Spandex or elastane, Spandex-mixed fabrics and polyolens (e.g. polypropylene). Prints on
garments are not ironable either.
Ironing
1 Place the steam generator on a stable and even surface.
Note: In order to ensure safe ironing we recommend to always place the base on a stable ironing
board.
2 Make sure that there is enough water in the water tank.
3 Put the mains plug in an earthed wall socket and press the on/o button to switch on the steam
generator.Wait until the 'iron ready' light lights up continuously (Fig. 8). This takes approx. 2
minutes.
4 Remove the water supply hose from the water supply hose storage compartment.
5 Press the carry lock release button to unlock the iron from the iron platform (Fig. 9).
6 Press and hold the steam trigger to start ironing (Fig. 10).
7 For best ironing results, after ironing with steam, perform the last strokes without steam.
Warning: Never direct steam at people.
Note: When you use the appliance for the rst time, it may take 30 seconds for steam to come out
of the appliance.
Note: The pump is activated each time you press the steam trigger. It produces subtle rattling
sound, which is normal. When there is no water in the water tank, the pump sound is louder. Fill up
the water tank with water when the water level drops below the minimum level.
English

8
For more powerful steam, you can use the TURBO steam mode, which is safe on all ironable fabrics.
For fabrics such as cotton, jeans and linen, you are recommended to use the TURBO steam mode.
1 Press and hold the on/o button for 2 seconds until the light turns white.
2 To deactivate the TURBO mode, press and hold the on/o button for 2 seconds again until the light
turns blue.
Steam boost function
Use the steam boost function to remove stubborn creases.
1 Press the steam trigger twice quickly (Fig. 11).
Vertical ironing
Warning: Hot steam is emitted from the iron. Never attempt to remove wrinkles from
a garment while someone is wearing it (Fig. 12). Do not apply steam near your or
someone else's hand.
You can use the steam iron in vertical position to remove wrinkles from hanging fabrics.
1 Hold the iron in vertical position, press the steam trigger and touch the garment lightly with the
soleplate and move the iron up and down (Fig. 13).
Safe rest
Resting the iron while rearranging your garment
While rearranging your garment, you can rest the iron either on the iron platform or horizontally on the
ironing board (Fig. 2). The OptimalTEMP technology ensures the soleplate will not damage the ironing
board cover.
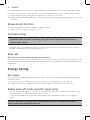
Energy saving
Eco mode
By using the ECO mode (reduced amount of steam), you can save energy without compromising on
the ironing result.
1 To activate the ECO mode, press the ECO button (Fig. 14). The green ECO light goes on.
2 To deactivate the ECO mode, press the ECO button again. The green ECO light goes out.
Safety auto-o mode (specic types only)
- To save energy, the appliance switches o automatically when it has not been used for 5 minutes.
The auto-o light in the on/o button starts to ash.
- To activate the appliance again, press the on/o button. The appliance then starts to heat up
again.
Warning: Never leave the appliance unattended when it is connected to the mains.
Always unplug the appliance after use.
English

9
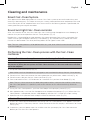
Cleaning and maintenance
Smart Calc-Clean System
Your appliance has been designed with a Smart Calc-Clean system to ensure that descaling and
cleaning is done regularly. This helps to maintain a strong steam performance and prevents dirt and
stains coming out of the soleplate over time. To ensure that the cleaning process is performed, the
steam generator gives regular reminders.
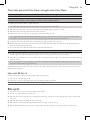
Sound and light Calc-Clean reminder
After 1 to 3 months of use, the Calc-Clean light starts ashing and the appliance starts beeping to
indicate that you have to perform the Calc-Clean process (Fig. 15).
Besides that, a second defense step to protect the steam generator from scale is integrated: the
steam function gets disabled if descaling is not done (Fig. 16). After descaling is done, the steam
function will be restored. This takes place regardless of the type of water used.
Note: The Calc-Clean process can be performed at any time, even when the sound and light reminder
is not activated yet.
Performing the Calc-Clean process with the Calc-Clean
container
Warning: Do not leave the appliance unattended during the Calc-Clean process.
Caution: Always perform the Calc-Clean process with the Calc-Clean container. Do not interrupt
the process by lifting the iron up from the Calc-Clean container, as hot water and steam will come
out of the soleplate.
1 Fill up the water tank halfway (Fig. 17).
Note: Make sure that the appliance is plugged in and switched ON during the Calc-Clean process.
2 Place the Calc-Clean container on the ironing board or any other even, stable surface (Fig. 18).
3 Place the iron stably on the Calc-Clean container (Fig. 19).
4 Press and hold the CALC-CLEAN button for 2 seconds until you hear short beeps (Fig. 20).
Note: The Calc-Clean container has been designed to collect scale particles and hot water during
the Calc-Clean process. It is perfectly safe to rest the iron on this container during the entire
process.
5 During the Calc-Clean process, you hear short beeps and a pumping sound (Fig. 21).
6 Wait approximately 2 minutes for the appliance to complete the process (Fig. 22). When the Calc-
Clean process is completed, the iron stops beeping and the CALC-CLEAN light stops ashing.
7 Wipe the iron with a piece of cloth and put it back on the base station (Fig. 23).
Caution: The iron is hot.
8 As the Calc-Clean container becomes hot during the Calc-Clean process, wait approx. 5 minutes
before you touch it. Then carry the Calc-Clean container to the sink, empty it and store it for future
use (Fig. 24).
9 If necessary, you can repeat steps 1 to 8. Make sure that you empty the Calc-Clean container
before you start the Calc-Clean process.
English

10
Note: During the Calc-Clean process, clean water may come out of the soleplate if no scale has
accumulated inside the iron. This is normal.
For more information on how to carry out the Calc-Clean process, refer to the videos in this link:
http://www.philips.com/descaling-iron.
Cleaning the soleplate
To properly maintain your appliance, clean it regularly.
1 Clean the appliance with a moist cloth.
2 To easily and eectively remove stains, let the soleplate heat up and move the iron over a moist
cloth (Fig. 25).
Tip: Clean the soleplate regularly to ensure smooth gliding.
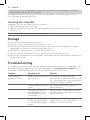
Storage
1 Switch o the steam generator and unplug it.
2 Pour the water out of the water tank into the sink (Fig. 26).
3 Fold the water supply hose. Wind the water supply hose inside the water supply hose storage
compartment and secure it inside the storage hook (Fig. 27).
4 Fold the mains cord and fasten it with the Velcro strip (Fig. 28).
5 Push the carry lock release button to lock the iron onto the iron platform (Fig. 29).
6 You can carry the appliance with one hand by the handle of the iron when the iron is locked on the
iron platform (Fig. 30).
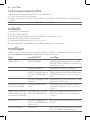
Troubleshooting
This chapter summarizes the most common problems you could encounter with the appliance. If you
are unable to solve the problem with the information below, visit www.philips.com/support for a list
of frequently asked questions or contact the Consumer Care Center in your country.
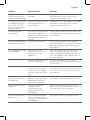
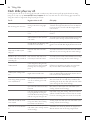
Problem Possible cause Solution
The iron does not
produce any steam.
There is not enough water in
the water tank.
Fill the water tank beyond the MIN
indication. Press and hold the steam trigger
until steam comes out. It may take up to 30
seconds until steam comes out.
You did not press the steam
trigger.
Press and hold the steam trigger until
steam comes out.
The steam function has
been disabled until you
have performed the Calc-
Clean process.
Perform the Calc-Clean process to restore
the steam function. (see chapter ' Cleaning
and maintenance')
At the start of your ironing
session, the steam trigger
has not been pressed long
enough.
Press and hold the steam trigger until
steam comes out. It may take up to 30
seconds until steam comes out.
English

11
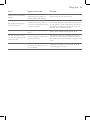
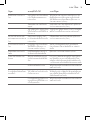
Problem Possible cause Solution
The light of the CALC-
CLEAN button ashes
and the appliance beeps.
This is the Calc-Clean
reminder.
Perform the Calc-Clean after the Calc-
Clean reminder is given (see chapter
'Cleaning and maintenance').
No steam comes out of
the soleplate, the light
of the CALC-CLEAN
button ashes and the
appliance beeps.
You have not done or have
not completed the Calc-
Clean process.
Perform the Calc-Clean process to enable
the steam function again (see chapter
'Cleaning and maintenance').
The appliance has
switched o.
The safety auto-o function
is activated automatically
when the appliance has not
been used for more than 5
minutes.
To activate the appliance again, press the
on/o button. The appliance then starts to
heat up again.
The appliance produces
a loud pumping sound.
The water tank is empty. Fill the water tank with water and press
the steam trigger until the pumping sound
becomes softer and steam comes out of
the soleplate.
Water droplets come out
of the soleplate.
After the Calc-Clean
process remaining water
may drip out of the
soleplate.
Wipe the soleplate dry with a piece of
cloth. If the Calc-Clean light still ashes
and the appliance still beeps, perform the
Calc-Clean process (see chapter 'Cleaning
and maintenance').
The Calc-Clean process has
not been completed.
You have to perform the Calc-Clean
process again (see chapter 'Cleaning and
maintenance').
Steam condenses into water
in the hose when you use
steam for the rst time or
have not used it for a long
time.
This is normal. Hold the iron away from the
garment and press the steam trigger.Wait
until steam instead of water comes out of
the soleplate.
Dirty water and
impurities come out of
the soleplate.
Impurities or chemicals
present in the water have
deposited in the steam
vents and/or soleplate.
Perform the Calc-Clean process regularly
(see chapter 'Cleaning and maintenance').
Water ushes out of the
soleplate.
You have accidentally
started the Calc-
Clean process (see
chapter 'Cleaning and
maintenance').
Switch o the appliance. Then switch it
back on again. Let the iron heat up until the
'iron ready' light lights up steadily.
The Calc-Clean process
does not start.
You have not pressed the
CALC-CLEAN button for 2
seconds until the appliance
started beeping.
See chapter 'Cleaning and maintenance'.
English

12
Problem Possible cause Solution
The iron leaves a shine
or an imprint on the
garment.
The surface to be ironed
was uneven, for instance
because you were ironing
over a seam or a fold in the
garment.
PerfectCare is safe on all garments. The
shine or imprint is not permanent and will
come o if you wash the garment.Avoid
ironing over seams or folds or you can
place a cotton cloth over the area to be
ironed to avoid imprints.
There was not enough felt in
the ironing board cover.
Put an extra layer of felt material under the
ironing board cover.
The ironing board cover
becomes wet, or there
are water droplets on the
oor/garment.
Steam has condensed on
the ironing board cover after
a long ironing session.
Replace the ironing board cover if the
foam or felt material has worn out. You
can also add an extra layer of felt material
under the ironing board cover to prevent
condensation on the ironing board.
You have an ironing board
that is not designed to cope
with the high steam rate of
the appliance.
Put an extra layer of felt material under
the ironing board cover to prevent
condensation on the ironing board.
English

13
Pengenalan
Tahniah atas pembelian anda dan selamat menggunakan Philips! Untuk memanfaatkan sepenuhnya
sokongan yang ditawarkan oleh Philips, daftar produk anda di www.philips.com/welcome.
Baca manual pengguna ini, risalah maklumat penting dan panduan mula pantas dengan teliti sebelum
anda menggunakan perkakas. Simpannya untuk rujukan akan datang.
Gambaran keseluruhan produk (Rajah 1)
1 Hos stim
2 Picu stim/Penggalak stim
3 Lampu 'seterika sedia'
4 Tapak seterika
5 Platform seterika
6 Butang pelepas kunci pembawa
7 Pintu pengisian tangki air
8 Ruang penyimpanan hos bekalan
9 Kord sesalur kuasa dengan palam
10 Butang CALC-CLEAN dengan lampu
11 Butang hidup/mati dengan lampu hidup kuasa dan mati auto
12 Butang ECO dengan lampu
13 Bekas Sistem Pembersihan Kerak
Teknologi eksklusif daripada Philips
Teknologi OptimalTEMP
Teknologi OptimalTEMP membolehkan anda menyeterika pelbagai jenis fabrik boleh diseterika,
dengan apa jua cara, tanpa perlu melaraskan suhu seterika dan tanpa mengasingkan pakaian anda.
Adalah selamat untuk meletakkan plat tapak yang panas terus pada papan seterika (Raj. 2) tanpa
meletakkan kembali ke platform besi. Ini akan membantu mengurangkan tekanan pada pergelangan
anda.
Seterika ini telah diluluskan oleh syarikat Woolmark Company
Pty Ltd untuk menyeterika produk wul sahaja dengan syarat
pakaian itu diseterika mengikut arahan pada label pakaian
dan yang telah dikeluarkan oleh pengeluar seterika ini. R1603.
Simbol Woolmark merupakan tanda pensijilan di kebanyakan
negara.
Compact ProVelocity Technology
Teknologi ini menyampaikan stim berterusan yang menembus dalam untuk mengeluarkan lipatan
dengan mudah. Pada masa yang sama, ia memastikan perkakasan lebih mampat dan ringan
berbanding penjana stim tradisional, untuk storan lebih mudah.
Bahasa Melayu

14
Membuat persediaan untuk guna
Jenis air untuk digunakan
Perkakas ini telah direka bentuk untuk digunakan dengan air paip. Jika anda tinggal di kawasan
yang mempunyai air liat, pembentukan skala pantas boleh berlaku. Oleh itu, adalah disyorkan untuk
menggunakan air suling atau tanpa mineral untuk memanjangkan hayat perkakas tersebut.
Amaran: Jangan gunakan air berwangian, air dari mesin pengering pakaian, cuka, kanji,
agen penyahkerakan, bahan bantu penyeterikaan, air yang dinyah kerak secara kimia
atau bahan kimia lain, kerana ini boleh menyebabkan air berdetus, kesan kotoran perang
atau kerosakan pada perkakas anda.
Mengisi tangki air
Isikan tangki air sebelum setiap penggunaan atau apabila paras air dalam tangki jatuh bawah paras
minimum. Anda boleh mengisi semula tangki air pada bila-bila masa semasa penggunaan.
1 Buka pintu (Raj. 4) pengisian tangki air.
2 Isikan tangki air sehingga penunjuk (Raj. 5) MAX.
3 Tutup pintu pengisian tangki air (bunyi 'klik').
Menggunakan perkakas
Fabrik yang boleh diseterika
Jangan seterika fabrik yang tidak boleh diseterika.
- Fabrik dengan simbol (Raj. 6) ini boleh diseterika, seperti linen, kapas, poliester, sutera, wul, viskos
dan rayon.
- Fabrik dengan simbol (Raj. 7) ini tidak boleh diseterika. Fabrik ini termasuk fabrik sintetik seperti
Spandex atau elastan, fabrik campuran Spandex dan poliolen (seperti polipropilena). Cetakan
pada pakaian juga tidak boleh diseterika.
Penyeterikaan
1 Letakkan penjana stim di atas permukaan yang stabil dan rata.
Catatan: Untuk memastikan penyeterikaan selamat, kami syorkan anda sentiasa meletakkan tapak
pada papan seterika yang stabil.
2 Pastikan air di dalam tangki air mencukupi.
3 Masukkan palam sesalur kuasa ke dalam soket dinding yang dibumikan dan tekan butang
hidup/mati untuk menghidupkan penjana stim.Tunggu sehingga lampu 'seterika sedia' menyala
berterusan (Raj. 8). Ini mengambil masa lebih kurang 2 minit.
4 Tanggalkan hos bekalan daripada ruang penyimpanan hos.
5 Tekan butang pelepas kunci pembawa untuk melepaskan seterika dari platform (Raj. 9) seterika.
6 Tekan dan tahan pencetus stim untuk memulakan penyeterikaan (Raj. 10).
7 Untuk hasil seterika terbaik, selepas menyeterika dengan stim, lakukan gosokan terakhir tanpa stim.
Amaran: Jangan sekali-kali menghalakan stim kepada sesiapa.
Bahasa Melayu

15
Catatan: Apabila anda menggunakan perkakas ini buat pertama kali, masa selama 30 saat mungkin
diperlukan untuk stim keluar sepenuhnya dari perkakas.
Catatan: Pam diaktifkan setiap kali anda menekan picu stim. Ia mengeluarkan bunyi bergetar yang
rendah, yang merupakan kebiasaan. Apabila tiada air dalam tangki air, pam berbunyi lebih kuat.
Penuhkan tangki dengan air apabila paras air ke bawah paras minimum.
Untuk stim yang lebih kuat, anda boleh menggunakan mod stim TURBO, yang selamat pada semua
fabrik yang boleh diseterika.
Untuk fabrik seperti kapas, jean dan linen, anda disyorkan untuk menggunakan mod stim TURBO.
1 Tekan dan tahan butang hidup/mati selama 2 saat hingga lampu bertukar putih.
2 Untuk menyahaktifkan mod TURBO, tekan dan tahan butang hidup/mati selama 2 saat sehingga
lampu bertukar biru.
Fungsi galak stim
Gunakan fungsi pancutan stim untuk menghilangkan kedutan yang degil.
1 Tekan picu stim dua kali dengan cepat (Raj. 11).
Penyeterikaan secara menegak
Amaran: Stim panas dikeluarkan daripada seterika. Jangan sekali-kali menghilangkan
kedut daripada pakaian semasa seseorang memakainya (Raj. 12). Jangan gunakan
stim berdekatan dengan tangan anda atau tangan orang lain.
Anda boleh menggunakan seterika stim dalam keadaan menegak untuk menyingkirkan kedut
daripada baju yang digantung.
1 Pegang seterika dalam posisi menegak, tekan picu stim dan sentuh pakaian dengan lembut pada
plat tapak dan gerakkan seterika atas dan bawah (Raj. 13).
Rehat selamat
Meletakkan seterika semasa menyusun semula pakaian anda
Semasa menyusun semula pakaian anda, anda boleh meletakkan seterika di atas platform seterika
atau secara mendatar di atas papan seterika (Raj. 2). Teknologi OptimalTEMP memastikan tapak
seterika tidak akan merosakkan penutup papan seterika.
Penjimatan kuasa
Mod ECO
Dengan mod ECO (pengurangan jumlah stim), anda boleh menjimatkan tenaga tanpa mengurangkan
hasil penyeterikaan.
1 Untuk mengaktifkan mod ECO, tekan butang ECO (Raj. 14). Lampu hijau ECO bernyala.
2 Untuk menyahaktifkan mod ECO, tekan butang ECO sekali lagi. Lampu hijau ECO terpadam.
Bahasa Melayu

16
Mod automati keselamatan (jenis tertentu sahaja)
- Untuk menjimatkan tenaga, perkakas akan dimatikan secara automatik jika ia tidak digunakan
selama 5 minit. Lampu pada butang mati secara auto mula berkelip.
- Untuk mengaktifkan perkakas semula, tekan butang hidup/mati. Perkakas kemudian mula menjadi
panas semula.
Amaran: Jangan biarkan perkakas tanpa dijaga apabila ia bersambung dengan sesalur
kuasa. Cabut plag perkakas setiap kali selepas digunakan.
Pembersihan dan penyenggaraan
Sistem Pembersihan Kerak Pintar
Perkakasan anda telah dipasang dengan sistem Smart Calc-Clean yang memastikan penyahskalaan
dan pembersihan dilakukan dengan kerap. Ini membantu mengekalkan prestasi stim yang kuat
dan mengelakkan kekotoran keluar daripada plat tapak lama kelamaan. Untuk memastikan proses
pembersihan dilakukan, penjana stim memberi peringatan tetap.
Peringatan bunyi dan lampu Pembersihan Kerak
Selepas penggunaan selama 1 hingga 3 bulan, lampu Pembersihan Kerak akan mula bernyala dan
perkakas akan mula mengeluarkan bunyi bip yang menandakan anda perlu melakukan proses (Raj. 15)
Calc-Clean.
Selain itu, langkah pertahanan kedua untuk melindungi penjana stim daripada kerak disepadukan:
fungsi stim akan dinyahdayakan jika pembuangan kerak tidak dilakukan (Raj. 16). Selepas
pembuangan kerak selesai, fungsi stim akan dipulihkan. Ini berlaku tidak kira jenis air yang digunakan.
Catatan: Proses Calc-Clean boleh dilakukan pada bila-bila masa, walaupun apabila peringatan bunyi
dan lampu tidak diaktifkan lagi.
Melakukan proses Pembersihan Kerak dengan bekas
Pembersihan Kerak
Amaran: Jangan tinggalkan perkakas tanpa dijaga sewaktu proses Pembersihan Kerak.
Awas: Sentiasa lakukan proses Calc-Clean dengan bekas Calc-Clean. Jangan ganggu proses
dengan mengangkat seterika dari bekas Pembersihan Kerak, kerana air panas dan stim akan
keluar dari plat tapak.
1 Isikan separuh (Raj. 17) tangki air.
Catatan: Pastikan palam perkakas dimasukkan dan perkakas DIHIDUPKAN ketika proses
Pembersihan Kerak.
2 Letakkan bekas Pembersihan Kerak di papan seterika atau lain-lain permukaan yang stabil dan
rata.
3 Letakkan seterika dengan stabil pada bekas Calc-Clean (Raj. 19).
4 Tekan dan tahan butang CALC-CLEAN selama 2 saat sehingga anda mendengar bunyi bip singkat.
Bahasa Melayu

17
Catatan: Bekas CALC-CLEAN telah ditetapkan untuk mengumpulkan partikel kerak dan air panas
sewaktu proses Calc-Clean. Adalah sangat selamat untuk meletakkan seterika di atas bekas ini
sepanjang proses.
5 Semasa proses Calc-Clean, anda mendengar bunyi bip dan bunyi pam (Raj. 21).
6 Tunggu lebih kurang 2 minit untuk perkakas menyelesaikan proses. Apabila proses Pembersihan
Kerak selesai, seterika akan berhenti berbunyi bip dan lampu CALC-CLEAN berhenti berkelip.
7 Lap seterika dengan kain dan letakkannya kembali di stesen pangkalan (Raj. 23).
Awas: Seterika panas.
8 Apabila bekas Pembersihan Kerak menjadi panas sewaktu proses Pembersihan Kerak, tunggu kira-
kira 5 minit sebelum anda menyentuhnya. Kemudian bawa bekas Pembersihan Kerak ke singki,
kosongkannya dan simpan untuk kegunaan masa depan (Raj. 24).
9 Jika perlu, anda boleh mengulangi langkah 1 hingga 8. Pastikan anda mengosongkan bekas Calc-
Clean sebelum anda memulakan proses Calc-Clean.
Catatan: Sewaktu proses Pembersihan Kerak, air yang bersih mungkin keluar dari plat tapak jika
tiada kerak yang terkumpul dalam seterika. Ini perkara biasa.
Untuk mendapatkan maklumat tentang cara melakukan proses Calc-Clean, rujuk video dalam pautan
ini: http://www.philips.com/descaling-iron.
Membersihkan tapak seterika
Untuk menyelenggarakan perkakas anda dengan betul, bersihkan dengan kerap.
1 Bersihkan perkakas dengan kain lembap.
2 Untuk menghilangkan kotoran dengan mudah dan berkesan, biarkan plat tapak memanas dan
gerakkan seterika pada kain lembap.
Petua: Bersihkan plat tapak dengan kerap untuk memastikan luncuran yang lancar.
Penyimpanan
1 Matikan penjana stim dan cabut palamnya.
2 Tuangkan air keluar dari tangki air ke dalam sink.
3 Gulung hos bekalan. Lilit hos bekalan dalam ruang penyimpanan hos bekalan dan simpannya
dalam cangkuk storan (Raj. 27).
4 Gulung kord sesalur kuasa dan ikat dengan jaluran Velcro (Raj. 28).
5 Tekan butang pelepas kunci pembawa untuk mengunci seterika pada platform seterika (Raj. 29).
6 Anda boleh membawa perkakas dengan mudah dengan satu tangan pada pemegang seterika
semasa seterika dikunci pada platform (Raj. 30) seterika.
Bahasa Melayu

18
Penyelesai Masalah
Bab ini meringkaskan masalah paling lazim yang anda mungkin hadapi dengan perkakas ini. Jika anda
tidak dapat menyelesaikan masalah dengan maklumat di bawah, lawati www.philips.com/support
untuk mendapatkan senarai soalan lazim atau hubungi Pusat Penjagaan Pengguna di negara anda.
Masalah
Punca yang
berkemungkinan
Penyelesaian
Seterika tidak
menghasilkan stim.
Air di dalam tangki air tidak
mencukupi.
Isikan tangki air melebihi penunjuk MIN.
Tekan dan tahan pencetus stim sehingga
stim keluar. Masa sehingga 30 saat
diperlukan sehingga stim keluar.
Anda tidak menekan picu
stim.
Tekan dan tahan pencetus stim sehingga
stim keluar.
Fungsi stim telah
dinyahdayakan sehingga
anda melakukan proses
Pembersihan Kerak.
Lakukan proses Calc-Clean untuk
memulihkan fungsi stim. (lihat bab
'Pembersihan dan penyelenggaraan')
Pada permulaan sesi
seterika anda, picu stim
tidak ditekan cukup lama.
Tekan dan tahan pencetus stim sehingga
stim keluar. Masa sehingga 30 saat
diperlukan sehingga stim keluar.
Lampu butang CALC-
CLEAN berkelip dan
perkakas mengeluarkan
bunyi bip.
Ini ialah peringatan
Pembersihan Kerak.
Lakukan Calc-Clean selepas peringatan
Calc-Clean diberikan (lihat bab
'Pembersihan dan penyelenggaraan').
Tiada stim yang keluar
dari plat tapak, lampu
butang CALC-CLEAN
berkelip dan perkakas
mengeluarkan bunyi bip.
Anda tidak melakukan
atau belum melengkapkan
proses Pembersihan Kerak.
Lakukan proses Calc-Clean untuk
mendayakan fungsi stim sekali lagi (lihat
bab 'Pembersihan dan penyelenggaraan').
Perkakas telah mati.
Fungsi auto mati
keselamatan diaktifkan
secara automatik apabila
perkakas tidak digunakan
selama lebih daripada 5
minit.
Untuk mengaktifkan perkakas semula,
tekan butang hidup/mati. Perkakas
kemudian mula menjadi panas semula.
Perkakas mengeluarkan
bunyi mengepam yang
kuat.
Tangki air kosong.
Isikan semula tangki air dengan air dan
tekan pencetus stim sehingga bunyi
mengepam menjadi lebih lembut dan stim
keluar dari plat tapak.
Titisan air menitik keluar
dari tapak seterika.
Selepas proses Calc-Clean,
baki air mungkin akan
mengalir keluar dari plat
tapak.
Lap kering plat tapak dengan kain. Jika
lampu Calc-Clean masih berkelip dan
perkakasan masih berbunyi, lakukan proses
Calc-Clean (lihat bab 'Pembersihan dan
penyelenggaraan').
Proses Pembersihan Kerak
tidak dilengkapkan.
Anda perlu melakukan proses Calc-Clean
sekali lagi (lihat bab 'Pembersihan dan
penyelenggaraan').
Bahasa Melayu

19
Masalah
Punca yang
berkemungkinan
Penyelesaian
Stim memeluwap menjadi
air di dalam hos apabila
anda menggunakan
stim pada kali pertama
atau sudah lama tidak
menggunakannya.
Ini perkara biasa. Jauhkan seterika
daripada pakaian dan tekan pencetus stim.
Tunggu sehingga stim, dan bukannya air
keluar daripada tapak seterika.
Air kotor dan kotoran
keluar dari tapak
seterika.
Kotoran atau bahan kimia
yang ada di dalam air
mungkin telah termasuk di
dalam bolong stim dan/atau
plat tapak.
Lakukan proses Calc-Clean dengan
kerap (lihat bab 'Pembersihan dan
penyelenggaraan').
Air mengalir keluar
daripada plat tapak.
Anda memulakan proses
Calc-Clean secara
tidak sengaja (lihat
bab 'Pembersihan dan
penyelenggaraan').
Matikan perkakas. Kemudian hidupkannya
semula. Biar seterika dipanaskan sehingga
lampu 'seterika sedia' menyala secara
berterusan.
Proses Pembersihan
Kerak tidak bermula.
Anda tidak menekan butang
CALC-CLEAN selama 2 saat
sehingga perkakas mula
mengeluarkan bunyi bip.
Lihat bab 'Pembersihan dan
penyelenggaraan'.
Seterika meninggalkan
kilatan atau kesan pada
pakaian.
Permukaan yang
hendak diseterika tidak
rata, contohnya ketika
menyeterika di atas kelim
atau lipatan pada pakaian.
PerfectCare selamat untuk semua pakaian.
Kilatan atau kesan ini tidak kekal dan akan
hilang setelah pakaian dibasuh. Elakkan
daripada menyeterika di atas kelim atau
lipatan, atau anda boleh letakkan kain
kapas di atas kawasan tersebut supaya
tidak ada kesan.
Tidak cukup felt dalam
penutup papan seterika.
Letakkan lapisan tambahan bahan felt di
bawah penutup papan seterika.
Penutup papan seterika
menjadi basah atau
terdapat titisan air pada
lantai/pakaian.
Stim telah memeluwap
pada penutup papan
seterika selepas sesi
penyeterikaan yang lama.
Gantikan penutup papan seterika jika
bahan busa atau felt telah lusuh. Anda juga
boleh menambahkan lapisan tambahan
bahan felt di bawah penutup papan
seterika untuk mengelakkan pemeluwapan
pada papan seterika.
Anda mempunyai papan
seterika yang tidak direka
bentuk untuk menerima
kadar stim yang tinggi dari
perkakas.
Letakkan lapisan tambahan bahan felt
di bawah penutup papan seterika untuk
mengelakkan pemeluwapan pada papan
seterika.
Bahasa Melayu

20
Giới thiu
Chúc mừng bạn đ mua hng v cho mừng bạn đến với Philips! Để có được lợi ích đầy đủ từ sự hỗ trợ do Philips cung
cấp, hy đăng ký sản phẩm tại www.philips.com/welcome.
Vui lòng đọc ti liệu hướng dẫn sử dụng ny, tờ rơi về các thông tin quan trọng v hướng dẫn khởi động nhanh thật kỹ
trước khi sử dụng thiết bị. Cất giữ ti liệu để tiện tham khảo sau ny.
Tổng quan về sản phẩm (Hình 1)
1 Ống hơi nước
2 Nút bấm hơi nước/Tăng cường hơi nước
3 Đèn báo 'bn ủi sẵn sng'
4 Mặt đế
5 Giá bn ủi
6 Nút mở khóa thiết bị để mang đi
7 Nắp đổ nước của ngăn chứa nước
8 Ngăn bảo quản ống cấp hơi nước
9 Dây điện nguồn có phích cắm
10 Nút CALC-CLEAN có đèn
11 Nút on/off (bật/tắt) có đèn báo nguồn v đèn tự động tắt
12 Nút ECO có đèn báo hiệu
13 Ngăn chứa Calc-Clean Thông minh
Công ngh độc quyền từ Philips
Công ngh OptimalTEMP
Công nghệOptimalTEMP cho phép bạn ủi tất cả các loại vải có thể ủi được, theo bất kỳ trình tự no, m không cần điều
chỉnh nhiệt độ bn ủi hoặc phân loại quần áo của bạn.
Bạn có thể đặt mặt đế bn ủi còn nóng một cách an ton trực tiếp trên cầu ủi (Hình 2) m không cần đặt trở lại giá bn
ủi. Điều ny sẽ giúp giảm căng thẳng trên cổ tay của bạn.
Chiếc bn ủi ny đ được The Woolmark Company Pty Ltd công nhận l
sản phẩm ủi len duy nhất với điều kiện quần áo được ủi theo hướng dẫn
trên nhn quần áo v hướng dẫn của nh sản xuất của chiếc bn ủi ny.
R1603. Biểu tượng Woolmark l nhn hiệu chứng nhận ở nhiều quốc gia.
Công ngh ProVelocity Gọn nhẹ
Công nghệ ny cung cấp hơi nước liên tục, thấm sâu v dễ dng loại bỏ các nếp nhăn. Đồng thời, nó giữ cho thiết bị nhỏ
gọn v nhẹ hơn so với bộ tạo hơi nước truyền thống để bảo quản dễ dng hơn.
Chuẩn b sử dụng my
Loại nước được sử dụng
Thiết bị ny được thiết kế để sử dụng với nước máy. Nếu bạn sống trong khu vực có nước nhiễm cặn vôi, cặn sẽ tích tụ
nhanh. Vì vậy, chúng tôi khuyên bạn nên dùng nước cất hoặc nước đ được khử khoáng để kéo di tuổi thọ của thiết bị.
Cảnh bo: Không thêm nước hoa, nước từ my sấy đảo, giấm, hồ vải, chất lm sạch cn, chất phụ trợ i,
nước đã được tẩy sạch bằng hóa chất hoc cc hóa chất khc, do cc chất ny có thể gây tình trạng phun
nước, ố vng hoc lm hỏng thiết b ca bạn.
Tiếng Việt

21
Châm nước vo ngăn cha nước
Đồ đầy nước vo ngăn chứa nước trước mỗi lần sử dụng hoặc khi mực nước trong ngăn chứa nước giảm xuống mức tối
thiểu. Bạn có thể đổ lại nước vo ngăn chứa nước bất cứ lúc no trong quá trình sử dụng.
1 Mở nắp (Hình 4) đổ nước của ngăn chứa nước.
2 Đổ nước v ngăn chứa nước đến mức (Hình 5) MAX (tối đa).
3 Đóng nắp đổ nước của ngăn chứa nước (nghe tiếng 'click').
Sử dụng thiết b
Vải có thể i được
Không i cc loại vải không i được.
- Các loại vải có các biểu tượng (Hình 6) ny có thể ủi được,ví dụ vải lanh, bông, polyester, lụa, len, sợi vitcô v tơ
nhântạo.
- Các loại vải có biểu tượng (Hình 7) ny không thể ủi được. Các loại vải ny bao gồm các loại vải tổng hợp như
Spandex hoặc elastane, vải pha Spandex v các loại vải polyolen (ví dụ polypropylene). Cũng không nên ủi hình in
trên quần áo.
Ủi
1 Đặt bộ tạo hơi nước trên bề mặt bằng phẳng, chắc chắn.
Lưu ý: Để đảm bảo ủi an ton, chúng tôi khuyên bạn nên luôn đặt đế trên cầu ủi chắc chắn.
2 Hy đảm bảo có đủ nước trong ngăn chứa nước.
3 Cắm phích cắm vo ổ điện có dây nối đất v bấm nút on/off (bật/tắt)để bật bộ tạo hơi nước.Chờ cho đến khi đèn
báo 'iron ready’ (bn ủi đ sẵn sng) sáng liên tục (Hình 8). Quá trình ny mất khoảng 2 phút.
4 Tháo ống cung cấp ra khỏi ngăn bảo quản ống.
5 Nhấn nút tháo khóa di chuyển thiết bị để mở khóa bn ủi ra khỏi giá (Hình 9) bn ủi.
6 Nhấn v giữ nút bật hơi nước để bắt đầu ủi (Hình 10).
7 Để có kết quả ủi tốt nhất, sau khi ủi bằng hơi nước, hy thực hiện vi lần di chuyển cuối cùng không có hơi nước.
Cảnh bo: Không hướngtia hơi nước vo ngưi.
Lưu ý: Khi bạn sử dụng thiết bị lần đầu, sẽ mất 30 giây để hơi nước thoát ra khỏi thiết bị.
Lưu ý: Bộ phận bơm sẽ được kích hoạt mỗi lần bạn nhấn nút bấm hơi nước. Thiết bị sẽ phát ra tiếng xả khí lạch cạch.
Việc ny hon ton bình thường. Khi không có nước trong ngăn chứa nước, bộ phận bơm sẽ phát ra tiếng to hơn. Đồ
đầy nước vo ngăn chứa nước khi mực nước trong ngăn chứa nước giảm xuống mức tối thiểu.
Để hơi nước mạnh hơn, bạn có thể sử dụng chế độ hơi nước TURBO an ton cho tất cả các loại vải có thể ủi được.
Đối với các loại vải như vải cotton, vải bò, vải lanh, chúng tối khuyến khích bạn dùng chế độ hơi nước TURBO.
1 Nhấn và giữ nút on/o (bật/tắt) trong 2 giây cho đến khi đèn chuyển sang màu trắng.
2 Để tắt chế độ TURBO (Tăng cường), hãy nhấn lại và giữ nút on/o (bật/tắt) trong 2 giây cho đến khi
đèn chuyển sang màu xanh dương.
Chc năng tăng cưng hơi nước
Sử dụng chức năng tăng cường hơi nước để loại bỏ các vết nhăn khó ủi.
1 Nhấn nhanh nút bật hơi nước hai lần (Hình 11).
Tiếng Việt

22
Ủi đng
Cảnh bo: Hơi nước nóng được phun ra từ bn i. Không tìm cch loại bỏ nếp nhăn trên quần o khi
có ngưi đang mc (Hình 12). Không phun hơi nước gần tay bạn hoc tay ngưi khc.
Bạn có thể sử dụng bn ủi hơi nước ở vị trí thẳng đứng để loại bỏ nếp nhăn trên vải treo.
1 Giữ bn ủi ở tư thế thẳng đứng, nhấn nút bật hơi nước v chạm nhẹ mặt đế bn ủi lên quần áo v di bn ủi chuyển
bn ủi lên v xuống (Hình 13).
Chân đế an ton
Đt bn i xuống trong khi sắp xếp lại quần o ca bạn
Trong khi sắp xếp lại quần áo, bạn có thể đặt bn ủi xuống giá bn ủi hoặc đặt nằm ngang trên cầu ủi (Hình 2). Công nghệ
OptimalTEMP đảm bảo mặt đế bn ủi sẽ không lm hỏng lớp bọc của cầu ủi.
Tiết kim năng lượng
Chế độ eco
Với chế độ ECO (giảm lượng hơi nước), bạn có thể tiết kiệm năng lượng m không lm ảnh hưởng đến kết quả ủi.
1 Để bật chế độ ECO, hy nhấn nút ECO (Hình 14). Đèn ECO mu xanh lá cây sáng.
2 Để tắt chế độ ECO, hy nhấn nút ECO một lần nữa. Đèn ECO mu xanh lá cây tắt.
Chế độ tự động tắt an ton (chỉ có ở một số kiểu nhất đnh)
- Để tiết kiệm năng lượng, thiết bị tự động tắt nếu không được sử dụng sau 5 phút. Đèn tự động tắt trên nút on/off (bật/
tắt) bắt đầu nhấp nháy.
- Để kích hoạt lại thiết bị, hy nhấn nút on/off (bật/tắt). Sau đó, thiết bị sẽ bắt đầu lm nóng lại.
Cảnh bo: Phải luôn để mắt đến thiết b khi đã cắm đin. Luôn rt phch cắm đin ca my ra sau khi
sửdụng.
V sinh v bảo dưỡng
H thống Calc-Clean Thông minh
Thiết bị được thiết kế với hệ thống Calc-Clean Thông minh để đảm bảo quá trình lm sạch v tẩy cặn được thực hiện
thường xuyên. Việc ny giúp duy trì hiệu suất hơi nước mạnh mẽ v tránh bụi v vết bẩn thoát ra
khỏi mặt đế bn ủi qua thời gian. Để đảm bảo quá trình vệ sinh được thực hiện, bộ tạo hơi nước đưa ra các nhắc nhở
thường xuyên.
Âm thanh v đèn nhắc Calc-Clean
Sau 1 đến 3 tháng sử dụng, đèn Calc-Clean bắt đầu nhấp nháy v thiết bị sẽ phát tiếng bíp cho bạn biết bạn phải thực
hiệnquá trình (Hình 15) Calc-Clean.
Ngoi ra, một bước ngăn ngừa thứ hai để bảo vệ bộ tạo hơi nước khỏi cặn bám được tích hợp: chức năng hơi nước bị vô
hiệu hóa nếu việc tẩy sạch cặn bám không được thực hiện (Hình 16). Sau khi việc tẩy sạch cặn bám hon tất, chức năng
hơi nước sẽ được khôi phục. Việc ny xảy ra không phụ thuộc vo loại nước bạn sử dụng.
Lưu ý: Có thể thực hiện quá trình Calc-Clean bất kỳ lúc no, ngay cả khi đèn v âm thanh nhắc chưa được kích hoạt.
Tiếng Việt
ページが読み込まれています...
ページが読み込まれています...
ページが読み込まれています...
ページが読み込まれています...
ページが読み込まれています...
ページが読み込まれています...
ページが読み込まれています...
ページが読み込まれています...
ページが読み込まれています...
ページが読み込まれています...
ページが読み込まれています...
ページが読み込まれています...
ページが読み込まれています...
ページが読み込まれています...
ページが読み込まれています...
ページが読み込まれています...
ページが読み込まれています...
ページが読み込まれています...
ページが読み込まれています...
ページが読み込まれています...
ページが読み込まれています...
ページが読み込まれています...
ページが読み込まれています...
ページが読み込まれています...
ページが読み込まれています...
ページが読み込まれています...
-
 1
1
-
 2
2
-
 3
3
-
 4
4
-
 5
5
-
 6
6
-
 7
7
-
 8
8
-
 9
9
-
 10
10
-
 11
11
-
 12
12
-
 13
13
-
 14
14
-
 15
15
-
 16
16
-
 17
17
-
 18
18
-
 19
19
-
 20
20
-
 21
21
-
 22
22
-
 23
23
-
 24
24
-
 25
25
-
 26
26
-
 27
27
-
 28
28
-
 29
29
-
 30
30
-
 31
31
-
 32
32
-
 33
33
-
 34
34
-
 35
35
-
 36
36
-
 37
37
-
 38
38
-
 39
39
-
 40
40
-
 41
41
-
 42
42
-
 43
43
-
 44
44
-
 45
45
-
 46
46


