DJI Three-Channel Follow Focus User Guide
EN
. 3
12
14
13
13
10
11
7
6
5
2
3
4
9
8
1
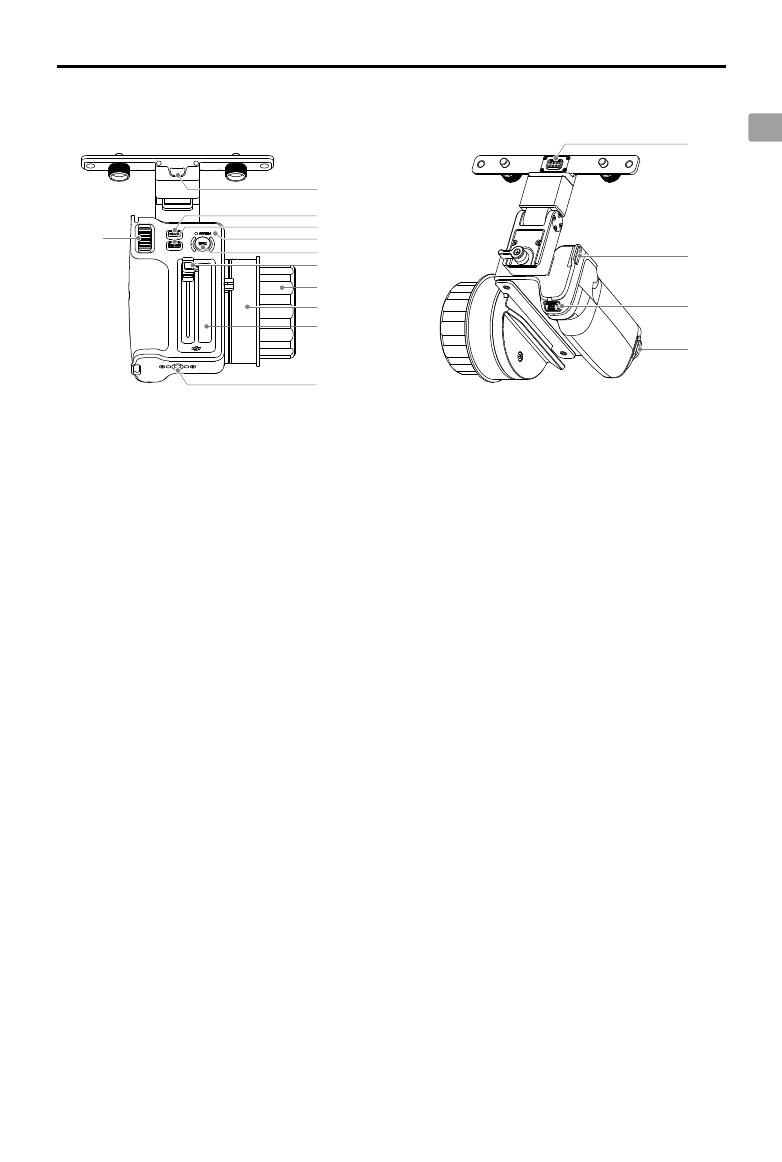
Overview
1. Zoom Stick
Push the zoom stick forward to zoom in and
backward to zoom out. The zoom speed
adjusts based on the pressure applied to
the stick.
2. Lanyard Hole
Attach a lanyard here (not included).
3. MULTI Button*
Press once to mark or remove a focus point.
Press and hold to remove all focus points at
once.
Press twice to switch between the focus
knob’s three levels of resistance.
4. LIMIT Button*
Press once to mark or remove a limit point.
Press and hold to remove all limit points at
once.
* Press the MULTI button and LIMIT button at the same
time to turn on or off the backlight of the focus marking
ring and the iris marking strip.
5. System Status LED
Indicates the system status of the follow
focus. Refer to the System Status LED
Descriptions section for details.
6. REC Button
Press once to start or stop recording. The
backlight stays on during the recording
and turns off when the recording stops.
7. Iris Slider
Push the slider forward or backward to
adjust the iris of the lens.
8. Focus Knob
Turn to adjust the focus of the lens.
9. Focus Marking Ring
Use a marker pen or tape to mark the focus
positions. Easily change the focus marking
ring when shooting different scenes or
changing lenses.
The backlight of the focus marking ring
makes it easy to read markings in dark
environments.
10. Iris Marking Strip
Use a marker pen or tape to mark the slider
positions. The backlight of the iris marking
strip makes it easy to read the marks in
dark environments.
11. Mounting Holes
1/4-inch threaded holes for mounting other
accessories according to usage scenarios.
12. Pin Connector
Connect to the DJI High-Bright Remote
Monitor via the pin connector. The remote
monitor provides power for the follow focus.
13. Hand Strap Mounting Holes
For mounting a hand strap (not included).
14. AF/MF Button
Set the lens autofocus mode to AF (Auto
Focus) or AMF (Automated Manual Focus)
on the display of the Ronin 4D High-Bright
Main Monitor.
When set to AF mode, press the AF/MF
button to switch between MF and AF mode.
When set to AMF mode, press the AF/MF
button to switch between MF and AMF mode.


