
简体中文
一般说明
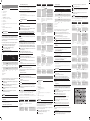
(
图 1
)
1
喷雾嘴
2
注水口盖
3
蒸汽控制
- ;
=
蒸汽熨烫
-- t
=
干熨
- CALC CLEAN
=
自动除垢功能
4
蒸汽束喷射按钮(仅限于特定型号)
5
喷雾按钮
6
温度旋钮
7
温度指示灯(仅限于特定型号:带安全自动关熄指示灯)
8
电源线
9
型号铭牌
10
水箱,带
MAX
(最高)水位标示
11
底板
使用本产品
给水箱注水
注意
:
根据设计
,
您的产品适合使用自来水
。
如果您所居住的
区域水质非常硬
,
水垢积聚会非常快
。
因此
,
建议完全使用蒸
馏水或软化水以延长产品的使用寿命
。
注意
:
请勿将香水
、
醋
、
淀粉
、
除垢剂
、
烫衣剂
、
化学除垢水
或其它化学品放入水箱
。
1 将蒸汽控制旋钮调至 t 位置
(
干熨
)。(
图 2
)
2 向水箱注水至 MAX
(
最高
)
水位
(
图 3
)。
3 盖上注水口的盖子
。
选择温度和蒸汽设定
表 1
面料类型 温度设定 蒸汽设定 蒸汽喷射
(
仅限特
定型号
)
喷雾
功能
亚麻 最大 ; 是 是
棉质 mmm ; 是 是
羊毛 mm ; 否 是
丝质 mm ; 否 是
合成纤维
(例如丙烯酸
纤维、尼龙、
聚酰胺、
聚酯纤维)。
m
t
否 否
注意
:
如上表所示
,
请勿在低温时使用蒸汽或蒸汽束喷射
,
否则
,
熨斗可能泄漏热水
。
1 参阅表 1
,
将温度旋钮调至适合衣物的设置
(
图 4
)。
2 将熨斗竖放并将插头插入电源插座
。
温度指示灯亮起
,
表示熨斗正在加热
(
图 5
)。
3 温度指示灯熄灭时
,
表示熨斗已达到适当的温度
。
4 参阅表 1
,
选择与设定温度对应的蒸汽设定
(
图
6
)。
功能
干熨
- 将蒸汽控制旋钮调至
t(干熨)可进行无蒸汽熨烫。
(图
2
)。
喷水功能
- 按几次喷雾按钮,把要熨烫的布料润湿。这有助于抚平顽固
褶皱(图
7
)。
蒸汽束喷射功能
(
仅限于特定型号
)
- 按下然后释放蒸汽束喷射按钮可获得强劲的蒸汽喷射,轻松
抚平顽固皱褶(图
8
)。
垂直蒸汽
(
仅限于特定型号
)
- 您可以在竖直握住熨斗时使用蒸汽束喷射功能,用于去除悬
挂衣物、窗帘上的褶皱(图
9
)。
安全自动关熄功能
(
仅限于特定型号
)
- 如果熨斗在水平位置
30
秒或在垂直位置
8
分钟未被
移动,熨斗会自动关闭。自动关熄指示灯会开始闪烁
(图
10
)。
- 要使熨斗重新加热,请拿起或轻轻移动熨斗,直至自动关熄
指示灯熄灭。
清洁和维护
清洁
1 将蒸汽控制旋钮调至 t
(
干熨
),
拔下熨斗插头
,
使其
冷却
。(
图 2
)
2 将水箱中的水全部倒出
。
3 用湿布和非腐蚀性
(
液体
)
清洁剂抹去底板上的薄片和其他
沉积物
。
警告
:
要保持底板光滑
,
请避免与金属物碰撞
。
切勿使用磨砂
布
、
醋或其它化学药剂来清洁底板
。
注意
:
定期用自来水冲洗水箱
。
冲洗后倒空水箱
。
除水垢功能
注意事项
:
要延长产品的使用寿命并保持良好的蒸汽性能
,
应每 2 周使用一次自动除垢功能
。
如果您所在地区的水硬度
非常高
(
即熨烫过程中底板中出现薄片
),
则需更经常地使用
自动除垢功能
。
1 确保已经拔下产品插头
,
且已将蒸汽控制旋钮调至
t
(
干熨
)。(
图 2
)
2 为水箱注水至 MAX
(
最高
)
水位标示
。(
图 3
)
请勿将醋或其它除垢剂注入水箱
。
3 将熨斗插头插入插座
,
将温度旋钮调至 MAX
(
最高
)
(
图 11
)。
4 当温度指示灯熄灭时
,
拔下熨斗的电源插头
。
5 握住熨斗
,
将其置于水池上方
。
将蒸汽控制旋钮调至自动除
垢位置并按住
。(
图 12
)
6 轻轻摇动熨斗
,
直至水箱中的水全部用完
(
图 13
)。
警告
:
水垢冲出时
,
蒸汽和沸水也会从底板中冲出
。
7 将蒸汽控制旋钮调回 t
(
干熨
)
位置
。(
图 2
)
注意
:
如果从熨斗中冲出的水仍有水垢颗粒
,
则应再次使用自
动除垢功能
。
完成除水垢过程后
1 将熨斗插头插入插座
。
让熨斗加热
,
使底板干燥
。
2 当温度指示灯熄灭时
,
拔下熨斗的电源插头
。
3 将熨斗在一块布上轻轻移动
,
去除底板上残留的水渍
。
4 待熨斗冷却后再予以存放
。
存储
1 拔掉熨斗的插头
,
并将蒸汽控制旋钮调至 t
(
干熨
)
位置
。(
图 2
)
2 将电源线绕在熨斗的背板上
,
竖立存放熨斗
(
图 14
)。
故障排除
本章归纳了使用本产品时最常见的一些问题。如果您无法根据
以下信息解决问题,请访问
www.philips.com/support
查阅常见问题列表,或联系您所在国家
/
地区的客户服务中心
(联系详情,请参阅全球保修卡)。
问题 可能的原因 解决方法
熨斗已经插好
插头,但底板
仍是冷的。
温度旋钮已
设在
MIN
(最低)位置。
将温度旋钮转到所需
位置。
熨斗未产生
蒸汽。
水箱中水不足。 为水箱注水(见图
3
)。
蒸汽控制旋钮已
设在
位置。
将蒸汽滑钮调至
位置。
熨斗不够热。 设定适合蒸汽熨烫的
温度(2
至
MAX
(最高))。将熨斗竖
立,等到温度指示灯
熄灭后再开始熨烫。
熨斗未产生
蒸汽束喷射。
您在很短的时间
内过于频繁地使
用了蒸汽喷射
功能。
持续按水平方向熨烫,
稍等片刻后再使用蒸汽
喷射功能。
熨斗不够热。 将熨烫温度设为可以
使用蒸汽束喷射功能的
温度(3
至
MAX
(最高))。将熨斗竖立,
等到温度指示灯熄灭后再
使用蒸汽束喷射功能。
水箱中水不足。 为水箱注水(见图
3
)。
熨烫时,
水滴会滴在
布料上。
您没有正确地盖
上注水口盖。
按下盖子,直到听到喀哒
一声。
您在水箱中放入
了添加剂。
漂洗水箱并且不要往水箱
内注入任何添加剂。
设定温度太低,
无法进行蒸汽
熨烫。
设定
2
或更高的温度。
您在温度设定低
于
3
的情况
下使用了蒸汽束
喷射功能。
将温度旋钮调至
3
和
MAX(最高)之间的
设置。
熨斗冷却后或
存放期间,底
板漏水。
您在水箱仍然有
水的情况下将熨
斗水平放置。
倒空水箱或将熨斗竖立。
在熨烫过程中
底板内冒出水
垢和杂质。
硬水会在底板内
形成水垢。
使用一次或多次除垢功能
(请参阅“除垢功能”
部分)。
随着时间的推
移,蒸汽会
变弱。
硬水会在底板内
形成水垢。
使用一次或多次除垢功能
(请参阅“除垢功能”
部分)。
产品中有害物质的名称及含量
部件名称
有害物质
铅(
Pb
) 汞(
Hg
) 镉(
Cd
) 六价铬
Cr(VI)
多溴联苯
(
PBB
)
多溴二苯醚
(
PBDE
)
主机
MainBody
x O O O O O
电源线
Powercord
x O O O O O
本表格依据
SJ/T 11364
的规定编制。
○:
表示该有害物质在该部件所有均质材料中的含量均在
GB/T 26572
规定的限量要求以下。
×:
表示该有害物质至少在该部件的某一均质材料中的含量超出
GB/T 26572
规定的限量要求。
*
该表格中所显示的“有害物质”在产品正常使用情况下不会对人身和环境产生任何伤害。
*
该表格中所显示的“有害物质”及其存在的部件向消费者和回收处理从业者提供相关物质的存在信息,
有助于产品废弃时的妥善处理。
Specic types only
仅限于特定型号
4239 001 01973
©2018 Koninklijke Philips N.V.
保留所有权力。
用户手册
GC1420 series
保留备用
发行日期:2018-03-01
产品:
飞利浦蒸汽电熨斗
型号:
GC1423, GC1426
额定电压:
220 V
~
额定频率:
50 Hz
额定输入功率:
1200 W
生产日期:
请见产品本体
产地:
中国浙江慈溪
飞利浦(中国)投资有限公司
上海市静安区灵石路
718
号
A1
幢
全国顾客服务热线
: 4008 800 008
本产品根据国标
GB4706.1-2005
,
GB4706.2-2007
,
GB4343.1-2009
及
GB17625.1-2012
制造
2 3 4 5
6
7 8 9
10 11 12
13
14
1

ENGLISH
General description (Fig. 1)
1 Spray nozzle
2 Cap of lling opening
3 Steam control
- ; = steam ironing
-- t = dry ironing
- CALC CLEAN = Calc-Clean function
4 Steam boost button (Specic types only)
5 Spray button
6 Temperature dial
7 Temperature light (specic types only: with safety-auto o indication)
8 Mains cord
9 Type plate
10 Water tank with MAX water level indication
11 Soleplate
Using the appliance
Filling the water tank
Note: Your appliance has been designed to be used with tap water. If you
live in an area with hard water, fast scale build-up may occur. Therefore, it
is recommended to use 100% distilled or demineralized water to prolong the
lifetime of your appliance.
Note: Do not put perfume, vinegar, starch, descaling agents, ironing aids,
chemically descaled water or other chemicals in the water tank.
1 Set the steam control to position t (dry ironing). (Fig. 2)
2 Fill the water tank up to the MAX indication (Fig. 3).
3 Close the cap of the lling opening.
Selecting temperature and steam setting
Table 1
Fabric type Temperature
setting
Steam
setting
Steam
boost
(specic
types only)
Spray
Linen MAX ; Yes Yes
Cotton
mmm ;
Yes Yes
Wool
mm ;
No Yes
Silk
mm ;
No Yes
Synthetic fabrics
(e.g. acrylic,
nylon, polyamide,
polyester).
m
t No No
Note: As indicated in the table above, do not use steam or steam boost at a
low temperature, otherwise hot water may leak from the iron.
1 Consult table 1 to set the temperature dial to the appropriate setting for
your garment (Fig. 4).
2 Put the iron on its heel and plug it in. The temperature light goes on to
indicate that the iron is heating up (Fig. 5).
3 When the temperature light goes out, the iron has reached the correct
temperature.
4 Consult table 1 to select a steam setting that corresponds to the
temperature you have set (Fig. 6).
Features
Dry ironing
- Set the steam control to t (dry ironing) to iron without steam. (Fig. 2)
Spray function
- Press the spray button to moisten the article to be ironed. This helps
remove stubborn creases (Fig. 7).
Steam boost function (specic types only)
-
Press and release the steam boost button for a powerful boost of steam to
remove stubborn creases (Fig. 8).
Vertical steam (specic types only)
- You can use the steam boost function when you hold the iron in vertical
position for removing creases from hanging clothes, curtains etc (Fig. 9).
Safety auto-o function (specic types only)
- The iron switches o automatically if it has not been moved for 30
seconds in horizontal position or 8 minutes in vertical position. The auto-
o light starts ashing (Fig. 10).
- To let the iron heat up again, pick up the iron or move it slightly until the
auto-o light goes out.
Cleaning and maintenance
Cleaning
1 Set the steam control to t (dry ironing), unplug the iron and let it cool
down. (Fig. 2)
2 Pour any remaining water out of the water tank.
3 Wipe akes and any other deposits o the soleplate with a damp cloth
and a non-abrasive (liquid) cleaning agent.
Caution: To keep the soleplate smooth, avoid hard contact with metal
objects. Never use a scouring pad, vinegar or other chemicals to clean the
soleplate.
Note: Regularly rinse the water tank with tap water. Empty the water tank
after rinsing it.
Calc-Clean function
IMPORTANT: To prolong the lifetime of your appliance and to maintain
good steaming performance, use the Calc-Clean function once every two
weeks. If the water in your area is very hard (i.e. when akes come out of
the soleplate during ironing), use the Calc-Clean function more frequently.
1 Make sure the appliance is unplugged and the steam control is set to t
(dry ironing). (Fig. 2)
2 Fill the water tank to the MAX indication. (Fig. 3)
Do not pour vinegar or other descaling agents into the water tank.
3 Plug in the iron and set the temperature dial to MAX (Fig. 11).
4 Unplug the iron when the temperature light goes out.
5 Hold the iron over the sink. Push the steam control to the Calc-Clean
position and hold it. (Fig. 12)
6 Gently shake the iron until all water in the water tank has been used
up (Fig. 13).
Caution: While scale is ushed out, steam and boiling water also come out of
the soleplate.
7 Set the steam control back to t (dry ironing). (Fig. 2)
Note: Repeat the Calc-Clean process if the water that comes out of the iron
still contains scale particles.
After the Calc-Clean process
1 Plug in the iron. Let the iron heat up to let the soleplate dry.
2 Unplug the iron when the temperature light goes out.
3 Move the iron gently over a piece of cloth to remove any water stains on
the soleplate.
4 Let the iron cool down before you store it.
Storage
1 Unplug the iron and set the steam control to t (dry ironing). (Fig. 2)
2 Wind the mains cord round the backplate of the iron and store the iron
on its heel (Fig. 14).
Troubleshooting
This chapter summarises the most common problems you could encounter
with the appliance. If you are unable to solve the problem with the
information below, visit www.philips.com/support for a list of frequently
asked questions or contact the Consumer Care Centre in your country (see the
worldwide guarantee leaet for contact details).
Problem
Possible cause Solution
The iron is
plugged in, but
the soleplate is
cold.
The temperature
dial is set to MIN.
Set the temperature dial to the
required position.
The iron does not
produce any
steam.
There is not
enough water in
the water tank.
Fill the water tank (see Fig. 3).
Problem
Possible cause Solution
The steam control
is set to position .
Set the steam slider to position
.
The iron is not hot
enough.
Set an ironing temperature that
is suitable for steam ironing (2
to MAX). Put the iron on its heel
and wait until the temperature
light has gone o before you start
ironing.
The iron does not
produce a
steam boost.
You have used
the steam boost
function too often
within a very short
period.
Continue ironing in horizontal
position and wait a while before
you use the steam boost function
again.
The iron is not hot
enough.
Set an ironing temperature at
which the steam boost function
can be used ( 3 to MAX). Put
the iron on its heel and wait until
the temperature light has gone o
before you use the steam boost
function.
There is not
enough water in
the water tank.
Fill the water tank (see Fig. 3).
Water droplets
drip onto the
fabric during
ironing.
You have not
closed the cap of
the lling opening
properly.
Press the cap until you hear a
click.
You have put an
additive in the
water tank.
Rinse the water tank and do not
put any additive in the water tank.
The set
temperature is
too low for steam
ironing.
Set a temperature of 2 or higher.
You have used
the steam boost
function at a
temperature
setting below 3.
Set the temperature dial to a
setting between 3 and MAX.
Water drips from
the Soleplate
after the iron has
cooled down or
has been stored.
You have put the
iron in horizontal
position with water
still left in the
water tank.
Empty the water tank or put the
iron on heel.
Flakes and
impurities
come out of the
soleplate during
ironing.
Hard water forms
akes inside the
soleplate.
Use the Calc-Clean function one
or more times (see the ‘Calc-
clean function’ section
).
Steam becomes
weaker over time.
Hard water forms
akes inside the
soleplate.
Use the Calc-Clean function one
or more times (see the ‘Calc-
clean function’ section).
한국어
각 부의 명칭 (그림 1)
1 스프레이 노즐
2 물 주입구 뚜껑
3 스팀량 조절기
- ; = 스팀 다림질
-- t = 건식 다림질
- CALC CLEAN = 석회질 제거 기능
4 순간 스팀 버튼 (특정 모델만 해당)
5 스프레이 버튼
6 온도 조절기
7 온도 표시등(안전한 자동 전원 차단 기능이 있는 특정 모델만 해당)
8 전원 코드
9 명판
10 MAX 수위 표시선이 있는 물탱크
11 열판
제품 사용하기
물탱크 채우기
참고
:
이
다리미는
수돗물을
사용하도록
제작되었습니다
.
사용
지역의
수돗물이
경수일
경우
,
석회질이
더
빨리
축적될
수
있습니다
.
이럴
경우
100%
증류수
또는
탈염수를
사용하면
제품의
수명이
연장됩니다
.
참고
:
물
탱크에
향수
,
식초
,
풀
,
석회질
제거제
,
다림질
보조제
,
이물질
제거용
화학
약품
또는
기타
화학
약품을
넣지
마십시오
.
1
스팀량
조절기를
t
(
건식
다림질
)
위치에
맞추십시오
. (
그림
2)
2
물탱크를
MAX
표시선까지
채우십시오
(
그림
3).
3
물
주입구
뚜껑을
닫으십시오
.
온도 선택 및 스팀 설정
표 1
섬유
종류 온도
설정 스팀
설정 순간
스팀
(
특정
모델만
해당
)
스프레이
기능
마직 최대
;
예 예
면직
mmm ;
예 예
모직
mm ;
아니요 예
실크
mm ;
아니요 예
합성 섬유
(예: 아크릴, 나일론,
폴리아미드,
폴리에스테르)
m t
아니요 아니요
참고
:
위의
표에
표시된
대로
낮은
온도에서
스팀
또는
순간
스팀을
사용하지
마십시오
.
그렇지
않으면
다리미에서
뜨거운
물이
샐
수
있습니다
.
1
표
1
을
참조하여
온도
조절기를
옷감에
알맞게
설정하십시오
(
그림
4).
2
다리미를
바로
세우고
전원에
연결하십시오
.
온도
표시등이
켜지면서
다리미가
가열되고
있음을
알려줍니다
(
그림
5).
3
온도
표시등
이
꺼지면
다리미가
알맞은
온도로
가열된
것입니다
.
4
표
1
을
참조하여
설정한
온도에
알맞은
스팀
설정을
선택하십시오
(
그림
6).
특징
건식 다림질
- 스팀 없이 다림질하려면 스팀량 조절기를 t(건식 다림질) 위치로 맞추십시오.
(그림 2)
스프레이 기능
- 스프레이 버튼을 눌러 다림질할 부분을 적셔주십시오. 이렇게 하면 보다
간편하게 심하게 구겨진 주름을 제거할 수 있습니다 (그림 7).
순간 스팀 기능(특정 모델만 해당)
- 순간 스팀 버튼을 눌렀다가 놓으면 강력한 순간 스팀이 나와서 심하게 구겨진
주름을 제거할 수 있습니다 (그림 8).
수직 스팀(특정 모델만 해당)
- 순간 스팀 기능 은 걸려있는 옷이나 커튼 등의 주름을 없애기 위해 다리미를
수직으로 들고 있는 상태에서 사용할 수 있습니다 (그림 9).
안전한 자동 전원 차단 기능 (특정 모델만 해당)
- 다리미는 수평으로 놓인 상태에서 30초 또는 수직으로 놓인 상태에서 8분 동안
움직임이 없으면 전원이 자동으로 꺼집니다. 자동 전원 차단 표시등이 깜빡이기
시작합니다 (그림 10).
- 다리미를 다시 가열하려면 다리미를 들거나 자동 전원 차단 표시등이 꺼질
때까지 가볍게 움직이십시오.
세척 및 유지관리
세척
1
스팀량
조절기를
t
(
건식
다림질
)
위치로
맞추고
전원
플러그를
뽑아
제품을
식히십시오
. (
그림
2)
2
물탱크에
남아
있는
물을
모두
따라내십시오
.
3
젖은
헝겊과
비마모성
세척액으로
열판에서
불순물을
닦으십시오
.
주의
:
열판을
매끄럽게
유지하려면
금속
물질에
긁히지
않도록
주의하십시오
.
열판을
닦을
때는
절대
수세미나
식초
또는
기타
화학
약품을
사용하지
마십시오
.
참고
:
물탱크는
수돗물로
정기적으로
헹구십시오
.
헹군
후에는
물탱크를
비우십시오
.
석회질 제거 기능
중요 사항: 제품의 수명을 늘리고 우수한 스팀 성능을 유지하려면 석회질 제거
기능을 2주일에 한 번씩 사용하십시오. 사용 지역의 물이 심한 경수일 경우(예를
들어, 다림질하는 동안 열판에서 이물질이 나오는 경우)에는 석회질 제거 기능을
더욱 자주 사용하십시오.
1
제품의
전원
플러그가
분리되어
있고
스팀량
조절기가
t
(
건식
다림질
)
위치에
맞추어져
있는지
확인하십시오
. (
그림
2)
2
물탱크의
MAX
표시선까지
물을
채우십시오
. (
그림
3)
물
탱크에
식초
또는
다른
석회질
제거제를
넣지
마십시오
.
3
다리미를
전원에
연결하고
온도
조절기를
MAX
에
맞추십시오
(
그림
11).
4
온도
표시등이
꺼지면
다리미
전원
플러그를
뽑습니다
.
5
싱크대
위에서
다리미를
들고
,
스팀량
조절기를
석회질
제거
위치에
맞추십시오
. (
그림
12)
6
물탱크의
모든
물이
나올
때까지
다리미를
천천히
흔드십시오
(
그림
13).
주의
:
석회질이
씻겨져
나오는
동안
스팀과
끓는
물도
열판에서
새어나옵니다
.
7
스팀량
조절기를
t
(
건식
다림질
)
위치에
맞추십시오
. (
그림
2)
참고
:
다리미에서
나오는
물에
여전히
석회질
입자가
들어있는
경우
석회질
제거를
반복하십시오
.
석회질 제거 작업 후
1
다리미의
전원
코드를
연결하십시오
.
열판이
마르도록
다리미를
가열하십시오
.
2
온도
표시등이
꺼지면
다리미
전원
플러그를
뽑습니다
.
3
다리미를
천
위에
문질러서
열판에
남아
있는
물
얼룩을
제거하십시오
.
4
보관하기
전에
다리미를
식히십시오
.
보관
1
다리미
전원
코드를
뽑고
스팀량
조절기를
t
(
건식
다림질
)
위치로
맞추십시오
.
(
그림
2)
2
전원
코드를
다리미의
뒷면
패널에
잘
감아
놓고
다리미를
똑바로
세워서
보관하십시오
(
그림
14).
문제 해결
이 란은 제품을 사용하면서 가장 일반적으로 경험하는 문제와 그 해결 방법을
제시합니다. 아래 정보로 문제를 해결할 수 없는 경우 www.philips.com/support
를 방문하여 자주 묻는 질문(FAQ) 목록을 참조하거나 필립스 고객 상담실로
문의하십시오. 연락처는 제품 보증서를 참조하십시오.
원인
예상
원인 해결책
다리미를 전원에
연결했지만 열판이
가열되지 않습니다.
온도 조절기를 MIN에
맞추었습니다.
온도 조절기를 필요한 위치에
맞추십시오.
다리미에서 스팀이
나오지 않습니다.
물탱크의 물이
충분하지 않습니다.
물탱크를 채우십시오(그림 3).
스팀량 조절기를 에
맞추었습니다.
스팀량 조절기를 에
맞추십시오.
열판이 충분히
가열되지 않습니다.
스팀 다림질에 적합한 다림질
온도를 선택하십시오(2 ~
MAX). 다림질을 시작하기
전 온도 표시등이 꺼질
때까지 다리미를 바로 세우고
기다립니다.
다리미에서
순간 스팀이 나오지
않습니다.
순간 스팀 기능을 짧은
시간 동안 너무 자주
사용했을 수 있습니다.
순간 스팀 기능을 다시
사용하기 전에 수평으로
다림질을 하면서 조금만
기다리십시오.
열판이 충분히
가열되지 않습니다.
순간 스팀 기능을 사용할
수 있는 다림질 온도를
선택하십시오(3 ~ MAX).
순간 스팀 기능을 사용하기
전 온도 표시등이 꺼질
때까지 다리미를 바로 세우고
기다립니다.
물탱크의 물이
충분하지 않습니다.
물탱크를 채우십시오(그림 3).
다림질 하는 동안
옷 위로 물방울이
떨어집니다.
물 주입구의 뚜껑을
제대로 닫지
않았습니다.
딸깍 소리가 날 때까지 눌러
뚜껑을 닫아주십시오.
물 탱크에 첨가제를
넣었을 수 있습니다.
물 탱크를 헹구고 더 이상
첨가제를 넣지 마십시오.
설정한 온도가 너무
낮아 스팀 다림질을 할
수 없습니다.
2 또는 더 높은 온도를
선택하십시오.
순간 스팀 기능을
3 이하의 온도에서
사용했습니다.
온도 조절기를
3 ~ MAX로 설정하십시오.
다리미를 식히거나
보관한 후에
열판에서 물이
떨어집니다.
물탱크에 물이
남아있는 상태에서
다리미를 수평으로
놓아두었습니다.
물 탱크의 물을 버리거나
다리미를 바로 세우십시오.
다림질을 할 때
열판에서 이물질이나
불순물이 떨어집니다.
경수가 열판
내부에 석회질을
생성시켰습니다.
석회질 제거 기능을 한 번 이상
사용하십시오(‘석회질 제거
기능’ 섹션 참조).
시간이 지남에 따라
스팀이 약해집니다.
경수가 열판
내부에 석회질을
생성시켰습니다.
석회질 제거 기능을 한 번 이상
사용하십시오(‘석회질 제거
기능’ 섹션 참조).
-
 1
1
-
 2
2


他の言語で
- English: Philips GC1423/48 User manual