VIRTUALLY
INVISIBLE
®
300
WIRELESS SURROUND SPEAKERS
OWNER’S GUIDE BRUGERVEJLEDNING
BEDIENUNGSANLEITUNG GEBRUIKERSHANDLEIDING
GUÍA DEL USUARIO KÄYTTÖOHJE NOTICE D’UTILISATION
MANUALE DI ISTRUZIONI KEZELÉSI ÚTMUTATÓ
BRUKERVEILEDNING PODRĘCZNIK UŻYTKOWNIKA
MANUAL DO PROPRIETÁRIO BRUKSANVISNING
2 - ENGLISH
IMPORTANT SAFETY INSTRUCTIONS
Please read and keep all safety and use instructions
Important Safety Instructions
1. Read these instructions.
2. Keep these instructions.
3. Heed all warnings.
4. Follow all instructions.
5. Do not use this apparatus near water.
6. Clean only with a dry cloth.
7. Do not block any ventilation openings. Install in accordance with the manufacturer’s instructions.
8. Do not install near any heat sources such as radiators, heat registers, stoves, or other apparatus (including
amplifiers) that produce heat.
9. Protect the power cord from being walked on or pinched particularly at plugs, convenience receptacles, and the
point where they exit from the apparatus.
10. Only use attachments/accessories specified by the manufacturer.
11. Unplug this apparatus during lightning storms or when unused for long periods of time.
12. Refer all servicing to qualified personnel. Servicing is required when the apparatus has been damaged in any way,
such as power-supply cord or plug is damaged, liquid has been spilled or objects have fallen into the apparatus, the
apparatus has been exposed to rain or moisture, does not operate normally, or has been dropped.
This symbol means there is uninsulated, dangerous voltage within the product enclosure that may constitute a
risk of electrical shock.
This symbol means there are important operating and maintenance instructions in this guide.
This product contains magnetic material. Consult your physician on whether this might aect your implantable
medical device.
To reduce the risk of fire or electrical shock, do NOT expose this product to rain, liquids or moisture.
Do NOT expose this product to dripping or splashing, and do not place objects filled with liquids, such as vases, on or
near the product.
Keep the product away from fire and heat sources. Do NOT place naked flame sources, such as lighted candles, on or
near the product.
Do NOT make unauthorized alterations to this product.
Do NOT use a power inverter with this product.
Do NOT use in vehicles or boats.
The speaker wire and interconnect cables included with this system are not approved for in-wall installation. Please
check your local building codes for the correct type of wire and cable required for in-wall installation.
Where the mains plug or an appliance coupler is used as the disconnect device, the disconnect device shall remain
readily operable.
仅适用于 2000m 以下地区安全使用
Use at altitude less than 2000 meters only.
Due to ventilation requirements, Bose does not recommend placing the product in a confined space such as in a wall
cavity or in an enclosed cabinet.
The product label is located on the bottom of the product.
ENGLISH - 3
REGULATORY INFORMATION
This device complies with part 15 of the FCC Rules and with Industry Canada license-exempt RSS standard(s). Operation
is subject to the following two conditions: (1) This device may not cause harmful interference, and (2) this device must
accept any interference received, including interference that may cause undesired operation.
This device complies with FCC and Industry Canada radiation exposure limits set forth for general population. This
equipment should be installed and operated with a minimum distance of 20 cm between radiator and your body. This
transmitter must not be co-located or operating in conjunction with any other antenna or transmitter.
This device is for indoor use only to reduce the potential for harmful interference to other co-channel systems.
W52 for Indoor Use Only
Receiver Category = 2
Bose Corporation hereby declares that this product is in compliance with the essential requirements and other
relevant provisions of Directive 2014/53/EU and all other EU directive requirements. The complete declaration
of conformity can be found at: www.Bose.com/compliance
Date of Manufacture: The eighth digit in the serial number indicates the year of manufacture; “7” is 2007 or 2017.
The Bluetooth® word mark and logos are registered trademarks owned by Bluetooth SIG, Inc. and any use of such marks
by Bose Corporation is under license.
SoundTouch and the wireless note design are registered trademarks of Bose Corporation in the U.S. and other countries.
Wi-Fi is a registered trademark of Wi-Fi Alliance®.
Bose Corporation Headquarters: 1-877-230-5639
©2017 Bose Corporation. No part of this work may be reproduced, modified, distributed or otherwise used without prior
written permission.
4 - ENGLISH
CONTENTS
Getting Started
Building your entertainment system .......................................................................... 5
Unpacking ............................................................................................................................. 5
Placement guidelines ....................................................................................................... 6
Mounting the speakers ............................................................................................ 7
Setting Up the Speakers
Connecting the adapters ................................................................................................ 8
Identifying switch settings on the wireless receivers .......................................... 9
Connecting the speakers ................................................................................................ 9
Connecting to power ........................................................................................................ 10
Finishing Setup
Pairing with a SoundTouch® 300 soundbar ............................................................. 11
Checking for sound ........................................................................................................... 12
About ADAPTiQ® audio calibration ............................................................................ 12
Running ADAPTiQ® audio calibration ................................................................ 12
Getting System Information
System status indicators ................................................................................................. 14
Care and Maintenance
Cleaning ................................................................................................................................. 15
Customer service ............................................................................................................... 15
Limited warranty information ....................................................................................... 15
Technical information ....................................................................................................... 15
SERVICE connector .......................................................................................................... 16
Troubleshooting
Common solutions ............................................................................................................ 17
Unable to complete ADAPTiQ® audio calibration ................................................. 19
ENGLISH - 5
Building your entertainment system
The Virtually Invisible® 300 wireless rear speakers are part of a modular home
entertainment system. They are compatible with the SoundTouch® 300 soundbar and
Acoustimass® 300 wireless bass module (not provided). You can wirelessly pair the bass
module and surround speakers at any time for an even richer, more immersive sound.
To purchase these systems, contact your local Bose® dealer or visit www.Bose.com
Unpacking
Carefully unpack the carton and confirm that the following parts are included:
Virtually Invisible® 300 speaker (2) Wireless receiver (2) AC2 adapter (2)
Power cord (2)* Two-pin speaker cable (2)
*May ship with multiple power cords. Use the power cord for your region.
Note: If any part is damaged, do not use it. Contact your authorized Bose dealer or
Bose customer service.
GETTING STARTED
6 - ENGLISH
GETTING STARTED
Placement guidelines
To avoid interference, keep other wireless equipment 1 – 3 ft. (0.3 – 0.9 m) away from
the wireless receivers. Place the speakers and wireless receivers outside and away from
metal cabinets, other audio/video components and direct heat sources.
Component Placement recommendation
Rear speakers
Place the speakers on their rubber feet on a stable and level surface.
Place the speakers at ear height or higher in the back of the room.
If placing the speakers in an enclosed bookcase shelf, position them at
the front edge of the shelf.
For a sound that is directed straight at the listener, aim the speakers in
towards the listener.
For a sound that reflects o the walls to fill the room, aim the speakers
out towards a rear or side wall.
Wireless receivers Confirm that the switch on one wireless receiver is set to R (right).
Confirm that the switch on the other wireless receiver is set to L (left).
Facing the TV, place the speaker and R wireless receiver on the right
side of the room.
Facing the TV, place the speaker and L wireless receiver on the left side
of the room.
Make sure there is an AC (mains) outlet near each wireless receiver.
ENGLISH - 7
GETTING STARTED
Mounting the speakers
You can mount the speakers on wall brackets, ceiling mounts, floor stands or
table stands. To purchase these accessories, contact your local Bose® dealer or
visit www.Bose.com
CAUTION: Only use Bose hardware to mount the speakers. Using unauthorized mounts
may damage your Bose system and its components.
8 - ENGLISH
SETTING UP THE SPEAKERS
Connecting the adapters
1. Using the screwdriver, turn the screws to the left (counterclockwise) to loosen the
wire terminals.
2. Insert the red, stripped end of the two-pin cable marked + into the red + terminal.
3. Insert the black, stripped end of the two-pin cable into the silver terminal.
Note: Be sure to only insert the stripped and tinned portions of each exposed wire
to avoid clamping the wire’s insulation.
4. Using the screwdriver, turn the screws to the right (clockwise) to secure the wires
into the terminals.
5. Repeat steps 1 – 4 to connect the other adapter.
ENGLISH - 9
Identifying switch settings on the
wireless receivers
Your speakers connect to wireless receivers to communicate with the SoundTouch® 300
soundbar. The receivers come preset to a left and right channel out of the box. You can
use the switch on the front of the receiver to adjust the channel settings.
1. Confirm that the switch on one wireless receiver is set to R (right).
2. Confirm that the switch on the other wireless receiver is set to L (left).
Note: Make sure that one wireless receiver is always set to L (left) and the other is set
to R (right).
Connecting the speakers
1. Insert the adapter into the back of your speaker.
2. Insert the other end of the two-pin cable into your wireless receiver.
You hear or feel a click.
3. Repeat steps 1 – 2 to connect your other speaker.
SETTING UP THE SPEAKERS
10 - ENGLISH
SETTING UP THE SPEAKERS
Connecting to power
1. Connect one end of the power cord into your wireless receiver.
2. Plug the other end of the power cord into an AC (mains) outlet.
3. Repeat steps 1 – 3 to set up your other speaker.
ENGLISH - 11
FINISHING SETUP
Pairing with a SoundTouch
®
300 soundbar
To wirelessly pair your rear speakers to a SoundTouch® 300 soundbar, you need to place
the soundbar into pairing mode using the remote control.
1. On the SoundTouch® 300 remote control, press the SoundTouch® button .
2. Press and hold until the connectivity indicator on the soundbar blinks white.
1
2
Once paired, your speakers emit a tone. The LED indicator on the back of the
wireless receiver and the
indicator on the soundbar glow white.
Note: If your speakers don’t pair with the soundbar, see “Troubleshooting” on
page 17.
12 - ENGLISH
FINISHING SETUP
Checking for sound
1. Power on your TV.
2. If you are using a cable/satellite box or other secondary source:
Power on this source.
If your secondary source is connected to your TV, select the appropriate TV input.
If you have not programmed the SoundTouch® 300 remote control, you may need
to use a dierent remote.
3. Power on the SoundTouch® 300 soundbar.
You hear sound coming from your rear speakers.
Note: If you do not hear sound from the rear speakers, see “Troubleshooting”
on page 17. If you do not hear sound from your soundbar, refer to the
SoundTouch® 300 owner’s guide.
About ADAPTiQ
®
audio calibration
After connecting your rear speakers to the SoundTouch® 300 soundbar, run ADAPTiQ®
audio calibration for the best acoustic performance. ADAPTiQ customizes the sound of
the system to the acoustics of your listening area by taking five audio measurements. To
run an audio calibration, you need 10 minutes when the room is quiet.
During ADAPTiQ, a microphone on the top of the ADAPTiQ headset (provided with the
SoundTouch® 300 soundbar) measures the sound characteristics of your room to
determine optimal sound quality.
If you no longer have the ADAPTiQ headset, contact Bose® customer service for a
replacement.
Note: If you are also pairing the Acoustimass® 300 wireless bass module with the
soundbar, pair the bass module before running ADAPTiQ audio calibration. Refer
to the Acoustimass® 300 quick start guide or owner’s guide.
Running ADAPTiQ® audio calibration
1. Insert the ADAPTiQ® headset cable into the ADAPTiQ connector on the back of
the soundbar.
ENGLISH - 13
FINISHING SETUP
2. Put the ADAPTiQ® headset (provided with the SoundTouch® 300) on your head.
3. On the SoundTouch® 300 remote control, press the SoundTouch® button .
4. Press and hold until the TV indicator and the Bluetooth® indicator on the
soundbar glow green.
3
4
The ADAPTiQ process begins.
Note: If you don’t hear your language, press and on the remote’s
navigation pad. To reset the language, press and hold
for 10 seconds.
5. Follow the voice prompts until the ADAPTiQ process is complete.
If you hear an error message and are unable to complete the ADAPTiQ audio
calibration, see page 19.
6. Unplug the ADAPTiQ headset from the soundbar and store it in a safe place.
If you later pair the optional bass module, move or mount the system, or move any
furniture, run the ADAPTiQ audio calibration again to ensure optimal sound quality.
14 - ENGLISH
System status indicators
The front of the wireless receiver has an LED indicator that shows system status.
The LED glows according to system state.
Indicator activity System state
Blinking amber Ready to pair
Solid white Connected to the soundbar
Solid amber (dim) Disconnected from the soundbar
Blinking white Downloading system software update
Blinking red Firmware error — contact Bose® customer service
GETTING SYSTEM INFORMATION
ENGLISH - 15
CARE AND MAINTENANCE
Cleaning
Clean the exterior of the rear speakers with a soft, dry cloth.
Do not use any sprays near the rear speakers. Do not use any solvents, chemicals or
cleaning solutions containing alcohol, ammonia or abrasives.
Do not allow liquids to spill or objects to drop into any openings.
Customer service
For additional help using the rear speakers:
Visit global.Bose.com/Support/VI300
Contact Bose® customer service.
Limited warranty information
Your system is covered by a limited warranty. Details of the limited warranty are
provided on the warranty card in the carton. Please refer to the warranty card for
instructions on how to register. Failure to register will not aect your limited
warranty rights.
The warranty information provided with this product does not apply in
Australia and New Zealand. See our website at www.bose.com.au/warranty or
www.bose.com.nz/warranty for details of the Australia and New Zealand warranty.
Technical information
Input power rating: 100 – 240V 50/60Hz 30W
16 - ENGLISH
CARE AND MAINTENANCE
SERVICE connector
The SERVICE connector is for service use only. Do not insert any cables into
this connector.
ENGLISH - 17
If you experience problems with your rear speakers do the following:
Unplug the power cords for the wireless receivers, wait 15 seconds and plug them
firmly into a live AC (mains) outlet.
Secure all cables.
Check the state of system status indicator (see page 14).
Move the speakers and wireless receivers away from possible interference
(wireless routers, cordless phones, televisions, microwaves, etc.).
Place wireless receivers and rear speakers according to the placement
guidelines (see page 6).
If you could not resolve your issue, see the table below to identify symptoms
and solutions to common problems. If you are unable to resolve your issue, contact
Bose® customer service.
Common solutions
The following table lists symptoms and possible solutions to common problems.
Symptom Solution
No power
Make sure that the system is powered on by checking the status
indicator (see page 14).
Unplug the power cords for the wireless receivers and soundbar, and
plug them firmly into a live AC (mains) outlet. Repeat the pairing
process (see page 11).
Use the SoundTouch® 300 remote to power on the soundbar.
Wireless receivers
don’t pair with the
soundbar
Unplug the power cords for the wireless receivers and soundbar, and
plug them firmly into a live AC (mains) outlet. Repeat the pairing
process (see page 11).
Reset the soundbar (refer to your SoundTouch® 300 owner’s guide).
TROUBLESHOOTING
18 - ENGLISH
TROUBLESHOOTING
Symptom Solution
No audio
Unmute the system.
Increase the volume.
Make sure that sound is coming out of your SoundTouch® 300
soundbar (refer to your SoundTouch® 300 owner’s guide).
If your source is connected to your TV, select the correct TV input
(refer to your SoundTouch® 300 owner’s guide).
Unplug the power cords for the wireless receivers and soundbar, and
plug them firmly into a live AC (mains) outlet. Repeat the pairing
process (see page 11).
Make sure that the positive and negative speaker cable wires are
securely inserted into the adapter. Firmly plug the adapters into
the speakers.
Make sure one wireless receiver is set to the L (left) channel and the
other to the R (right) channel. If both wireless receivers are set to the
same channel:
1. Unplug both wireless receivers from the AC (mains) outlet.
2. Set one wireless receiver to the L (left) channel and the other to
the R (right) channel.
3. Plug both wireless receivers back into an AC (mains) outlet.
Intermittent, poor or
distorted sound.
Test dierent sources if available.
If you have not already completed the ADAPTiQ® audio calibration
process, run it now (see page 12).
Make sure that the positive and negative speaker cable wires are
securely inserted into the adapter. Firmly plug the adapters into the
speakers.
If placing the speakers in a cabinet or on a shelf, position them as
close as possible to the front edge of the shelf for optimum acoustic
performance.
Update the system software:
1. On the SoundTouch® 300 remote control, press the SoundTouch®
button .
2. Press and hold the Closed Captioning button until the Wi-Fi
indicator , TV indicator , SoundTouch® indicator and
Bluetooth indicator on the soundbar blink white.
Note: The update may take 10 or more minutes.
ENGLISH - 19
TROUBLESHOOTING
Symptom Solution
No surround sound
Make sure that your TV can output surround sound audio (refer to
your TV owner’s guide).
Make sure that the positive and negative speaker cable wires are
securely inserted into the adapter. Firmly plug the adapters into the
speakers.
Make sure one wireless receiver is set to the L (left) channel and the
other to the R (right) channel. If both wireless receivers are set to the
same channel:
1. Unplug both wireless receivers from the AC (mains) outlet.
2. Set one wireless receiver to the L (left) channel and the other to
the R (right) channel.
3. Plug both wireless receivers back into an AC (mains) outlet.
Unable to complete ADAPTiQ
®
audio calibration
Listen to the voice prompts for the following error messages:
Error message Problem What to do
1 The microphone on
the ADAPTiQ® headset
cannot detect sound.
Secure all speaker cables.
Make sure the microphone opening on the top
of ADAPTiQ headset is not blocked.
Your ADAPTiQ headset may be damaged.
Contact Bose® customer service for
replacement parts.
2 The room is too loud.
Re-run ADAPTiQ audio calibration when the
room is quiet.
3 The ADAPTiQ headset
is too close to the
speakers.
Move the ADAPTiQ headset farther away from
the speakers.
4 The listening locations
are too similar.
Move 1 – 2 ft. (.3 – .6 m) away from your previous
listening location.
5 The ADAPTiQ
headset cannot take
measurements due to
movement.
Hold your head still.
After correcting your problem, you must re-run ADAPTiQ audio calibration (see
page 12). If you hear a dierent error message, contact Bose® customer service for
further instructions.
2 - DANSK
VIGTIGE SIKKERHEDSINSTRUKTIONER
Læs og opbevar venligst alle sikkerheds- og brugsinstruktioner
Vigtige sikkerhedsinstruktioner
1. Læs disse instruktioner.
2. Gem disse instruktioner.
3. Ret dig efter alle advarsler.
4. Følg alle instruktioner.
5. Anvend ikke dette apparat i nærheden af vand.
6. Rengør kun med en tør klud.
7. Undgå at blokere ventilationsåbningerne. Installer i overensstemmelse med producentens instruktioner.
8. Installer ikke i nærheden af varmekilder som f.eks. radiatorer, varmeovne, komfurer eller andre apparater (herunder
forstærkere), der producerer varme.
9. Beskyt netledningen mod at blive trådt på eller klemt, specielt ved stikket, stikkontakter, og hvor den kommer ud
af udstyret.
10. Brug kun tilslutningsudstyr/tilbehør, der er angivet af producenten.
11. Afbryd strømmen til apparatet under tordenvejr, eller når det står ubrugt i lang tid.
12. Overlad al service til kvalificeret servicepersonale. Et serviceeftersyn er påkrævet, når apparatet på nogen måde
er beskadiget, hvis f.eks. netledningen eller stikket er beskadiget, der er blevet spildt væske, eller der er kommet
objekter ind i apparatet, hvis apparatet er blevet udsat for regn eller fugt, ikke virker normalt eller er blevet tabt.
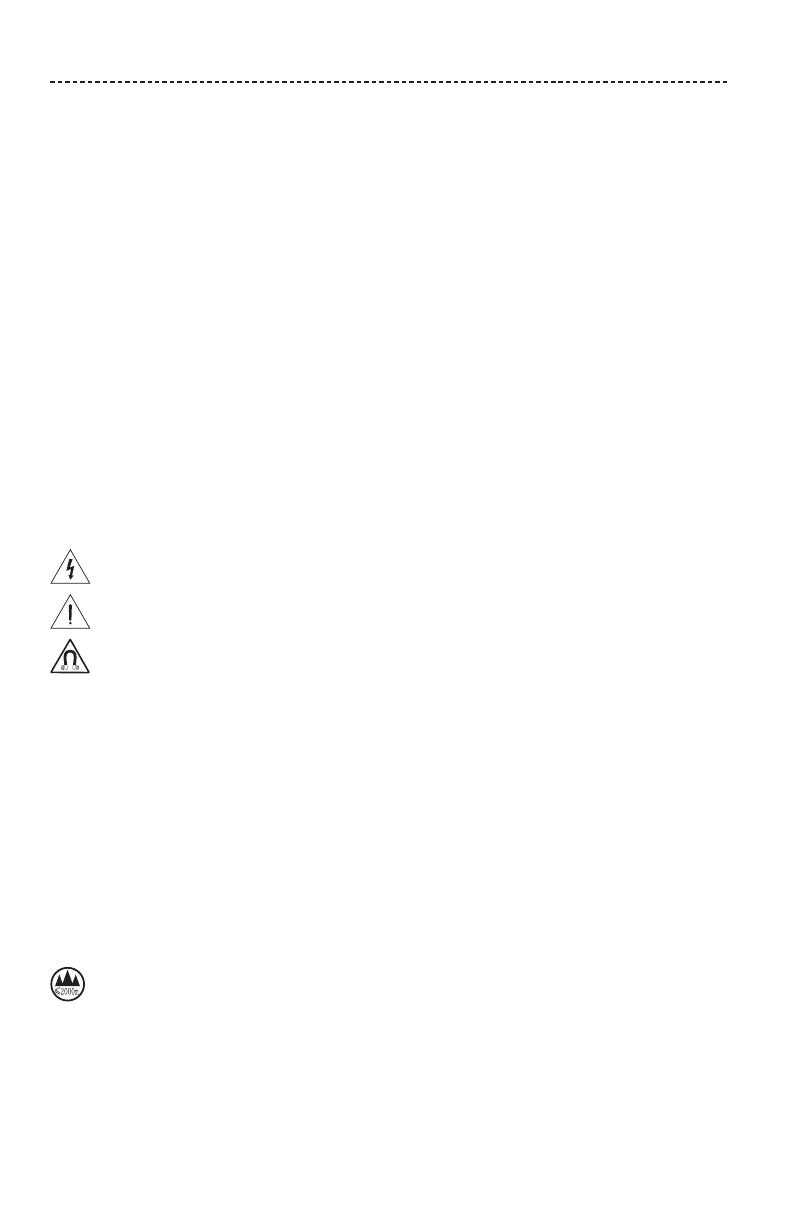
Dette symbol på produktet angiver, at der er uisoleret farlig spænding indeni produktet, som kan være så
kraftig, at der er risiko for elektrisk stød.
Dette symbol betyder, at der er vigtige betjenings- og vedligeholdelsesinstruktioner i denne vejledning.
Dette produkt indeholder magnetisk materiale. Kontakt din læge for at finde ud af, om dette kan påvirke din
implanterbare medicinske enheds funktion.
Systemet må IKKE udsættes for regn eller fugt af hensyn til risikoen for brand eller elektrisk stød.
Udsæt IKKE dette produkt for dryp eller stænk, og placer ikke genstande, der er fyldt med væske, på eller nær
ved produktet.
Hold altid produktet væk fra ild og andre varmekilder. Placer IKKE nogen form for åben ild (f.eks. stearinlys) på eller
tæt ved produktet.
Foretag IKKE nogen uautoriserede ændringer af produktet.
Brug IKKE en strømomformer med dette produkt.
Brug IKKE produktet i køretøjer eller på både.
Den højttalerledning og de tilslutningskabler, som følger med dette system, er ikke godkendt til installation i
væggen. Kontroller de lokale bygningsregler for at få oplysninger om den type ledning og kabel, der kræves ved
installation i væggen.
Hvis netstikket eller stikdåsen anvendes som afbryder, skal denne afbryder være let at komme til.
仅适用于 2000m 以下地区安全使用
Må kun bruges i en højde, der er mindre end 2000 meter.
På grund af ventilationskravene anbefaler Bose ikke, at du placerer højttalerne på et indelukket sted som f.eks. i et
hulrum i væggen eller i et lukket skab.
Produktmærkaten er placeret i bunden af produktet.
  • Page 1 1
  • Page 2 2
  • Page 3 3
  • Page 4 4
  • Page 5 5
  • Page 6 6
  • Page 7 7
  • Page 8 8
  • Page 9 9
  • Page 10 10
  • Page 11 11
  • Page 12 12
  • Page 13 13
  • Page 14 14
  • Page 15 15
  • Page 16 16
  • Page 17 17
  • Page 18 18
  • Page 19 19
  • Page 20 20
  • Page 21 21
  • Page 22 22
  • Page 23 23
  • Page 24 24
  • Page 25 25
  • Page 26 26
  • Page 27 27
  • Page 28 28
  • Page 29 29
  • Page 30 30
  • Page 31 31
  • Page 32 32
  • Page 33 33
  • Page 34 34
  • Page 35 35
  • Page 36 36
  • Page 37 37
  • Page 38 38
  • Page 39 39
  • Page 40 40
  • Page 41 41
  • Page 42 42
  • Page 43 43
  • Page 44 44
  • Page 45 45
  • Page 46 46
  • Page 47 47
  • Page 48 48
  • Page 49 49
  • Page 50 50
  • Page 51 51
  • Page 52 52
  • Page 53 53
  • Page 54 54
  • Page 55 55
  • Page 56 56
  • Page 57 57
  • Page 58 58
  • Page 59 59
  • Page 60 60
  • Page 61 61
  • Page 62 62
  • Page 63 63
  • Page 64 64
  • Page 65 65
  • Page 66 66
  • Page 67 67
  • Page 68 68
  • Page 69 69
  • Page 70 70
  • Page 71 71
  • Page 72 72
  • Page 73 73
  • Page 74 74
  • Page 75 75
  • Page 76 76
  • Page 77 77
  • Page 78 78
  • Page 79 79
  • Page 80 80
  • Page 81 81
  • Page 82 82
  • Page 83 83
  • Page 84 84
  • Page 85 85
  • Page 86 86
  • Page 87 87
  • Page 88 88
  • Page 89 89
  • Page 90 90
  • Page 91 91
  • Page 92 92
  • Page 93 93
  • Page 94 94
  • Page 95 95
  • Page 96 96
  • Page 97 97
  • Page 98 98
  • Page 99 99
  • Page 100 100
  • Page 101 101
  • Page 102 102
  • Page 103 103
  • Page 104 104
  • Page 105 105
  • Page 106 106
  • Page 107 107
  • Page 108 108
  • Page 109 109
  • Page 110 110
  • Page 111 111
  • Page 112 112
  • Page 113 113
  • Page 114 114
  • Page 115 115
  • Page 116 116
  • Page 117 117
  • Page 118 118
  • Page 119 119
  • Page 120 120
  • Page 121 121
  • Page 122 122
  • Page 123 123
  • Page 124 124
  • Page 125 125
  • Page 126 126
  • Page 127 127
  • Page 128 128
  • Page 129 129
  • Page 130 130
  • Page 131 131
  • Page 132 132
  • Page 133 133
  • Page 134 134
  • Page 135 135
  • Page 136 136
  • Page 137 137
  • Page 138 138
  • Page 139 139
  • Page 140 140
  • Page 141 141
  • Page 142 142
  • Page 143 143
  • Page 144 144
  • Page 145 145
  • Page 146 146
  • Page 147 147
  • Page 148 148
  • Page 149 149
  • Page 150 150
  • Page 151 151
  • Page 152 152
  • Page 153 153
  • Page 154 154
  • Page 155 155
  • Page 156 156
  • Page 157 157
  • Page 158 158
  • Page 159 159
  • Page 160 160
  • Page 161 161
  • Page 162 162
  • Page 163 163
  • Page 164 164
  • Page 165 165
  • Page 166 166
  • Page 167 167
  • Page 168 168
  • Page 169 169
  • Page 170 170
  • Page 171 171
  • Page 172 172
  • Page 173 173
  • Page 174 174
  • Page 175 175
  • Page 176 176
  • Page 177 177
  • Page 178 178
  • Page 179 179
  • Page 180 180
  • Page 181 181
  • Page 182 182
  • Page 183 183
  • Page 184 184
  • Page 185 185
  • Page 186 186
  • Page 187 187
  • Page 188 188
  • Page 189 189
  • Page 190 190
  • Page 191 191
  • Page 192 192
  • Page 193 193
  • Page 194 194
  • Page 195 195
  • Page 196 196
  • Page 197 197
  • Page 198 198
  • Page 199 199
  • Page 200 200
  • Page 201 201
  • Page 202 202
  • Page 203 203
  • Page 204 204
  • Page 205 205
  • Page 206 206
  • Page 207 207
  • Page 208 208
  • Page 209 209
  • Page 210 210
  • Page 211 211
  • Page 212 212
  • Page 213 213
  • Page 214 214
  • Page 215 215
  • Page 216 216
  • Page 217 217
  • Page 218 218
  • Page 219 219
  • Page 220 220
  • Page 221 221
  • Page 222 222
  • Page 223 223
  • Page 224 224
  • Page 225 225
  • Page 226 226
  • Page 227 227
  • Page 228 228
  • Page 229 229
  • Page 230 230
  • Page 231 231
  • Page 232 232
  • Page 233 233
  • Page 234 234
  • Page 235 235
  • Page 236 236
  • Page 237 237
  • Page 238 238
  • Page 239 239
  • Page 240 240
  • Page 241 241
  • Page 242 242
  • Page 243 243
  • Page 244 244
  • Page 245 245
  • Page 246 246
  • Page 247 247
  • Page 248 248
  • Page 249 249
  • Page 250 250
  • Page 251 251
  • Page 252 252
  • Page 253 253
  • Page 254 254
  • Page 255 255
  • Page 256 256
  • Page 257 257
  • Page 258 258
  • Page 259 259
  • Page 260 260
  • Page 261 261
  • Page 262 262
  • Page 263 263
  • Page 264 264
  • Page 265 265
  • Page 266 266
  • Page 267 267
  • Page 268 268
  • Page 269 269
  • Page 270 270
  • Page 271 271
  • Page 272 272
  • Page 273 273
  • Page 274 274
  • Page 275 275
  • Page 276 276
  • Page 277 277
  • Page 278 278
  • Page 279 279
  • Page 280 280
  • Page 281 281
  • Page 282 282
  • Page 283 283
  • Page 284 284
  • Page 285 285
  • Page 286 286
  • Page 287 287
  • Page 288 288
  • Page 289 289
  • Page 290 290
  • Page 291 291
  • Page 292 292
  • Page 293 293
  • Page 294 294
  • Page 295 295
  • Page 296 296
  • Page 297 297
  • Page 298 298
  • Page 299 299
  • Page 300 300
  • Page 301 301
  • Page 302 302
  • Page 303 303
  • Page 304 304
  • Page 305 305
  • Page 306 306
  • Page 307 307
  • Page 308 308
  • Page 309 309
  • Page 310 310
  • Page 311 311
  • Page 312 312
  • Page 313 313
  • Page 314 314
  • Page 315 315
  • Page 316 316
  • Page 317 317
  • Page 318 318
  • Page 319 319
  • Page 320 320
  • Page 321 321
  • Page 322 322
  • Page 323 323
  • Page 324 324
  • Page 325 325
  • Page 326 326
  • Page 327 327
  • Page 328 328
  • Page 329 329
  • Page 330 330
  • Page 331 331
  • Page 332 332
  • Page 333 333
  • Page 334 334
  • Page 335 335
  • Page 336 336
  • Page 337 337
  • Page 338 338
  • Page 339 339
  • Page 340 340
  • Page 341 341
  • Page 342 342
  • Page 343 343
  • Page 344 344