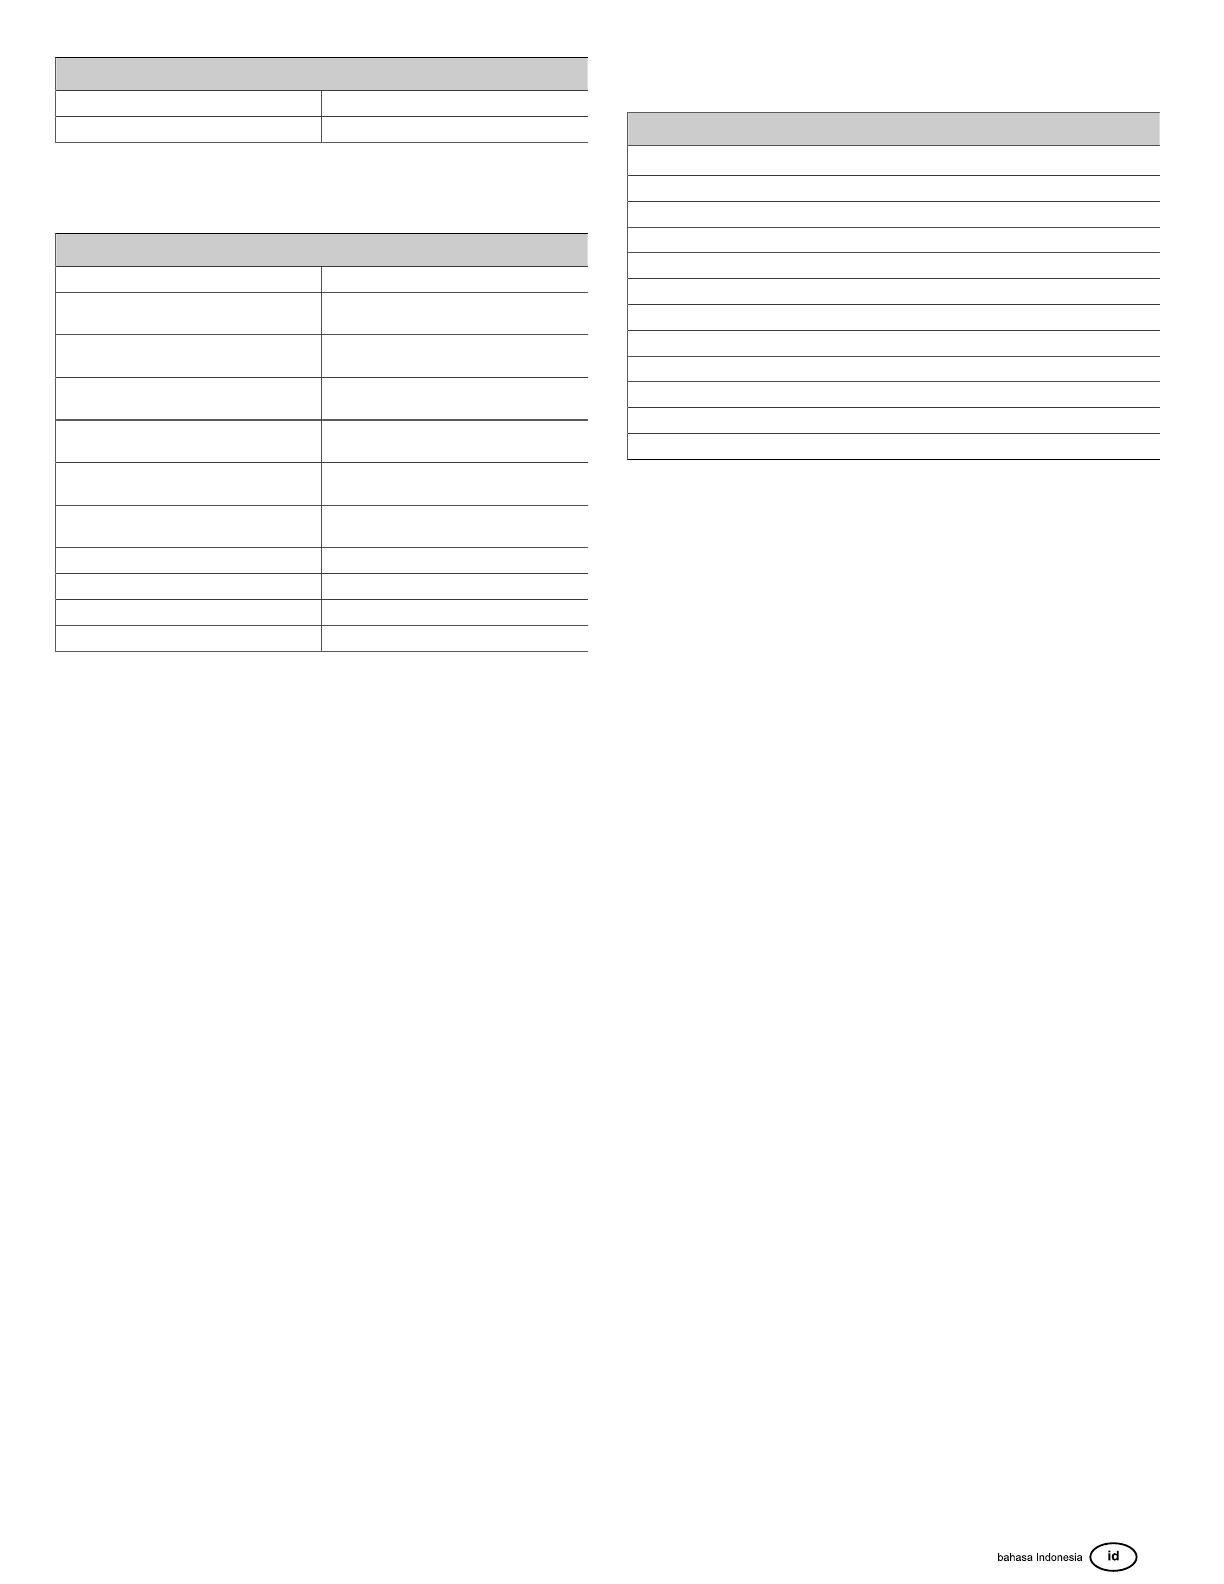
Simplicity MANUAL, OPERATOR'S ユーザーマニュアル

カテゴリー
自動車アクセサリー
タイプ
ユーザーマニュアル
Operator's Manual
Panduan Operator
操作マニュアル
사용자설명서
Manual Operator
คู่มือการใช้งาน
Sổ tay Vận hành
操作员手冊
190000, 250000
© 2024 Briggs & Stratton. All rights reserved. 80131129
Revision A
Not for
Reproduction
1
2
3
4
5
6
7
8
9
10
2 BRIGGSandSTRATTON.COM
Not for
Reproduction
11
12
13
14
15
16
17
18
3
Not for
Reproduction
General Information
This manual contains the safety information about the hazards and risksrelatedto
the engine and how to prevent them.It also containsthe correctoperation and
maintenance of this engine.It is important that you read, understand, and obey these
instructions. Keepthis manual for future reference.
NOTE:The figures and illustrations in this manual are for information only and can be
different from your model. Use the figures thatalign withyour engine configuration. If it is
necessary, speak to an Authorized Service Dealer.
Record the date of purchase, engine model, type, trim, and the engine serial number
for replacement parts. These numbers are on your engine. Refer to the Features and
Controls section.
Date of Purchase
Engine Model - Type - Trim
Engine Serial Number
European Office Contact Information
For questions related to European emissions, contact our European office at:
Max-Born-Straße 2, 68519 Viernheim, Germany.
European Union (EU) Stage V (5): Carbon
Dioxide (CO2) Values
Enter CO2 in the search window on BriggsandStratton.com to find carbon dioxide values
of Briggs & Stratton EU Type-Approval Certificate engines.
Operator Safety
Safety Alert Symbol and Signal Words
The safety alert symbol identifies safety information about hazards that could
result in personal injury. A signal word (DANGER, WARNING, or CAUTION) is used to
indicate the likelihood and the potential severity of injury. In addition, a hazard symbol
is used to represent the type of hazard.
DANGER indicates a hazard which, if not avoided, will result in death or serious injury.
WARNING indicates a hazard which, if not avoided, could result in death or serious
injury.
CAUTION indicates a hazard which, if not avoided, could result in minor or moderate
injury.
NOTICE indicates information considered important but not hazard-related.
Hazard Symbols and Meanings
Safety information about
hazards that can result in
personal injury.
Read and understand the
Operator's Manual before
operating or servicing the
unit.
Fire Hazard Explosion Hazard
Shock Hazard Toxic Fume Hazard
Hot Surface Hazard Kickback Hazard
Amputation Hazard -
Moving Parts Fuel Level - Maximum
Do Not Overfill
Safety Messages
WARNING
Briggs & Stratton® Engines are not designed for and are not to be used to power:
fun-karts; go-karts; children's, recreational, or sport all-terrain vehicles (ATVs);
motorbikes; hovercraft; aircraft products; or vehicles used in competitive events not
sanctioned by Briggs & Stratton. For information about competitive racing products, see
www.briggsracing.com. For use with utility and side-by-side ATVs, please contact Briggs
& Stratton Power Application Center, 1-866-927-3349. Incorrect engine use could result
in serious injury or death.
Recycling Information
Recycle all cartons, boxes, used oil, and batteries as
specified by government regulations.
Features and Controls
Engine Controls
Compare the callout letters in Figures 1, 2, 3 to the engine controls in the list that
follows:
A. Engine Identification Numbers Model - Type - Code
B. Spark Plug
C. Air Cleaner
D. ChokeControl
E. Starter Cord Handle
F. Air Intake Grille
G. Throttle Control (if installed)
H. Stop Switch (if installed)
I. Fuel Tank and Cap
J. Oil Drain Plug
K. Short Dipstick
L. Muffler, Muffler Guard (if installed), Spark Arrester (if installed)
M. Fuel Shut-off
N. Electric Start Switch (electric start models)1
O. Extended Dipstick (if installed)
Some engines and equipment have remote controls. Refer to the equipment manual for
the location and operation of remote controls.
Engine Control Symbols and Meanings
Engine Speed - FAST Engine Speed - SLOW
Engine Speed - STOP ON - OFF
Engine Start
Choke CLOSED Engine Start
Choke OPEN
Fuel Cap
Fuel Shut-off OPEN Fuel Shut-off CLOSED
4 BRIGGSandSTRATTON.COM
Not for
Reproduction
Operation
WARNING
Fuel vapors are flammable and explosive. Fire or explosion could result in burns
or death.
If you smell gas
Do not start the engine.
Do not switch on electrical switches.
Do not use a phone in the vicinity.
Evacuate the area.
Contact the fire department.
When you operate the equipment
Do not tilt the engine or the equipment at an angle which causes fuel to spill.
When you move the location of the equipment
Make sure that the fuel tank is EMPTY or that the fuel shut-off valve, if installed,
is in the CLOSED position.
Oil Recommendations
Oil Capacity: Refer to SECTION 9 - SPECIFICATIONS.
We recommend the use of Briggs & Stratton® Warranty Certified oils for best
performance. Other high-quality detergent oils are permitted if classified for service SF,
SG, SH, SJ or higher. Do not use special additives.
Use the chart to select the best viscosity for the outdoor temperature range expected.
Vanguard® 15W-50 Synthetic oil gives the best protection in most environments as well
as superior protection for equipment operated in hot temperatures. Engines on most
outdoor power equipment can operatewell with Synthetic 5W-30 oil.
A SAE 30 - Below 40 °F (4 °C) the use of SAE 30 will result in hard starting.
B 10W-30 - Above 80 °F (27 °C) the use of 10W-30 may cause increased oil
consumption. Checkthe oil level frequently.
C 5W-30
D Synthetic 5W-30
EVanguard® Synthetic 15W-50
Check the Oil Level
Before you check theoil level
Make sure that the engine is level.
Clean the oil fill area ofunwanted material.
Refer to the Specifications section for the oil capacity.
Short Dipstick, if installed
1. Remove the dipstick (A, Figure 4). Use a cloth to remove oil from the dipstick.
2. Install the dipstick (A, Figure 4). Do not turn or tightenthe dipstick.
3. Remove the dipstick and check the oil level. The correct oil level is at the top of the
full indicator (B, Figure 4) on the dipstick.
4. If the oil level is low, slowly add oil into the engine oil fill (C, Figure 4). Do not add
too much oil. Wait one minute and check the oil level again. Make sure that the oil
level is correct.
5. Install and tighten the dipstick (A, Figure 4).
Extended Dipstick, if installed
1. Remove the dipstick (A, Figure 5). Use a cloth to remove remaining oil from the
dipstick.
2. Install the dipstick (A, Figure 5). Do not turn or tighten the dipstick..
3. Remove the dipstick and check the oil level. The correct oil level is at the top of the
full indicator (B, Figure 5) on the dipstick.
4. If the oil level is low, slowly add oil into the engine oil fill (C, Figure 5). Do not add
too much oil. Wait one minute and check the oil level again. Make sure that the oil
level is correct.
5. Install and tighten the dipstick (A, Figure 5).
6. Connect the spark plug wire to the spark plug. Refer to the Remove Oil section.
Low Oil Protection System (if installed)
A low oil sensor is installed on some engines. If the oil is low, the sensor will show a
warning light or stop the engine. Stop the engine and do the steps that follow before you
start the engine.
Make sure that the engine is level.
Do an oil check. Refer to the Check Oil Level section.
If the oil level is low, add the correct amount of oil. Start the engine and make
sure that the warning light (if installed) does not come on.
If the oil level is not low, do not start the engine. Contact a Briggs & Stratton
Authorized Service Dealer to correct the oil problem.
Fuel Recommendations
Fuel must meet these requirements:
Clean, fresh, unleaded gasoline.
A minimum of 87 octane/87 AKI (91 RON). High altitude use, see below.
Gasoline with up to 10% ethanol (gasohol) is permitted.
NOTICE
Do not use unapproved gasoline, such as E15 and E85. Do not mix oil in gasoline or
change the engine to operate on alternate fuels. Use of unapproved fuels could result
in damage to engine components, which will not be repaired under the warranty.
To protect the fuel system from gum formation, and corrosion, mix analcohol-free fuel
stabilizer and ethanol treatmentinto the fuel. Refer to the Storage section. All fuel is
not the same. If start or performance problems occur, change fuel providers or brands.
This engine is certified to operate on gasoline. The emissions control system for
carbureted engines is EM (Engine Modifications). The emissions control systems for
engines with electronic fuel injection are ECM (Engine Control Module), MFI (Multiport
Fuel Injection), TBI (Throttle Body Fuel Injection) and if equipped an O2S (Oxygen
Sensor).
High Altitude
At altitudes over 5,000 feet (1524 meters), a minimum 87 octane/87 AKI (91 RON)
gasoline is permitted.
For carbureted engines, high altitude adjustment is required to maintain performance.
Operation without this adjustment will cause decreased performance, increased fuel
consumption, and increased emissions. Contact a Briggs & Stratton Authorized Service
Dealer for high altitude adjustment information. Operation of the engine at altitudes
below 2,500 feet (762 meters) with the high altitude adjustment is not recommended.
For Electronic Fuel Injection (EFI) engines, no high altitude adjustment is necessary.
Add Fuel
WARNING
Fuel and its vapors are flammable and explosive. Fire or explosion could result in
burns or death.
When you add fuel
Stop the engine. Before you remove the fuel cap, wait a minimum of two (2)
minutes to make sure that the engine is cool.
Fill the fuel tank outdoors or in an area that has good airflow.
Do not put too much fuel in the tank. For expansion of the fuel, do not fill above
the bottom of the fuel tank neck.
Keep fuel away from sparks, open flames, pilot lights, heat, and other ignition
sources.
Frequently examine the fuel lines, fuel tank, fuel cap, and connections for cracks
or leaks. Replace damaged parts.
If fuel spills, wait until it dries before you start the engine.
1. Clean the fuel cap area of dirt and debris. Remove the fuel cap.
2. Fill the fuel tank (A, Figure 6) with fuel. Because fuel will expand, do not fill above
the bottom of the fuel tank neck (B).
3. Install the fuel cap.
5
Not for
Reproduction
Start the Engine
WARNING
POISONOUS GAS HAZARD. Engine exhaust contains carbon monoxide, a
poisonous gas that could kill you in minutes. Although you do not smell exhaust
fumes, you could still be exposed to dangerous carbon monoxide gas. If you feel
sick, dizzy, or weak while you use this product, get to fresh air RIGHT AWAY. See
a doctor. You may have carbon monoxide poisoning.
Carbon monoxide gas can collect in occupied spaces. To reduce the risk of
carbon monoxide gas, ONLY operate this product outdoors and far away from
windows, doors and vents.
Install battery-operated carbon monoxide alarms or plug-in carbon monoxide
alarms with battery back-up as specified by the manufacturer's instructions.
Smoke alarms cannot sense carbon monoxide gas.
DO NOT operate this product in homes, garages, basements, crawlspaces,
sheds, or other closed spaces, even if you use fans or open doors and windows
for ventilation. After the operation of this product, carbon monoxide can quickly
collect in these spaces and stay for hours.
ALWAYS put this product downwind and point the engine exhaust away from
occupied spaces.
WARNING
Fuel and its vapors are flammable and explosive. Fire or explosion could result in
burns or death.
When you start the engine
Make sure that the spark plug, muffler, fuel cap and air cleaner (if equipped) are
correctly installed.
Do not crank the engine with the spark plug removed.
If the engine is flooded, set the choke (if equipped) to the OPEN or RUN
position. Move the throttle (if equipped) to the FAST position and crank until the
engine starts.
If there is natural or LP gas leakage in the area, do not start the engine.
Because vapors are flammable, do not use pressurized starter fluids.
WARNING
Rotating parts can entangle hands, feet, hair, clothing, or accessories and result
in traumatic amputation or laceration.
Operate equipment with the guards correctly installed.
Keep hands and feet away from rotating parts.
Remove jewelry and make sure that long hair is away from all rotating parts.
Do not wear loose clothes or items that could become caught.
WARNING
Fast retraction of the starter cord (kickback) will pull your hand and arm to the
engine faster than you can let go.Broken bones, fractures, bruises or sprains
could result.
To prevent kickback when you start the engine, pull the starter cord slowly until
resistance is felt and then pull quickly.
Before you start the engine, disconnect or remove all external equipment and
engine loads.
Make sure that direct-coupled equipment components, such as, but not limited
to, blades, impellers, pulleys, and sprockets, are correctly attached.
1. Check the engine oil. Refer to the Check the Oil Level section.
2. Make sure that the equipment drive controls, if equipped, are disengaged.
3. Push the stop switch (A, Figure 7), if installed, to the ON position.
4. Move the throttle control (B, Figure 7), if installed, to the FAST position. Operate the
engine in the FAST position.
5. Move the choke control (C, Figure 7) to the CHOKE position.
NOTICEThe choke is usually not necessary when you start a warm engine.
6. Move the fuel shut-off (D, Figure 7), if installed, to the OPEN position.
7. Rewind Start, if installed: Tightly hold the starter cord handle (E, Figure 7). Pull
the starter cord handle slowly until resistance is felt, then pull quickly.
8. Electric Start, if installed: Turn the electric start switch (F, Figure 7) to the ON or
START position.
9. As the engine warms, move the choke control (C, Figure 7) to the RUN position.
Stop the Engine
WARNING
Fuel and its vapors are flammable and explosive. Fire or explosion could result in
burns or death.
Do not choke the carburetor (if equipped) to stop the engine.
1. Stop Switch, if installed: Move the stop switch (A, Figure 8) to the STOP position.
2. Throttle Control, if installed: Move the throttle control (B, Figure 8) to SLOW and
then to theSTOP position.
3. Electric Start, if installed: Turn the electric start switch (F, Figure 8) to the OFF /
STOP position.
4. Remove the key, and keep it in a safe location.
5. After the engine stops, move the fuel shut-off (D, Figure 8), if installed, to the
CLOSED position.
Maintenance
Maintenance Information
WARNING
Fuel and its vapors are flammable and explosive. Fire or explosion could result in
burns or death.
Duringmaintenanceif it is necessary to tilt the unit, make sure that the fuel tank, if
mounted on the engine, is empty and that the spark plug side is up. If the fuel tank is not
empty, leakage can occur and could result in a fire or an explosion. If the engine is tilted
in a different direction, it will not easily start because of oil or fuel contamination of the air
filter or the spark plug.
WARNING
Accidental engine spark can cause an electric shock, fire or explosion and could
result in entanglement, traumatic amputation or laceration.
Before you make adjustments or repairs:
Disconnect all spark plug wires and keep them away from the spark plugs.
Disconnect the battery wire from the negative battery terminal (only engines with
electric start).
Use only the correct tools.
When you check for spark:
Use an approved spark plug tester.
Do not check for spark with the spark plug removed.
WARNING
All the components used to assemble this engine must stay in the initial position
for correct operation. Damage or injury can occur if you use incorrect parts or you
do not replace all parts on the engine.
Replacement parts must be of the same design and installed in the same
position as initial parts.
If installed, do not change the governor spring, links, or other parts to increase
the engine speed.
See a Briggs & Stratton Authorized Service Dealer for all maintenance and servicing of
the engine and engine parts.
Emissions Control Service
For maintenance, replacement, or repair of emissions control devices and
systems, contact a qualified off-road engine repair establishment or service
technician. However, for "no charge" emissions control service, the work must be done
by a factory authorized dealer. Refer to the Emissions Control Statements.
Maintenance Schedule
First 5 Hours
Change the engine oil.
Intervals of 8 Hours or Daily
Check the engine oil level.
Clean the area around the muffler and controls.
Clean the air intake grille.
Intervals of 25 Hours or Annually
6 BRIGGSandSTRATTON.COM
Not for
Reproduction
Clean the air filter1.
Clean the pre-cleaner1.
Intervals of 50 Hours or Annually
Service the exhaust system.
Intervals of 100 Hoursor Annually
Change the engine oil.
Annually
Replace the spark plug.
Replace the air filter.
Replace the pre-cleaner.
Service the cooling system1.
1 Clean more frequently in dusty conditions or when many particles are in the air.
Carburetor and Engine Speed
Do not make adjustments to the carburetor, governor spring, linkages, or other parts
to adjust the engine speed. If adjustments arenecessary,contact a Briggs & Stratton
Authorized Service Dealer forservicing.
NOTICE
The equipment manufacturer specifies the maximum speed for the engine as installed
on the equipment. Do not exceed this speed. If you are not sure what the equipment
maximum speed is, or what the engine speed is set to from the factory, contact a Briggs
& Stratton Authorized Service Dealer for assistance. For safe and correct operation
of the equipment, the engine speed should only be adjusted by a qualified service
technician.
Servicing the Spark Plug
Check the spark plug gap (A, Figure 9) with a wire gauge (B). If necessary, set the
spark plug gap. Install and tighten the spark plug to the correct torque. For gapand
torque specifications, refer to the Specifications section.
Servicing theExhaust System
WARNING
During operation, the engine and muffler become hot. If you touch a hot engine,
thermal burns can occur.
Combustible materials, such as leaves, grass and brush, can catch fire.
Before you touch the engine or muffler, stop the engine and wait two (2)
minutes. Make sure that the engine and muffler are safe to touch.
Remove debris from the muffler and engine.
It is a violation of California Public Resource Code, Section 4442, to use or operate the
engine on any forest-covered, brush-covered, or grass-covered land unless the exhaust
system is equipped with a spark arrester, as defined in section 4442, maintained in
effective working order. Other states or federal jurisdictions may have similar laws;
reference Federal Regulation 36 CFR Part 261.52. Contact the original equipment
manufacturer, retailer, or dealer to obtain a spark arrester designed for the exhaust
system installed on this engine.
Remove debris from the muffler and cylinder area. Inspect the muffler for cracks,
corrosion, or other damage. Remove the deflector or the spark arrester, if equipped, and
inspect for damage or carbon blockage. If damage is found, install the replacement parts
before you operate the equipment.
Change Engine Oil
WARNING
Fuel and its vapors are flammable and explosive. Fire or explosion could result in
burns or death.
During operation, the engine and muffler become hot. If you touch a hot engine,
thermal burns can occur.
If you drain the oil from the top oil fill tube, the fuel tank must be empty. If it is not
empty, fuel leakage can occur and cause a fire or an explosion.
Before you touch the engine or muffler, stop the engine and wait two (2)
minutes. Make sure that the engine and muffler are safe to touch.
Used oil is a hazardous waste product and must be discarded of correctly. Do not
discard with household waste. Contact your local authorities, service center, or dealer
for safe disposal or recycling facilities.
Remove Oil
1. With the engine OFF but warm,disconnect the spark plug wire (D, Figure 10), and
keep it away from the spark plug (E).
2. Remove the oil drain plug (F, Figure 11). Drain the oil into an approved container.
NOTE:All of the oil drain plugs (G, Figure 11) can be installed in the engine.
3. Install and tighten the oil drain plug (F, Figure 11).
Add Oil
Make sure that the engine is level.
Clean the oil fill area of debris.
See the Specifications section for oil capacity.
Oil Fill Cap, if installed
1. Remove the oil fill cap (H, Figure 12).
2. Slowly add oil into the engine oil fill (C, Figure 12).
3. Install and tighten the oil fill cap (H, Figure 12).
4. Connect the spark plug wire (D, Figure 12) to the spark plug (E).
Short Dipstick, if installed
1. Remove the dipstick (A, Figure 13). Use a cloth to remove oil from the dipstick.
2. Install the dipstick (A, Figure 13). Do not turn or tightenthe dipstick.
3. Remove the dipstick and check the oil level. The correct oil level is at the top of the
full indicator (B, Figure 13) on the dipstick.
4. If the oil level is low, slowly add oil into the engine oil fill (C, Figure 13). Do not add
too much oil. Wait one minute and check the oil level again. Make sure that the oil
level is correct.
5. Install and tighten the dipstick (A, Figure 13).
Extended Dipstick, if installed
1. Remove the dipstick (A, Figure 14). Use a cloth to remove remaining oil from the
dipstick.
2. Install the dipstick (A, Figure 14). Do not turn or tighten the dipstick..
3. Remove the dipstick and check the oil level. The correct oil level is at the top of the
full indicator (B, Figure 14) on the dipstick.
4. If the oil level is low, slowly add oil into the engine oil fill (C, Figure 14). Do not add
too much oil. Wait one minute and check the oil level again. Make sure that the oil
level is correct.
5. Install and tighten the dipstick (A, Figure 14).
6. Connect the spark plug wire to the spark plug. Refer to the Remove Oil section.
Servicingthe Air Filter
WARNING
Fuel vapors are flammable and explosive. Fire or explosion could result in burns
or death.
Do notstart and operate the engine with the air cleaner assembly (if equipped)
or the air filter (if equipped) removed.
NOTICE
Do not use pressurized air or solvents to clean the filter. Pressurized air could result in
damage to the filter and solvents will dissolve the filter.
See the Maintenance Schedule forservicingrequirements.
Different models will use a foam or a paper filter. Some models could also have an
optional pre-cleaner that can becleanedand used again. Compare the illustrations in
this manual with the type installed on your engine and service as follows.
Paper Air Filter
1. Loosen the fastener(s) (C, Figure 15).
2. Remove the cover (A, Figure 15)and the filter (B).
3. To loosen debris, lightly tap the filter (B, Figure 15) on a hard surface. If the filter is
dirty, replace it with a new filter.
4. Install the filter (B, Figure 15).
5. Install the cover (A, Figure 15) with the fastener(s) (C). Make sure that the
fastener(s) is tight.
Paper Air Filter
7
Not for
Reproduction
1. Loosen the fastener(s) (A, Figure 16) and remove the cover (B).
2. Remove the fastener(s) (C, Figure 16) and the air filter (D).
3. Remove the pre-cleaner (E, Figure 16), if equipped, from the air filter (D).
4. To loosen unwanted material, lightly tap the air filter (D, Figure 16) on a hard
surface. If the filter is dirty, replace it.
5. Clean the pre-cleaner (E, Figure 16) in liquid detergent and water. Let the pre-
cleaner fully dry. DO NOT lubricate the pre-cleaner.
6. Assemble the dry pre-cleaner (E, Figure 16), if equipped, to the air filter (D).
7. Install the steel washer (F, Figure 16), the air filter (D), and the pre-cleaner (E) into
the air filter base (G) and onto the stud (H).Make sure that the air filter is correctly
assembled to the air filter base with the fastener(s) (C).
8. Install the cover (B, Figure 16) with the fastener(s) (A). Make sure that the
fastener(s) is tight.
Foam Air Filter
1. Loosen the fastener(s) (A, Figure 17) that hold the cover (B).
2. Open the cover (B, Figure 17) and remove the filter (C).
3. Clean the foam element (C, Figure 17) in liquid detergent and water. Squeeze dry
the foam element in a clean cloth.
4. Soak the foam element (C, Figure 17) with clean engine oil. To remove remaining
oil, squeeze the foam element in a clean cloth.
5. Install the filter (C, Figure 17).
6. Install the cover (B, Figure 17) and close the fastener(s) (A).
Storage
Fuel System
Refer to Figure: 18.
WARNING
Fuel and its vapors are flammable and explosive. Fire or explosion could result in
burns or death.
Fuel Storage
Because pilot lights or other ignition sources can cause explosions, keep fuel or
equipment away from furnaces, stoves, water heaters or other appliances that
have pilot lights.
Keep the engine level (normal operating position). Fill the fuel tank (A, Figure 18) with
fuel. For fuel expansion, do not fill above the fuel tank neck (B).
Fuel can become stale when kept in a storage container for more than 30 days.The use
of analcohol-free fuel stabilizer and ethanol treatmentin the fuel storage container is
recommended to prevent fuel degradation and keep the fuel fresh.
When you fill the fuel container with fuel, addan alcohol-free fuel stabilizer as specified
by the manufacturer’s instructions.If gasoline in the engine has not been treated with a
fuel stabilizer, it must be drained into an approved container.Operate the engine until it
is out of fuel.
Engine Oil
While the engine is still warm, change the engine oil. Refer to Change the Engine Oil
section.
Troubleshooting
Assistance
For assistance, contact your local dealer or go to BRIGGSandSTRATTON.COM or call
1-800-444-7774 (in USA).
Specificationsand Service Parts
Model: 190000
Displacement 18.67 ci (306 cc)
Bore 3.228 in (82 mm)
Stroke 2.283 in (58 mm)
Oil Capacity 35 - 39 oz (1,05- 1,15 L)
Spark Plug Gap .030 in (,76 mm)
Spark Plug Torque 274 lb-in (31 Nm)
Armature Air Gap .008 - .016 in (,2 - ,4 mm)
Intake Valve Clearance .005 - .007 in (,13 - ,18 mm)
Exhaust Valve Clearance .005 - .007 in (,13 - ,18 mm)
Model: 250000
Displacement 25.63 ci (420 cc)
Bore 3.543 in (90 mm)
Stroke 2.598 in (66 mm)
Oil Capacity 35 - 39 oz(1,05- 1,15 L)
Spark Plug Gap .030 in (,76 mm)
Spark Plug Torque 274 lb-in (31 Nm)
Armature Air Gap .008 - .016 in (,2 - ,4 mm)
Intake Valve Clearance .005 - .007 in (,13 - ,18 mm)
Exhaust Valve Clearance .005 - .007 in (,13 - ,18 mm)
Engine power will decrease 3.5% for each 1,000 feet (300 meters) above sea level
and 1% for each 10°F (5.6°C) above 77°F (25°C). The engine will operate satisfactorily
at an angle up to 25°. Refer to the equipment Operator's Manual for safe permitted
operating limits on slopes.
Service Parts - Models: 190000, 250000
Service Part Part Number
Paper Air Filter (Model 190000, Figure
15) 491588
Paper Air Filter (Model 190000, Figure
16) 592605
Foam Air Filter (Model 190000, Figure
17) 591778
Paper Air Filter (Model 250000, Figure
15) 491588
Paper Air Filter (Model 250000, Figure
16) 799818
Foam Air Filter (Model 250000, Figure
17) 591778
Spark Plug (Resistor) 797235
Spark Plug (Non-Resistor) 798615
Spark Plug Wrench 19605
Spark Tester 84003327
We recommend that you see a Briggs & Stratton Authorized Dealer for maintenance
and servicing of the engine and engine parts.
Power Ratings
The gross power rating for individual gasoline engine models is labeled in accordance
with SAE (Society of Automotive Engineers) code J1940 Small Engine Power & Torque
Rating Procedure, and is rated in accordance with SAE J1995. Torque values are
derived at 2600 RPM for those engines with “rpm” called out on the label and 3060 RPM
for all others; horsepower values are derived at 3600 RPM. The gross power curves
can be viewed at www.BRIGGSandSTRATTON.COM. Net power values are taken with
exhaust and air cleaner installed whereas gross power values are collected without
these attachments. Actual gross engine power will be higher than net engine power and
is affected by, among other things, ambient operating conditions and engine-to-engine
variability. Given the wide array of products on which engines are placed, the gasoline
engine may not develop the rated gross power when used in a given piece of power
equipment. This difference is due to a variety of factors including, but not limited to, the
variety of engine components (air cleaner, exhaust, charging, cooling, carburetor, fuel
pump, etc.), application limitations, ambient operating conditions (temperature, humidity,
altitude), and engine-to-engine variability. Due to manufacturing and capacity limitations,
Briggs & Stratton may substitute an engine of higher rated power for this engine.
Warranty
Briggs & Stratton® Engine Warranty
Effective March 2023
Limited Warranty
Briggs & Stratton warrants that, during the warranty period specified below, it will
repair or replace, free of charge, with a new, reconditioned or re-manufactured part,
at the sole discretion of Briggs & Stratton, any part that is defective in material or
workmanship or both. Transportation charges on product submitted for repair or
replacement under this warranty must be borne by purchaser. This warranty is effective
for and is subject to the time periods and conditions stated below. For warranty
service, find the nearest Authorized Service Dealer in our dealer locator map at
BRIGGSandSTRATTON.COM. The purchaser must contact the Authorized Service
Dealer, and then make the product available to the Authorized Service Dealer for
inspection and testing.
There is no other express warranty. Implied warranties, including those of
merchantability and fitness for a particular purpose, are limited to one year
8 BRIGGSandSTRATTON.COM
Not for
Reproduction
from purchase, or to the extent permitted by law. All other implied warranties
are excluded. Liability for incidental or consequential damages are excluded
to the extent exclusion is permitted by law. Some states or countries do not allow
limitations on how long an implied warranty lasts, and some states or countries donot
allow the exclusion or limitation of incidental or consequential damages, so the above
limitation and exclusion may not apply to you. This warranty gives you specific legal
rights and you may also have other rights which vary from state to state and country to
country*.
Standard Warranty Terms 1, 2
Vanguard®; CXi Series
Consumer Use - 36 months
Commercial Use - 36 months
XR Series
Consumer Use - 24 months
Commercial Use - 24 months
All Other Engines Featuring Dura-Bore™ Cast Iron Sleeve
Consumer Use - 24 months
Commercial Use - 12 months
All Other Engines
Consumer Use - 24 months
Commercial Use - 3 months
1These are our standard warranty terms, but occasionally there may be additional
warranty coverage that was not determined at time of publication. For a listing of
current warranty terms for your engine, go to BRIGGSandSTRATTON.COM or contact
your Briggs & Stratton Authorized Service Dealer.
2There is no warranty for engines on equipment used for prime power in place of a
utility; standby generators used for commercial purposes, utility vehicles exceeding 25
MPH, or engines used in competitive racing or on commercial or rental tracks.
The warranty period begins on the date of purchase by the first retail consumer or
commercial end user, and continues for the period of time stated in the table above.
“Consumer use” means personal residential household use by a retail consumer.
“Commercial use” means all other uses, including use for commercial, income
producing or rental purposes. Once an engine has experienced commercial use,
it shall thereafter be considered as a commercial use engine for purposes of this
warranty.
No warranty registration is necessary to obtain warranty on Briggs & Stratton
products. Save your proof of purchase receipt. If you do not provide proof of the
initial purchase date at the time warranty service is requested, the manufacturing
date of the product will be used to determine the warranty period.
About Your Warranty
This limited warranty covers engine-related material and/or workmanship issues only,
and not replacement or refund of the equipment to which the engine may be mounted.
Routine maintenance, tune-ups, adjustments, or normal wear and tear are not covered
under this warranty. Similarly, warranty is not applicable if the engine has been altered
or modified or if the engine serial number has been defaced or removed. This warranty
does not cover engine damage or performance problems caused by:
1. The use of parts that are not original Briggs & Stratton parts;
2. Operating the engine with insufficient, contaminated, or an incorrect grade of
lubricating oil;
3. The use of contaminated or stale fuel, gasoline formulated with ethanol greater
than 10%, or the use of alternative fuels such as liquefied petroleum or natural gas
on engines not originally designed/manufactured by Briggs & Stratton to operate
on such fuels;
4. Dirt which entered the engine because of improper air cleaner maintenance or
reassembly;
5. Striking an object with the cutter blade of a rotary lawn mower, loose or improperly
installed blade adapters, impellers, or other crankshaft coupled devices, or
excessive v-belt tightness;
6. Associated parts or assemblies such as clutches, transmissions, equipment
controls, etc., which are not supplied by Briggs & Stratton;
7. Overheating due to grass clippings, dirt and debris, or rodent nests which plug or
clog the cooling fins or flywheel area, or by operating the engine without sufficient
ventilation;
8. Excessive vibration due to over-speeding, loose engine mounting, loose or
unbalanced cutter blades or impellers, or improper coupling of equipment
components to the crankshaft;
9. Misuse, lack of routine maintenance, shipping, handling, or warehousing of
equipment, or improper engine installation.
Warranty service is available only through Briggs & Stratton Authorized Service
Dealers. Locate your nearest Authorized Service Dealer in our dealer locator map at
BRIGGSandSTRATTON.COM or by calling 1-800-444-7774 (in USA).
80114782(Revision B)
Briggs & Stratton Emissions Warranty
U.S. EPA and Briggs & Stratton, LLC Emissions Control Warranty - Your
Warranty Rights and Obligations
For Briggs & Stratton Engine Models with "B" or "G" Trim Designation (Model-
Type-Trim Representation xxxxxx xxxx Bx or xxxxxx xxxx Gx)
The U.S. EPA and Briggs & Stratton (B&S) are pleased to explain the exhaust
emissions (“emissions”) control system warranty on your 2023-2025 engine. New
small off-road engines and large spark ignited engines less than or equal to 1.0 liter
must be designed, built, and equipped to meet stringent anti-smog standards.B&S
must warrant the emissions control system on your engine for the periods of time
listed below provided there has been no abuse, neglect or improper maintenance of
your small off-road engine or equipment leading to the failure of the emissions control
system.
Your emissions control system may include parts such as the carburetor or fuel-
injection system, the ignition system, catalytic converter, fuel tanks, fuel lines (for liquid
fuel and fuel vapors), fuel caps, valves, canisters, filters, clamps and other associated
components.Also included may be hoses, belts, connectors, and other emission-
related assemblies.
Where a warrantable condition exists, B&S will repair your engine at no cost to you
including diagnosis, parts, and labor.
Manufacturer’s Warranty Coverage:
The exhaust emissions control system on your engine is warranted for two years.If any
emissions-related part on your engine is defective, the part will be repaired or replaced
by B&S.
Owner’s Warranty Responsibilities:
As the engine owner, you are responsible for the performance of the required
maintenance listed in your owner’s manual.B&S recommends that you retain
all receipts covering maintenance on your engine, but B&S cannot deny
warranty coverage solely for the lack of receipts or for your failure to ensure the
performance of all scheduled maintenance.
As the engine owner, you should however be aware that B&S may deny you
warranty coverage if your engine or a part has failed due to abuse, neglect, or
improper maintenance or unapproved modifications.
You are responsible for presenting your engine to a B&S distribution center
or service center as soon as the problem exists. The warranty repairs shall
be completed in a reasonable amount of time, not to exceed 30 days.If you
have a question regarding your warranty rights and responsibilities, you should
contact B&S at 1-800-444-7774 (in USA) or BRIGGSandSTRATTON.COM.
Briggs & Stratton Emissions Control Warranty Provisions
The following are specific provisions relative to your Emissions Control Warranty
Coverage. It is in addition to the B&S engine warranty for non-regulated engines found
in the Operator’s Manual.
1. Warranted Emissions Parts
Coverage under this warranty extends only to the parts listed below (the emissions
control systems parts) to the extent these parts were present on the B&S engine.
a. Fuel Metering System
Cold start enrichment system (soft choke)
Carburetor or fuel injection system
Oxygen sensor
Electronic control unit
Fuel pump module
b. Air Induction System
Air cleaner
Intake manifold
c. Ignition System
Spark plug(s)
Magneto ignition system
d. Catalyst System
Catalytic converter
Exhaust manifold
Air injection system or pulse value
e. Miscellaneous Items Used in Above Systems
Vacuum, temperature, position, time sensitive valves and switches
9
Not for
Reproduction
Connectors and assemblies
Electronic controls
2. Length of Coverage
Coverage is for a period of two years from the date of delivery to an ultimate
purchaser, or for the time period listed in the respective engine or product warranty
statement, whichever is greater. B&S warrants to the original purchaser and each
subsequent purchaser that the engine is designed, built, and equipped so as
to conform with all applicable regulations; that it is free from defects in material
and workmanship that could cause the failure of a warranted part; and that it is
identical in allmaterial respects to the engine described in the manufacturer’s
application for certification. The warranty period begins on the date the engine or
equipment is delivered to an ultimate purchaser.
The warranty on emissions-related parts is as follows:
Any warranted part that is not scheduled for replacement as required
maintenance in the Operator’s Manual supplied, is warranted for the warranty
period stated above. If any such part fails during the period of warranty
coverage, the part will be repaired or replaced by B&S at no charge to
the owner. Any such part repaired or replaced under the warranty will be
warranted for the remaining warranty period.
Any warranted part that is scheduled only for regular inspection in the
Operator’s Manual supplied, is warranted for the warranty period stated
above. Any such part repaired or replaced under warranty will be warranted
for the remaining warranty period.
Any warranted part that is scheduled for replacement as required
maintenance in the Operator’s Manual supplied, is warranted for the period of
time prior to the first scheduled replacement point for that part. If the part fails
prior to the first scheduled replacement, the part will be repaired or replaced
by B&S at no charge to the owner. Any such part repaired or replaced under
warranty will be warranted for the remainder of the period prior to the first
scheduled replacement point for the part.
Add-on or modified parts that are not exempted may not be used. The use of
any non-exempted add-on or modified parts by the owner will be grounds for
disallowing a warranty claim. The manufacturer will not be liable to warrant
failures of warranted parts caused by the use of a non-exempted add-on or
modified part.
3. Consequential Coverage
Coverage shall extend to the failure of any engine components caused by the
failure of any warranted emissions parts.
4. Claims and Coverage Exclusions
Warranty claims shall be filed according to the provisions of the B&S engine
warranty policy. Warranty coverage does not apply to failures of emissions
parts that are not original equipment B&S parts or to parts that fail due to abuse,
neglect, or improper maintenance as set forth in the B&S engine warranty policy.
B&S is not liable for warranty coverage of failures of emissions parts caused by
the use of add-on or modified parts.
Look For Relevant Emissions Durability Period and Air Index Information On
Your Small Off-Road Engine Emissions Label
Briggs & Stratton engines are certified to meet the United States Environmental
Protection Agency (USEPA) Phase 2 or Phase 3 emissions standards. The Emissions
Compliance Period referred to on the Emissions Compliance label indicates the
number of operating hours for which the engine has been shown to meet Federal
emissions requirements.
For engines at or less than 80 cc displacement:
Category C = 50 hours, Category B = 125 hours, Category A = 300 hours
For engines greater than 80 cc displacement and less than 225 cc displacement:
Category C = 125 hours, Category B = 250 hours, Category A = 500 hours
For engines of 225 cc or more displacement:
Category C = 250 hours, Category B = 500 hours, Category A = 1000 hours
80130178 Revision A
Briggs & Stratton Emissions Warranty
U.S. EPA and Briggs & Stratton, LLC Emissions Control Warranty - Your
Warranty Rights and Obligations
For Briggs & Stratton Engine Models with "F" Trim Designation (Model-Type-
Trim Representation xxxxxx xxxx Fx)
The U.S. EPA and Briggs & Stratton (B&S) are pleased to explain the exhaust and
evaporative emissions (“emissions”) control system warranty on your 2023-2025
engine. New equipment that use small off-road engines must be designed, built, and
equipped to meet stringent anti-smog standards.B&S must warrant the emissions
control system on your engine/equipment for the periods of time listed below provided
there has been no abuse, neglect or improper maintenance of your small off-road
engine or equipment leading to the failure of the emissions control system.
Your emissions control system may include parts such as the carburetor or fuel-
injection system, the ignition system, catalytic converter, fuel tanks, fuel lines (for liquid
fuel and fuel vapors), fuel caps, valves, canisters, filters, clamps and other associated
components.Also included may be hoses, belts, connectors, and other emission-
related assemblies.
Where a warrantable condition exists, B&S will repair your engine/equipment at no cost
to you including diagnosis, parts, and labor.
Manufacturer's Warranty Coverage:
The exhaust and evaporative emissions control system on your engine/equipment
is warranted for two years. If any evaporative emission-related part on your engine/
equipment is defective, the part will be repaired or replaced by B&S.
Owner’s Warranty Responsibilities:
As the engine/equipment owner, you are responsible for the performance of
the required maintenance listed in your owner’s manual. B&S recommends
that you retain all receipts covering maintenance on your engine, but B&S
cannot deny warranty coverage solely for the lack of receipts or for your failure
to ensure the performance of all scheduled maintenance.
As the engine/equipment owner, you should however be aware that B&S may
deny you warranty coverage if your engine/equipment or a part has failed due
to abuse, neglect, or improper maintenance or unapproved modifications.
You are responsible for presenting your engine/equipment to a B&S
distribution center or service center as soon as the problem exists. The
warranty repairs shall be completed in a reasonable amount of time, not
to exceed 30 days.If you have a question regarding your warranty rights
and responsibilities, you should contact B&S at 1-800-444-7774 (in USA) or
BRIGGSandSTRATTON.COM.
Briggs & Stratton Emissions Control Warranty Provisions
The following are specific provisions relative to your Emissions Control Warranty
Coverage. It is in addition to the B&S engine warranty for non-regulated engines found
in the Operator’s Manual.
1. Warranted Emissions Parts
Coverage under this warranty extends only to the parts listed below (the emissions
control systems parts) to the extent these parts were present on the B&S engine
and/or B&S supplied fuel system.
a. Fuel Metering System
Cold start enrichment system (soft choke)
Carburetor or fuel injection system
Oxygen sensor
Electronic control unit
Fuel pump module
Fuel line (for liquid fuel and fuel vapors), fuel line fittings, clamps
Fuel tank, cap and tether
Carbon canister and mounting bracket
Pressure relief valves
Liquid/Vapor separator
b. Air Induction System
Air cleaner
Intake manifold
Purge and vent line
c. Ignition System
Spark plug(s)
Magneto ignition system
d. Catalyst System
Catalytic converter
Exhaust manifold
Air injection system or pulse value
e. Miscellaneous Items Used in Above Systems
Vacuum, temperature, position, time sensitive valves and switches
Connectors and assemblies
Electronic controls
10 BRIGGSandSTRATTON.COM
Not for
Reproduction
2. Length of Coverage
Coverage is for a period of two years from the date of delivery to an ultimate
purchaser, or for the time period listed in the respective engine or product warranty
statement, whichever is greater. B&S warrants to the original purchaser and each
subsequent purchaser that the engine is designed, built, and equipped so as
to conform with all applicable regulations; that it is free from defects in material
and workmanship that could cause the failure of a warranted part; and that it is
identical in all material respects to the engine described in the manufacturer’s
application for certification. The warranty period begins on the date the engine or
equipment is delivered to an ultimate purchaser.
The warranty on emissions-related parts is as follows:
Any warranted part that is not scheduled for replacement as required
maintenance in the Operator’s Manual supplied, is warranted for the warranty
period stated above. If any such part fails during the period of warranty
coverage, the part will be repaired or replaced by B&S at no charge to
the owner. Any such part repaired or replaced under the warranty will be
warranted for the remaining warranty period.
Any warranted part that is scheduled only for regular inspection in the
Operator’s Manual supplied, is warranted for the warranty period stated
above. Any such part repaired or replaced under warranty will be warranted
for the remaining warranty period.
Any warranted part that is scheduled for replacement as required
maintenance in the Operator’s Manual supplied, is warranted for the period of
time prior to the first scheduled replacement point for that part. If the part fails
prior to the first scheduled replacement, the part will be repaired or replaced
by B&S at no charge to the owner. Any such part repaired or replaced under
warranty will be warranted for the remainder of the period prior to the first
scheduled replacement point for the part.
Add-on or modified parts that are not exempted may not be used. The use of
any non-exempted add-on or modified parts by the owner will be grounds for
disallowing a warranty claim. The manufacturer will not be liable to warrant
failures of warranted parts caused by the use of a non-exempted add-on or
modified part.
3. Consequential Coverage
Coverage shall extend to the failure of any engine components caused by the
failure of any warranted emissions parts.
4. Claims and Coverage Exclusions
Warranty claims shall be filed according to the provisions of the B&S engine
warranty policy. Warranty coverage does not apply to failures of emissions
parts that are not original equipment B&S parts or to parts that fail due to abuse,
neglect, or improper maintenance as set forth in the B&S engine warranty policy.
B&S is not liable for warranty coverage of failures of emissions parts caused by
the use of add-on or modified parts.
Look For Relevant Emissions Durability Period and Air Index Information On
Your Small Off-Road Engine Emissions Label
Briggs & Stratton engines are certified to meet the United States Environmental
Protection Agency (USEPA) Phase 2 or Phase 3 emissions standards. The Emissions
Compliance Period referred to on the Emissions Compliance label indicates the
number of operating hours for which the engine has been shown to meet Federal
emissions requirements.
For engines at or less than 80 cc displacement:
Category C = 50 hours, Category B = 125 hours, Category A = 300 hours
For engines greater than 80 cc displacement and less than 225 cc displacement:
Category C = 125 hours, Category B = 250 hours, Category A = 500 hours
For engines of 225 cc or more displacement:
Category C = 250 hours, Category B = 500 hours, Category A = 1000 hours
80130180 Revision A
11
Not for
Reproduction
Informasi Umum
Panduan ini berisi informasi keselamatan tentang bahaya dan risikoterkaitmesin dan
cara mencegahnya.Panduan ini juga berisipengoperasian dan perawatan mesinyang
benar.Penting bagi Anda untuk membaca, memahami, dan mematuhi instruksi ini.
Simpanpanduan ini untuk referensi di lain waktu.
PERHATIKAN:Angka-angka dan ilustrasi dalam pedoman ini hanya sebagai informasi
dan mungkin saja berbeda dari model yang Anda miliki. Gunakan angka yangsejajar
dengankonfigurasi mesin Anda. Apabila perlu, hubungi Penyalur Servis Resmi.
Catat tanggal pembelian, model, tipe, trim, dan nomor seri mesin untuk suku cadang
pengganti. Nomor tersebut ada di mesin Anda. Lihat bagian Fitur dan Kontrol.
Tanggal Pembelian
Model - Tipe - Trim Mesin
Nomor Seri Mesin
Informasi Kontak Kantor Eropa
Untuk pertanyaan mengenai emisi Eropa, hubungi kantor Eropa kami yang beralamat di:
Max-Born-Straße 2, 68519 Viernheim, Jerman.
Uni Eropa (UE) Tahap V (5): Nilai Karbon
Dioksida (CO2)
Masukkan CO2 dalam jendela pencarian pada BriggsandStratton.com untuk mencari
nilai karbon dioksida mesin Sertifikat Persetujuan Tipe UE Briggs & Stratton.
Keselamatan Operator
Simbol Peringatan dan Kata-kata Sinyal Terkait
Keselamatan
Simbol peringatan keselamatan mengidentifikasi informasi keselamatan
tentang bahaya yang dapat berakibat cedera pribadi. Kata peringatan (BAHAYA,
PERINGATAN, atau PERHATIAN) digunakan untuk menunjukkan kemungkinan dan
keparahan potensi cedera. Selain itu, simbol bahaya digunakan untuk mewakili tipe
bahaya.
BAHAYA mengindikasikan bahaya yang, jika tidak dihindari, akan mengakibatkan
kematian atau cedera serius.
PERINGATAN mengindikasikan bahaya yang, jika tidak dihindari, dapat
mengakibatkan kematian atau cedera serius.
PERHATIAN menunjukkan bahaya yang, jika tidak dihindari, dapat mengakibatkan
cedera ringan atau sedang.
PEMBERITAHUAN menunjukkan informasi yang dianggap penting namun tidak
berkaitan dengan bahaya.
Simbol Keselamatan dan Artinya
Informasi keselamatan
mengenai bahaya yang
dapat mengakibatkan
cedera diri.
Baca dan pahami Panduan
Operator sebelum
mengoperasikan atau
menyervis unit.
Bahaya Kebakaran Bahaya Ledakan
Bahaya Sengatan Listrik Bahaya Asap Beracun
Bahaya Permukaan Panas Bahaya Hentakan Balik
Bahaya Amputasi-
Komponen yang Bergerak Tingkat Bahan Bakar -
Maksimum
Jangan Mengisi Terlalu
Penuh
Pesan Keselamatan
PERINGATAN
Mesin Briggs & Stratton® tidak dirancang untuk dan tidak untuk digunakan untuk
menggerakkan: fun-kart; go-kart; anak, rekreasi, kendaraan serbaguna (all-terrain
vehicle/ATV), sepeda motor; hovercraft; produk pesawat; atau kendaraan yang
digunakan pada acara pertandingan yang tidak disetujui oleh Briggs & Stratton. Untuk
informasi mengenai produk balap kompetitif, lihat www.briggsracing.com. Untuk
penggunaan dengan utilitas dan ATV berdampingan, hubungilah Pusat Penerapan
Daya Briggs & Stratton, 1-866-927-3349. Penggunaan mesin yang keliru dapat
menyebabkan cedera serius atau kematian.
Informasi Daur Ulang
Daur ulang semua kardus, kotak, oli bekas, dan baterai
sesuai peraturan pemerintah.
Fitur dan Kontrol
Kontrol Mesin
Bandingkan huruf timbul dalam Gambar 1, 2, 3 dengan kontrol mesin dalam daftar
berikut:
A. Nomor Identifikasi MesinModel - Tipe - Kode
B. Busi
C. Pembersih Udara
D. Kontrol Cuk
E. Gagang Tali starter Cord
F. Kisi-kisi Saluran Masuk Udara
G. Kontrol Trotel (jika dipasang)
H. Sakelar Stop (jika dipasang)
I. Tangki Bahan Bakar dan Tutup Tangki
J. Penyumbat Oli
K. Batang Celup Pendek
L. Knalpot, Pelindung Knalpot (jika dipasang), Penahan Percikan Api (jika dipasang)
M. Katup Penutup Bahan Bakar
N. Sakelar penstarteran elektrik (model Starter listrik)1
O. Batang Celup yang Diperpanjang (jika dipasang)
Beberapa mesin dan peralatan memiliki kendali jarak jauh. Lihat panduan peralatan
untuk mendapatkan informasi tentang lokasi dan pengoperasian kendali jarak jauh.
Simbol Kontrol Mesin dan Artinya
Kecepatan Mesin - CEPAT Kecepatan Mesin -
LAMBAT
Kecepatan Mesin -
BERHENTI NYALA - MATI
Mesin Menyala
Cuk TERTUTUP Mesin Menyala
Cuk TERBUKA
Tutup Bahan Bakar
Penutup Bahan Bakar
TERBUKA
Penutup Bahan Bakar
TERTUTUP
12 BRIGGSandSTRATTON.COM
Not for
Reproduction
Operasi
PERINGATAN
Uap bahan bakar mudah terbakar dan meledak. Kebakaran atau ledakan dapat
mengakibatkan luka bakar atau kematian.
Apabila Anda mencium bau gas
Jangan menyalakan mesin.
Jangan menyalakan sakelar listrik.
Jangan menggunakan telepon di daerah sekitarnya.
Evakuasi area.
Hubungi pemadam kebakaran.
Saat Anda mengoperasikan peralatan
Jangan memiringkan mesin atau peralatan pada sudut yang menyebabkan
bahan bakar tumpah.
Saat Anda memindahkan lokasi peralatan
Pastikan tangki bahan bakar KOSONG atau katup penutup bahan bakar, jika
terpasang, berada dalam posisi TERTUTUP.
Rekomendasi Oli
Kapasitas Oli: Lihat bagian Spesifikasi.
Kami menyarankan Anda agar menggunakan Oli Resmi Bergaransi Briggs &
Stratton® untuk mendapatkan performa terbaik. Oli detergen berkualitas tinggi lainnya
diperbolehkan jika tergolong untuk servis SF, SG, SH, SJ, atau yang lebih tinggi.
Jangan gunakan bahan aditif khusus.
Gunakan bagan berikut untuk memilih viskositas terbaik untuk perkiraan kisaran suhu
luar ruangan. Mesin pada sebagian besar peralatan daya luar ruangan cocok dengan
Oli Sintetik 5W-30. Untuk peralatan yang dioperasikan pada suhu panas, Oli Sintetik
Vanguard® 15W-50 memberikan perlindungan yang terbaik.
A SAE 30 - Pada suhu di bawah 40°F (4°C), penggunaan oli SAE 30 akan
mengakibatkan penstarteran sulit.
B 10W-30 - Pada suhu di atas 80°F (27°C), penggunaan oli 10W-30 dapat
menyebabkan bertambahnya konsumsi oli. Periksaketinggian oli sesering
mungkin.
C 5W-30
D Sintetis 5W-30
EVanguard® Sintetik 15W-50
Cek Ketinggian Oli
Sebelum mengecekketinggian oli
Pastikan mesin dalam posisi datar.
Bersihkan area lubang pengisian oli darimateri yang tidak diinginkan.
Baca bagian Spesifikasi untuk mengetahui kapasitas oli.
Batang Celup Pendek, jika dipasang
1. Lepaskan batang celup (A, Gambar 4). Gunakan kain untuk membersihkan oli dari
batang celup.
2. Pasang batang celup (A, Gambar 4). Jangan membalikkan atau
mengencangkanbatang celup.
3. Lepaskan batang celup dan periksa level oli. Ketinggian oli yang benar adalah di
atas indikator penuh (B, Gambar 4) pada batang celup.
4. Apabila ketinggian oli rendah, tuangkan oli perlahan-lahan ke dalam lubang
pengisian oli pada mesin (C, Gambar 4). Jangan menambahkan terlalu banyak
oli. Tunggu selama satu menit, kemudian periksa kembali ketinggian oli. Pastikan
ketinggian oli tepat.
5. Pasang dan kencangkan batang celup (A, Gambar 4).
Batang Celup yang Diperpanjang, jika dipasang
1. Lepaskan batang celup (A, Gambar 5). Gunakan kain untuk menghilangkan sisa oli
dari batang celup.
2. Pasang batang celup (A, Gambar 5). Jangan membalikkan atau
mengencangkan batang celup.
3. Lepaskan batang celup dan periksa level oli. Ketinggian oli yang benar adalah di
atas indikator penuh (B, Gambar 5) pada batang celup.
4. Apabila ketinggian oli rendah, tuangkan oli perlahan-lahan ke dalam lubang
pengisian oli pada mesin (C, Gambar 5). Jangan menambahkan terlalu banyak
oli. Tunggu selama satu menit, kemudian periksa kembali ketinggian oli. Pastikan
ketinggian oli tepat.
5. Pasang dan kencangkan batang celup (A, Gambar 5).
6. Sambungkan kabel busi ke busi. Bacalah bagian Membersihkan Oli.
Sistem Perlindungan Ketinggian Oli Rendah (jika
dipasang)
Sensor ketinggian oli rendah dipasang pada beberapa mesin. Apabila oli rendah, sensor
akan menunjukkan lampu peringatan atau mematikan mesin. Matikan mesin dan ikuti
langkah berikut sebelum menyalakan mesin.
Pastikan mesin dalam posisi datar.
Lakukan pemeriksaan oli. Lihat bagian Cek Ketinggian Oli.
Apabila ketinggian oli rendah, tambahkan oli dalam jumlah yang tepat. Nyalakan
mesin dan pastikan lampu peringatan (jika dipasang) tidak menyala.
Apabila ketinggian oli tidak rendah, jangan menyalakan mesin. Hubungi
Penyalur Servis Resmi Briggs & Stratton untuk memperbaiki masalah oli.
Rekomendasi Bahan Bakar
Bahan bakar harus memenuhi persyaratan berikut:
Bensin bersih, baru, dan tanpa timbal.
Nilai oktan minimal 87/87 AKI (91RON). Penggunaan di tempat tinggi, lihat di
bawah.
Bensin dengan kandungan etanol (gasohol) hingga 10% diperbolehkan.
PEMBERITAHUAN
Jangan menggunakan bensin yang tidak disetujui, seperti E15 dan E85. Jangan
mencampurkan oli ke dalam bensin atau mengganti mesin untuk dioperasikan
dengan bahan bakar pengganti. Penggunaan bahan bakar yang tidak disetujui akan
menyebabkan kerusakan pada komponen mesin, yang perbaikannya tidak akan
ditanggung garansi.
Untuk melindungi sistem bahan bakar dari pembentukan endapan, dan korosi,
campurkan stabilisator bahan bakar bebas alkohol dan perlakuan etanol ke dalam
bahan bakar. Baca bagian Penyimpanan. Semua bahan bakar berbeda-beda. Apabila
terjadi masalah penstarteran atau performa, ganti dengan penyedia atau merek bahan
bakar lain. Mesin ini disertifikasi untuk beroperasi dengan bensin. Sistem kontrol emisi
untuk mesin berkarburator adalah EM (Modifikasi Mesin). Sistem kontrol emisi untuk
mesin dengan injeksi bahan bakar elektronik adalah ECM (Modul Kontrol Mesin), MFI
(Injeksi Multi-Bahan Bakar Port), TBI (Injeksi Bahan Bakar Badan Trotel), dan jika
dilengkapi O2S (Sensor Oksigen).
Lokasi yang Tinggi
Di lokasi dengan ketinggian lebih dari 5.000 kaki (1.524 meter), bensin dengan
minimum 85 oktan/85 AKI (89 RON) diperbolehkan.
Untuk mesin berkarburator, diperlukan setelan lokasi tinggi guna mempertahankan
performa. Pengoperasian tanpa penyetelan ini akan menyebabkan performa
berkurang, konsumsi bahan bakar bertambah, dan emisi meningkat. Hubungi Penyalur
Servis Resmi Briggs & Stratton untuk mengetahui informasi setelan lokasi tinggi.
Pengoperasian mesin di lokasi dengan ketinggian kurang dari 2.500 kaki (762 meter)
dengan setelan lokasi tinggi tidak disarankan.
Mesin Injeksi Bahan Bakar Elektronik (EFI) tidak memerlukan setelan lokasi tinggi.
13
Not for
Reproduction
Tambahkan Bahan Bakar
PERINGATAN
Bahan bakar dan uapnya sangat mudah terbakar dan meledak. Kebakaran atau
ledakan dapat mengakibatkan luka bakar atau kematian.
Ketika Anda menambahkan bahan bakar
Matikan mesin. Sebelum melepas tutup tangki, tunggu minimal dua (2) menit
untuk memastikan bahwa mesin sudah dingin.
Isi tangki bahan bakar di luar ruangan atau di area yang memiliki aliran udara
yang baik.
Jangan mengisi tangki bahan bakar terlalu penuh. Karena bahan bakar dapat
memuai, jangan lakukan pengisian di atas bagian dasar leher tangki bahan
bakar.
Jauhkan bahan bakar dari percikan api, nyala api, lampu penunjuk, panas, dan
sumber pemicu api lainnya.
Periksa saluran bahan bakar, tangki bahan bakar, tutup tangki, dan sambungan
secara rutin untuk mengetahui apakah terdapat retakan atau kebocoran. Ganti
komponen yang rusak.
Apabila bahan bakar tumpah, tunggu hingga tumpahannya kering sebelum Anda
menyalakan mesin.
1. Bersihkan bagian lubang pengisian oli dari kotoran dan serpihan. Lepas tutup
bahan bakar.
2. Isi tangki bahan bakar (A, Gambar 6) dengan bahan bakar. Karena bahan bakar
akan menguap, jangan mengisi di atas dasar leher tangki bahan bakar(B).
3. Pasang kembali tutup bahan bakar.
Nyalakan Mesin
PERINGATAN
Penarikan tali starter yang cepat (entakan balik) akan menarik tangan dan lengan
menuju mesin lebih cepat dari usaha Anda untuk melepaskannya. Ini dapat
mengakibatkan patah tulang, retak tulang, memar, atau terkilir. Untuk menghindari
entakan balik saat Anda menyalakan mesin, tarik tali starter perlahan-lahan sampai
dirasakan tertahan dan kemudian tarik dengan cepat.
PERINGATAN
Bahan bakar dan uapnya sangat mudah terbakar dan meledak. Kebakaran atau
ledakan dapat mengakibatkan luka bakar atau kematian.
Saat Anda menyalakan mesin
Pastikan busi, knalpot, tutup tangki, dan pembersih udara (jika dilengkapi)
terpasang dengan benar.
Jangan menghidupkan mesin dengan busi dilepas.
Apabila mesin terkena tumpahan, atur cuk (jika dilengkapi) ke posisi BUKA atau
BEROPERASI. Pindahkan trotel (jika dilengkapi) ke posisi CEPAT dan putar
hingga mesin menyala.
Apabila terdapat kebocoran gas LP atau alam di area, jangan menyalakan
mesin.
Karena uapnya mudah terbakar, jangan menggunakan cairan starter
bertekanan.
PERINGATAN
BAHAYA GAS BERACUN. Gas buang mesin mengandung karbon monoksida,
yakni gas beracun yang dapat mematikan dalam hitungan menit. Meskipun
Anda tidak mencium asap gas buang, Anda masih dapat terpapar gas karbon
monoksida yang berbahaya. Apabila Anda merasa tidak enak badan, pusing, atau
lemas saat menggunakan produk ini, SEGERA cari udara segar. Kunjungi dokter.
Anda mungkin keracunan karbon monoksida.
Gas karbon monoksida dapat menumpuk di ruang berpenghuni. Untuk
mengurangi risiko terkumpulnya gas karbon monoksida, HANYA operasikan
produk ini di luar ruangan dan jauh dari jendela, pintu, dan ventilasi.
Pasanglah alarm karbon monoksida bertenaga baterai atau sambungkan alarm
karbon monoksida dengan baterai cadangan ke stopkontak listrik sebagaimana
ditetapkan oleh instruksi produsen. Alarm asap tidak dapat mengetahui gas
karbon monoksida.
JANGAN mengoperasikan produk ini di dalam rumah, garasi, ruang bawah
tanah, kolong, gudang, atau ruang tertutup lainnya, meskipun jika Anda
menggunakan kipas angin atau pintu dan jendela terbuka sebagai ventilasi.
Setelah mengoperasikan produk ini, karbon monoksida dapat dengan cepat
terkumpul di ruang tersebut dan menetap selama berjam-jam.
SELALU letakkan produk ini sesuai dengan arah angin dan posisikan saluran
gas buangan mesin menjauh dari ruangan berpenghuni.
PEMBERITAHUAN
Mesin ini dikirim tanpa oli dari Briggs & Stratton. Penyalur atau produsen peralatan
mungkin telah menambahkan oli pada mesin. Sebelum Anda menyalakan mesin untuk
pertama kali, pastikan oli pada ketinggian yang benar. Tambahkan oli sesuai dengan
instruksi pada pedoman ini. Apabila Anda menyalakan mesin tanpa oli, kerusakan akan
terjadi pada mesin dan perbaikan mesin tidak akan ditanggung garansi.
1. Periksa oli mesin. Lihat bagianPeriksa Level Oli.
2. Pastikan kontrol penggerak peralatan, jika ada, dalam kondisi nonaktif.
3. Tekan sakelar stop (A, Gambar 7), jika dilengkapi, ke posisi ON.
4. Pindahkan kontrol trotel (B, Gambar 7), jika dilengkapi, ke posisi CEPAT.
Operasikan mesin pada posisi CEPAT.
5. Pindahkan kontrol cuk (C, Gambar 7), ke posisi CHOKE.
PERHATIKAN:Cuk tersebut biasanya tidak diperlukan saat menyalakan kembali mesin
yang masih panas.
6. Pindahkan penutup bahan bakar (D, Gambar 7), jika dilengkapi, ke posisi BUKA.
7. Starter Putar Balik, jika ada: Tahan dengan kuat handel kabel starter (E, Gambar
7). Tarik handel kabel starter perlahan sampai terasa ada tahanan, lalu tarik
dengan cepat.
PERINGATAN
Penarikan tali starter yang cepat (entakan balik) akan menarik tangan dan lengan
menuju mesin lebih cepat dari usaha Anda untuk melepaskannya. Ini dapat
mengakibatkan patah tulang, retak tulang, memar, atau terkilir. Untuk menghindari
entakan balik saat Anda menyalakan mesin, tarik tali starter perlahan-lahan sampai
dirasakan tertahan dan kemudian tarik dengan cepat.
8. Penstarteran elektrik, jika ada: Putar sakelar penstarteran elektrik (F, Gambar 7)
ke posisi ON atau MULAI.
PEMBERITAHUAN
Untuk memperpanjang masa pakai starter, gunakan siklus starter singkat (maksimum
lima detik). Tunggu satu menit di antara siklus starter.
9. Setelah mesin panas, pindahkan kontrol cuk (C, Gambar ) ke posisi BEROPERASI.
Apabila mesin tidak menyala setelah 3atau 4 kali percobaan, hubungi penyalur
setempat Anda ataukunjungi BRIGGSandSTRATTON.COM, atau hubungi
1-800-444-7774.
Mematikan Mesin
PERINGATAN
Bahan bakar dan uapnya sangat mudah terbakar dan meledak. Kebakaran atau
ledakan dapat mengakibatkan luka bakar atau kematian.
Jangan menggunakan cuk karburator (jika dilengkapi) untuk mematikan mesin.
1. Sakelar Stop, jika ada: Pindahkan sakelar stop (A, Gambar 8) ke posisi
HENTIKAN.
2. Kontrol Trotel, jika ada: Pindahkan kontrol trotel (B, Gambar 8) ke LAMBAT lalu
ke posisiHENTIKAN.
3. Penstarteran elektrik, jika ada: Putar sakelar penstarteran elektrik (F, Gambar 8)
ke posisi OFF/HENTIKAN. Lepaskan kunci dan simpan di tempat yang jauh dari
jangkauan anak-anak.
4. Setelah mesin berhenti, putar katup penutup bahan bakar (D, Gambar 8), jika
dilengkapi, ke posisi TUTUP.
Pemeliharaan
Informasi Pemeliharaan
PERINGATAN
Bahan bakar dan uapnya sangat mudah terbakar dan meledak. Kebakaran atau
ledakan dapat mengakibatkan luka bakar atau kematian.
Apabila unit perlu dimiringkan selama pemeliharaan, pastikan bahwa tangki bahan
bakar, jika terpasang pada mesin, kosong dan bahwa busi menghadap ke atas. Apabila
tangki bahan bakar tidak dikosongkan, dapat terjadi kebocoran dan dapat menimbulkan
kebakaran atau ledakan. Apabila mesin dimiringkan ke arah yang berbeda, mesin akan
sulit dinyalakan karena kontaminasi oli atau bahan bakar pada filter udara atau busi.
14 BRIGGSandSTRATTON.COM
Not for
Reproduction
PERINGATAN
Percikan mesin yang tidak disengaja dapat menyebabkan sengatan listrik,
kebakaran, atau ledakan dan dapat mengakibatkan belitan, amputasi traumatik,
atau laserasi.
Sebelum melakukan penyetelan atau perbaikan:
Lepaskan kabel busi dan jauhkan dari busi.
Lepaskan kabel baterai dari terminal negatif baterai (hanya pada mesin dengan
penstarteran elektrik).
Hanya gunakan alat bantu yang tepat.
Saat memeriksa percikan:
Gunakan tester busi yang disetujui.
Jangan periksa percikan listrik saat busi dilepas.
PERINGATAN
Komponen pengganti harus sama dan dipasang pada posisi yang sama seperti
komponen asli. Komponen lain dapat mengakibatkan kerusakan atau cedera.
PEMBERITAHUAN
Agar mesin beroperasi dengan baik, semua komponen yang digunakan untuk membuat
mesin ini harus tetap berada di tempatnya.
Kunjungi Penyalur Servis Resmi Briggs & Stratton untuk semua pemeliharaan serta
servis mesin dan komponen mesin.
Layanan Kontrol Emisi
Untuk pemeliharaan, penggantian, atau perbaikan perangkat dan sistem kontrol
emisi, hubungi perusahaan atau teknisi layanan perbaikan mesin medan berat
yang memenuhi syarat. Namun, untuk mendapatkan servis kontrol emisi “tanpa biaya”,
pekerjaan harus dilakukan oleh penyalur resmi pabrik. Baca Pernyataan Kontrol Emisi.
Jadwal Pemeliharaan
5 Jam Pertama
Ganti oli mesin.
Setiap 8 Jam atau Setiap Hari
Periksa ketinggian oli mesin.
Bersihkan area di sekitar knalpot dan kontrol.
Bersihkan kisi-kisi masuk udara.
Setiap 25 Jam atau Setiap Tahun
Bersihkan filter udara1.
Bersihkan saringan awal udara1.
Setiap 50 Jam atau Setiap Tahun
Servis sistem pembuangan.
Setiap 100 Jam atauSetiap Tahun
Ganti oli mesin.
Setiap Tahun
Ganti busi.
Ganti filter udara.
Ganti saringan awal udara.
Servis sistem pendingin1.
1 Bersihkan lebih sering ketika dalam kondisi berdebu atau saat banyak partikel di
udara.
Karburator dan Kecepatan Mesin
Jangan melakukan penyetelan terhadap karburator, pegas governor, mata rantai, atau
komponen lain untuk menyetel kecepatan mesin. Apabila penyetelan perlu dilakukan,
hubungi Penyalur Servis Resmi Briggs & Stratton untuk melakukan servis.
PEMBERITAHUAN
Produsen peralatan menentukan kecepatan maksimum untuk mesin saat dipasang
pada peralatan. Jangan melampaui kecepatan ini. Apabila Anda tidak yakin berapa
kecepatan maksimum mesin, atau berapa kecepatan mesin yang disetel dari pabriknya,
hubungi Penyalur Servis Resmi Briggs & Stratton untuk mendapatkan bantuan. Untuk
pengoperasian peralatan secara aman dan tepat, kecepatan mesin hanya boleh disetel
oleh teknisi servis yang berkualifikasi.
Menyervis Busi
Periksa celah busi (A, Gambar 9) dengan kabel ukuran (B). Apabila diperlukan, atur
celah busi. Pasang dan kencangkan busi ke torsi yang benar. Untuk memperoleh
spesifikasi celahdan torsi, lihatlah bagian Spesifikasi.
Servis SistemPembuangan Gas
PERINGATAN
Selama pengoperasian, mesin dan knalpot menjadi panas. Apabila Anda
menyentuh mesin yang panas, luka bakar panas dapat terjadi.
Bahan yang mudah terbakar, seperti daun, rumput, dan sikat, dapat tersulut api.
Sebelum Anda menyentuh mesin atau knalpot, matikan mesin dan tunggu dua
(2) menit. Pastikan mesin dan knalpot aman disentuh.
Bersihkan serpihan dari knalpot dan mesin.
Penggunaan atau pengoperasian mesin melanggar Pedoman Sumber Daya Publik
California, Pasal 4442, jika dilakukan di lahan yang tertutup hutan, tertutup semak, atau
tertutup rumput kecuali sistem pembuangannya dilengkapi pelindung percikan (spark
arrester), sebagaimana disebutkan dalam pasal 4442, yang terawat dan dapat bekerja
dengan baik. Yurisdiksi negara bagian atau federal lainnya mungkin memiliki undang-
undang serupa; rujuk Peraturan Federal 36 CFR Bagian 261.52. Hubungi produsen
peralatan asli, peritel, atau dealer untuk memperoleh spark arrester yang dirancang
untuk sistem pembuangan yang dipasang pada mesin ini.
Bersihkan serpihan dari area knalpot dan silinder. Periksa keretakan, korosi, atau
kerusakan lainnya pada knalpot. Lepaskan deflektor atau penangkal percikan, jika
dilengkapi, dan periksa jika ada kerusakan atau penyumbatan karbon. Apabila
ditemukan kerusakan, pasang komponen pengganti sebelum mengoperasikan
peralatan.
PERINGATAN
Komponen pengganti harus sama dan dipasang pada posisi yang sama seperti
komponen asli. Komponen lain dapat mengakibatkan kerusakan atau cedera.
Mengganti Oli Mesin
PERINGATAN
Bahan bakar dan uapnya sangat mudah terbakar dan meledak. Kebakaran atau
ledakan dapat mengakibatkan luka bakar atau kematian.
Selama pengoperasian, mesin dan knalpot menjadi panas. Apabila Anda
menyentuh mesin yang panas, luka bakar panas dapat terjadi.
Apabila Anda menguras oli dari tabung pengisian oli atas, tangki bahan bakar
harus kosong. Apabila tidak dikosongkan, dapat terjadi kebocoran bahan bakar
dan dapat menyebabkan kebakaran atau ledakan.
Sebelum Anda menyentuh mesin atau knalpot, matikan mesin dan tunggu dua
(2) menit. Pastikan mesin dan knalpot aman disentuh.
Oli bekas merupakan produk limbah berbahaya dan harus dibuang dengan benar.
Jangan dibuang bersamaan dengan sampah rumah tangga. Hubungi otoritas setempat,
pusat servis, atau penyalur untuk mengetahui fasilitas pembuangan atau daur ulang
yang aman.
Pindahkan Oli
1. Ketika mesin OFF (MATI) tetapi masih panas, cabut kawat busi (D, Gambar 10)
dan jauhkan dari busi (E).
2. Lepaskan sumbat oli (F, Gambar 11). Kuras oli ke wadah yang disetujui.
PERHATIKAN:Semua sumbat penguras oli (G, Gambar 11) dapat dipasang di mesin.
3. Pasang dan kencangkan sumbat oli (F, Gambar 11).
Tambahkan Oli
Pastikan mesin dalam posisi datar.
Bersihkan bagian lubang pengisian oli dari serpihan.
Lihat bagian Spesifikasi untuk mengetahui kapasitas oli.
Tutup Pengisian Oli, jika dipasang
1. Lepaskan tutup pengisian oli (H, Gambar 12).
15
Not for
Reproduction
2. Tuangkan oli perlahan ke dalam lubang pengisian oli mesin (C, Gambar 12).
3. Pasang dan kencangkan penyumbat pengisi oli (H, Gambar 12).
4. Sambungkan kawat busi (D, Gambar 12) ke busi (E).
Batang Celup Pendek, jika dipasang
1. Lepaskan batang celup (A, Gambar 13). Gunakan kain untuk membersihkan oli dari
batang celup.
2. Pasang batang celup (A, Gambar 13). Jangan membalikkan atau
mengencangkanbatang celup.
3. Lepaskan batang celup dan periksa level oli. Ketinggian oli yang benar adalah di
atas indikator penuh (B, Gambar 13) pada batang celup.
4. Apabila ketinggian oli rendah, tuangkan oli perlahan-lahan ke dalam lubang
pengisian oli pada mesin (C, Gambar 13). Jangan menambahkan terlalu banyak
oli. Tunggu selama satu menit, kemudian periksa kembali ketinggian oli. Pastikan
ketinggian oli tepat.
5. Pasang dan kencangkan batang celup (A, Gambar 13).
Batang Celup yang Diperpanjang, jika dipasang
1. Lepaskan batang celup (A, Gambar 14). Gunakan kain untuk menghilangkan sisa
oli dari batang celup.
2. Pasang batang celup (A, Gambar 14). Jangan membalikkan atau
mengencangkan batang celup.
3. Lepaskan batang celup dan periksa level oli. Ketinggian oli yang benar adalah di
atas indikator penuh (B, Gambar 14) pada batang celup.
4. Apabila ketinggian oli rendah, tuangkan oli perlahan-lahan ke dalam lubang
pengisian oli pada mesin (C, Gambar 14). Jangan menambahkan terlalu banyak
oli. Tunggu selama satu menit, kemudian periksa kembali ketinggian oli. Pastikan
ketinggian oli tepat.
5. Pasang dan kencangkan batang celup (A, Gambar 14).
6. Sambungkan kabel busi ke busi. Bacalah bagian Membersihkan Oli.
MenyervisFilter Udara
PERINGATAN
Uap bahan bakar mudah terbakar dan meledak. Kebakaran atau ledakan dapat
mengakibatkan luka bakar atau kematian.
Janganmenghidupkan dan mengoperasikan mesin dengan perangkat
pembersih udara (jika dilengkapi) atau filter udara (jika dilengkapi).
PEMBERITAHUAN
Jangan gunakan udara bertekanan atau senyawa pelarut untuk membersihkan filter.
Udara bertekanan dapat mengakibatkan kerusakan pada filter dan pelarut akan
melarutkan bahan filter.
Lihat Jadwal Pemeliharaan untuk mengetahui persyaratan servis.
Model yang berbeda akan menggunakan filter busa atau kertas. Beberapa model
mungkin juga dilengkapi dengan saringan udara awal opsional yang dapat dibersihkan
dan digunakan kembali. Bandingkan ilustrasi dalam panduan ini dengan tipe yang
terpasang pada mesin Anda dan lakukan servis sebagai berikut.
Filter Udara Kertas
1. Longgarkan pengencang (C, Gambar 15).
2. Lepaskan penutup (A, Gambar 15) dan filter(B).
3. Untuk menghilangkan serpihan, ketuk-ketukkan filter (B, Gambar 15) secara
perlahan pada permukaan yang keras. Apabila filter udara kotor, ganti dengan filter
baru.
4. Pasang filter (B, Gambar 15).
5. Pasang penutup (A, Gambar 15) menggunakan pengencang(C). Pastikan
pengencang terpasang dengan erat.
Filter Udara Kertas
1. Kendurkan pengencang (A, Gambar 16) dan lepas penutup (B).
2. Lepaskan pengencang (C, Gambar 16) dan filter udara (D).
3. Lepaskan saringan awal udara (E, Gambar 16), jika dilengkapi, dari filter udara (D).
4. Untuk menghilangkan material yang tidak diinginkan, ketuk-ketukkan perlahan filter
udara (D, Gambar 16) pada permukaan yang keras. Jika filter kotor, ganti.
5. Bersihkan saringan awal udara (E, Gambar 16) dalam detergen cair dan air.
Biarkan saringan awal udara benar-benar kering. JANGAN melumasi saringan
awal udara.
6. Rakit saringan awal udara yang kering (E, Gambar 16), jika dilengkapi, ke filter
udara (D).
7. Pasang washer baja (F, Gambar 16), filter udara (D), dan saringan awal udara
(E), ke dudukan filter udara (G) dan pada kunci (H).Pastikan bahwa filter udara
dipasang dengan benar pada dudukan filter udara dengan pengencang (C).
8. Pasang penutup (B, Gambar 16) dengan pengencang (A). Pastikan pengencang
terpasang dengan erat.
Filter Udara Busa
1. Kendurkan pengencang (A, Gambar 17) yang menahan penutup (B).
2. Buka penutup (B, Gambar 17) dan lepaskan filter (C).
3. Bersihkan elemen busa (C, Gambar 17) dalam deterjen cair dan air. Peras elemen
busa hingga kering di dalam kain bersih.
4. Rendam elemen busa (C, Gambar 17) dan oli mesin yang bersih. Untuk
menghilangkan sisa oli, remas elemen busa dengan kain bersih.
5. Pasang filter (C, Gambar 17).
6. Pasang penutup (B, Gambar 17) dan tutup pengencang (A).
Ruang Penyimpanan
Sistem Bahan Bakar
Lihat Gambar: 18.
PERINGATAN
Bahan bakar dan uapnya sangat mudah terbakar dan meledak. Kebakaran atau
ledakan dapat mengakibatkan luka bakar atau kematian.
Penyimpanan Bahan Bakar
Karena lampu utama atau sumber pengapian lain dapat menimbulkan ledakan,
jauhkan bahan bakar atau peralatan dari tungku, kompor, alat pemanas air, atau
perangkat lainnya yang dilengkapi lampu utama.
Simpan mesin di tempat yang datar (posisi pengoperasian normal). Isi tangki bahan
bakar (A, Gambar 18) dengan bahan bakar. Untuk penguapan bahan bakar, jangan
mengisi di atas leher tangki bahan bakar (B).
Bahan bakar mungkin menjadi basi jika disimpan dalam wadah penyimpanan selama
lebih dari 30 hari. Dianjurkan untuk menggunakan stabilisator bahan bakar bebas
alkohol dan perawatan etanol dalam wadah penyimpanan bahan bakar demi mencegah
degradasi bahan bakar dan menjaga kesegaran bahan bakar.
Saat Anda mengisi wadah bahan bakar dengan bahan bakar, tambahkan stabilisator
bahan bakar bebas alkohol sebagaimana diarahkan dalam instruksi produsen. Apabila
bensin dalam mesin belum dicampur stabilisator bahan bakar, maka bensin harus
dikuras ke wadah yang disarankan.Operasikan mesin sampai bahan bakar habis.
Oli Mesin
Saat mesin masih hangat, ganti oli mesin. Baca bagian Mengganti Oli Mesin.
Pemecahan Masalah
Bantuan
Untuk mendapatkan bantuan, hubungi penyalur lokal Anda atau kunjungi
BRIGGSandSTRATTON.COM atau hubungi 1-800-444-7774 (di AS).
Spesifikasidan Suku Cadang Servis
Model: 190000
Volume Langkah 18.67 ci (306 cc)
Lubang Silinder 3.228 in (82 mm)
Putaran 2.283 in (58 mm)
Kapasitas Oli 35 - 39 oz (1,05- 1,15 L)
Celah Busi .030 in (,76 mm)
Torsi Busi 274 lb-in (31 Nm)
Celah Udara Jangkar Dinamo .008 - .016 in (,2 - ,4 mm)
Kelonggaran Katup Isap .005 - .007 in (,13 - ,18 mm)
Kelonggaran Katup Buang .005 - .007 in (,13 - ,18 mm)
Model: 250000
Volume Langkah 25.63 ci (420 cc)
Lubang Silinder 3.543 in (90 mm)
Putaran 2.598 in (66 mm)
Kapasitas Oli 35 - 39 oz(1,05- 1,15 L)
Celah Busi .030 in (,76 mm)
Torsi Busi 274 lb-in (31 Nm)
Celah Udara Jangkar Dinamo .008 - .016 in (,2 - ,4 mm)
16 BRIGGSandSTRATTON.COM
Not for
Reproduction
Model: 250000
Kelonggaran Katup Isap .005 - .007 in (,13 - ,18 mm)
Kelonggaran Katup Buang .005 - .007 in (,13 - ,18 mm)
Daya mesin akan menurun sebesar 3,5% untuk setiap 1.000 kaki (300 meter) di atas
permukaan laut dan 1% untuk setiap 10°F (5,6°C) di atas 77°F (25°C). Mesin akan
beroperasi secara memuaskan pada sudut hingga 25°. Bacalah Panduan Operator
peralatan untuk batas pengoperasian aman yang diizinkan pada lereng.
Suku Cadang Servis - Model: 190000, 250000
Suku Cadang Servis Nomor Suku Cadang
Filter Udara Kertas (Model 190000,
Gambar 15) 491588
Filter Udara Kertas (Model 190000,
Gambar 16) 592605
Filter Udara Busa (Model 190000,
Gambar 17) 591778
Filter Udara Kertas (Model 250000,
Gambar 15) 491588
Filter Udara Kertas (Model 250000,
Gambar 16) 799818
Filter Udara Busa (Model 250000,
Gambar 17) 591778
Torsi Busi (Resistor) 797235
Torsi Busi (Non-Resistor) 798615
Kunci Busi 19605
Penguji Busi 84003327
Kami merekomendasikan agar Anda mengunjungi Penyalur Resmi Briggs & Stratton
untuk pemeliharaan serta servis mesin dan komponen mesin.
Peringkat Daya
Peringkat daya kotor untuk setiap model mesin bensin tercantum pada label sesuai
dengan peraturan J1940 Prosedur Peringkat Torsi & Daya Mesin Kecil dari SAE
(Perhimpunan Insinyur Otomotif), dan diberi peringkat menurut SAEJ1995. Nilai torsi
diperoleh dengan 2600RPM untuk mesin dengan “rpm” pada label dan 3060RPM
untuk semua mesin lainnya; nilai tenaga kuda diperoleh dengan 3600RPM. Kurva daya
kotor dapat dilihat di www.BRIGGSandSTRATTON.COM. Nilai daya bersih diambil
dengan kondisi gas buang dan pembersih udara yang terpasang, sedangkan nilai
daya kotor diukur tanpa perangkat tambahan ini. Daya kotor mesin yang sebenarnya
akan lebih tinggi daripada daya bersih mesin dan dipengaruhi oleh, antara lain,
kondisi pengoperasian di sekitar dan perbedaan antarmesin. Mengingat produk yang
dilengkapi mesin tersebut sangat beragam, mesin bensin tersebut mungkin tidak akan
menghasilkan daya kotor terukur jika digunakan dalam peralatan pembangkit listrik
tertentu. Perbedaan ini diakibatkan oleh berbagai faktor, termasuk, namun tidak terbatas
pada, komponen mesin yang beragam (unit pembersih udara, pembuangan, pengisian
daya, pendinginan, karburator, pompa bahan bakar, dll.), keterbatasan pengaplikasian,
kondisi pengoperasian di sekitar (suhu, kelembapan, ketinggian), dan perbedaan
antarmesin. Karena keterbatasan produksi dan kapasitas, Briggs & Stratton dapat
mengganti mesin dengan daya nominal yang lebih tinggi untuk mesin ini.
Garansi
Garansi Mesin Briggs & Stratton®
Berlaku Maret 2023
Garansi Terbatas
Briggs & Stratton menjamin bahwa selama masa garansi yang ditetapkan di bawah,
pihaknya akan memperbaiki atau mengganti, secara gratis, dengan suku cadang
yang direkondisi atau diproduksi ulang, atas pertimbangan Briggs & Stratton sendiri,
untuk setiap komponen yang rusak terkait dengan bahan maupun pengerjaan atau
keduanya. Biaya pengangkutan atas produk yang dikirim untuk diperbaiki atau diganti
berdasarkan jaminan ini harus ditanggung oleh pembeli. Jaminan ini berlaku selama
masa jaminan dan diatur berdasarkan ketentuan yang dinyatakan di bawah. Untuk
layanan garansi, kunjungi Penyalur Servis Resmi terdekat pada peta pencari lokasi
penyalur kami di BRIGGSandSTRATTON.COM. Pembeli harus menghubungi Dealer
Servis Resmi, dan kemudian mengirimkan produk ke Dealer Servis Resmi untuk
diperiksa dan diuji.
Tidak ada garansi tertulis lainnya. Garansi tersirat, termasuk kelayakan untuk
jual beli dan kecocokan untuk tujuan tertentu, dibatasi hanya selama satu
tahun sejak tanggal pembelian, atau sejauh diizinkan oleh hukum. Semua
garansi tersirat lainnya dikecualikan. Kewajiban atas kerugian insidental atau
konsekuensial dikecualikan sejauh yang diizinkan oleh hukum. Beberapa negara
bagian atau negara tidak mengizinkan pembatasan atas masa berlakunya jaminan
tersirat, serta beberapa negara bagian dan negara tidak mengizinkan pengecualian
atau pembatasan atas kerusakan insidental maupun konsekuensial, sehingga
pembatasan dan pengecualian di atas mungkin tidak berlaku bagi Anda. Garansi ini
memberi Anda hak hukum spesifik dan Anda juga mungkin memiliki hak lain yang
berbeda-beda dari satu negara bagian dengan negara bagian lain serta dari satu
negara dengan negara lainnya*.
Ketentuan Garansi Standar 1, 2
Vanguard®; Seri CXi
Penggunaan Oleh Konsumen - 36 bulan
Penggunaan Komersial - 36 bulan
Seri XR
Penggunaan Oleh Konsumen - 24 bulan
Penggunaan Komersial - 24 bulan
Semua Mesin Lain yang Menggunakan Selongsong Besi Tuang Dura-Bore™
Penggunaan Oleh Konsumen - 24 bulan
Penggunaan Komersial - 12 bulan
Semua Mesin Lainnya
Penggunaan Oleh Konsumen - 24 bulan
Penggunaan Komersial - 3 bulan
1Inilah ketentuan garansi standar kami, tetapi terkadang mungkin ada cakupan
garansi tambahan yang belum ditentukan pada saat penerbitan. Untuk melihat daftar
syarat garansi saat ini bagi mesin Anda, kunjungi BRIGGSandSTRATTON.COM atau
hubungi Penyalur Servis Resmi Briggs & Stratton Anda.
2 Tidak ada garansi untuk mesin pada peralatan yang digunakan sebagai sumber listrik
primer untuk menggantikan sumber listrik induk; generator siaga yang digunakan untuk
keperluan komersial, kendaraan serbaguna yang melebihi 25 MPH, atau mesin yang
digunakan dalam balapan kompetitif atau dengan tujuan komersial atau penyewaan.
Masa garansi dimulai sejak tanggal pembelian oleh pengguna akhir konsumen atau
komersial ritel pertama dan berlangsung selama jangka waktu yang dinyatakan
pada tabel di atas. “Penggunaan konsumen” berarti penggunaan di rumah tangga
tempat tinggal pribadi oleh konsumen ritel. “Penggunaan komersial” berarti semua
penggunaan lainnya, termasuk penggunaan untuk tujuan komersial, menghasilkan
pendapatan, atau penyewaan. Setelah mesin diterapkan dalam penggunaan
komersial, penggunaan selanjutnya akan dianggap sebagai penggunaan komersial
untuk tujuan jaminan ini.
Tidak perlu mendaftarkan garansi untuk mendapatkan garansi produk Briggs &
Stratton. Simpan tanda bukti pembelian Anda. Apabila Anda tidak memberikan
bukti tanggal pembelian awal pada saat meminta layanan garansi, tanggal
pembuatan produk akan digunakan untuk menentukan masa garansi.
Tentang Garansi Anda
Garansi terbatas ini mencakup hanya masalah bahan dan/atau pengerjaan terkait
mesin, dan bukan penggantian atau pengembalian dana untuk peralatan tempat mesin
mungkin dipasang. Perawatan rutin, penyeteman, penyesuaian, atau keausan normal
tidak tercakup dalam garansi ini. Selain itu, garansi tidak berlaku jika mesin telah
diubah atau dimodifikasi atau jika nomor seri mesin telah dikaburkan atau dihilangkan.
Garansi ini tidak mencakup kerusakan mesin atau masalah performa yang disebabkan
oleh:
1. Penggunaan suku cadang yang bukan suku cadang asliBriggs & Stratton
2. Pengoperasian mesin dengan oli pelumas yang tidak memadai, tercemar, atau
memiliki grade tidak benar;
3. Penggunaan bahan bakar yang tercemar atau sudah basi, bensin yang diformulasi
dengan etanol lebih dari 10%, atau penggunaan bahan bakar alternatif seperti
elpiji atau gas alam pada mesin yang aslinya tidak dirancang/dibuat oleh Briggs &
Stratton agar dapat bekerja dengan bahan bakar tersebut;
4. Kotoran yang memasuki mesin akibat pemeliharaan pembersih udara atau
perakitan kembali yang tidak benar;
5. Menghantam benda dengan pisau pemotong mesin pemotong rumput rotari,
adaptor pisau, baling-baling, atau perangkat lain yang tersambung ke poros
engkol yang kendur atau terpasang tidak benar, atau kekencangan v-belt yang
berlebihan;
6. Komponen atau rakitan yang terkait seperti kopling, transmisi,Briggs & Stratton
7. Panas berlebihan akibat adanya cacahan rumput, tanah atau kotoran, atau sarang
binatang pengerat yang menyumbat atau menyumpal sirip-sirip pendingin, atau
area roda gila atau akibat mengoperasikan mesin tanpa ventilasi yang memadai;
8. Getaran berlebihan akibat kecepatan berlebih, dudukan mesin yang kendur,
pisau atau baling-baling pemotong yang kendur atau tidak seimbang, atau
penyambungan yang tidak benar atas komponen peralatan ke poros engkol;
9. Penyalahgunaan, kurangnya perawatan rutin, pengiriman, penanganan, atau
penggudangan peralatan, atau instalasi mesin yang tidak benar.
Servis garansi tersedia hanya melalui Penyalur Servis Resmi Briggs & Stratton.
Temukan Penyalur Servis Resmi terdekat di peta pencari lokasi penyalur kami di
BRIGGSandSTRATTON.COM atau dengan menghubungi1-800-444-7774 (di AS).
17
Not for
Reproduction
80114782(Revisi B)
18 BRIGGSandSTRATTON.COM
Not for
Reproduction
一般情報
本マニュアルには、このエンジンに関わる危険とリスクと、それらを防止できるよう
にするための安全情報が記載されています。また、このエンジンの正しい運転とメンテ
ナンスが含まれています。この取扱説明を読んで理解し、その内容に従うことが重要で
す。今後の参照のため、本取扱説明書を保管しておいてください。
注本マニュアルに記載されている図およびイラストは情報提供のためであり、モデル
ごとに異なる場合があります。ご使用のエンジンに合わせて図を使用してください。必
要に応じて、正規の修理店にお問い合わせください。
交換部品用に、購入日、エンジンのモデル、タイプ、トリム、エンジンのシリアル番号
を記録しておいてください。これらの番号はエンジンに記載されています。機能及びコ
ントロールセクションをご覧下さい。
購入日
エンジン モデル - タイプ - トリム
エンジン シリアル番号
ヨーロッパ事務所連絡先情報
ヨーロッパの排出量に関するご質問は、以下の弊社ヨーロッパ事務所までご連絡下さ
い:
Max-Born-Straße 2, 68519 Viernheim, Germany
欧州連合(EU)ステージV(5):二酸化炭素
(CO2)値
BriggsandStratton.comの検索ウィンドウにCO2と入力すると、Briggs & Stratton EUタ
イプ認定証明書エンジンの二酸化炭素値をご確認いただけます。
運転者の安全
安全警告記号およびシグナルワード
安全警告シンボル は、人身傷害につながる危険についての安全情報を特定し
ます。シグナルワード(危険警告注意)は、傷害の可能性および重篤性の可能性
を示します。また、危険シンボルは危険のタイプを表すために使用されます。
危険とは、それが避けられなかった場合、死亡または重大な傷害をもたらす危険を指
します。
警告とは、それが避けられなかった場合、死亡または重大な傷害につながる恐れのあ
危険を指します。
注意とは、その危険が避けられなかった場合、軽度または中程度の傷害につながる
れがあることを示します。
通知は、危険に関するものではないものの、重要な情報を意味します。
危険示す記号およびその説明
人身傷害の起因となる危険
についての安全情報。 作業機の操作あるいはサー
ビス前に必ずこの取扱説
明書を読み、理解して下さ
い。
火災の危険 爆発の危険性
感電の危険性 有毒煙の危険性
高温注意の危険 反動の危険性
切断の危険性- 可動部品 燃料レベル- 上限
過剰充填しないでください
安全のために
警告
Briggs & Stratton®エンジンは、以下の動力として設計されたものではなく、またこれ
らの用途に使うことはできません:ファンカート、ゴーカート、子供のリクリエーショ
ン用またはスポーツ用の全地形対応車(All Terrain Vehicle、ATV)、モーターバイク、ホ
バークラフト、航空機用製品、もしくは、Briggs & Strattonが認可していな競技イベン
トで使用される車両。競走用車両向け製品に関する情報は、www.briggsracing.comを
ご参照下さい。ユーティリティーでの使用やサイドバイサイドATV車での使用について
は、Briggs & Strattonパワーアプリケーションセンター(1-866-927-3349)までご連絡
下さい。誤ったエンジンの使用は、重傷または死亡を引き起こす可能性があります。
リサイクル情報
ボール紙、箱、使用済みオイルおよび電池はすべて、政府の
規制に従ってリサイクルして下さい。
機能及びコントロール
エンジンコントロール
図1、2および3 の吹き出し文字を、下記リストにあるエンジンコントロールと比較して
下さい:
A. エンジンID番号モデル- タイプ- コード
B. スパークプラグ
C. エアクリーナー
D. チョークコントロール
E. 起動コードハンドル
F. 吸気グリル
G. スロットルコントロール(装備されている場合)
H. 停止スイッチ(装備されている場合)
I. 燃料タンク及びキャップ
J. オイル・ドレン・プラグ
K. 短いオイルレベルゲージ
L. マフラー、マフラーガード(装備されている場合)、スパークアレスター(装備さ
れている場合)
M. 燃料遮断スイッチ
N. 電動起動スイッチ(電動起動モデル)1
O. 長いオイルレベルゲージ(装備されている場合)
一部のエンジンおよび器具にはリモコンがあります。リモコンの位置と操作法について
は、装置のマニュアルを参照してください。
エンジン制御系統のシンボルおよびその意味
エンジン速度- 高速 エンジン速度- 低速
エンジン速度- 停止 オン- オフ
エンジン始動
チョークを閉じる エンジン始動
チョークを開く
燃料キャップ
燃料遮断バルブを開く 燃料遮断バルブを閉じる
19
Not for
Reproduction
使用
警告
燃料ガスは可燃性が高く、爆発しやすい性質があります。火災や爆発は、火傷あるいは
死亡を引き起こす可能性があります。
ガス臭い場合
• エンジンを始動してはいけません。
• 電源スイッチをオンにしないで下さい。
• 近くで電話を使用しないで下さい。
• そのエリアから避難して下さい。
• 消防署に連絡してください。
装置の運転時
• 燃料がこぼれる角度まで、エンジンおよび装置を傾けないで下さい。
装置の位置を移動する時
• 燃料タンクが空であること、または燃料遮断バルブ(装備されている場合)が
「閉じる」の位置にあることを確認してください。
推奨オイル
オイル容量仕様セクションをご覧ください。
最適な性能を得るために、Briggs & Stratton®純正オイルのご使用が推奨されます。グ
レードSF、SG、SH、SJ以上に分類される、その他の高性能清浄オイルもご使用にな
れます。特殊な添加剤は使用しないでください。
下記のチャートを参照して、予想される外気温の範囲に最も適した粘度を選択してくだ
さい。屋外動力機器に使われるエンジンは通常、5W-30グレードの合成潤滑油で正常に
動作します。装置を高温の条件下で使用する場合は、Vanguard®15W-50グレードの化
学合成オイルを使用すれば、装置を最良の状態に保護できます。
A SAE 30 - - 40°F(4°C)以下でSAE 30を使用すると、エンジンの始動不良が
生じることがあります。
B 10W-30 - 80°F(27°C)以上で10W-30を使用すると、オイル消費量が増加す
ることがあります。オイルレベルは頻繁に確認してください。
C 5W-30
D 化学合成オイル 5W-30
EVanguard® 化学合成オイル 15W-50
エンジンオイル量の点検
エンジンオイル量を点検する前に
• エンジンが水平であることを確認します。
• オイル注入部付近にある不要物を取り除いて下さい。
• オイル容量については、仕様セクションを参照して下さい。
短いオイルレベルゲージ(装備されている場合)
1. 検油棒 (A、図 4)を取り除いて下さい。布を使って、オイルゲージに付いたオイル
を拭き取って下さい。
2. 検油棒(A、図 4)を取り付けて下さい。オイルレベルゲージを回したり締めたりし
ないで下さい
3. 再びオイルゲージを取り外し、オイルの量を確認します。正しいオイルレベルは、
検油棒のインジケーター(B、図 4)の一番上です。
4. オイルレベルが少ない場合は、エンジンオイル充填口(C、図 4)からゆっくりと
オイルを追加して下さい。オイルを追加しすぎないで下さい。一分間待ってから、
オイルレベルを再点検してください。オイルレベルが正しいことを確認して下さ
い。
5. 検油棒(A、図 4)を取り付け、締め付けて下さい。
長いオイルレベルゲージ(装備されている場合)
1. 検油棒 (A、図 5)を取り除いて下さい。布を使って、オイルレベルゲージに残った
オイルを拭き取って下さい。
2. 検油棒(A、図 5)を取り付けて下さい。オイルレベルゲージは回したり締めたりし
ないで下さい
3. 再びオイルゲージを取り外し、オイルの量を確認します。正しいオイルレベルは、
検油棒のインジケーター(B、図 5)の一番上です。
4. オイルレベルが少ない場合は、エンジンオイル充填口(C、図 5)からゆっくりと
オイルを追加して下さい。オイルを追加しすぎないで下さい。一分間待ってから、
オイルレベルを再点検してください。オイルレベルが正しいことを確認して下さ
い。
5. 検油棒(A、図 5)を取り付け、締め付けて下さい。
6. スパークプラグのワイヤをスパークプラグに接続します。オイルの抜き取りセク
ションをご覧下さい。
低オイル保護システム(取り付けられている場合)
一部のエンジンには低オイルセンサーが取り付けられています。オイルが低レベルの場
合には、センサーが警告灯を表示するか、もしくはエンジンを停止します。エンジンを
始動する前にエンジンを停止し、次の手順に従って下さい。
• エンジンが水平であることを確認します。
• オイルを確認して下さい。オイルレベルの確認セクションをご覧下さい。
• オイルレベルが低い場合は、適切な量のオイルを追加して下さい。エンジンを
始動し、警告灯(取り付けられている場合)が点灯しないことを確認します。
• オイルレベルが低くない場合は、エンジンを始動させないで下さい。オイルの
問題を解決するには、Briggs & Strattonの正規修理店までご連絡ください。
推奨燃料
燃料は次の条件を満たさなければなりません。
• 汚染されていない、新しい無鉛ガソリン。
87 オクタン/87 AKI(91 RON)以上。高高度での使用については、以下をご覧
下さい。
エタノール含有率が10%までのガソリン (ガソノール)が許容されます。
通知
E15やE85などの承認されていないガソリンを使用しないで下さい。ガソリンにオイル
を混入したり、代替燃料で運転するためにエンジンを交換したりしないで下さい。承認
されていない燃料を使用するとエンジンの部品を損傷させる原因になります。こうした
損傷は保証の対象外です。
燃料システムにガム質が形成されたり、腐食が発生したりするのを防ぐため、燃料にア
ルコールを含まない燃料安定剤とエタノール添加剤を混ぜてください。保管セクション
をご覧下さい。すべての燃料は同じではありません。始動または性能の問題が生じた場
合、燃料供給業者またはブランドを変更してください。このエンジンは、ガソリンで動
作することが保証されています。気化器付きエンジンの排出制御システムは、EM(エ
ンジンモディフィケーション)です。電子式燃料噴射装置付きエンジンの排出制御シス
テムは、ECM(エンジンコントロールモジュール)、MFI(マルチポート燃料インジェ
クション)、TBI(スロットルボディ燃料インジェクション)、装備されている場合に
はO2S(酸素センサー)です。
高度
5,000フィート (1,524メートル) を超える高度では、最低85オクタン/85 AKI (89
RON) のガソリンが許容されます。
キャブレーター仕様エンジンの場合は、性能を維持するために高高度調整が必要にな
ります。この調整なしに運転すると、パフォーマンスが低下し、燃料の消費が増え、
排気ガスの排出量が増えます。高高度調整に関する情報は、Briggs & Strattonの正規の
修理店までお問い合わせください。762 m (2,500 フィート) 以下の高度では、高地用
キットを使用したエンジンの運転はしないでください。
電子式燃料噴射 (EFI) エンジンの場合、高度調整は必要ありません。
燃料の給油方法
警告
燃料及び発生ガスは可燃性が高く、爆発しやすい性質があります。火災や爆発は、火傷
あるいは死亡を引き起こす可能性があります。
燃料の追加時
• エンジンを停止します。燃料キャップを取り外す前に、少なくとも2分間待っ
て、エンジンが冷えたことを確認して下さい。
• 屋外または空気の流れが良い場所で、燃料タンクに給油して下さい。
• タンクには燃料を入れ過ぎないようにして下さい。燃料は膨張することがある
ため、燃料タンクのキャップの底部よりも上に給油しないで下さい。
• 燃料は、スパーク、直火、パイロット・ランプ、熱、その他の引火の原因とな
るものから遠ざけてください。
• 燃料パイプ、燃料タンク、燃料キャップ、そして接続部にひび割れや漏れがな
いか頻繁に確認して下さい。損傷のある部品は交換して下さい。
• 燃料がこぼれた場合は、蒸発するまでエンジンの始動を待って下さい。
1. 燃料キャップ付近の埃やごみを清掃します。燃料キャップを取り外します。
20 BRIGGSandSTRATTON.COM
Not for
Reproduction
  • Page 1 1
  • Page 2 2
  • Page 3 3
  • Page 4 4
  • Page 5 5
  • Page 6 6
  • Page 7 7
  • Page 8 8
  • Page 9 9
  • Page 10 10
  • Page 11 11
  • Page 12 12
  • Page 13 13
  • Page 14 14
  • Page 15 15
  • Page 16 16
  • Page 17 17
  • Page 18 18
  • Page 19 19
  • Page 20 20
  • Page 21 21
  • Page 22 22
  • Page 23 23
  • Page 24 24
  • Page 25 25
  • Page 26 26
  • Page 27 27
  • Page 28 28
  • Page 29 29
  • Page 30 30
  • Page 31 31
  • Page 32 32
  • Page 33 33
  • Page 34 34
  • Page 35 35
  • Page 36 36
  • Page 37 37
  • Page 38 38
  • Page 39 39
  • Page 40 40
  • Page 41 41
  • Page 42 42
  • Page 43 43
  • Page 44 44
  • Page 45 45
  • Page 46 46
  • Page 47 47
  • Page 48 48
  • Page 49 49
  • Page 50 50
  • Page 51 51
  • Page 52 52
  • Page 53 53
  • Page 54 54
  • Page 55 55
  • Page 56 56

Simplicity MANUAL, OPERATOR'S ユーザーマニュアル

カテゴリー
自動車アクセサリー
タイプ
ユーザーマニュアル